Pizza Oven Sourdough Pitas
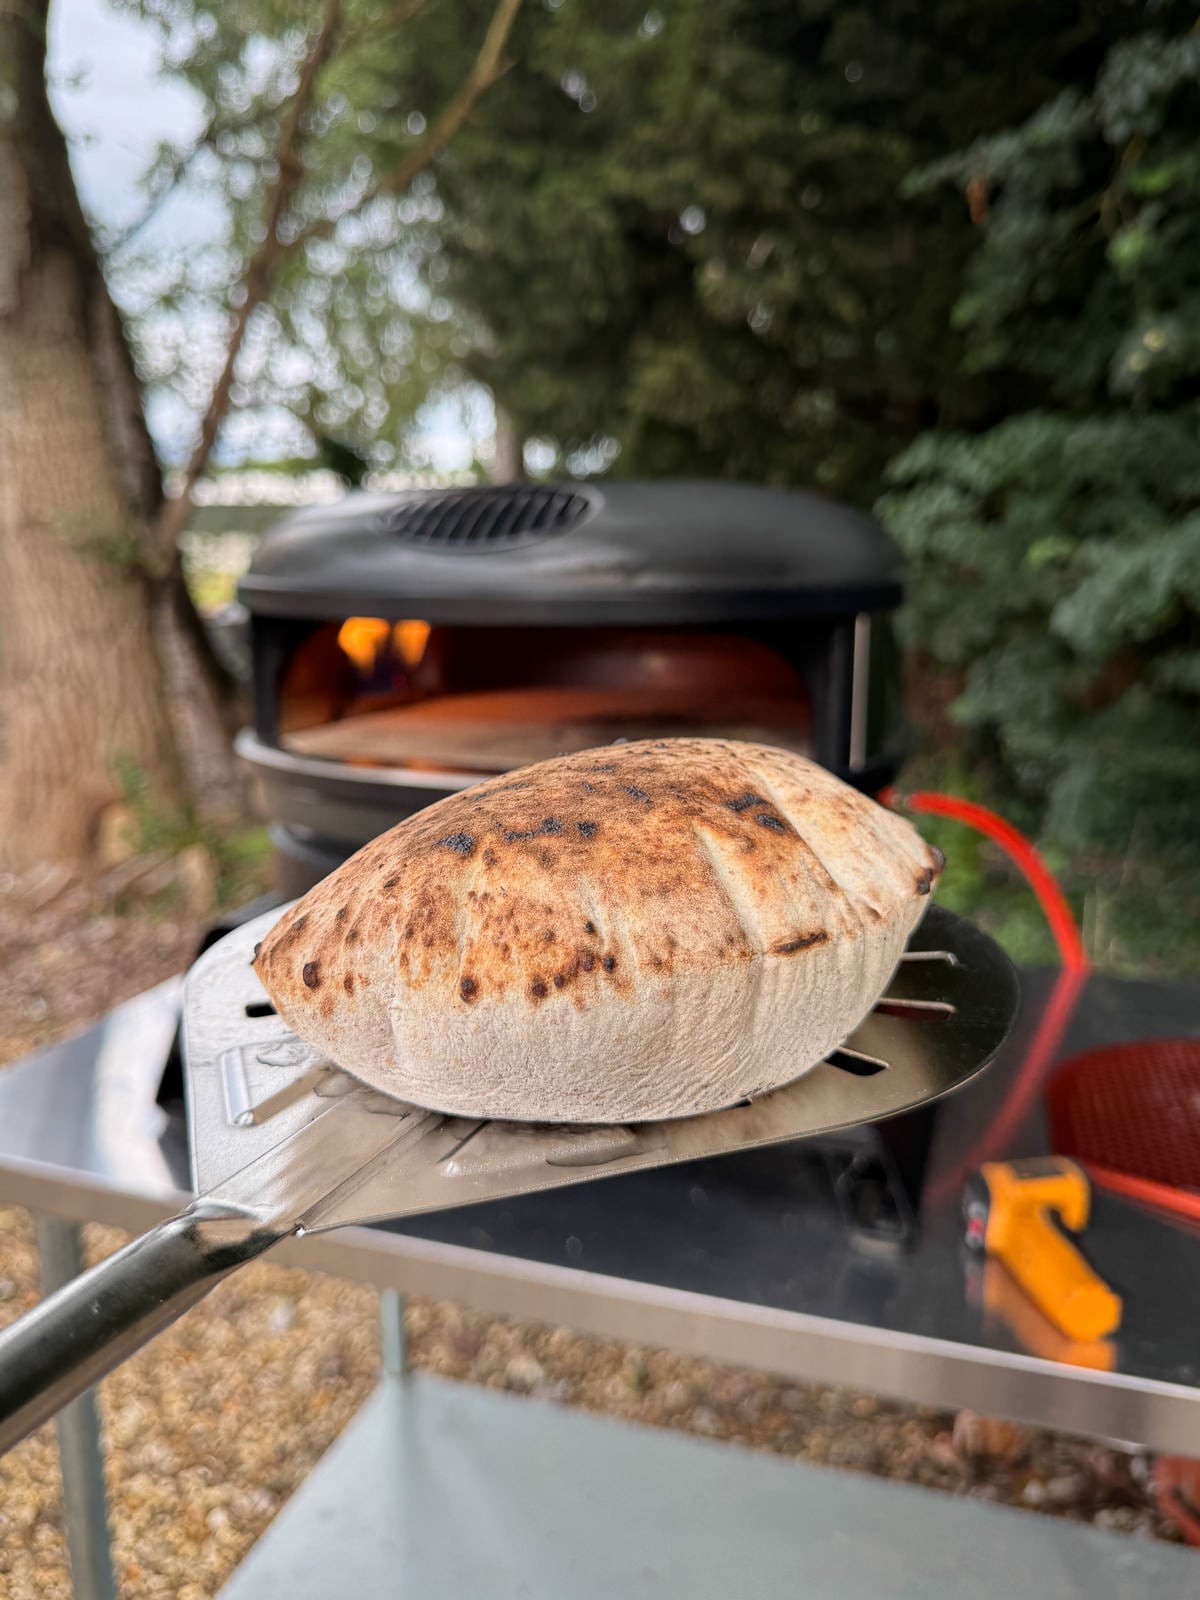
The secret to making soft, pillowy homemade pitas with loads of flavour is making the dough with a sourdough starter then baking them in a pizza oven.
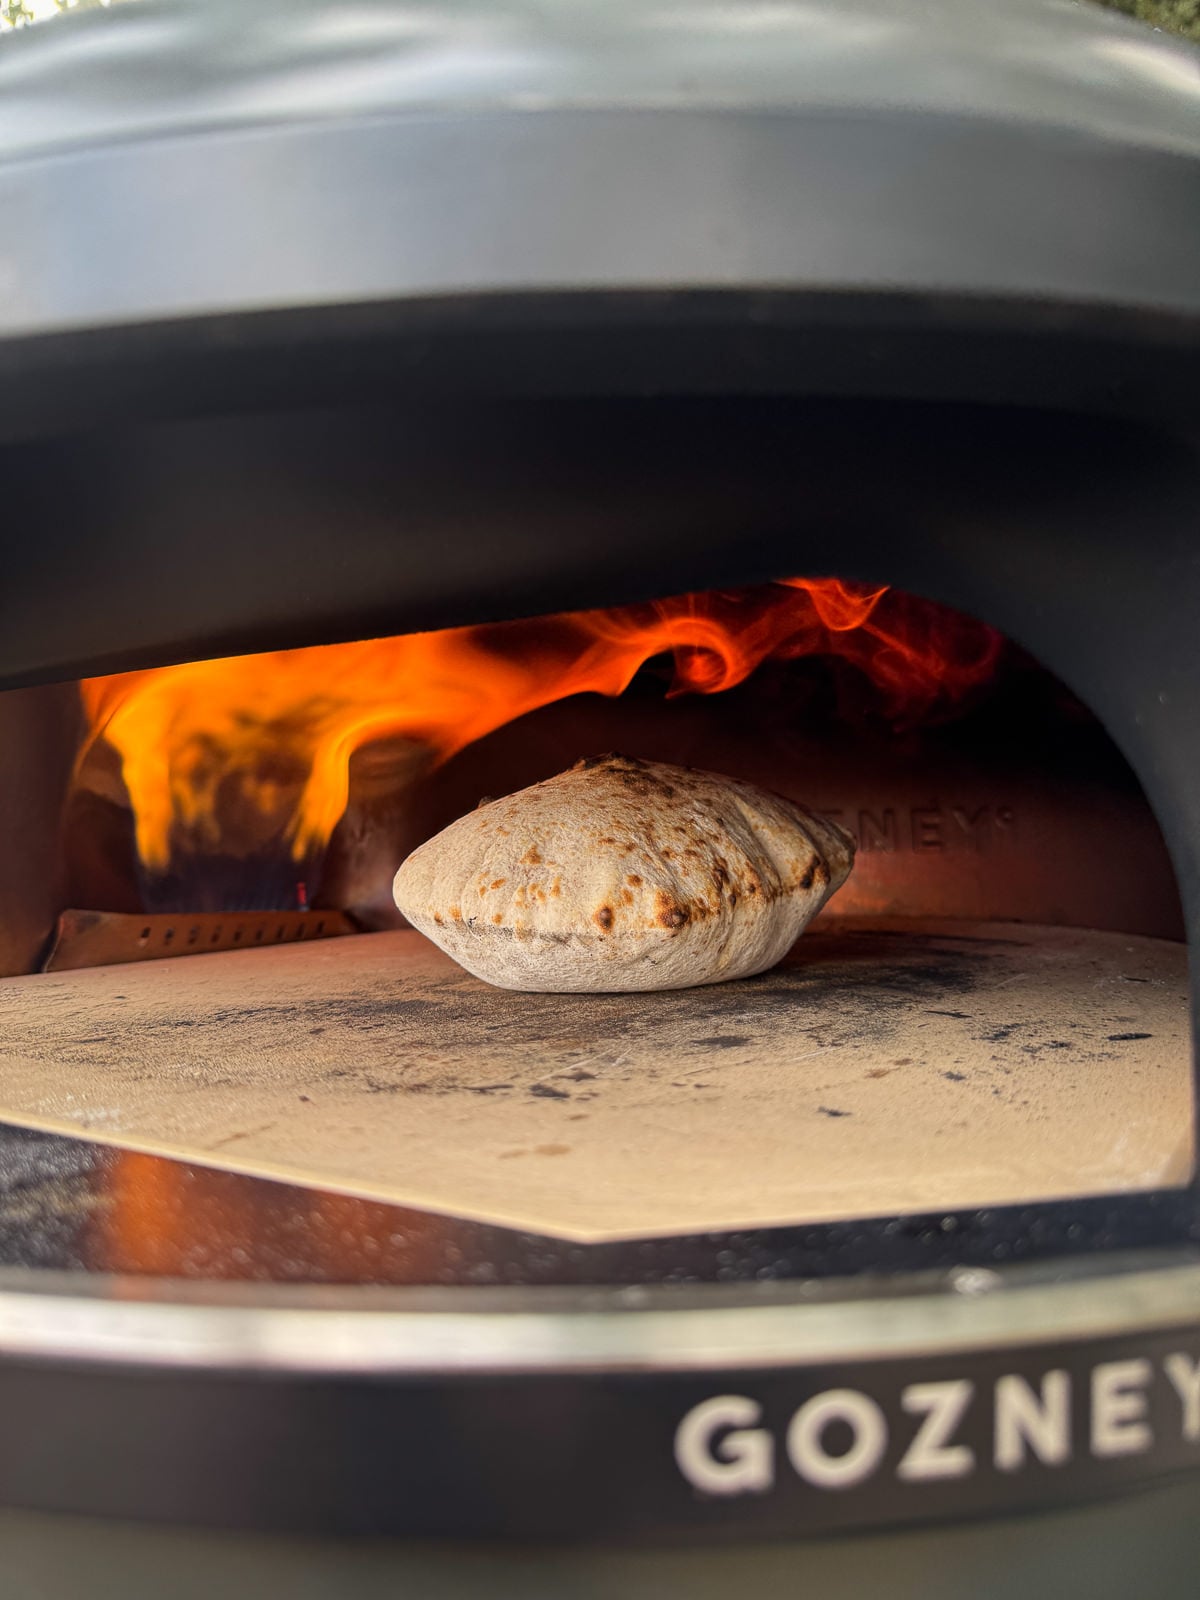
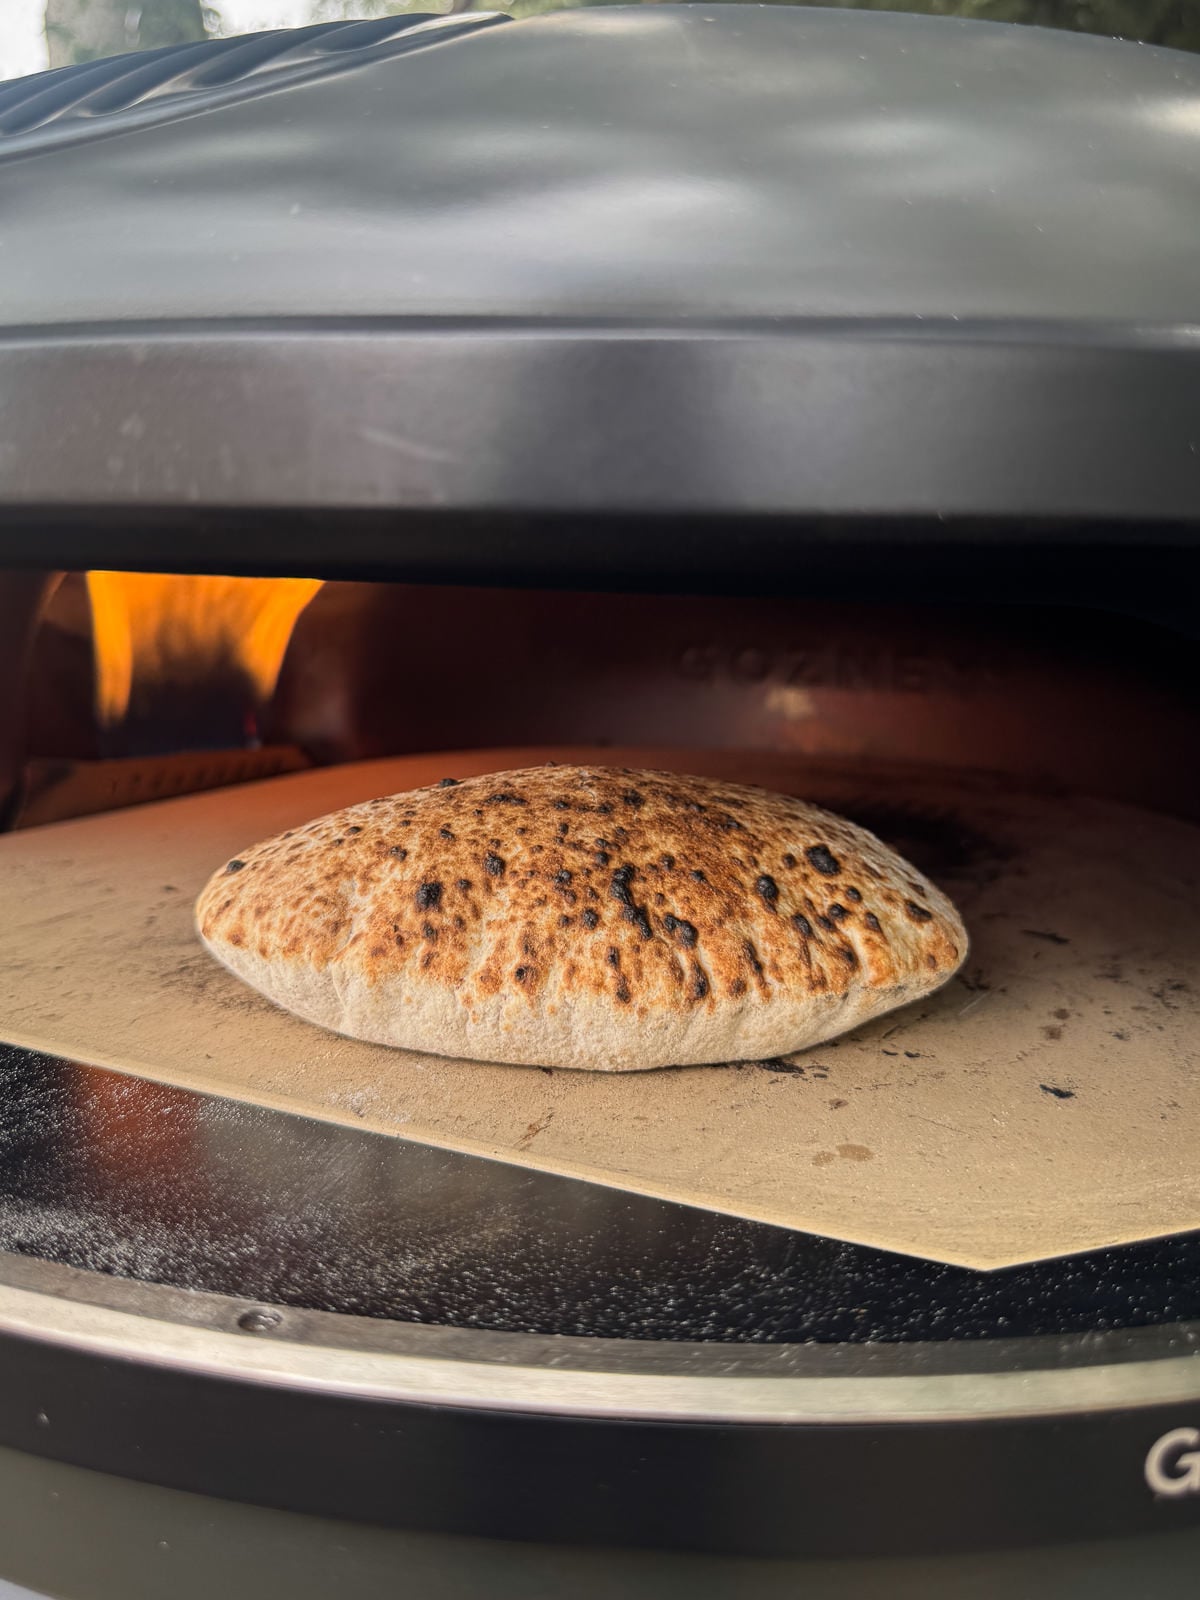
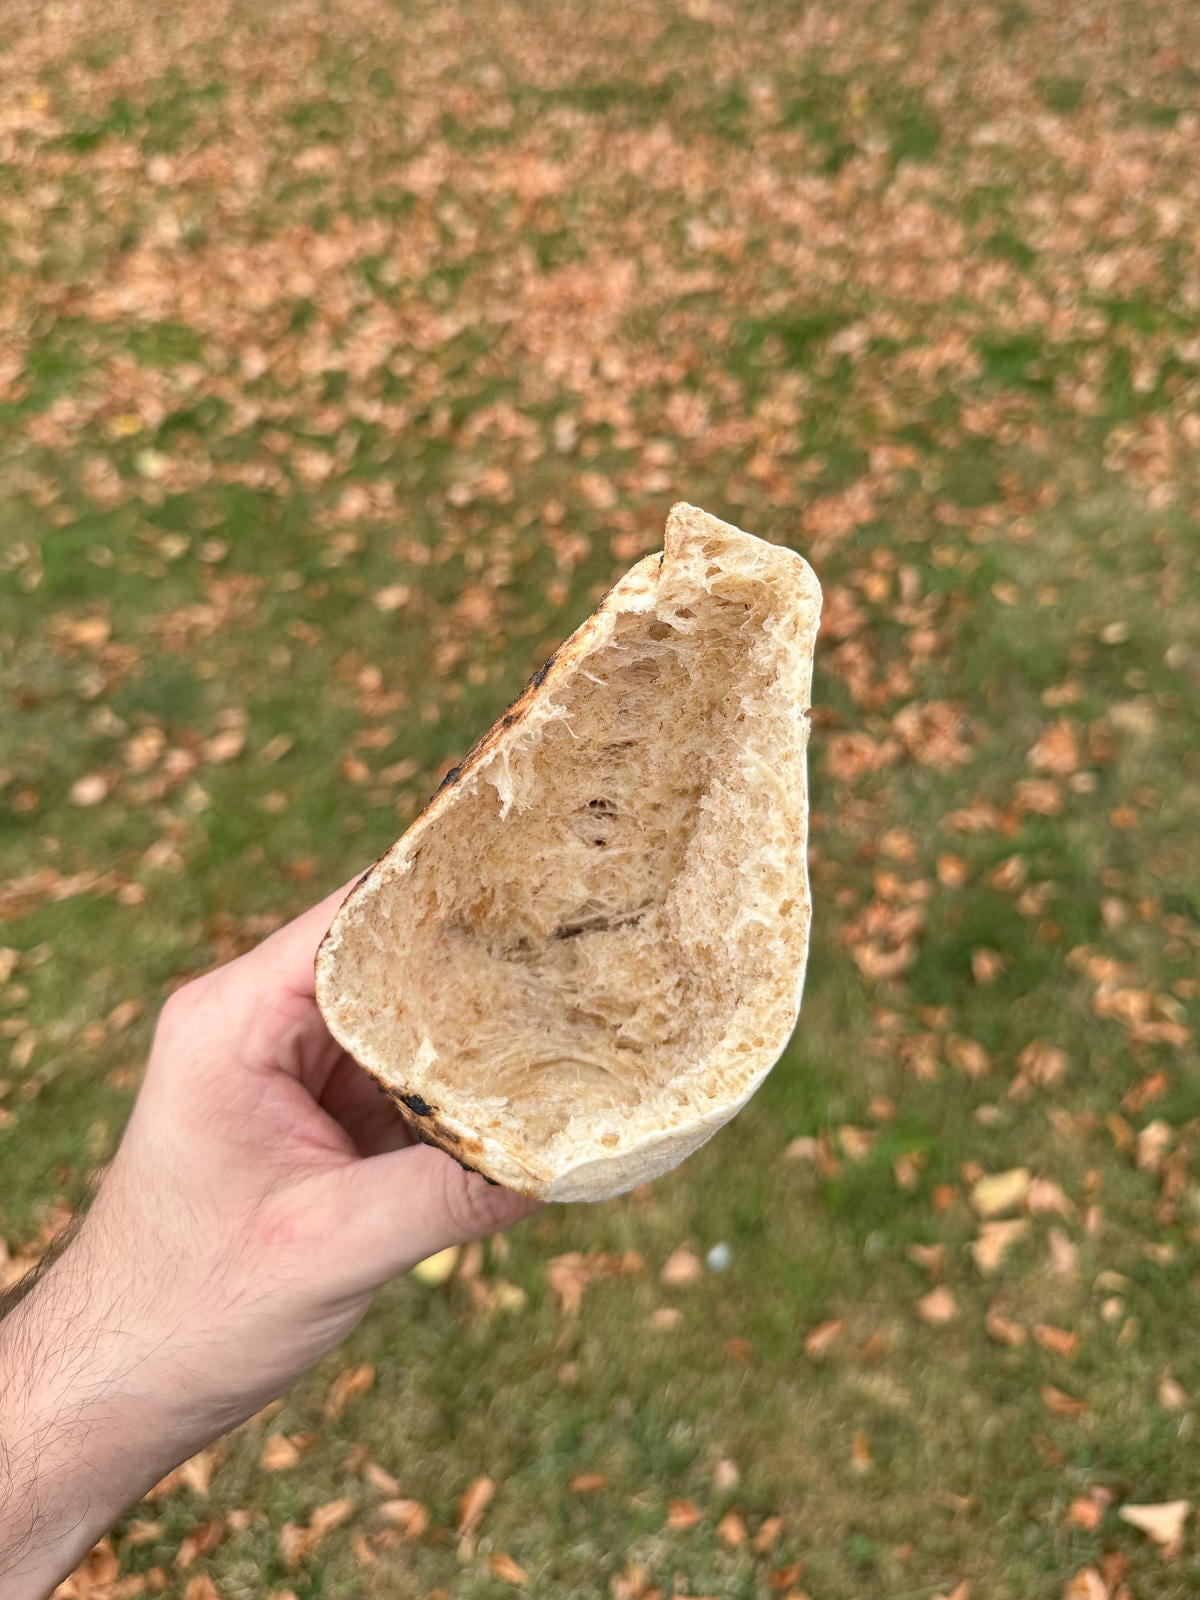
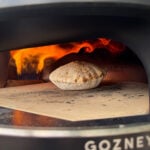
Pitas are one of my favourite breads to cook in my pizza oven, mainly because of how satisfying they are to watch bake but also because of just how easy they are to make. As long as you’ve got an active, bubbly sourdough starter, you’re guaranteed to get soft, pillowy homemade pitas with that signature pocket on the inside and loads of flavour.
I first made pitas in my pizza oven several years ago, using a regular yeasted dough and recently I’ve been slowly perfecting my sourdough pitas. To be honest, I wasn’t sure if sourdough pitas would puff up as drastically as ones made with yeast before I made them but they rise just as much, if not more!
I opted for an overnight cold prove in the fridge for these pitas and I balled the dough up like you would with pizza dough. I’ve had success with a shorter, room temperature rise but I’ve found that you get a much better flavour with a cold ferment, so it’s what we’re using for this recipe.
I’ll go into the method in more detail below but essentially, you mix the dough, bulk ferment for 3-4 hours then divide the dough, shape into balls and chill in the fridge overnight. The next day, you let the dough sit at room temperature to take the chill off then roll into ovals and bake for a minute or two in your pizza oven.
For more bread & dough recipes, take a look at our ever growing collection of bread recipes! Here you’ll find more pizza oven doughs, flatbreads, sourdough, burger buns, bagels & lots more.
Ingredients For Sourdough Pitas
- Sourdough Starter – These pitas are made with a 100% hydration sourdough starter, which means that it’s been fed with equal amounts of starter, flour & water. If you haven’t got a sourdough starter & would like to make one, take a look at my step by step sourdough starter guide!
- Flour – To make sourdough pitas, you’ll need a strong white bread flour and a strong wholemeal bread flour. It’s best to use flours with a protein content between 12-14%. I use Canadian bread flours from Shipton Mill.
- Salt – A good quality sea salt is best for this dough, I use Maldon salt. Make sure not to use table salt, as it will make the dough too salty.
- Water – Regular tap water is fine for this recipe. Make sure to accurately measure the water’s temperature with a food probe.
- Olive Oil – Adding a small amount of olive oil to pita dough gives the bread a softer crumb. It’s best to use a neutral olive oil (not extra virgin olive oil!), as we don’t want to change the flavour of the pitas.
Baker’s Percentages
Baker’s percentages are used to calculate the amount of each ingredient, in relation to the amount of flour used. For example, if a bread dough uses 500 grams of flour and has 60% hydration, you’ll need 300 grams of water. To work this out, you times 500 x 0.6. Using these means that you can scale the recipe up or down super easily.
Working baker’s percentages out with sourdough is a bit different, as you need to take into account the amount of flour and water in the starter. This recipe uses a 100% hydration sourdough starter, which means that it’s fed with equal parts starter, water & flour. This makes it super easy to figure out how much water and flour is used, as the amount of sourdough is simply 50% flour and 50% water.
So to figure out the total amount of flour, you work out half of the amount of starter then add it to the flour in the recipe (the weight not physically!). You do the same for the hydration, adding half the weight of starter to the water. There are online calculators and apps that you can use to work this out but here’s the math if you want to do it yourself.
- Hydration: 65%
- Sourdough Starter: 20%
- Salt: 2%
For this dough, the total weight of flour used is 350 grams, which for 20% sourdough means we need 70 grams of sourdough starter (350 x 0.2), which contains 35 grams of flour and 35 grams of water.
Then to work out 65% hydration, we times the total flour by 0.65 (so 385 x 0.65) which equals 250g. Take 35 grams of water out of this from the starter and you’re left with 215 grams of water that needs to be added. I used 15 grams of olive oil for my dough, which replaces 15 grams of the total water.
How To Make Sourdough Pita Dough
To make sourdough pitas, you’ll need an active sourdough starter. If yours has been in the fridge, I’d highly recommend getting it out at least 2 days before using it, giving it 2 feeds a day. A feed first thing in the morning and another last thing at night. That’s what I do whenever I’m making sourdough bread or pizza dough.
A Quick Note On Fridge & Room Temperatures
This recipe is based on a room temperature between 20-25°c (68-77°f) and a fridge temperature between 3-5°c (37-41°f). You can easily control the temperature of your fridge but room temperature depends on the weather, how well insulated your kitchen is, etc.
If your room temperature is warmer, your sourdough starter and dough will take less time to ferment whereas if the room temp is cooler, they’ll take longer. I’ve included visual signs on what to look out for in the recipe, to make things easier. It’s best not to rely on timings alone!
1. Feed Your Sourdough Starter
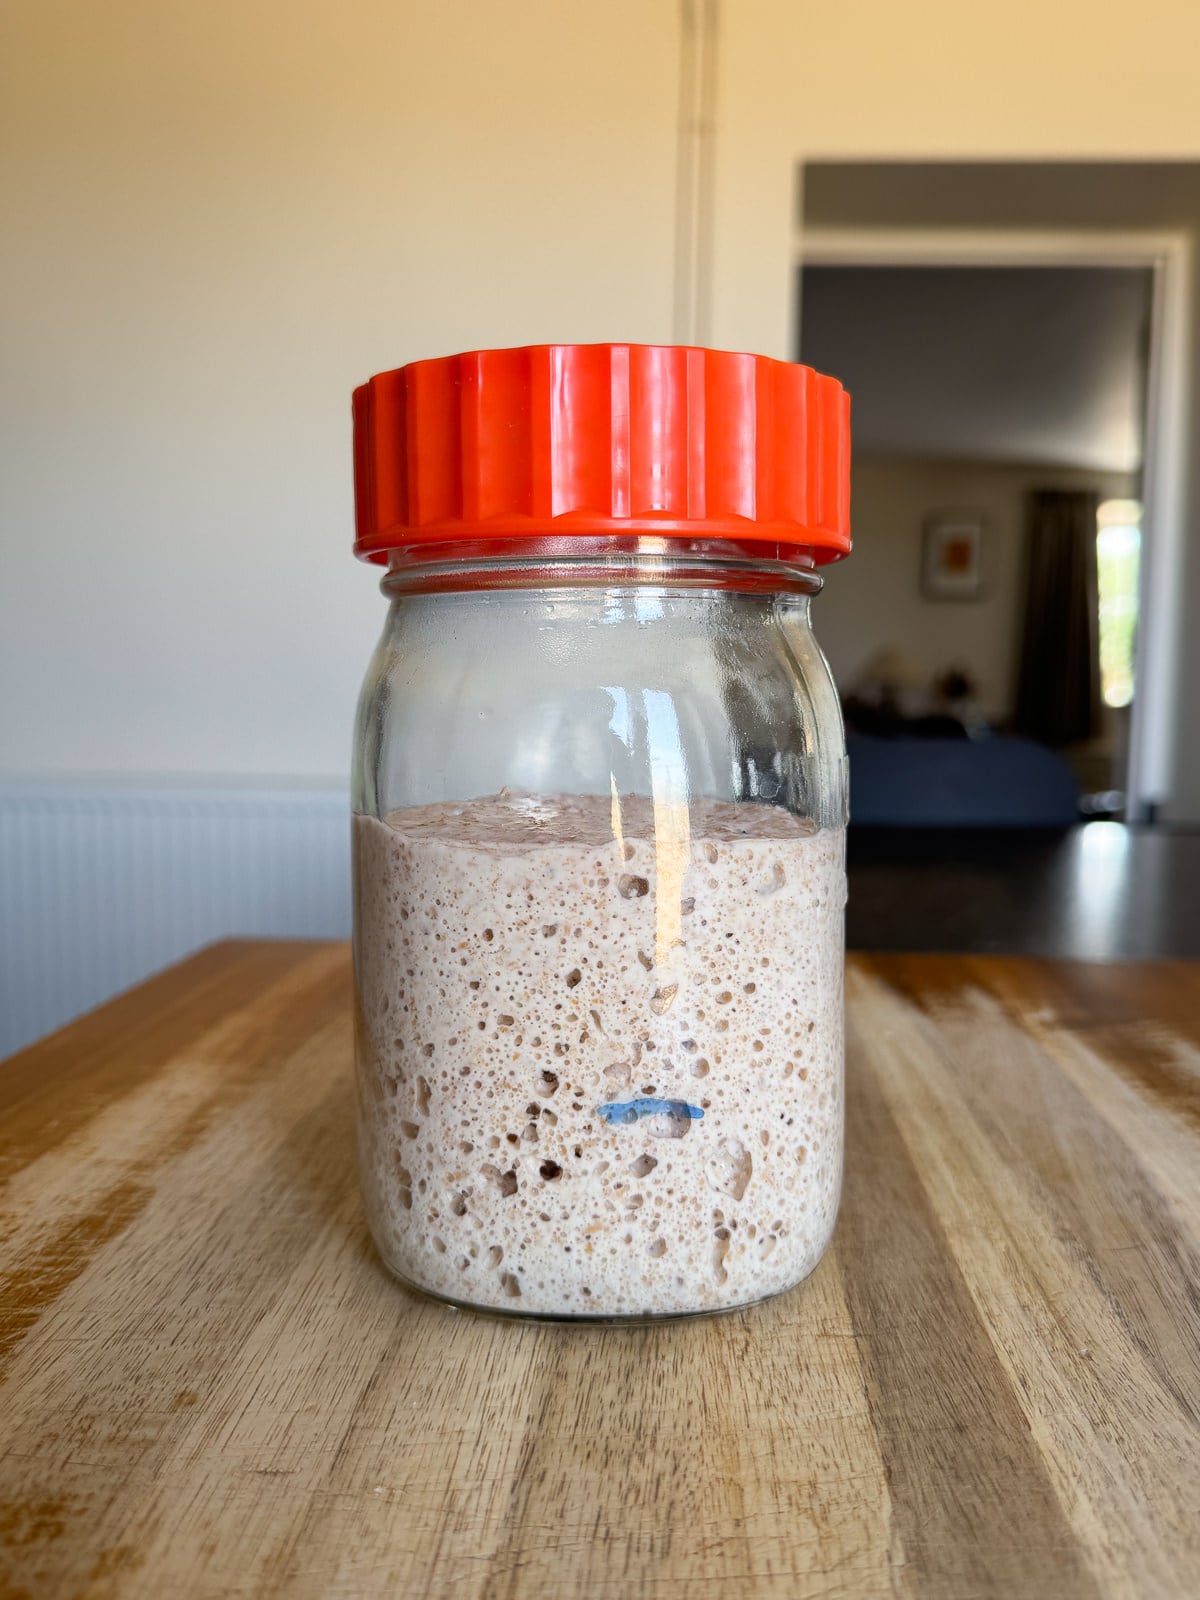
First, you’ll need to feed your sourdough starter then let it ferment at room temperature until it reaches its peak. With my starter, this usually takes around 4-6 hours but you’ll know your starter best!
As I mentioned earlier, this dough is made with a 100% hydration sourdough starter. All this means is that you feed your starter with equal quantities of starter, flour and water.
I feed my starter with equal amounts of white bread flour and wholemeal bread flour but it’s fine to stick with whatever you normally feed yours with. Whether it’s with just white bread flour, or a mix. I like to use a board marker to mark on the side of the jar where the starter is once it’s been fed then you can easily see how much it has risen.
2. Autolyse Dough
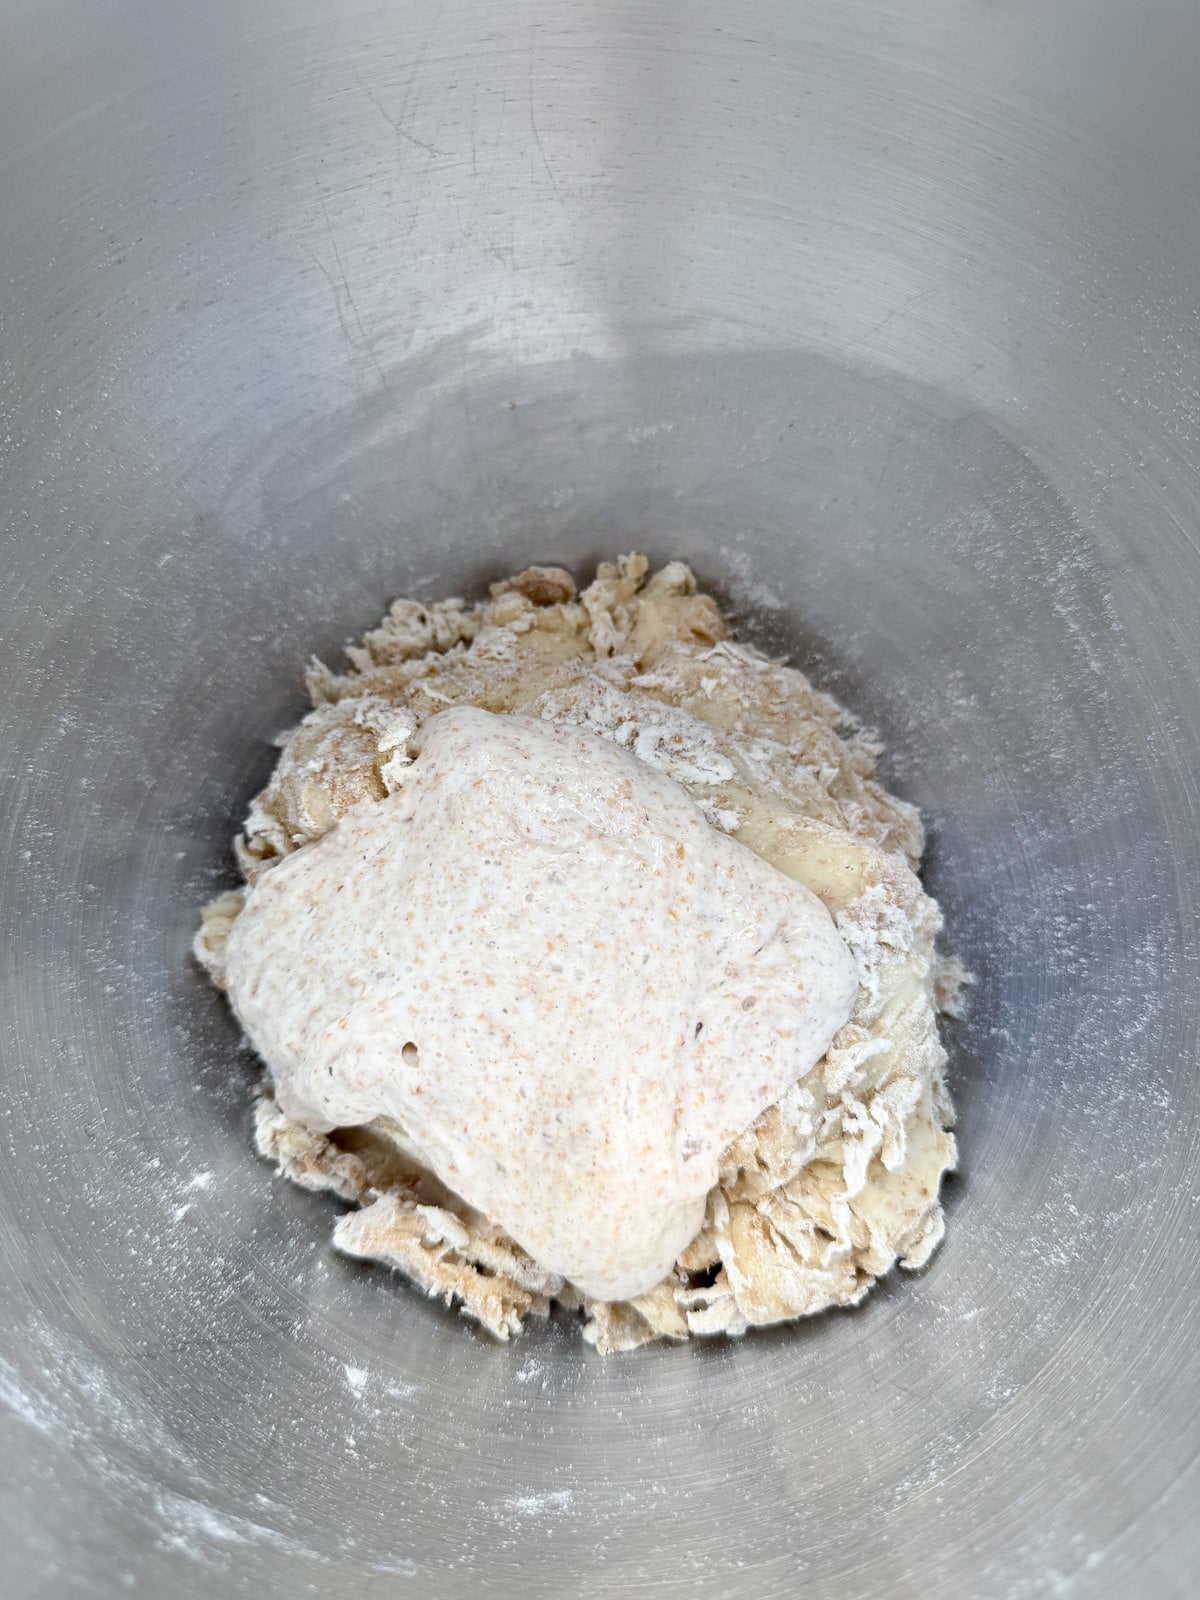
To autolyse pita dough, you simply mix the flour, water & a small amount of olive oil together to make a rough dough then let it sit at room temperature for an hour. This step hydrates the flour and kick starts gluten development, cutting down on mixing time. It’s best to mix the flour and water when your starter is almost finished fermenting but don’t worry if it the autolyes for longer than a hour, the dough will be absolutely fine.
3. Mix In Starter & Salt
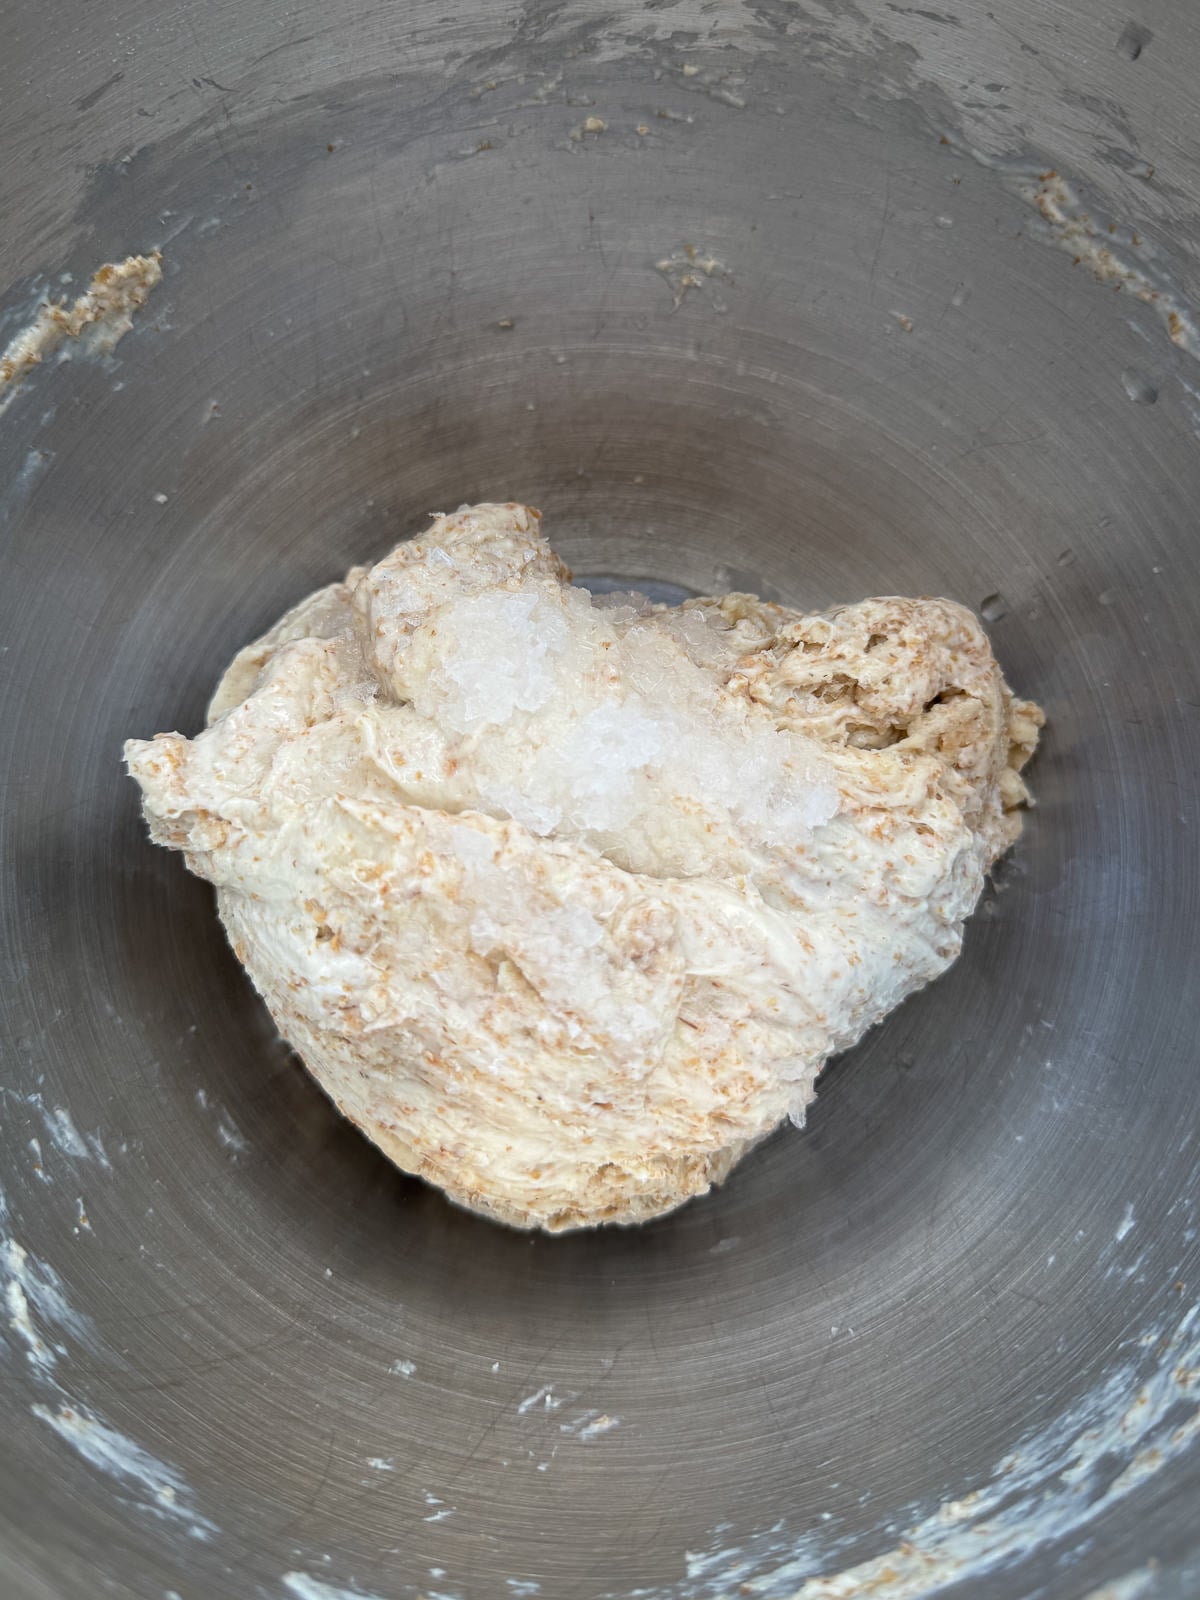
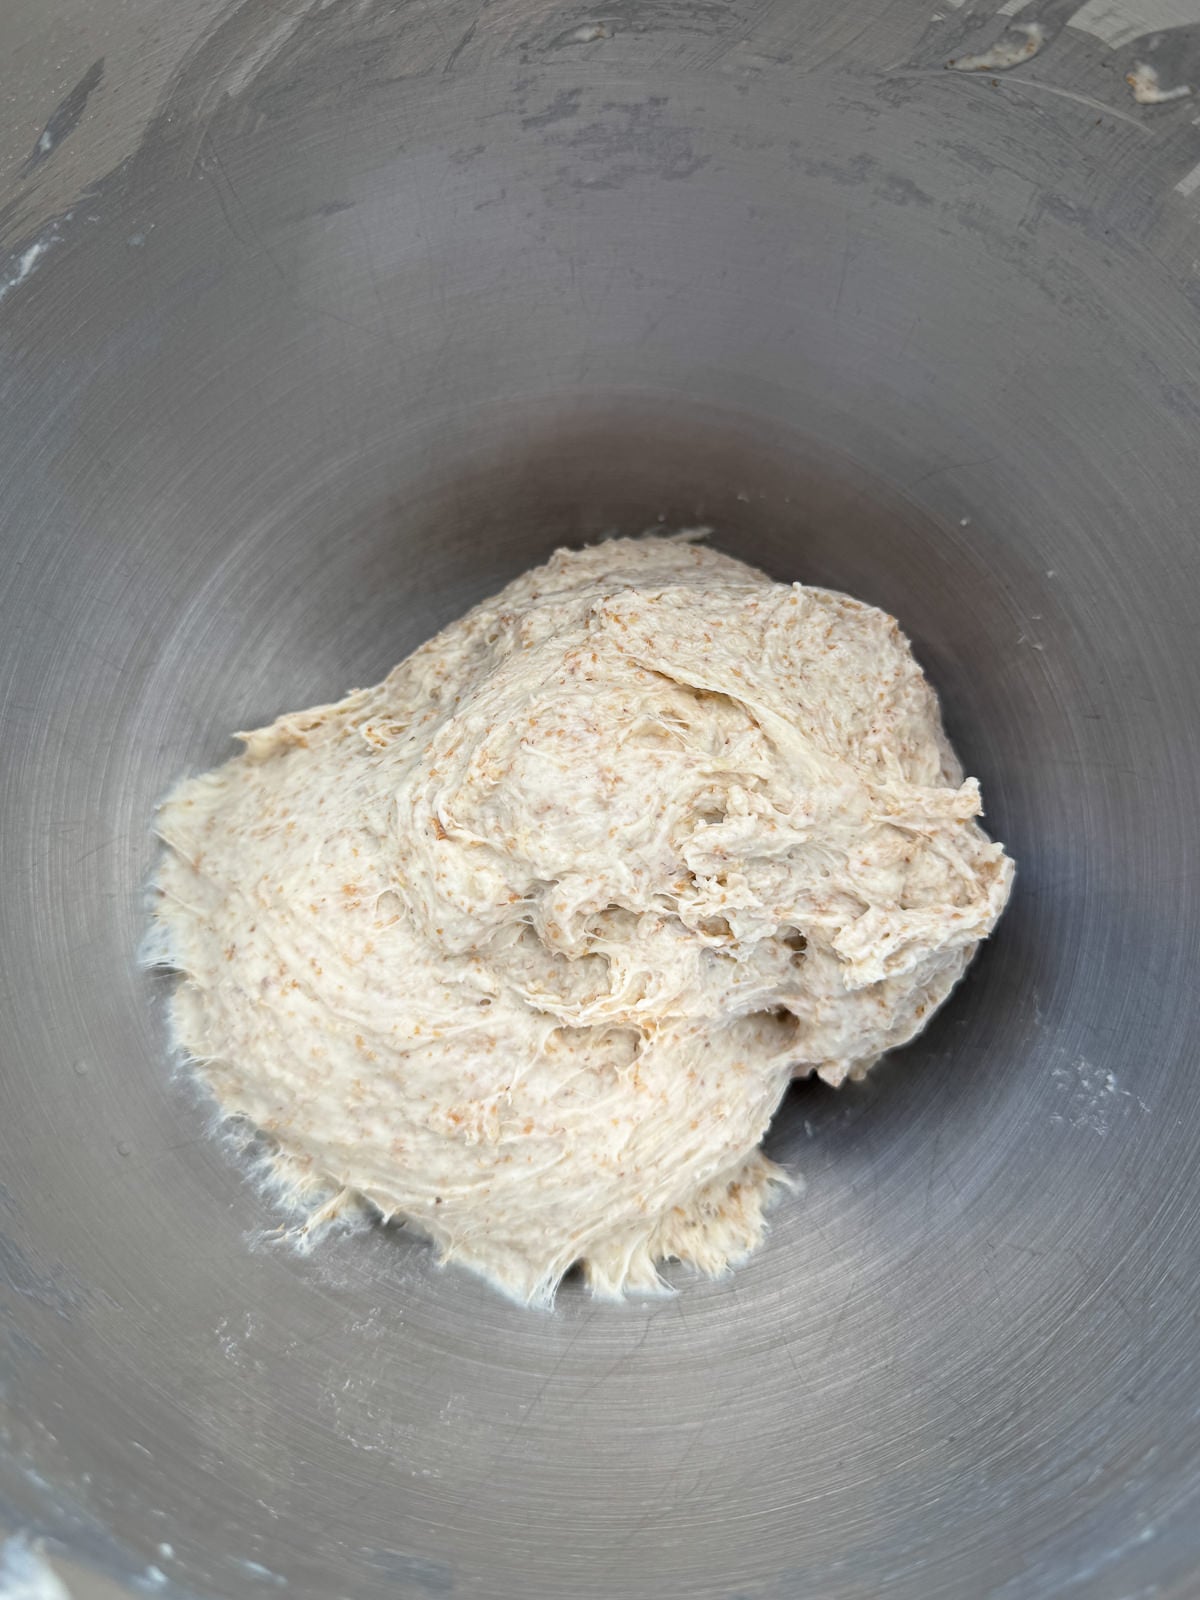
Once your starter is ready and the dough has had an hour long autolyse, you can weigh the starter into the dough then mix with the dough hook on a medium-low speed for 2-3 minutes until combined.
Next, add sea salt and 20g of reserved water into the dough then continue mixing until you get a smooth dough. This will only take 4-5 minutes of mixing. Reserving a small amount of the water to add in with the salt, helps it incorporate more easily.
Pita dough doesn’t need as much kneading as other breads as you don’t want to over develop the gluten. Too much mixing and the dough will be too elastic when you go to roll it out and the pitas won’t puff up as much as they bake! As long as the dough is smooth, it’ll be fine.
4. Bulk Ferment
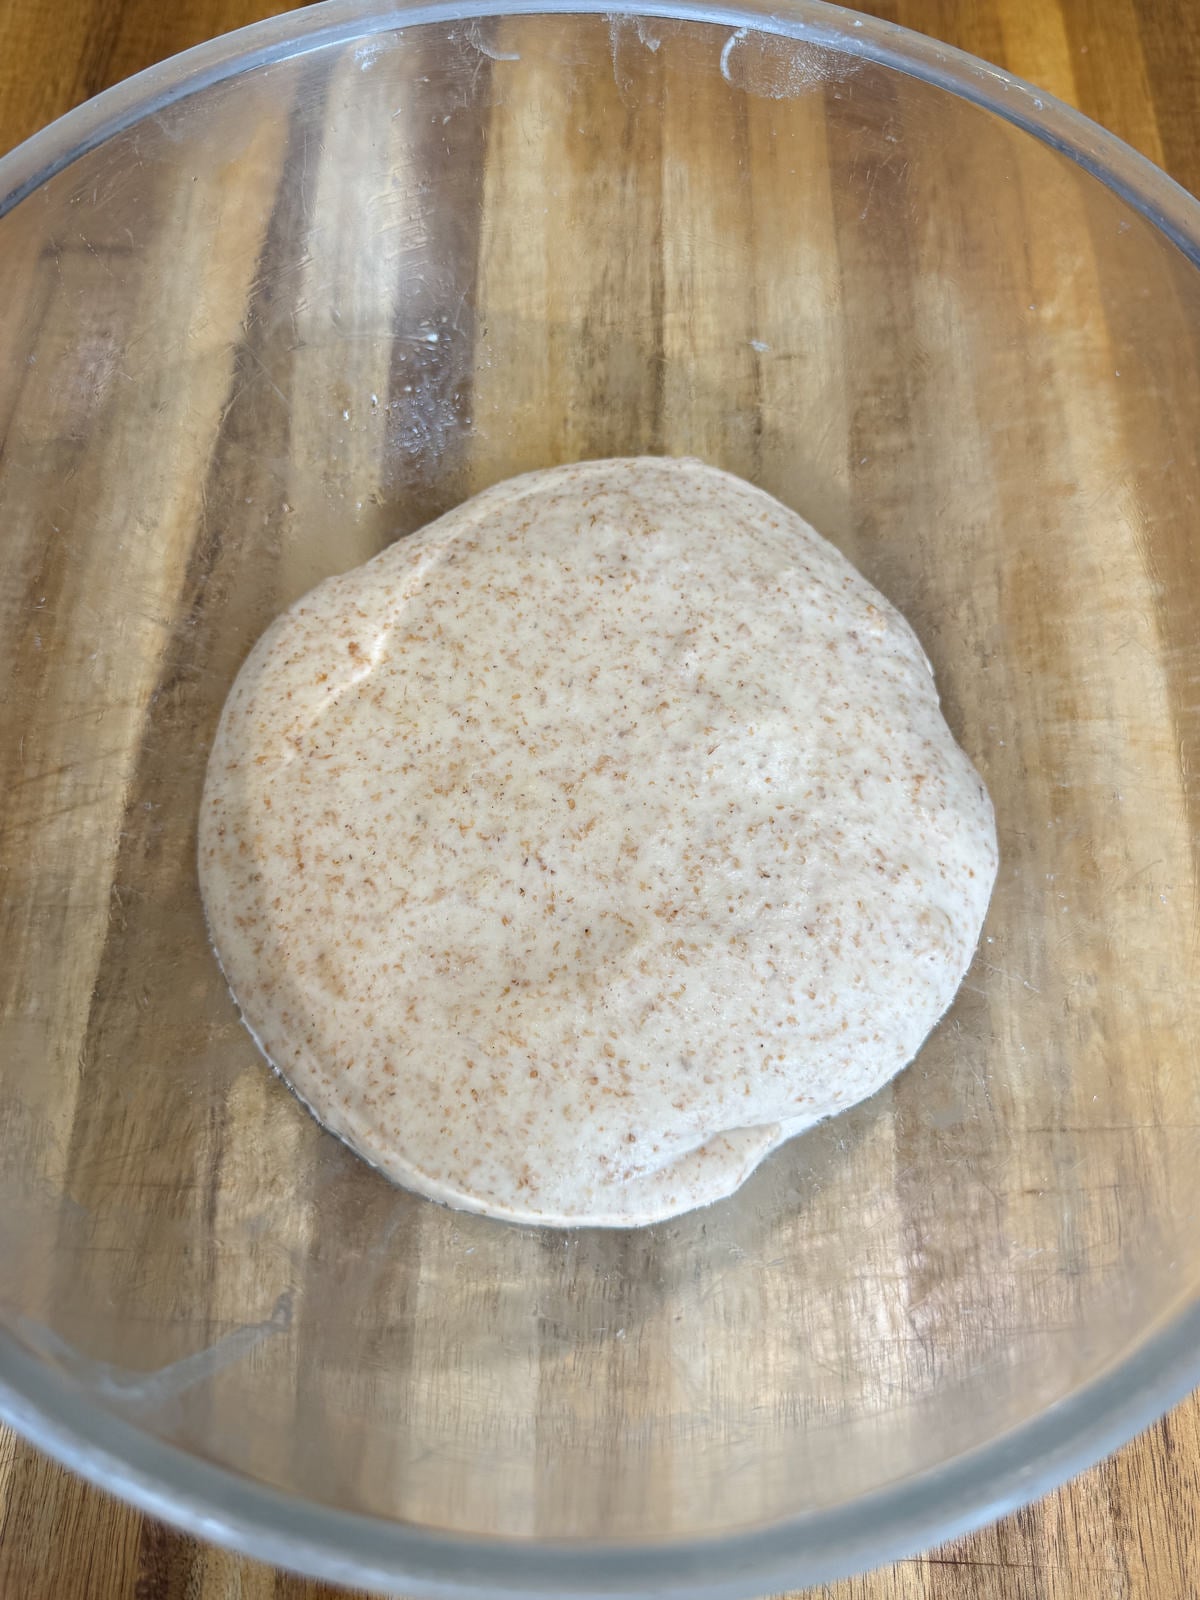
Once mixed, the dough needs to ferment at room temperature until it has increased in volume by 50%. This will take around 3-4 hours but it’s best to go by how much the dough has risen instead of relying solely on timing. They’ll be lots of tiny bubbles around the outside of the dough once it has fermented, so it’s best to use a glass bowl so you can see them!
During the first stage of the bulk ferment, I like to give the dough 2 sets of coil folds spaced 45 minutes apart. Just to strengthen the gluten slightly and help give the pitas their signature airy interior. Here’s how to perform a set of coil folds…
Step By Step Coil Folds
- With wet hands (this stops the dough from sticking), gently loosen the dough from the sides of the bowl
- Using both hands, gently lift the dough up from the middle until one side is released from the container/bowl.
- Fold the released side back under the dough.
- Turn the bowl 180° and repeat the folding process.
- Now turn the bowl 90° & repeat.
- Finally, turn the bowl another 180° and repeat one last time.
5. Divide & Shape Dough
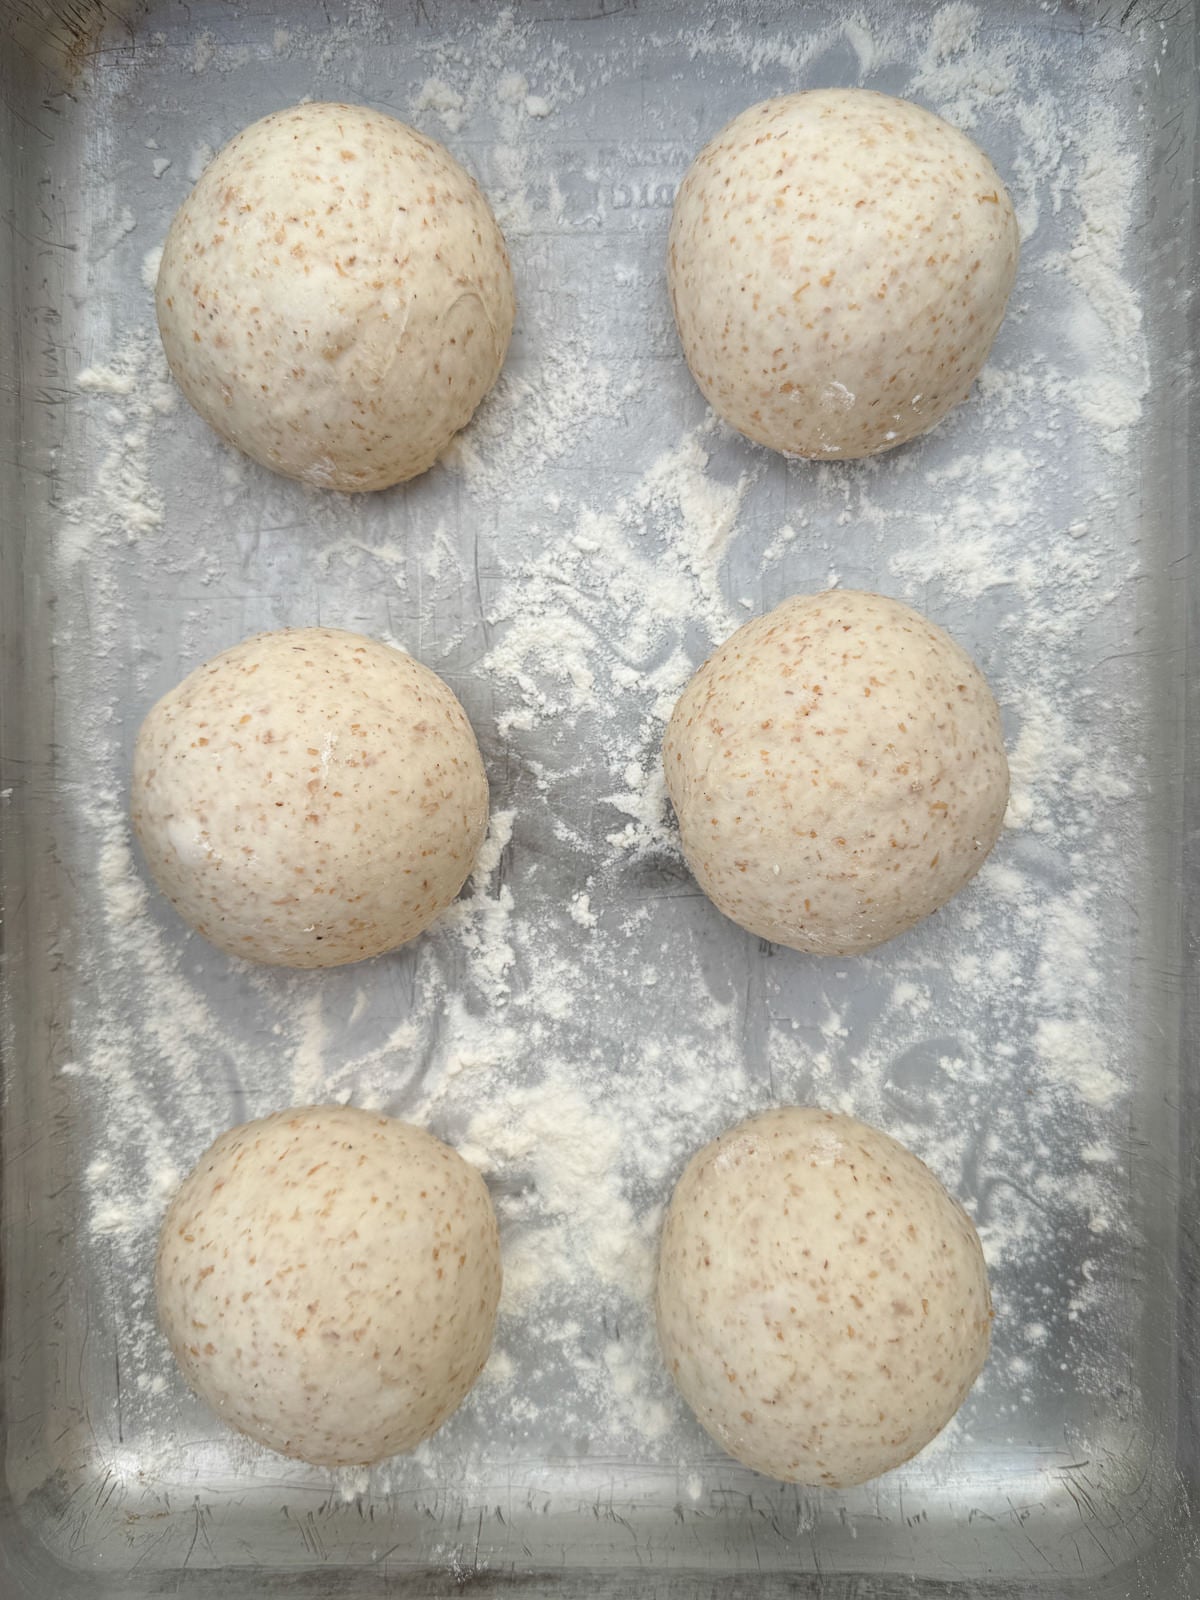
Once the dough has risen by 50%, transfer it to a lightly floured work surface then use a bench scraper to divide into 6 equal pieces. Shape each piece into a tight ball with your hands. Each piece of dough should weigh around 100 grams.
6. Cold Ferment
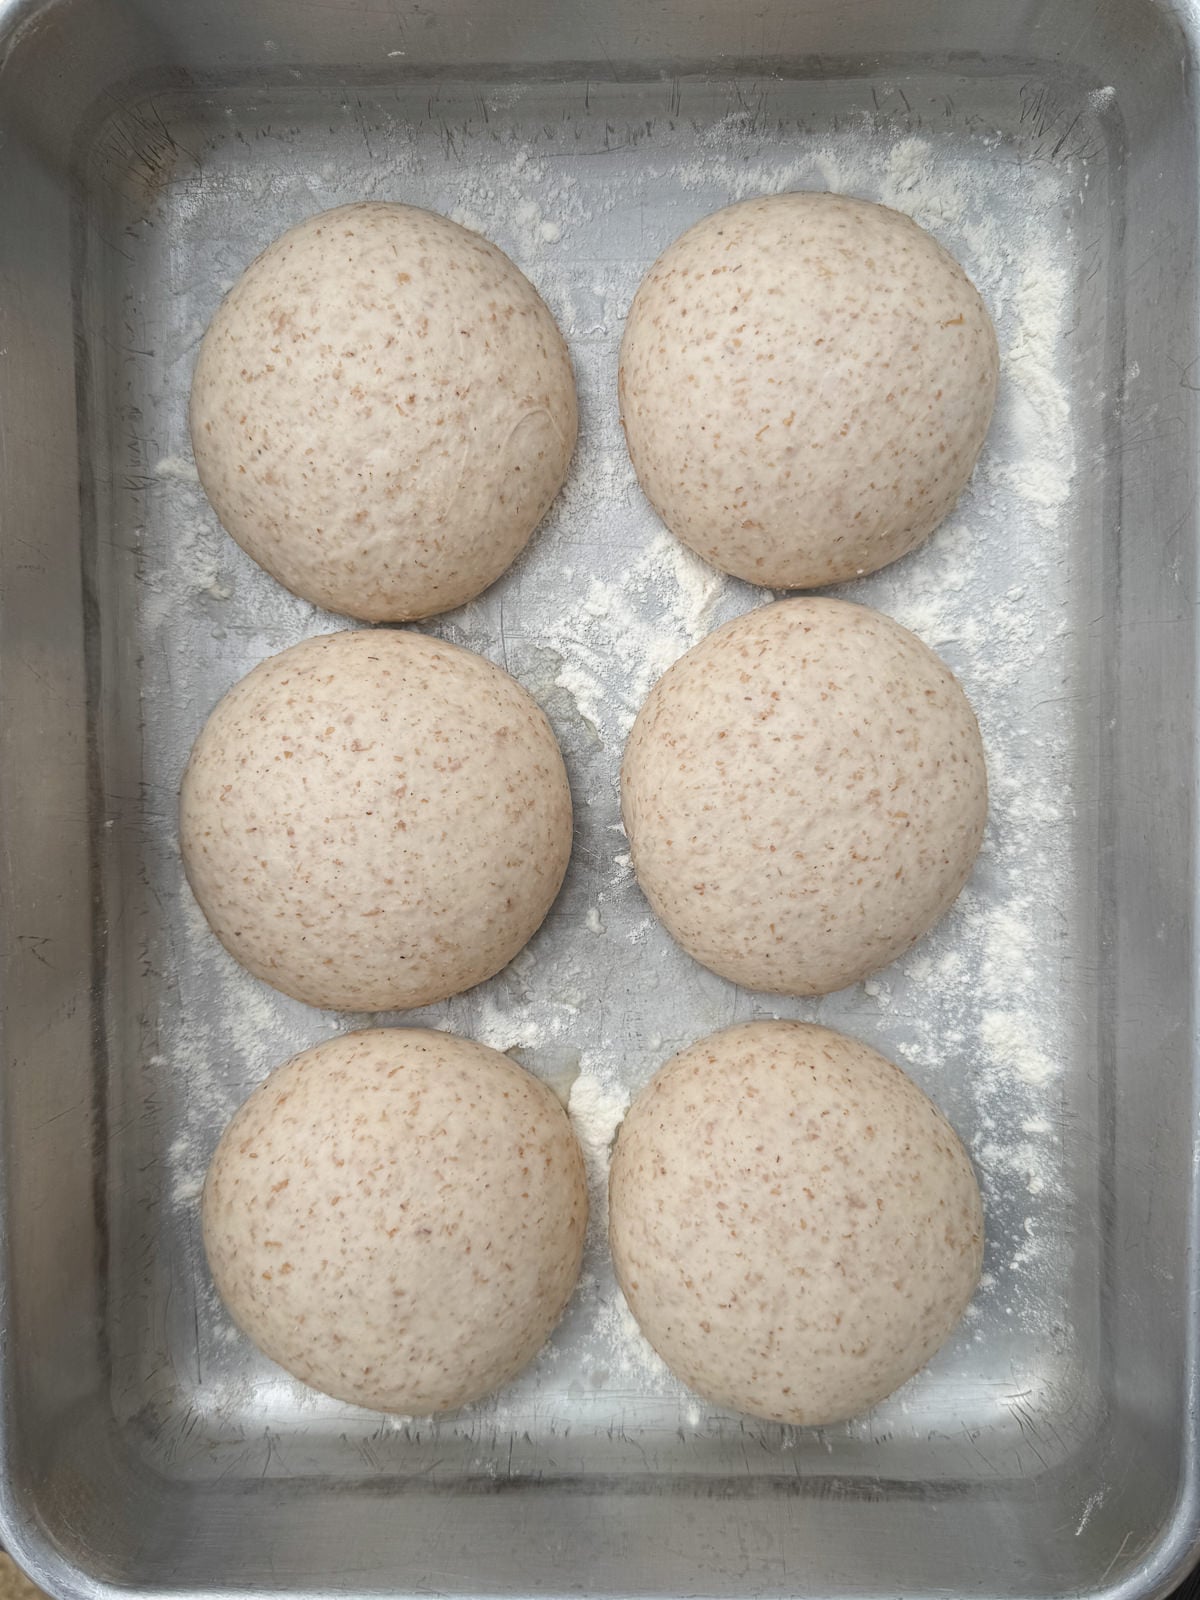
Next, transfer the balls of dough into a floured baking tin, spacing them a few centimetres apart then cover the tin with clingfilm and chill in the fridge for 12-24 hours.
The longer you ferment the dough for, the deeper/more sour the flavour will be. It’s best not to ferment for longer than 24 hours though, as the pitas won’t rise as much when you cook them.
7. Baking
The next day, take the dough balls out of the fridge then let them sit at room temperature for 1-2 hours, until they no longer feel cold to the touch. The dough will rise slightly during this time but we don’t want them to rise too much, so that the yeast still has enough energy to make the pitas rise in the oven.
You’ll need to preheat your pizza oven whilst the dough warms up and I’ve explained my cooking process for these pitas down below!
Dough Schedule Example
Here’s a schedule example to give you a rough idea on timings for sourdough pita dough. The time it takes for your starter to peak and the dough to bulk ferment will vary depending on the temperature of your kitchen, the weather & the temperature of your ingredients.
- 8:00 – Feed sourdough starter
- 12:00 – Autolyse dough
- 13:00 – Add starter to dough then mix
- 13:10 – Start bulk ferment (remember the coil folds!)
- 17:10 – Divide and shape dough
- 17:15 – Start cold fermentation
How To Cook Pitas In A Pizza Oven
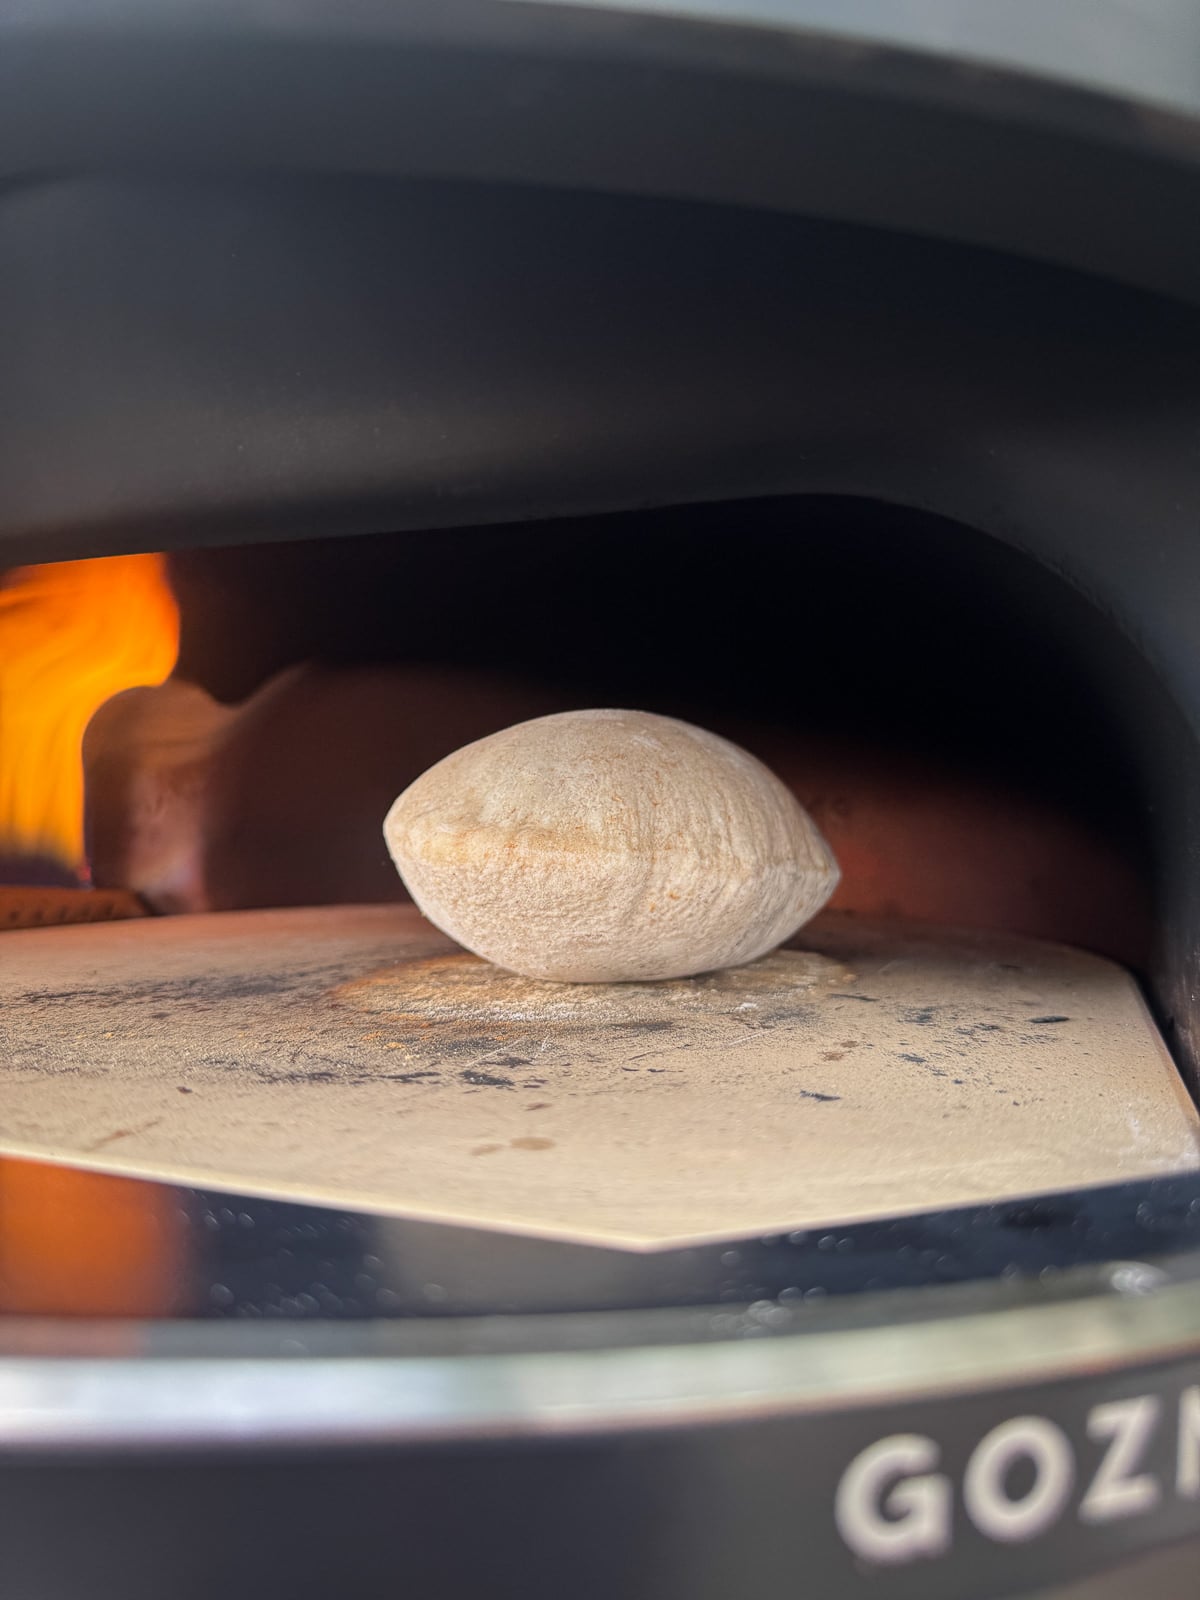
The very best way to cook sourdough pitas is in a pizza oven. You can use any style of pizza oven (gas or wood), as long as it can get up to a temperature between 350°c-400°c. Cooked in a pizza oven, pitas will bake in less than 2 minutes and will have a deeper, more caramelised crust and flavour than if you cook them in a pan.
Before baking the pitas, you need to get the stone in your pizza oven properly saturated with heat. If you’re using a Gozney pizza oven like me, this will take around 30 minutes. I use an Arc XL and I preheat the oven on high flame then turn it down to medium to bake the pitas.
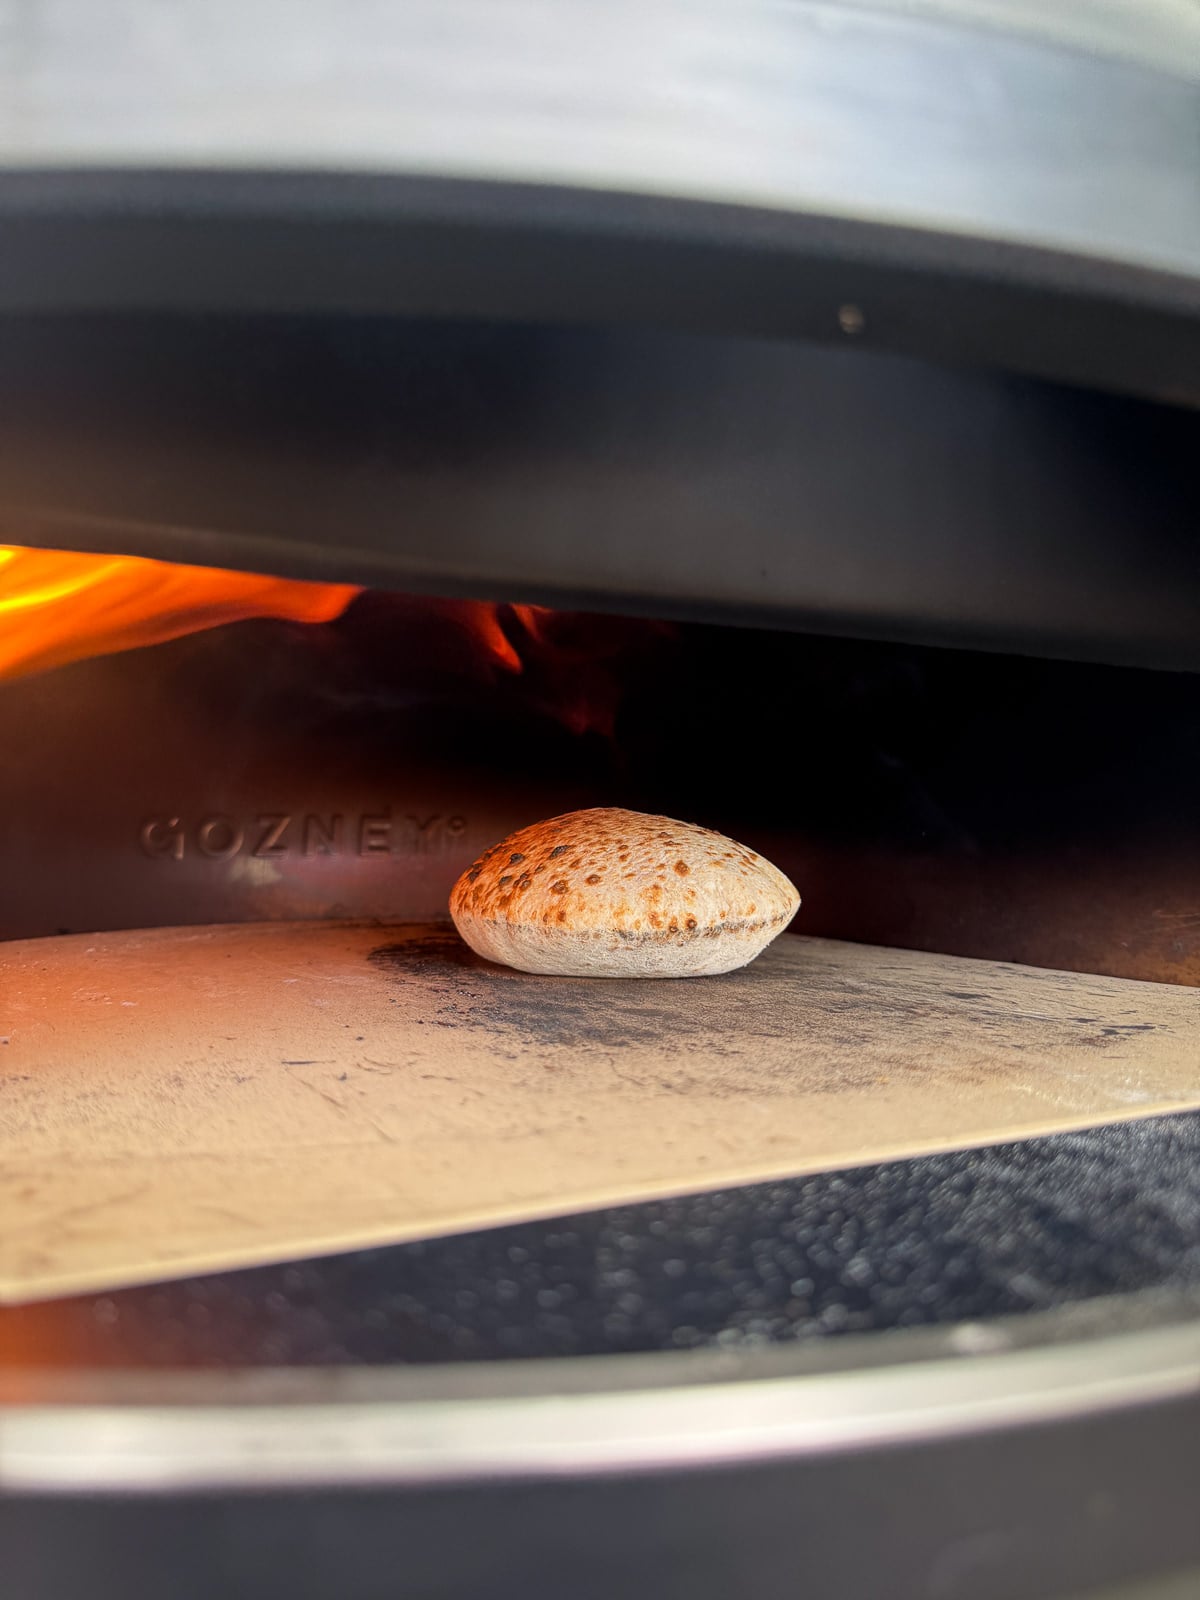
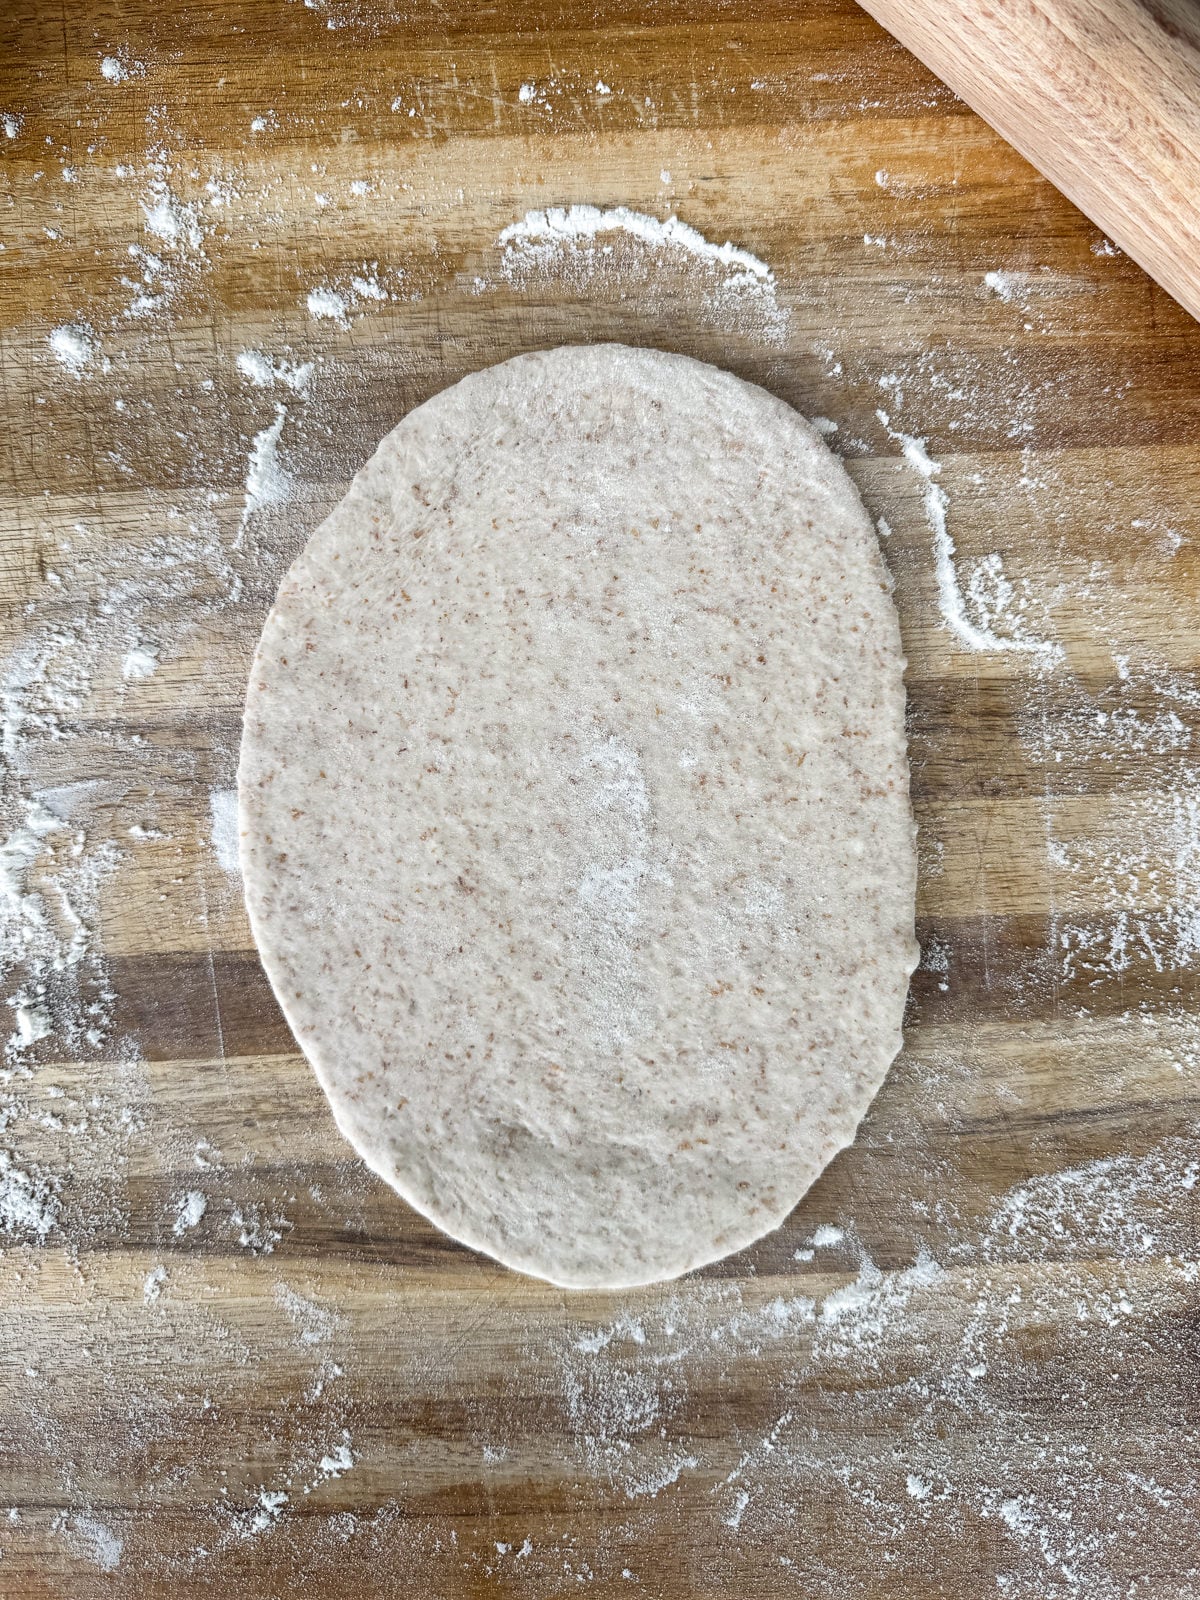
Once your oven’s up to temperature, it’s just a case of rolling the dough out into a 5mm thick oval then baking for 30 seconds – 1 minute, until the pitas has puffed up. As soon as this happens, spin the pita 180 degrees then bake for another minute so that the top colours evenly. That’s it! I bake my pitas one at a time then keep them warm by wrapping them in a tea towel.
Tips & Tricks
- For the most flavour and best possible rise, bake your pitas in a pizza oven.
- Make sure to use an active, well maintained sourdough starter. If your starter has been in the fridge, take it out 2-3 days before using, feeding it twice a day.
- Cold ferment the dough in the fridge overnight, for a deeper, more developed flavour.
- Don’t roll the dough out too thin otherwise the pitas won’t rise properly as they bake. Aim for a thickness of around half a cm.
- Keep your pitas warm by wrapping them in a tea towel straight after baking.
Frequently Asked Questions
For sourdough pitas, a strong bread flour with a protein content between 12-14% works best. For the best flavour, I like to use a mix of white and wholemeal bread flour.
Sourdough pitas can be made with all types of sourdough starter, including discarded sourdough, a stiff starter and a high hydration starter. Though for simplicity, it’s best to use a 100% hydration sourdough starter.
It’s to cold prove sourdough pita dough in the fridge for at least 12 hours but for no longer than 24. Pita dough doesn’t need to ferment for as long as other bread doughs, as the yeast needs enough energy to puff the pitas up properly as they bake. If you over ferment the dough, your pitas won’t rise.
Once cool, baked sourdough pitas should be stored in an airtight container and are best eaten within 2 days.
Unlike most bread doughs, pita dough doesn’t need to pass the windowpane test as you don’t want to overdevelop the gluten as this will make the dough too elastic. This will make the dough hard to roll out and the pitas won’t puff up properly as they bake.
Yes, sourdough pitas can absolutely be cooked in a regular oven or in a skillet on the stove. To bake in an oven, set your oven to its’ highest temperature, preheat with a baking stone or large baking tray placed in the centre of the oven & then cook the pittas in batches (you’ll need to allow an extra minute or two of cook time). Alternatively, cook the pitas in a large frying pan set over a high heat, for 3-4 minutes on each side.
More Pizza Oven Recipes To Try
- Sourdough Pizza Dough
- 3 Day Poolish Pizza Dough
- 100% Biga Potato Pizza Dough
- Pizza Oven Garlic Bread With Burrata
- Garlic Butter Naan
- Roasted Garlic White Pizza Sauce
If you have enjoyed this sourdough pita recipe, it would mean a lot if you could leave a review & rating. And if you’d like to stay up to date with future recipes, follow us on Instagram & TikTok or subscribe to our newsletter!
Pizza Oven Sourdough Pitas
Equipment
- Stand Mixer
- Baking Tray
- Pizza Oven
- Rolling Pin
Ingredients
To Feed Sourdough Starter
- 100 g Sourdough Starter (100% Hydration – See Notes)
- 100 g Water (25°c/78°f)
- 50 g Strong White Bread Flour (See Notes)
- 50 g Strong Wholemeal Bread Flour (See Notes)
Pita Dough
- 280 g Strong White Bread Flour
- 70 g Strong Wholemeal Bread Flour
- 200 g Water (25°c/78°f)
- 70 g Mature Sourdough Starter
- 15 g Olive Oil
- 7 g Fine Sea Salt
Instructions
Feeding Your Sourdough Starter
- Feed your sourdough starter using the quantities above then leave to ferment at room temperature until it reaches its peak. This will take around 4-6 hours but you'll know your starter best!The quantities used give you enough starter to make the dough plus enough to continue feeding.
Pita Dough – Autolyse
- An hour before your starter is ready, add the flours, oil and 180 grams of the water into a stand mixer then mix on a low speed (with the dough hook) until just combined.Don't over mix the dough, a few dry streaks are fine!
- Cover the bowl with a damp tea towel then leave to autolyse at room temperature for 1 hour, or until your starter is ready.Don't worry if the autolyse lasts slightly longer than an hour!
Pita Dough – Mixing
- Once your starter is ready, weigh 70 grams of it into the dough then mix on a medium-low speed until combined.
- Add the salt & the remaining 20 grams of water to the dough then continue mixing on medium-low, until the salt is mixed in and the dough is smooth & coming away from the sides of the bowl. This will take around 4-5 minutes of mixing.
- Once mixed, transfer the dough to a lightly oiled bowl then cover with a damp tea towel.I'd recommend using a glass bowl, so you can keep an eye how the dough is fermenting.
Bulk Fermentation
- Let the dough prove at room temperature and perform 2 sets of coil folds, spaced 45 minutes apart.
- Continue proving the dough at room temperature until it has risen in size by 50% & there's lots of tiny bubbles around the edges. The total time for the bulk ferment (including the coil folds) will roughly be between 3-4 hours.You'll know when it's done when the dough has risen in volume & there's signs of fermentation (lots of tiny bubbles).
Shaping & Cold Ferment
- Once the dough has proved, transfer it to a lightly floured work surface then use a bench scraper to divide into 6 equal pieces. Shape each piece into a tight ball with your hands.Each piece of dough should weigh around 100 grams.
- Next, dust a baking tray (or dough tray) with flour then add in the dough balls, making sure to space them at least a couple of centimetres apart.
- Cover the tray with clingfilm (or a lid) then leave to ferment in the fridge for 12-24 hours.The longer you ferment the dough for, the deeper/more sour the flavour will be. It's best not to ferment for longer than 24 hours though, as the pitas won't rise as much when you cook them.
Baking
- The next day, take the dough out of the fridge then leave to sit at room temperature for 1-2 hours, until they no longer feel cold to the touch.
- In the meantime, preheat a pizza oven to 350°c – 400°c (660°f-750°f).Make sure to give your oven plenty of time to saturate with heat.
- Next, place a ball of dough onto a lightly floured surface & use a rolling pin to roll out into an oval, roughly 20cm long & 5mm thick. Use a peel to transfer the rolled out pitta into the preheated pizza ovenIf you are using a gas pizza oven, turn the flame down to medium. If the flame is too fierce, the top of the pitas can burn.
- Allow the pita to cook untouched until it puffs up (this will take around 30 seconds) then turn 180° & cook for around another 30 seconds. Remove from the oven & place inside a tea towel to keep soft.
- Repeat with the remaining pittas, rolling out & cooking them one at a time.
Salt Butter Smoke Magazine
Love seasonal cooking?
Issue 001 features over 20 original autumn recipes, seasonal features, preserving guides and beautiful photography.
Take a Look Inside →Video
Notes
Enjoying This Recipe?
The Prep List is my free weekly newsletter with seasonal recipes, kitchen notes and behind-the-scenes from my kitchen. Add Salt Butter Smoke as a Google Preferred Source to see more of my recipes in Search.