3 Day Poolish Pizza Dough
This 3 day poolish pizza dough makes the best crusts! Chewy & crisp, this dough has incredible oven spring & a well developed flavour.
The dough can either make or break a pizza so it’s important to get it right!
For this recipe, we’re taking advantage of a poolish pre ferment & a long, cold prove in the fridge. This is the secret to making really good, artisan style pizza. If you’re after pizza with a chewy, airy crust, a crisp base & a well developed flavour, this 3 day poolish pizza dough recipe is for you!
Although this dough does take 72 hours to make, most of that time is hands off & the results really do speak for themselves. In this recipe, each part of the process is broken down into easy to follow steps and we’ll be covering how to make & use a pre ferment, signs of a properly fermented dough, an easy way to stretch pizza dough by hand for the best crusts and how to cook this dough in a pizza oven.
For more recipes, take a look at our ever growing collection of bread recipes! There’s buns, rolls, sourdough, bagels, doughnuts & lots more. And for more pizza doughs, sauces & toppings, check out our pizza recipe collection.
What Is A Poolish?
A poolish is a liquid pre ferment that is used in place of yeast in bread & pizza doughs. To make this, we combine equal parts flour & water with a tiny amount of dried active yeast then leave to ferment either at room temperature, in the fridge or a combination of both.
For this pizza dough recipe, we’re making a 100% hydration poolish using a quarter of our total flour & 0.8g of yeast (this is a baker’s percentage of 0.1%). This is then left to ferment at room temperature for 1 hour then it’s placed in the fridge for 24 hours. The initial room temperature ferment helps kick start the fermentation and the cold ferment means that we can stick it in the fridge & not worry about it!
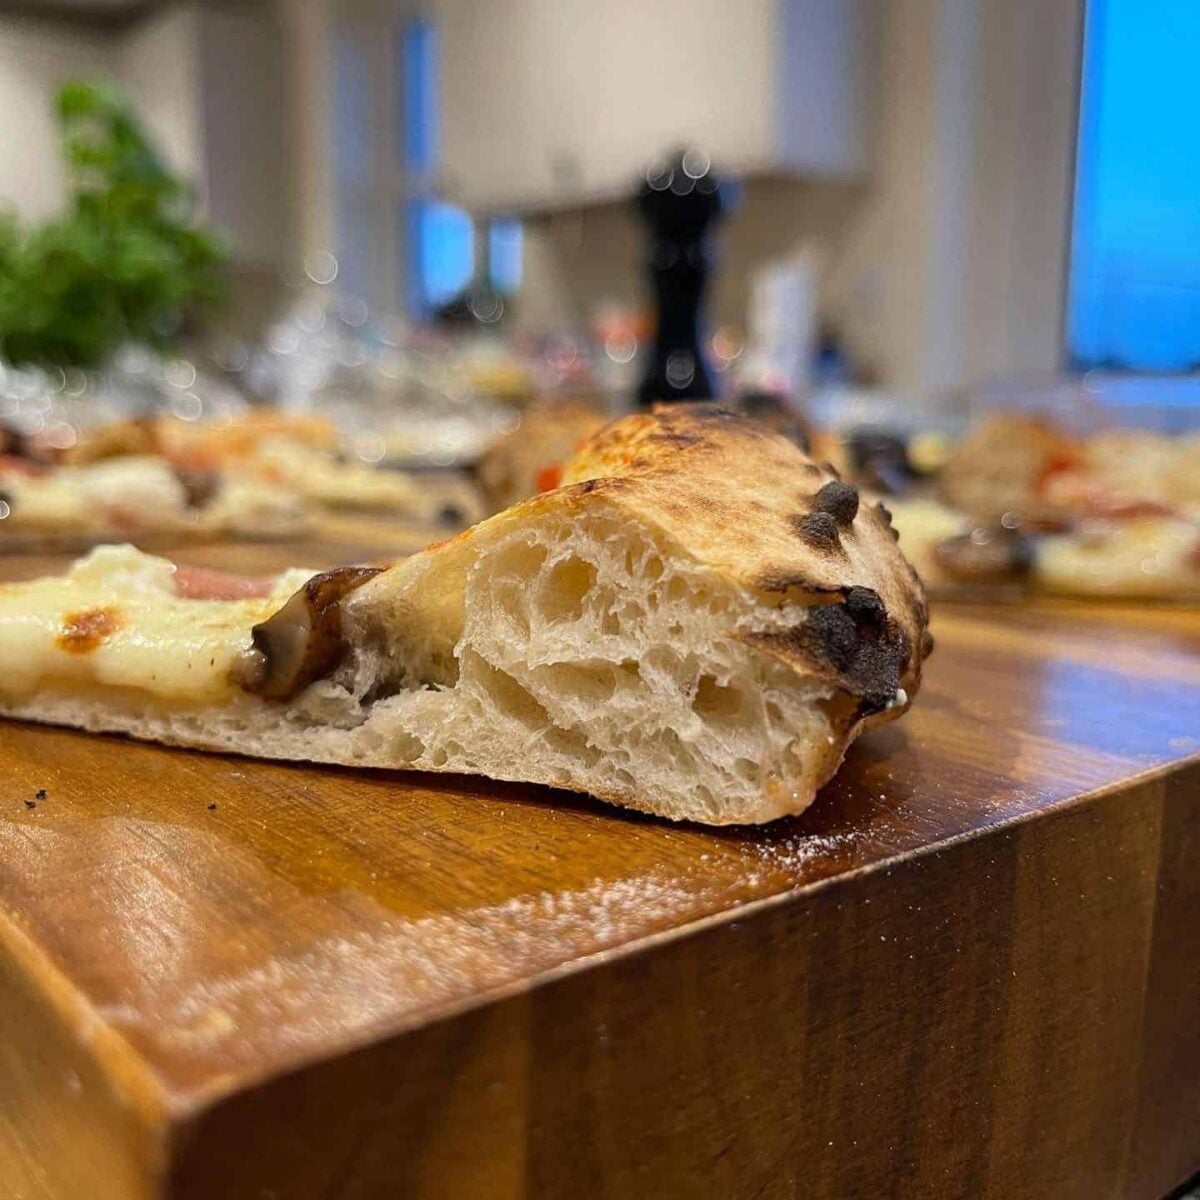
The Secret To Great Oven Spring
Oven spring is the term used to describe the dough’s final rise in the oven, just before the crust sets.
When dough is loaded into a pizza oven, the high temperature causes it to heat up instantly. At the same time, a combination of carbon dioxide (converted from sugar by the yeast) & steam (from the water) causes a rapid increase in the dough’s volume. This is what gives the crust its’ airy, open crumb.
The secret to getting the best oven spring comes down to a high level of hydration, good gluten formation, optimal fermentation & a high cooking temperature. This is easier than it sounds though and basically just means that we need to ferment & cook the dough at the correct temperatures. As well as making sure that we knead the dough for long enough initially. We’ll be going through each of these steps in detail in this post!
Ingredients Used For Poolish Pizza Dough
A good homemade pizza dough only needs a few ingredients; flour, salt, yeast, water & sometimes oil. So using good quality ingredients is key here!
00 Flour
The type of flour that you use for pizza affects the type of crust that you’ll get. We’re after a light, airy, slightly chewy crust which means that we need to use 00 flour. This is an Italian flour that is finely ground & is commonly used for pasta and pizza.
For cold fermented pizza & doughs made with a pre ferment, it’s best to use a flour with a protein content of around 12-14%. This is the ideal protein content as it can handle higher levels of hydration and makes dough with a stronger gluten network which means that the structure won’t break down during the longer prove.
In my opinion, the best 00 flour to use for pizza is from a brand called Caputo. For this recipe I used their Nuvola flour but their Classica or Pizzeria flour could be used instead. For this dough, we’re aiming for a soft, slightly chewy crust so this is the perfect flour to use. These all have a protein content of 12-12.5%. For a chewier, more robust pizza crust you’d use a flour with a protein content closer to 14%.
Dried Active Yeast
As we are making this pizza dough with a preferment, we only need to use a tiny amount of yeast (less than 1 gram!) and because we’re fermenting this dough over several days in the fridge, there’s no need to activate the yeast in warm water before using. Just make sure to use yeast that’s still in date so you know it’s still active!
Salt
Salt is added to pizza dough to add flavour, to strengthen gluten & to slow down fermentation (depending on how much is used). Typically you’d use between 2% & 3% of the flours total weight in salt which gives a good flavour without being salty. A good sea salt (like Maldon salt) is the best option.
Water
To make pizza with a light, open crumb, we need to use a fairly high level of hydration. Somewhere in the region of 60% – 70% of the total flour weight should be liquid. To make a dough with an open crumb but that’s still easy to handle, we’re going with 65% hydration.
When you’re measuring out the water, it’s important to get the temperature as close to 25.5°c/78°f as possible. Using a digital food probe is key here.
Olive Oil
Adding a small amount of olive oil to pizza dough, makes crusts with a slightly softer texture. If you’d prefer a crispier pizza base, leave the oil out & replace it with extra water.
How To Make 3 Day Poolish Pizza Dough
This homemade pizza dough is made over 3 days, which gives it a more developed flavour & next level oven spring! This may seem like a lot of effort for pizza dough but it really is worth it & there’s actually very little prep involved. It’s more about the planning & timing!
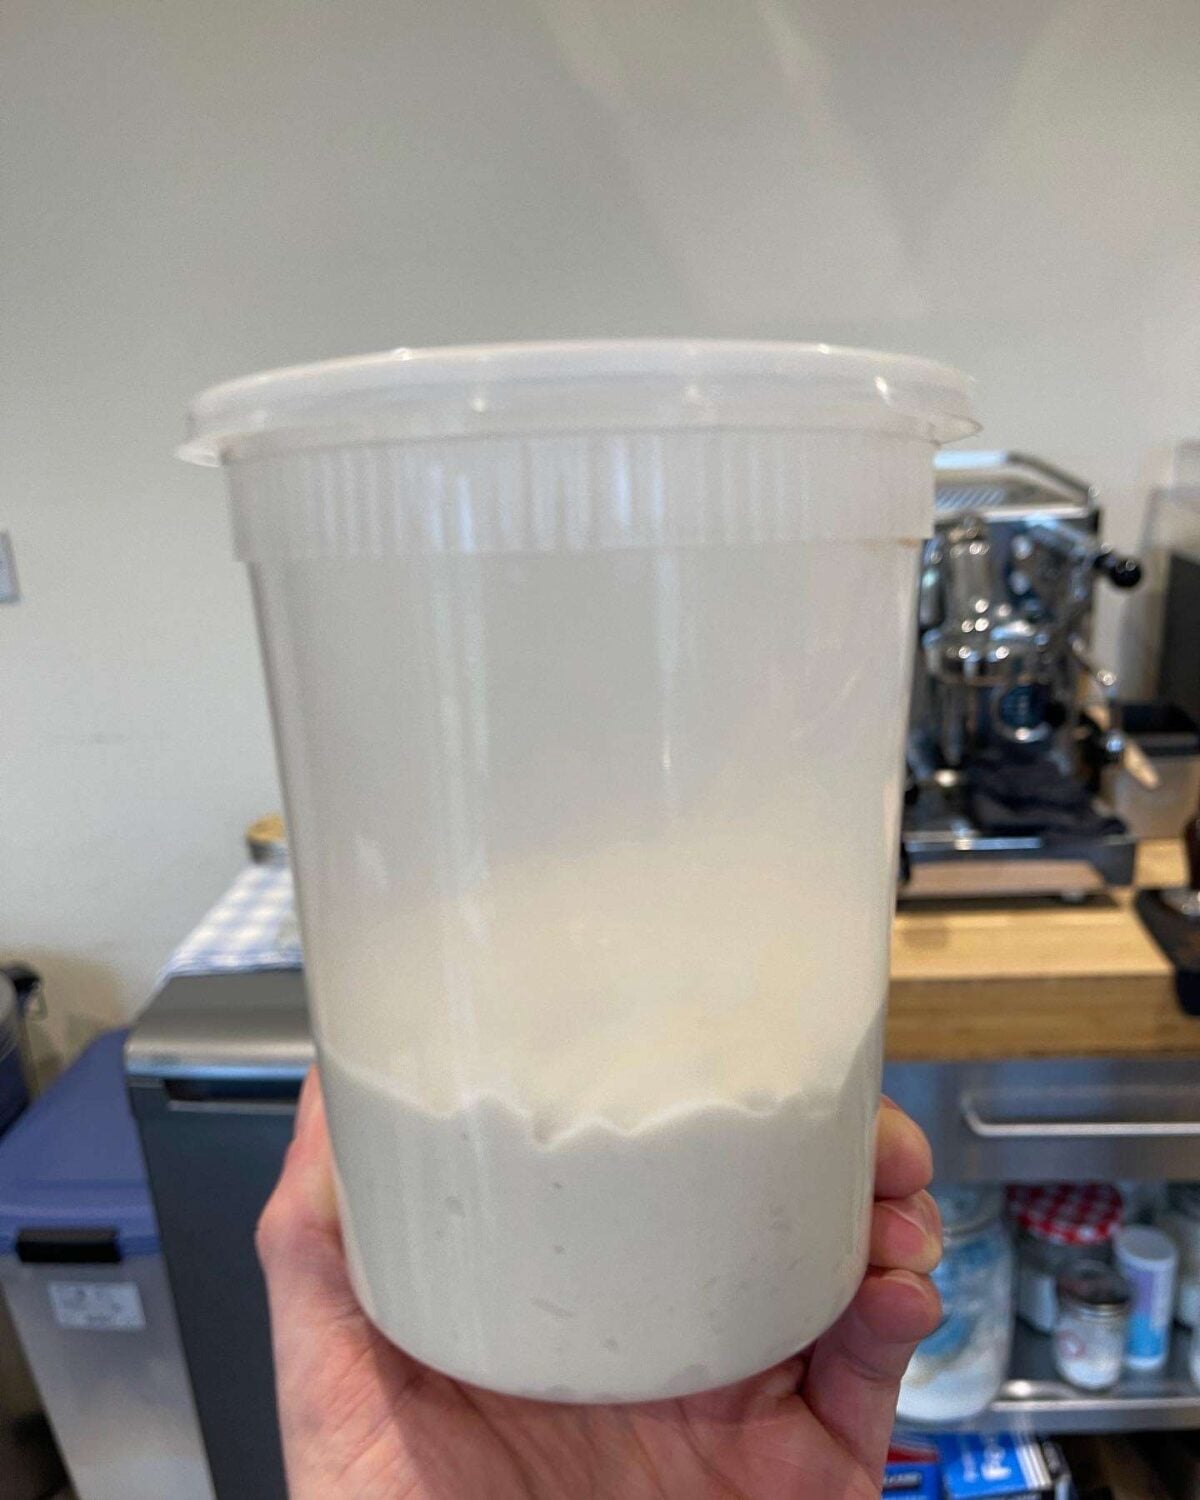
Step 1 – Poolish
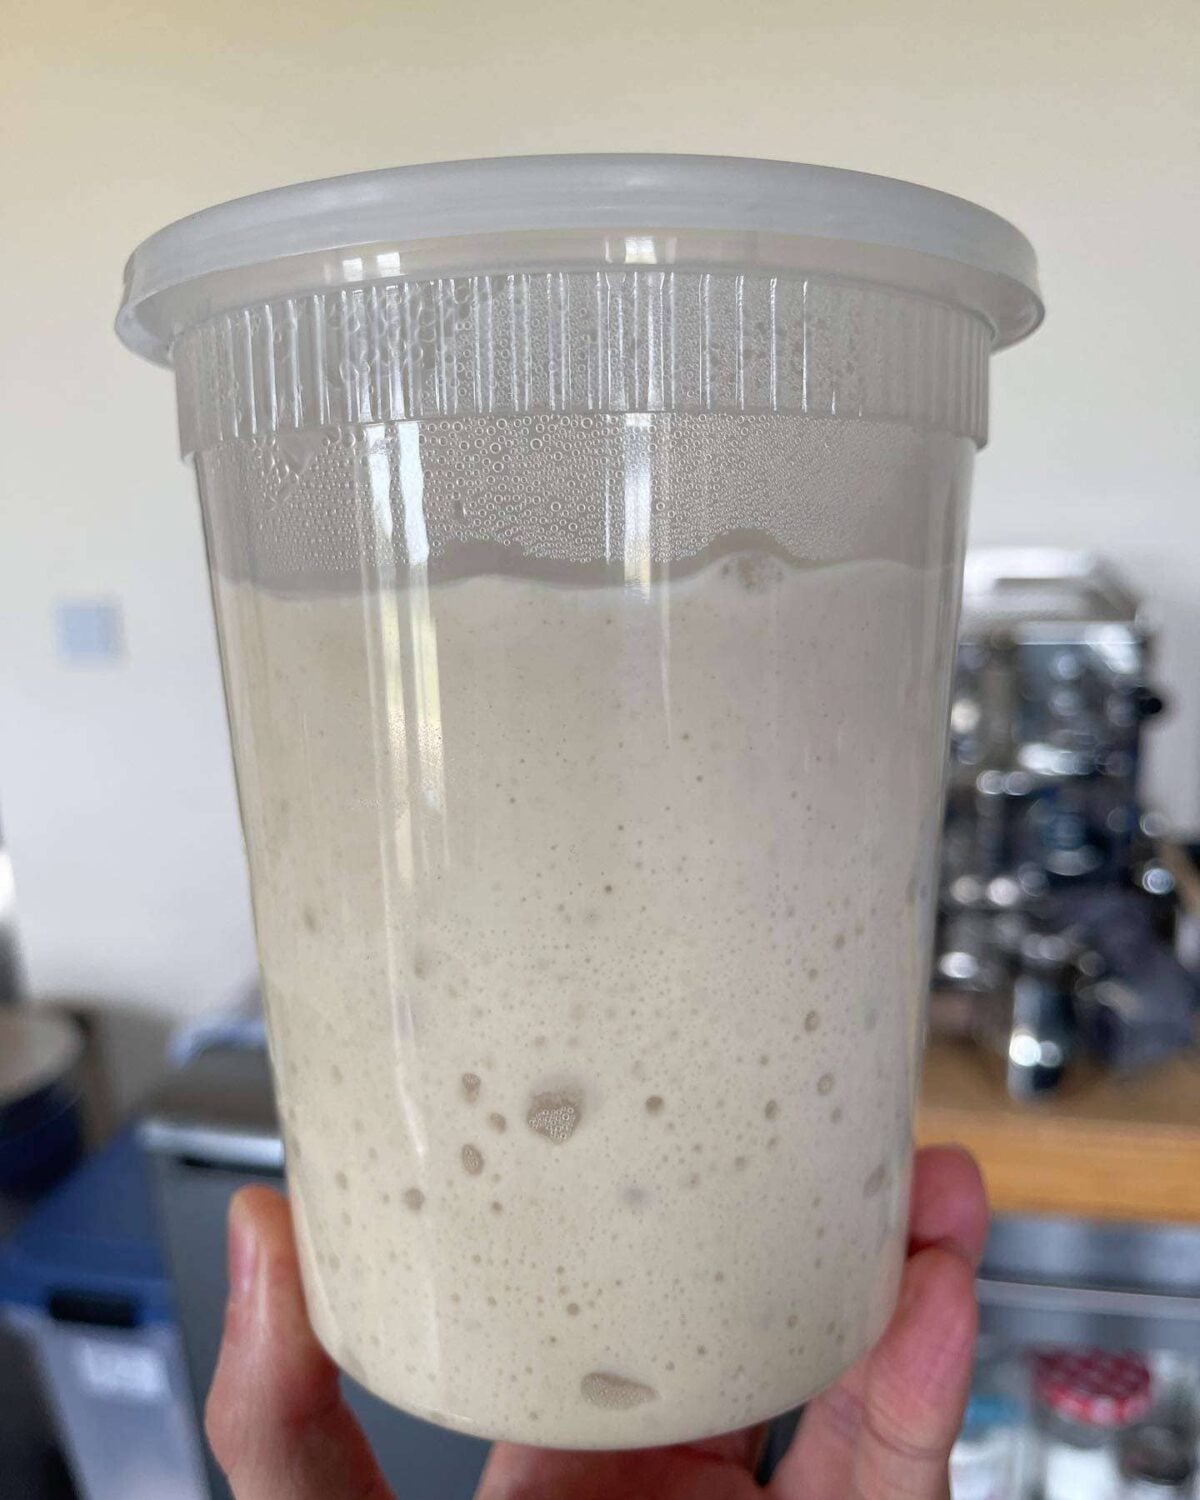
The first step is making the poolish pre ferment. To do this, dissolve dried active yeast in water then mix in 00 flour until just combined. This mix is then left at room temperature for 1 hour in an airtight container. Make sure to use a container that has enough room for the poolish to double in size (at least!).
After an hour, place the poolish in the fridge & leave it there for 18-24 hours.
Day 2 – Dough
The next day, it’s time to make the main dough.
Step 1 – Autolyse
First, take the poolish out of the fridge & leave it at room temperature for 1 hour.
At the same time, we mix (in a stand mixer) 00 flour with water & olive oil until just combined then leave to autolyse for the same amount of time. After an hour, the poolish should have doubled in size from its’ original volume. If it hasn’t, we let it sit at room temperature until it has. A slightly longer autolyse is fine so don’t worry if it sits for longer than an hour!
Step 2 – Mixing The Dough
Once the poolish is ready, mix it into the dough, followed by the sea salt. Then knead the dough until it’s smooth and passes the windowpane test. This will take around 10 minutes of mixing on a medium speed with a dough hook.
The windowpane test is used to check gluten development in dough. To do this, stretch a small amount of dough between your fingers. If it stretches thin enough so that you can see through it, it’s ready. If it doesn’t the dough requires more kneading.
Step 3 – Prove & Shape Then Cold Ferment
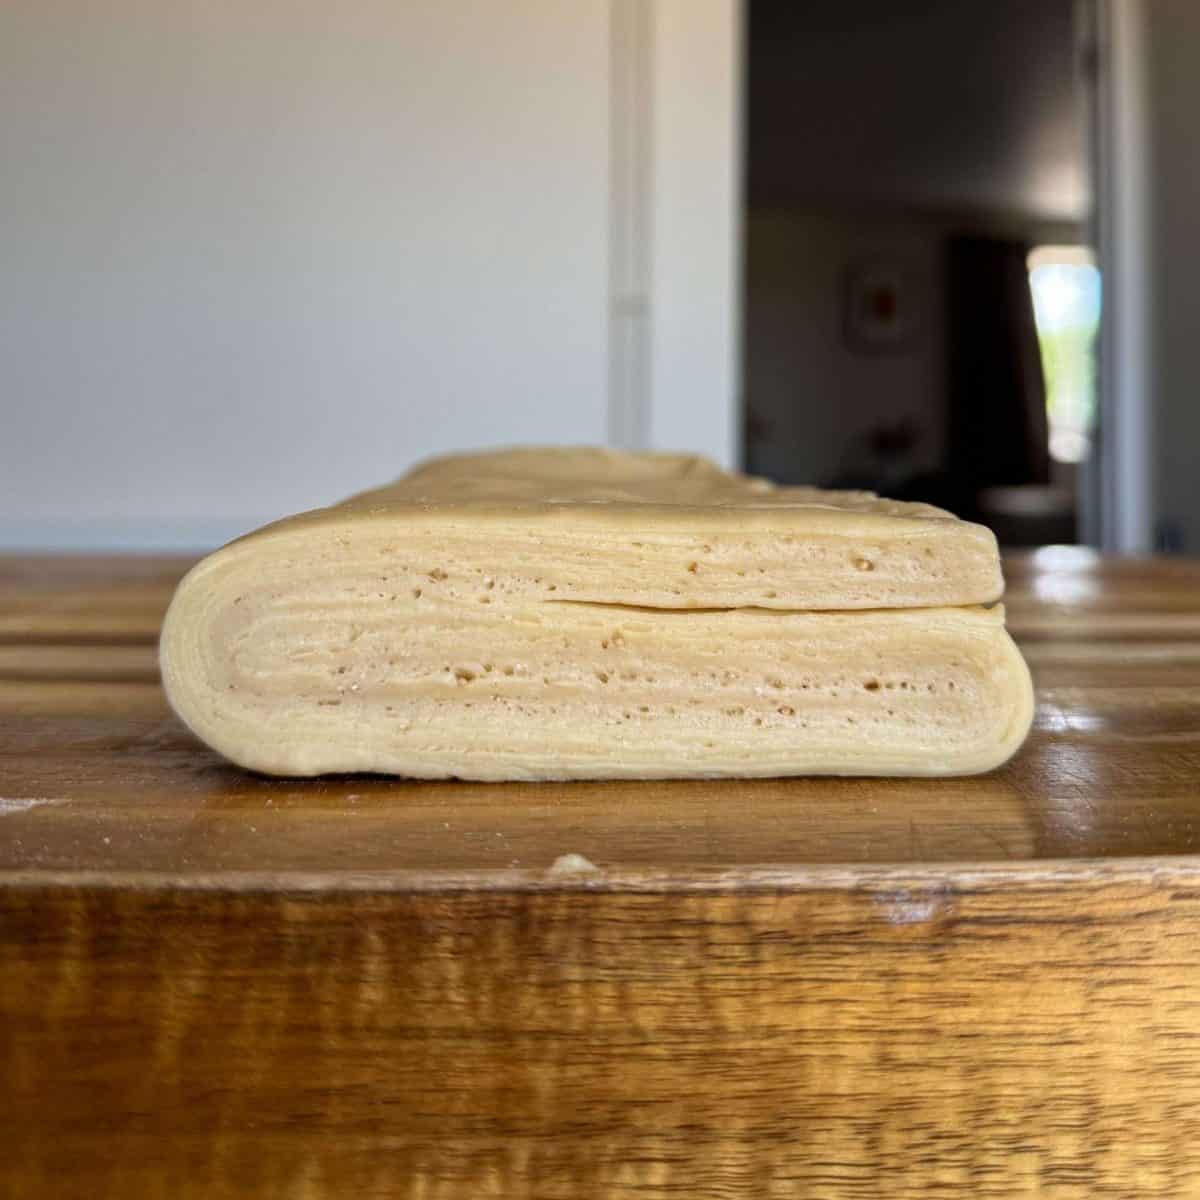
The kneaded dough is now left to ferment at room temperature for 1 hour before being divided into 5 equal portions (260 grams each) & shaped into balls. Finally, each ball of dough is placed into an oiled container & left in the fridge for a 36-48 hour cold prove.
Stretching And Cooking
Tempering The Dough
After 2 days in the fridge, the balls of dough are ready to make into pizza. But first, they need to sit at room temperature for 1½ – 2 hours. This is called tempering the dough & gives the gluten time to relax, making the dough easier to stretch/open up. If you use pizza dough straight from the fridge it will be hard work with and will most likely tear!
How To Remove Dough Without Degassing
To remove a ball of dough from it’ container, gently tip it out onto a floured surface then flip it over so that it’s facing the same way as it was in the container (smooth side up). It’s key to do this gently to avoid knocking any air out of the dough
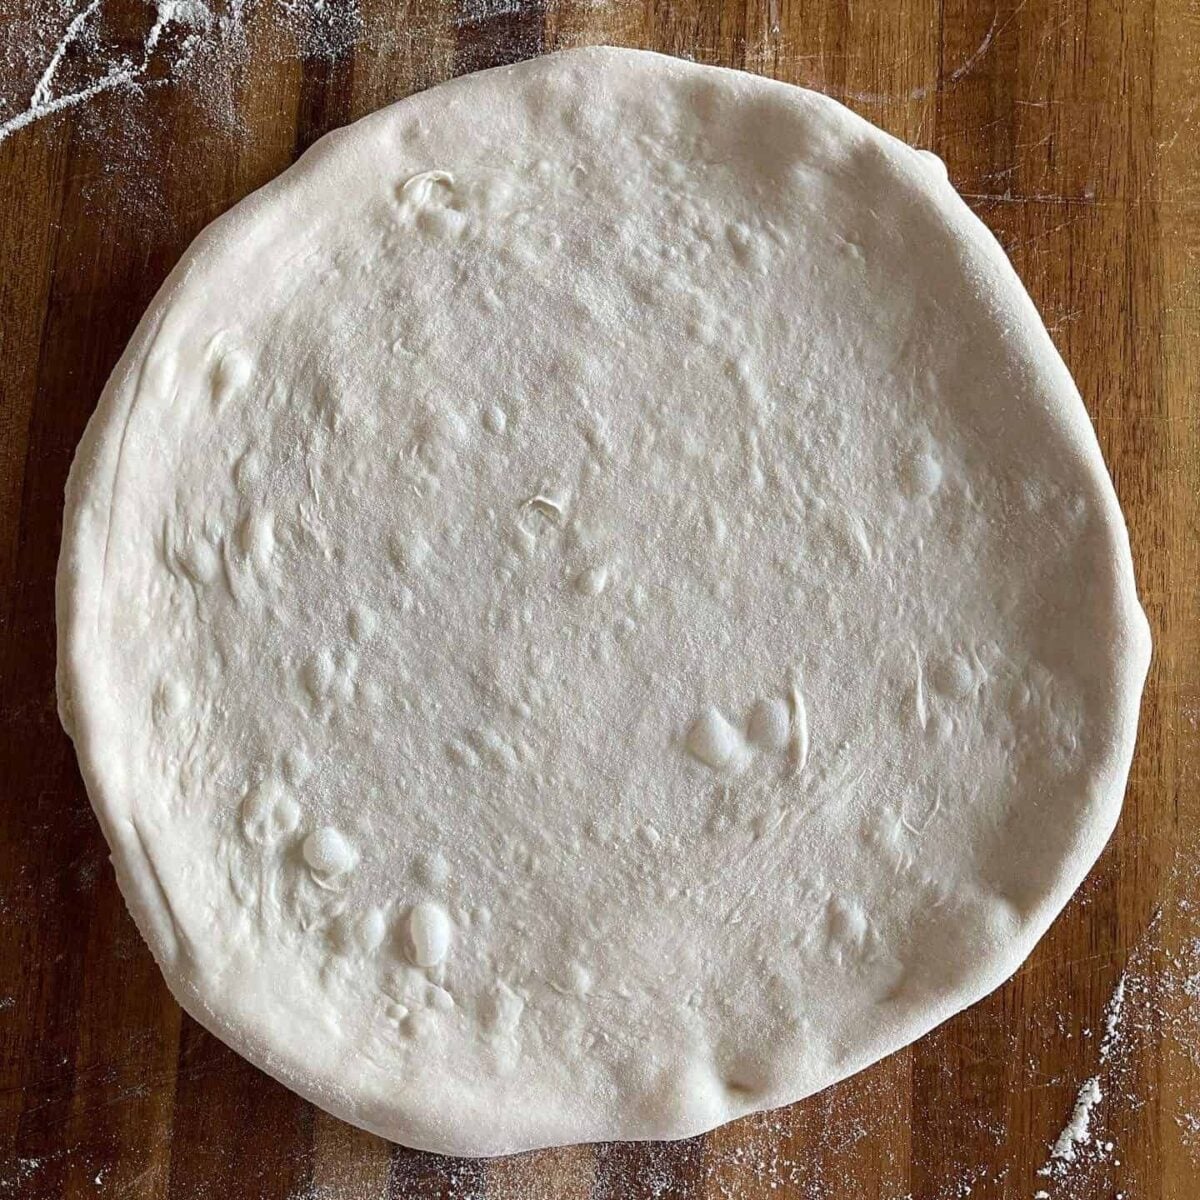
Stretching – The Steering Wheel Method
There are many ways that you can stretch a ball of dough into a pizza base but the way I like to use is called the “steering wheel” method. This is where you use your fingertips to press the dough into a disc (leaving a border round the outside) then hold it in the air & rotate it in your hands (like turning a steering wheel), pinching around the crust as you do so. This way, you’re letting gravity do the stretching for you.
When shaping, it’s important to keep as much gas in the dough as possible. This is key to getting a good oven spring & light, airy crust. Make sure to brush any excess flour from your dough before baking as it will burn in the oven!
Cooking
Once shaped, add a thin layer of toppings then cook in a 400°c – 450°c (750°f/840°f) pizza oven for 1-1½ minutes, making sure to turn the pizza regularly with a peel, to stop it from burning. As this dough makes thick, airy crusts, we need to cook it at a slightly lower temperature than you would with say a Neapolitan pizza, to prevent it from burning.

The Best Way To Cook Pizza
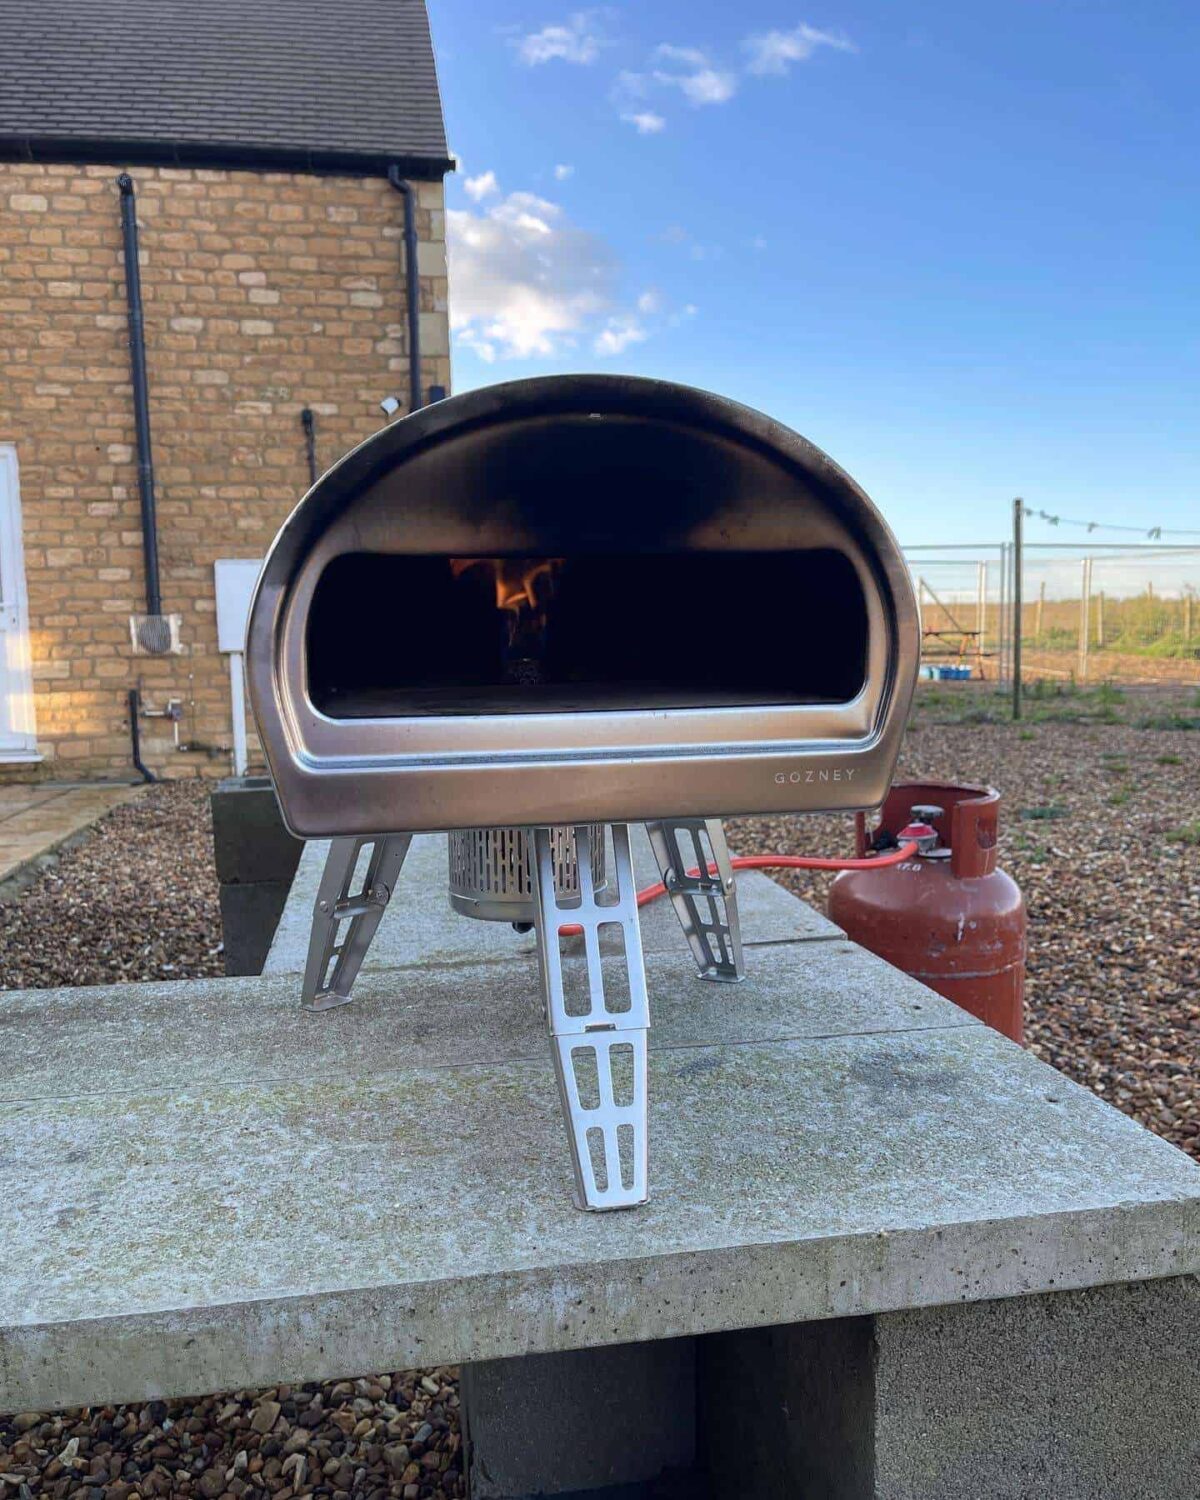
Pizzas are best cooked at a very high temperature, somewhere in the region of 400°c – 450°c (750°f/840°f). The only way that we can achieve these temperatures is by using a pizza oven, fuelled either by gas or wood. The cooking time will be pretty much the same either way.
When I cook pizzas at home, I use a Gozney pizza oven which is fuelled by gas. If you are also using one of these ovens, I’d recommend preheating it for at least 30 minutes, to properly saturate the stone. I tend to cook this dough with the dial set at medium-low.
3 Day Poolish Pizza Dough Tips & Tricks
- Make sure to measure the water temperature accurately with a digital food probe.
- Lightly grease the dough containers with olive oil. This will make removing the dough easier.
- Flour your work surface before stretching the dough to stop it sticking.
- Cook the dough in a pizza oven at 400°c – 450°c (750°f/840°f) & turn regularly, using a peel.
- Preheat your pizza oven so that the stone is well saturated with heat.
- Use a laser temperature gun for accurate pizza stone temperature readings.
- Don’t add too many toppings to the pizza. This can make the crust soggy.
Frequently Asked Questions
For poolish pizza dough and other cold fermented doughs, 00 flour is best, which is a type of fine Italian flour. Caputo is the best brand to use & can be bought online. I wouldn’t recommend using plain or regular bread flour instead.
Pizza is best cooked in a pizza oven but can also be made in a home oven. To do this, turn your oven to its’ highest setting & preheat with a metal sheet or baking stone inside. Cook the pizza directly on the hot stone. Keep in mind that pizza will take a couple of minutes longer to cook in a regular oven.
For best results, the balls of dough should be kept in the fridge for a minimum of 36-48 hours. An extra day won’t hurt but keep in mind that the flavour will be more developed. I wouldn’t recommend cold fermenting for longer than 72 hours as the oven spring won’t be as good.
I’d recommend using dried active yeast when making a 3 day pizza dough. This type of yeast is best suited for longer periods of cold fermentation. Fresh yeast could also be used, you’ll need to use twice as much.
Before using your pizza dough, it’s best to let it sit at room temperature for 1-2 hours. This relaxes the gluten in the dough, making it easier to stretch. The dough won’t really rise during this time, it just needs to come up to room temperature.
As we’re using such a small amount of yeast in this pizza dough, it’s best to use a set of micro scales to weigh it out. If you haven’t got a set, 0.8 grams of dried active yeast equates to a quarter of a teaspoon.
More Pizza Recipes To Try
- 2 Day Pizza Dough
- Pizza Oven Pittas
- 100% Biga Potato Pizza Dough
- Pizza Oven Garlic Bread With Burrata
- Roasted Garlic White Pizza Sauce
- Classic Tomato & Basil Sauce
Watch How To Make This Recipe
If you have enjoyed this 3 day pizza dough recipe, it would mean a lot if you could leave a review & rating. And if you’d like to stay up to date with future recipes, follow us on Instagram & TikTok or subscribe to our newsletter!

3 Day Poolish Pizza Dough
Equipment
- Stand Mixer
- Digital Scales
- Mixing Bowl
- Digital Food Probe
- 5 Round Storage Tubs With Lids
- Dough Scraper
- Bench Knife
Ingredients
Poolish
- 200 g 00 Flour
- 200 g Water (25.5°c/78°f)
- 0.8 g Dried Active Yeast
Dough
- 600 g 00 Flour
- 300 g Water (25.5°c/78°f)
- 20 g Olive Oil
- 20 g Maldon Salt
Instructions
Poolish
- Pour the water into a mixing bowl, add in the yeast & stir to dissolve. Add in the flour & mix until just combined.Be careful not to over mix!
- Transfer the poolish into an airtight container & cover with a lid. Leave to sit at room temperature for 1 hour then place in the fridge for 18-24 hours.Make sure to use a container with plenty of extra room! The poolish will double in size. See the notes section for room temperature adjustments.
Mixing The Dough
- The next day, take the poolish out of the fridge & leave to sit at room temperature for 1 hour.
- In the meantime, place the flour, water & olive oil into the bowl of a stand mixer. Mix with the dough hook until just combined then leave to autolyse for an hour.
- Next, pour the poolish into the dough & mix on a medium speed until incorporated. Add in the salt & continue mixing until the dough passes the windowpane test. This will take 10-15 minutes on a medium speed.
Bulk Ferment
- Cover the bowl with clingfilm (or a tea towel) & leave at room temperature for 1 hour.
- Next, tip the dough out onto a clean worksurface, divide into 5 even pieces then shape into balls. Each ball of dough should weigh around 260g.
- Lightly oil 5 round storage containers then place a ball of dough into each. Make sure to cover each pot before refrigerating (with a lid or clingfilm).I use 760ml/25oz storage pots with lids.
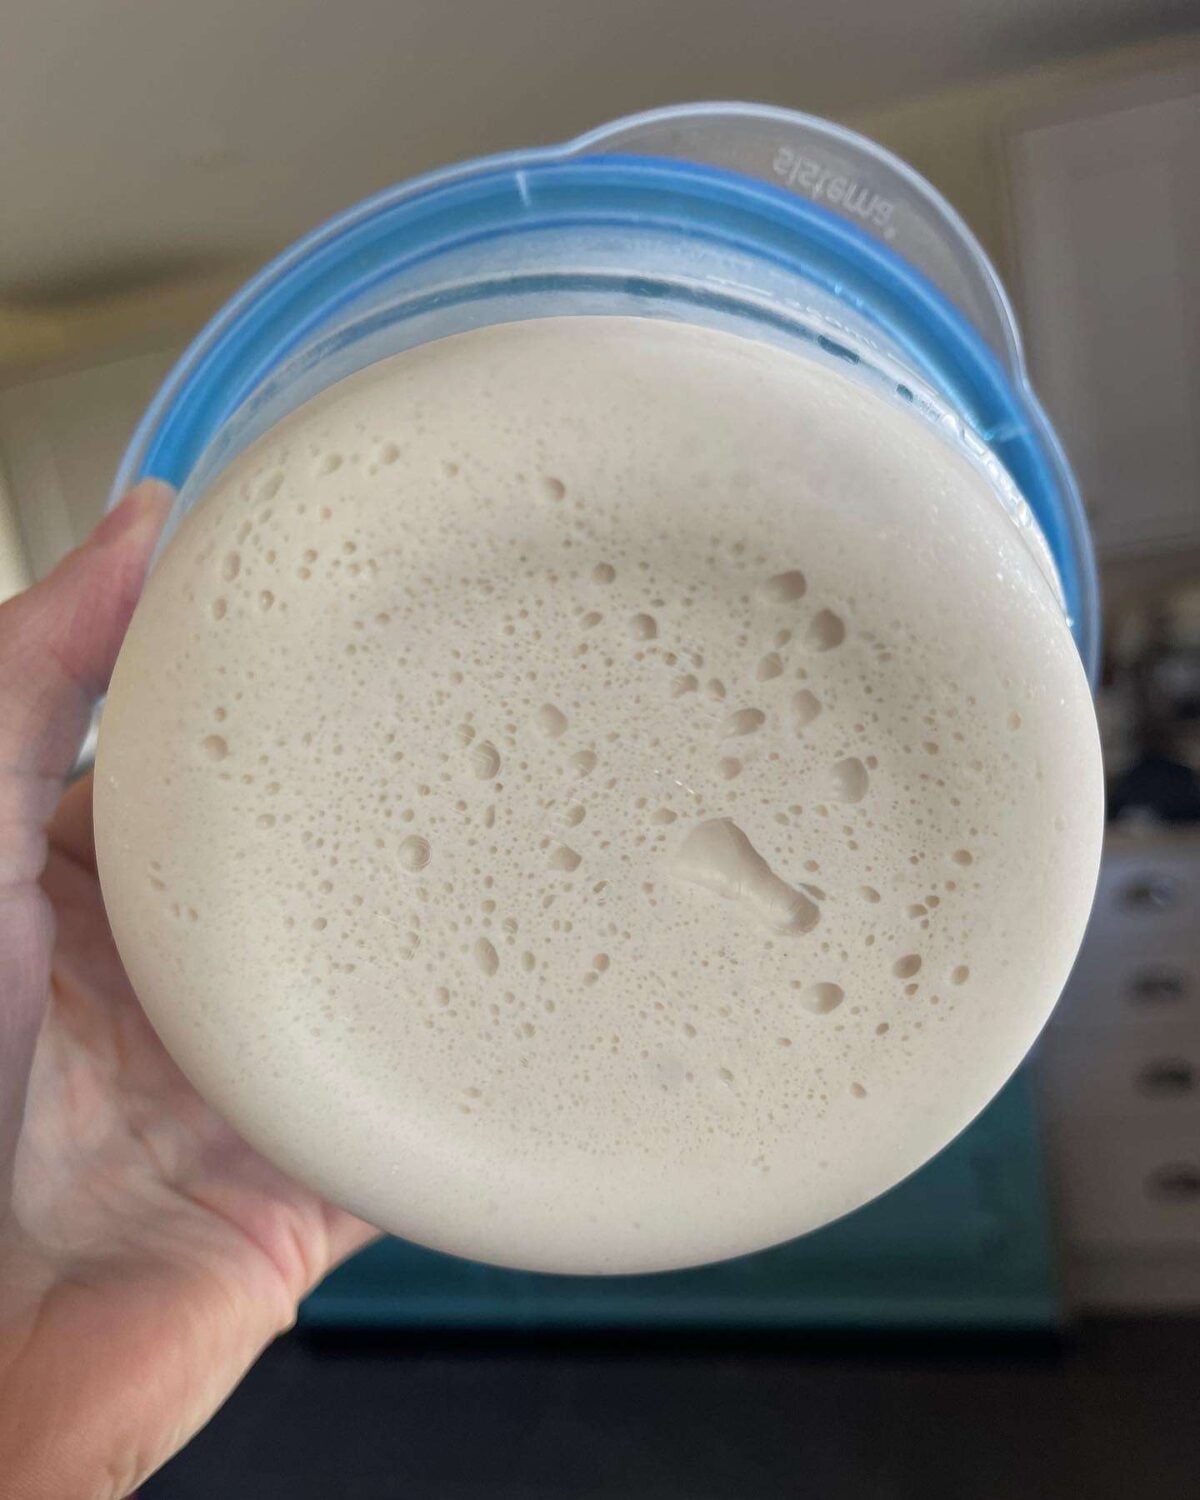
Cold Ferment
- Place the dough in the fridge & leave to ferment for 36-48 hours.Once proved, the dough will have lots of tiny bubbles around the sides. This is a sign of proper fermentation! You can prove for up to 72 hours for a stronger fermented flavour (like sourdough) but I wouldn't go any longer than this.
Using For Pizza
- Take the dough out of the fridge 1½ – 2 hours before using for pizza. The dough should be at room temperature when used.
- To make into pizza, first tip the dough out onto a floured worksurface then flip over so that the dough is facing the same was as it was in the container.
- Using your fingertips, press the dough into a disc. Starting from the centre & working to the edge, making sure to leaving a 1-2 cm border (this will be the crust).
- To stretch, I like to use a method know as "The Steering Wheel" stretch. Here's how…Using both hands, pick the dough up from one edge & hold it in front of you like a steering wheel. Now rotate the dough in your hands, pinching to form a crust as you do so. As the dough rotates, gravity will stretch it into a large circle. With this method you have full control on the thickness of the crust. If you'd prefer a thinner crust, pinch the dough nearer the edge. For a thicker crust, pinch more towards the centre.
- Top the dough with a light layer of toppings then cook in a pizza oven at 400°c – 450°c (750°f/840°f) for 1-1½ minutes turning regularly with a peel to stop it burning.
Video
Notes
❤️ Stay connected with Salt Butter Smoke
The Prep List is my free weekly newsletter with seasonal recipes, kitchen notes and behind-the-scenes from my kitchen. Add Salt Butter Smoke as a Google Preferred Source to see more of my recipes in Search.


About to try this – question, no honey/sugar in the poolish? Beginner here but curious to know the reasoning?
I don’t use sugar in the poolish because it is fermented for a day in the fridge. It would be interesting to see if adding sugar/honey to the poolish would speed up the fermentation though!
Great recipe and instructions! Thank you for an excellent pizza dough recipe.
Hi, lovely recipe.
I do notice that my dough is still quite sticky and I’m not really able to roll it into balls, even after the hour proofing and doing a successful windowpane test during kneading.
Is it okay to use a tiny bit of dough while making the dough balls, or do you have any tips why my dough is sticky?
TIA!
Hi! The only thing that I can think of that would make the dough sticky was if the flour that you’re using doesn’t have a high enough protein content. I use Caputo Nuvola flour which has a protein content of 12.5%. If you like, you could reduce the amount of water in the main dough by a small amount (say 20 grams?) without affecting the end dough too much, which would make it a bit easier to handle.