Sourdough Pizza Dough
Use your sourdough starter to make this sourdough pizza dough! It’s cold proved over 2 days for maximum flavour and the crusts have a soft, airy open crumb.

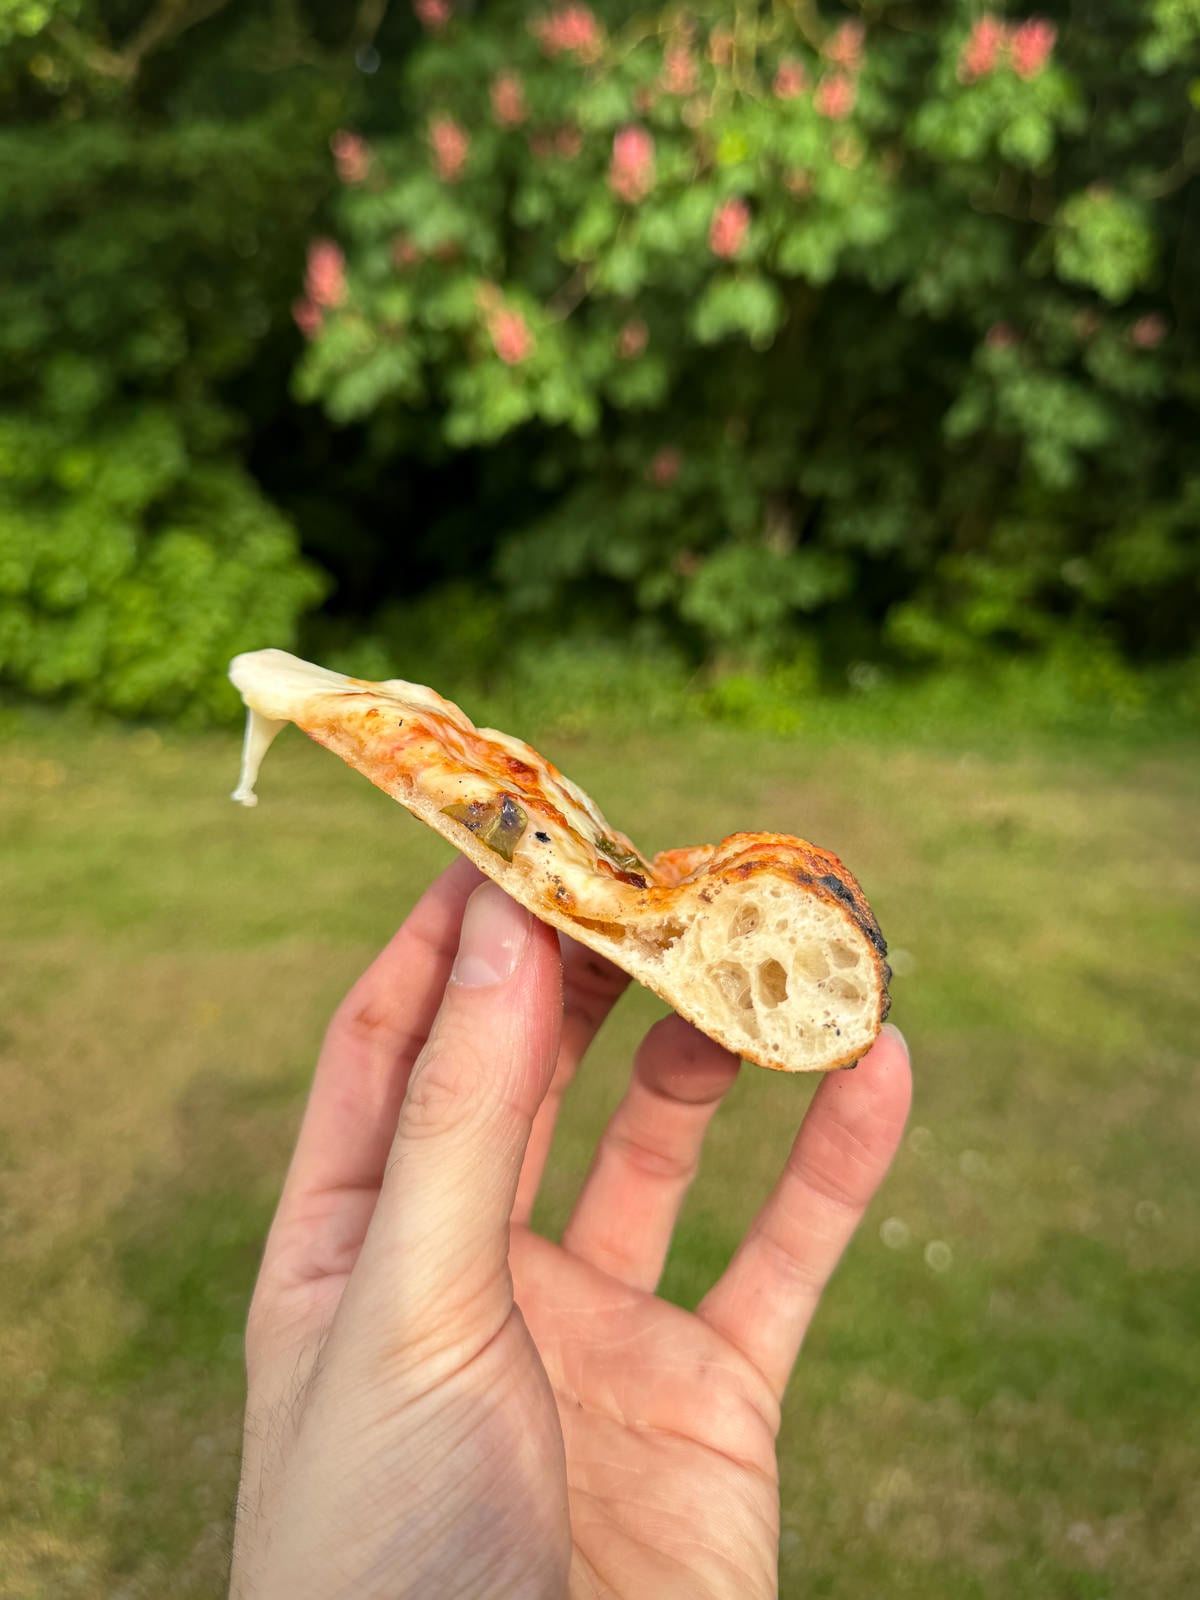
Using sourdough starter instead of yeast in pizza dough makes crusts with a soft, open, airy crumb, crisp bottoms and loads of flavour. If you’re looking to get that blistered leopard crust on your homemade pizza, a cold fermented, 2 day sourdough pizza dough is the way to go. This style of dough has a deep, well developed flavour and is surprisingly easy to make.
Making pizza dough with a sourdough starter uses the same techniques to when you make sourdough bread. This includes a room temperature bulk ferment followed by a cold prove in the fridge, giving the dough an autolyse before mixing and coil folds to develop gluten.
If you’re familiar with sourdough baking, this pizza dough will be incredibly easy to make. But don’t worry if you’re new to sourdough, we’ll be breaking down each stage into easy to follow steps. And if you need to make your own sourdough starter, check out our full step by step sourdough guide to making one!
For more bread & dough recipes, take a look at our ever growing collection of bread recipes! Here you’ll find more pizza doughs, flatbreads, sourdough, burger buns, bagels & lots more.
- Sourdough Starter – This pizza dough is made with a 100% hydration sourdough starter, which means that it’s been fed with equal amounts of starter, flour & water. If you haven’t got a sourdough starter & would like to make one, take a look at my step by step sourdough starter guide!
- 00 Flour – Using a good quality 00 flour makes all the difference when making pizza. I used Caputo Nuvola. For this style of pizza dough, it’s key that we use an 00 flour with a protein content of at least 12.5% & a W rating between 260 – 300.
- Salt – A good quality, fine sea salt like Maldon works best. Make sure to use sea salt and not fine table salt, as it will be too salty!
- Water – Regular tap water is fine for this recipe. Make sure to accurately measure the water’s temperature with a food probe.
Baker’s Percentages
Baker’s percentages are used to calculate the amount of each ingredient in relation to the total amount of flour. For example, if a recipe calls for 500 grams of flour and has a hydration of 60%, you’d need 300 grams of water. This means that you can scale the recipe up or down super easily.
This recipes makes a 62% hydration pizza dough, which gives you an open crumb whilst still being easy to work with. If you’d prefer to work with a slightly lower hydration, you’ll still get an open crumb with 60% hydration. Feel free to use slightly less water if you’re new to pizza making!
Working Out Baker’s Percentages With Sourdough
As this pizza dough is made with sourdough, we also need to take into account the water & flour in the starter. This recipe uses a 100% hydration sourdough starter, which means that it’s fed with equal parts starter, water & flour. This makes it super easy to figure out how much water and flour is used, as the amount of sourdough is simply 50% flour and 50% water.
So to figure out the total amount of flour, you work out half of the amount of starter then add it to the flour in the recipe (the weight not physically!). You do the same for the hydration, adding half the weight of starter to the water. There are online calculators and apps that you can use to work this out but here’s the math if you want to do it yourself.
- Hydration: 62%
- Sourdough Starter: 13%
- Salt: 3%
For this recipe, the weight of the flour of is 600 grams, which for 13% sourdough means we need 80 grams of sourdough starter (600 x 0.13). Then to work out 62% hydration, we times the total flour by 0.6 (so 640 x 0.62) which equals 396g. Take 40 grams of water out of this from the starter and you’re left with 356 grams of water that needs to be added. For simplicity I’ve rounded this down to 355g.
How To Make Sourdough Pizza Dough
In order to make sourdough pizza dough, you’ll need an active sourdough starter. If yours has been in the fridge, I’d highly recommend getting it out at least 2 days before using it, giving it 2 feeds a day. A feed first thing in the morning and another last thing at night. That’s what I do whenever I’m making sourdough bread or pizza dough.
A Quick Note On Fridge & Room Temperatures
This recipe is based on a room temperature between 20-25°c (68-77°f) and a fridge temperature between 3-5°c (37-41°f). You can easily control the temperature of your fridge but room temperature depends on the weather, how well insulated your kitchen is, etc.
If your room temperature is warmer, your sourdough starter and dough will take less time to ferment whereas if the room temp is cooler, they’ll take longer. I’ve included visual signs on what to look out for in the recipe, to make things easier. It’s best not to rely on timings alone!
1. Feed Your Sourdough Starter
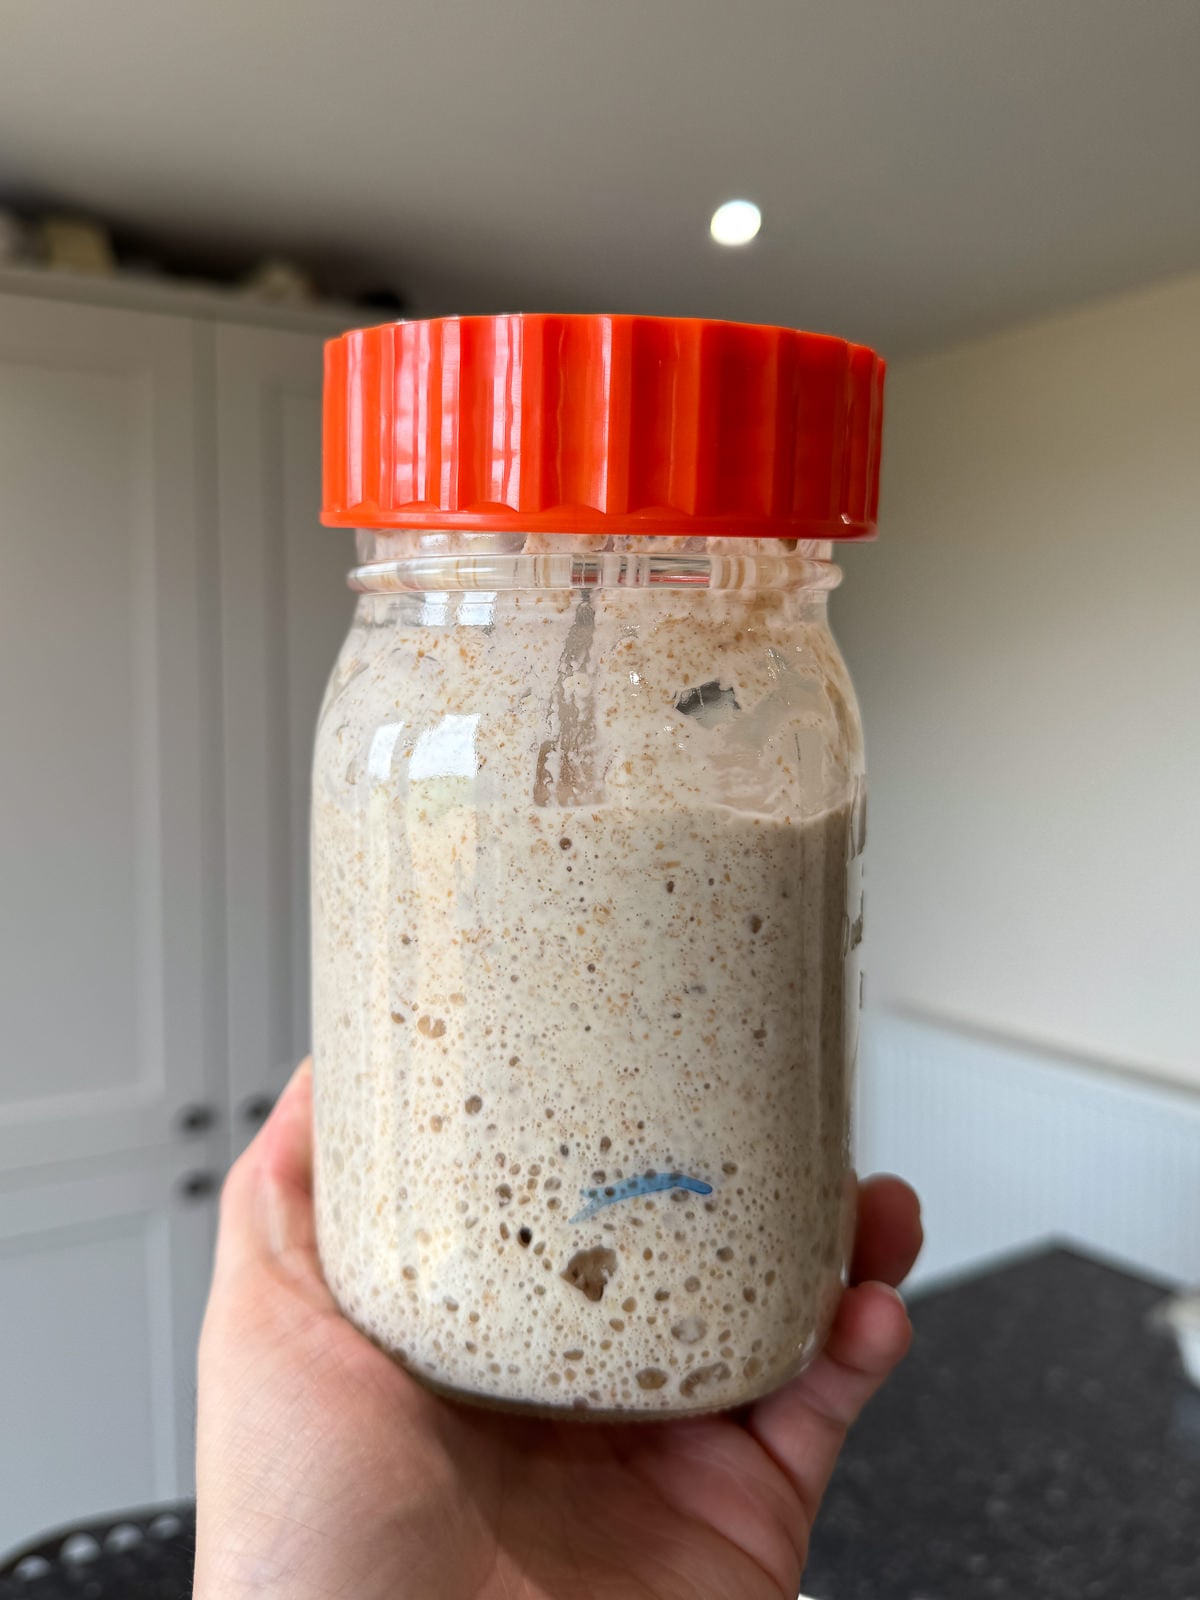
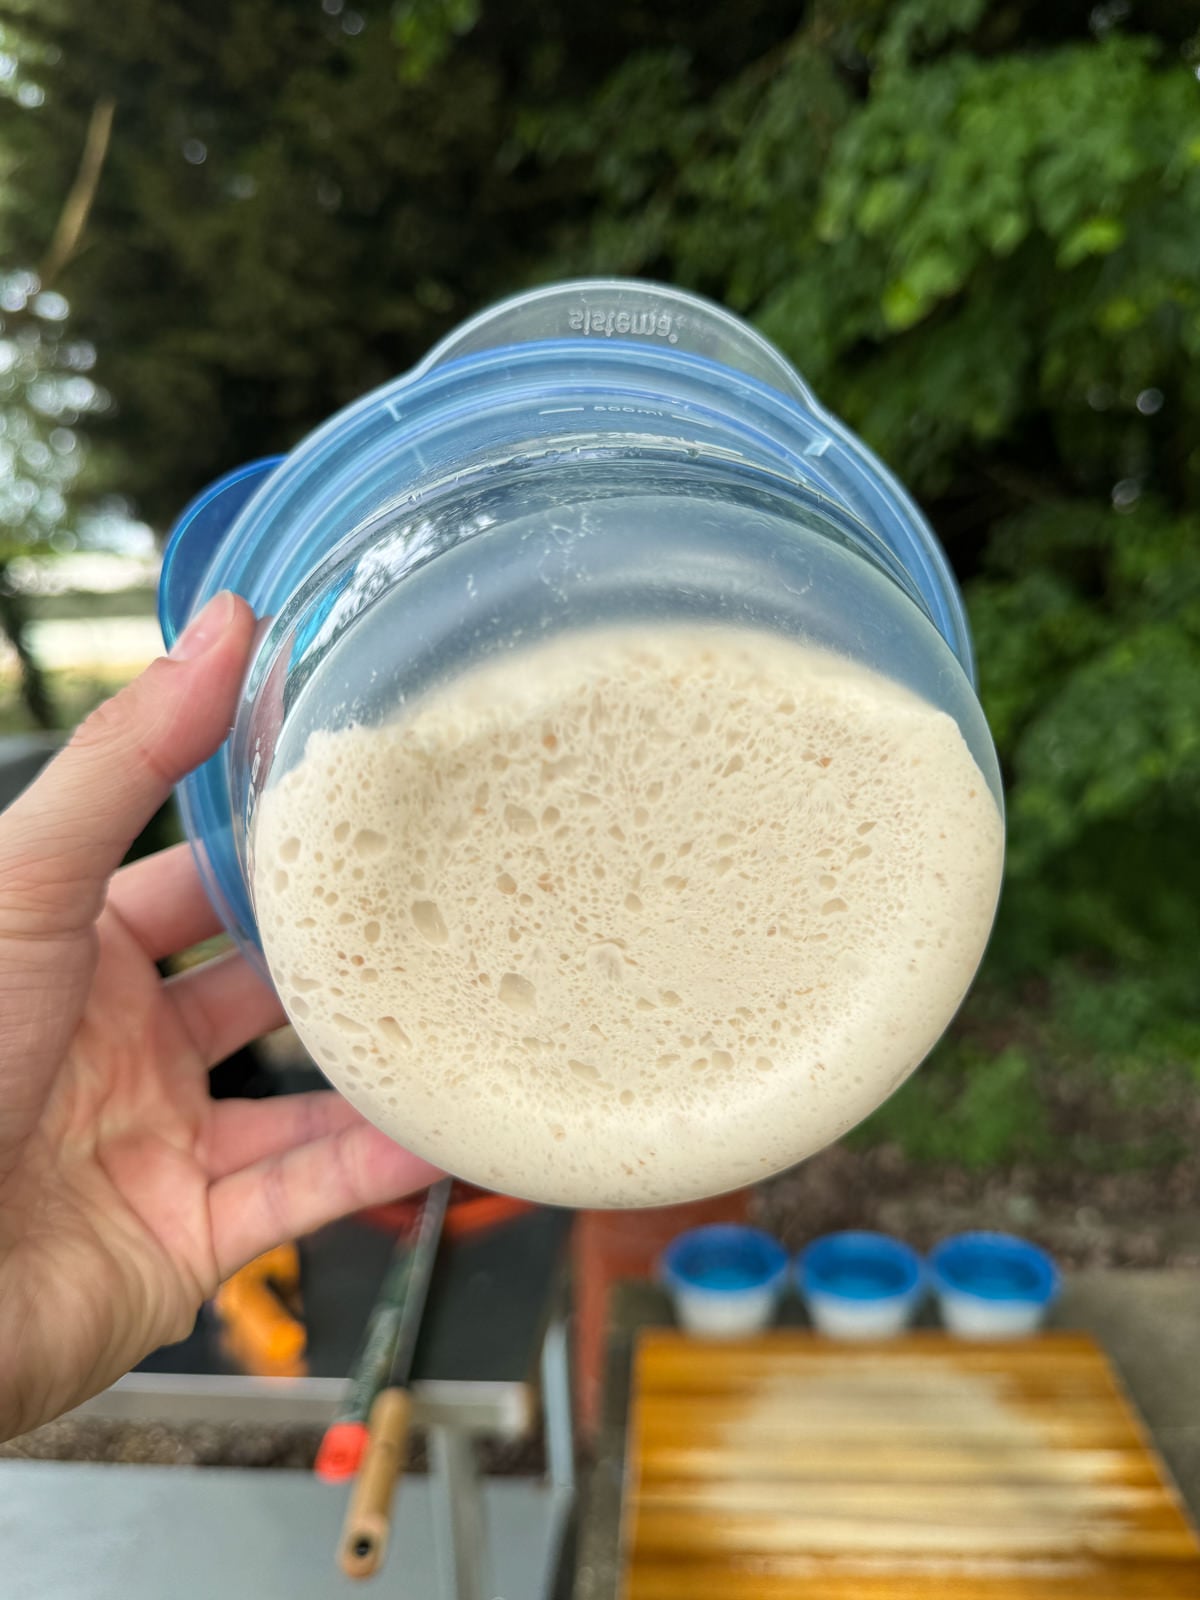
The first step is to feed your sourdough starter then let it ferment at room temperature until it reaches its peak. This is when the starter has at least doubled in size, just before it starts to fall. My starter tends to take between 4-6 hours to peak but you’ll get to know your starter’s timings when you feed it more regularly.
I feed my starter with equal amount of white bread flour and wholemeal bread flour but it’s fine to stick with whatever you normally feed yours with. Whether it’s with just white bread flour, or a mix. I like to use a board marker to mark on the side of the jar where the starter is once it’s been fed then you can easily see how much it has risen.
2. Autolyse
An autolyse is used to hydrate the flour & kick start gluten development in pizza dough. This is where you mix the flour & water together until just combined then let it sit at room temperature.
For pizza dough, I find that letting the dough autolyse for an hour is sufficient but if your starter’s not quite ready then leaving the dough for a bit longer is absolutely fine. I autolyse the dough in a stand mixer as it’s what we’re mixing the dough in. It’s also key not to over mix the dough, it just wants to be combined and a few dry patches are fine.
3. Mix In Starter & Salt
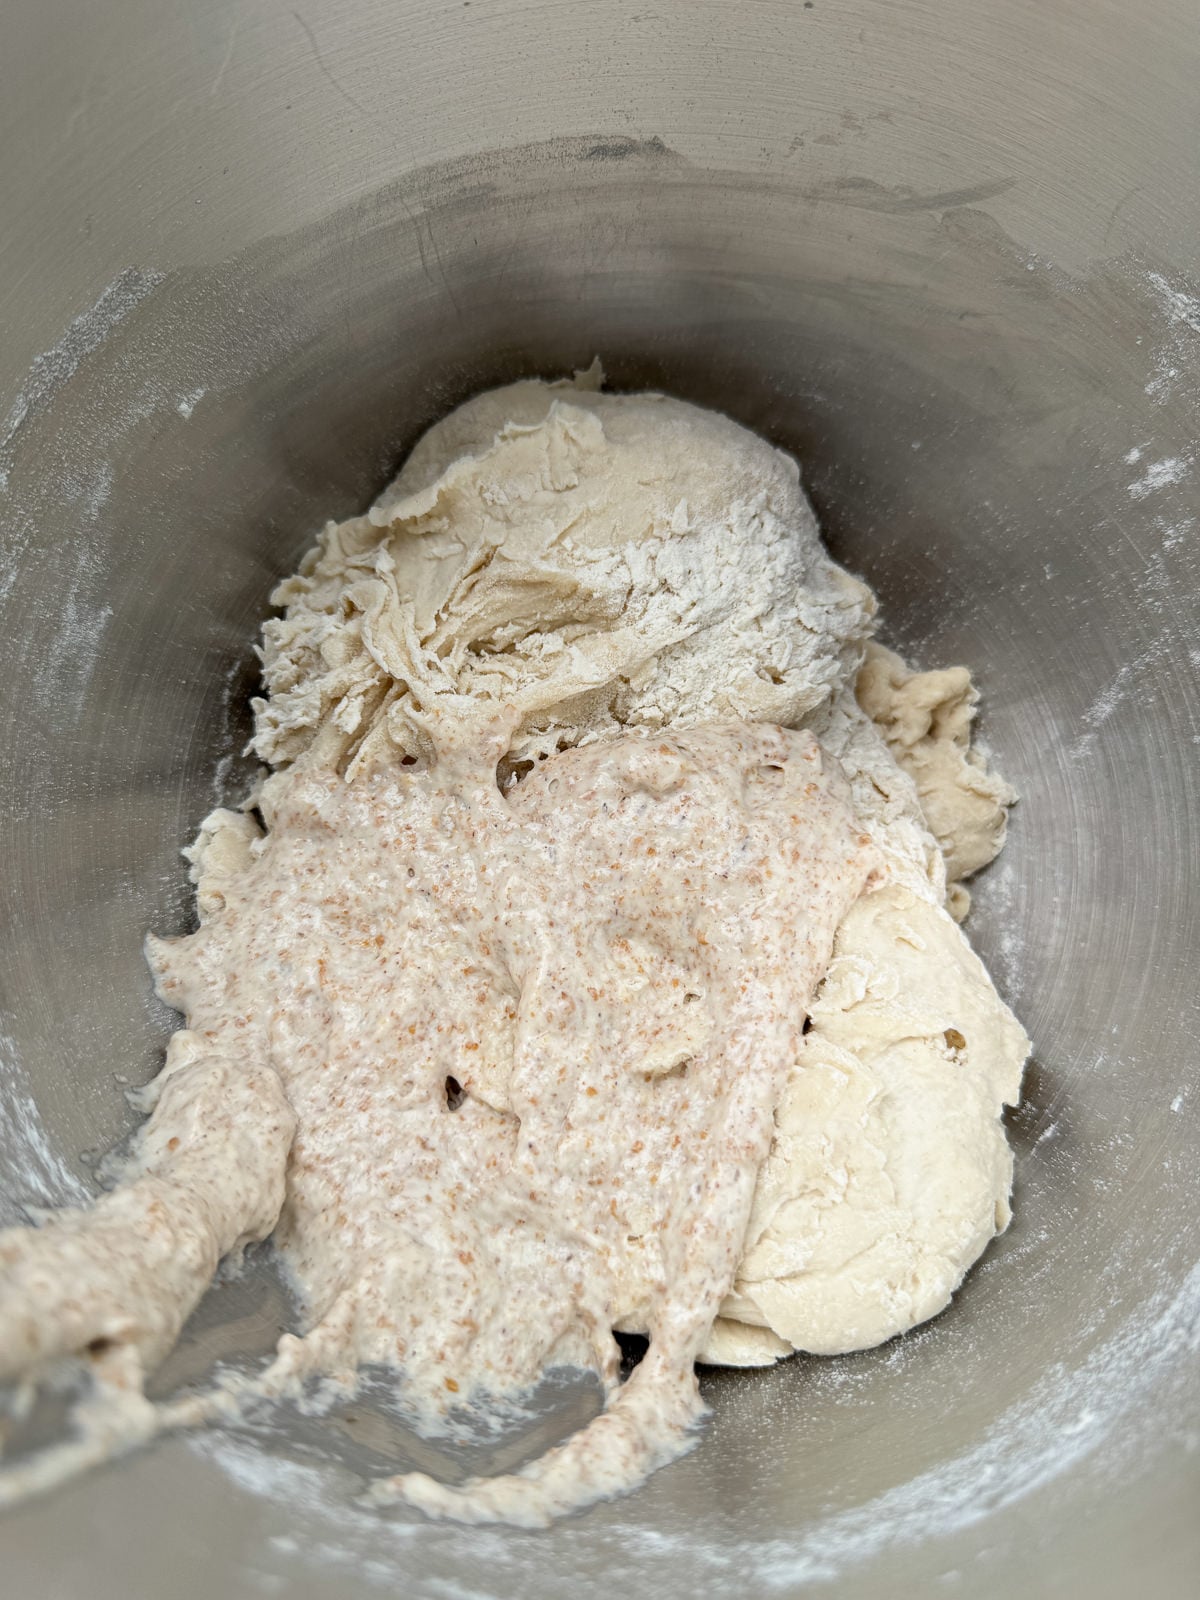
Once your starter is ready and the dough has had an hour long autolyse, you can weigh the starter into the dough then mix with the dough hook on a medium-low speed for 2-3 minutes until combined.
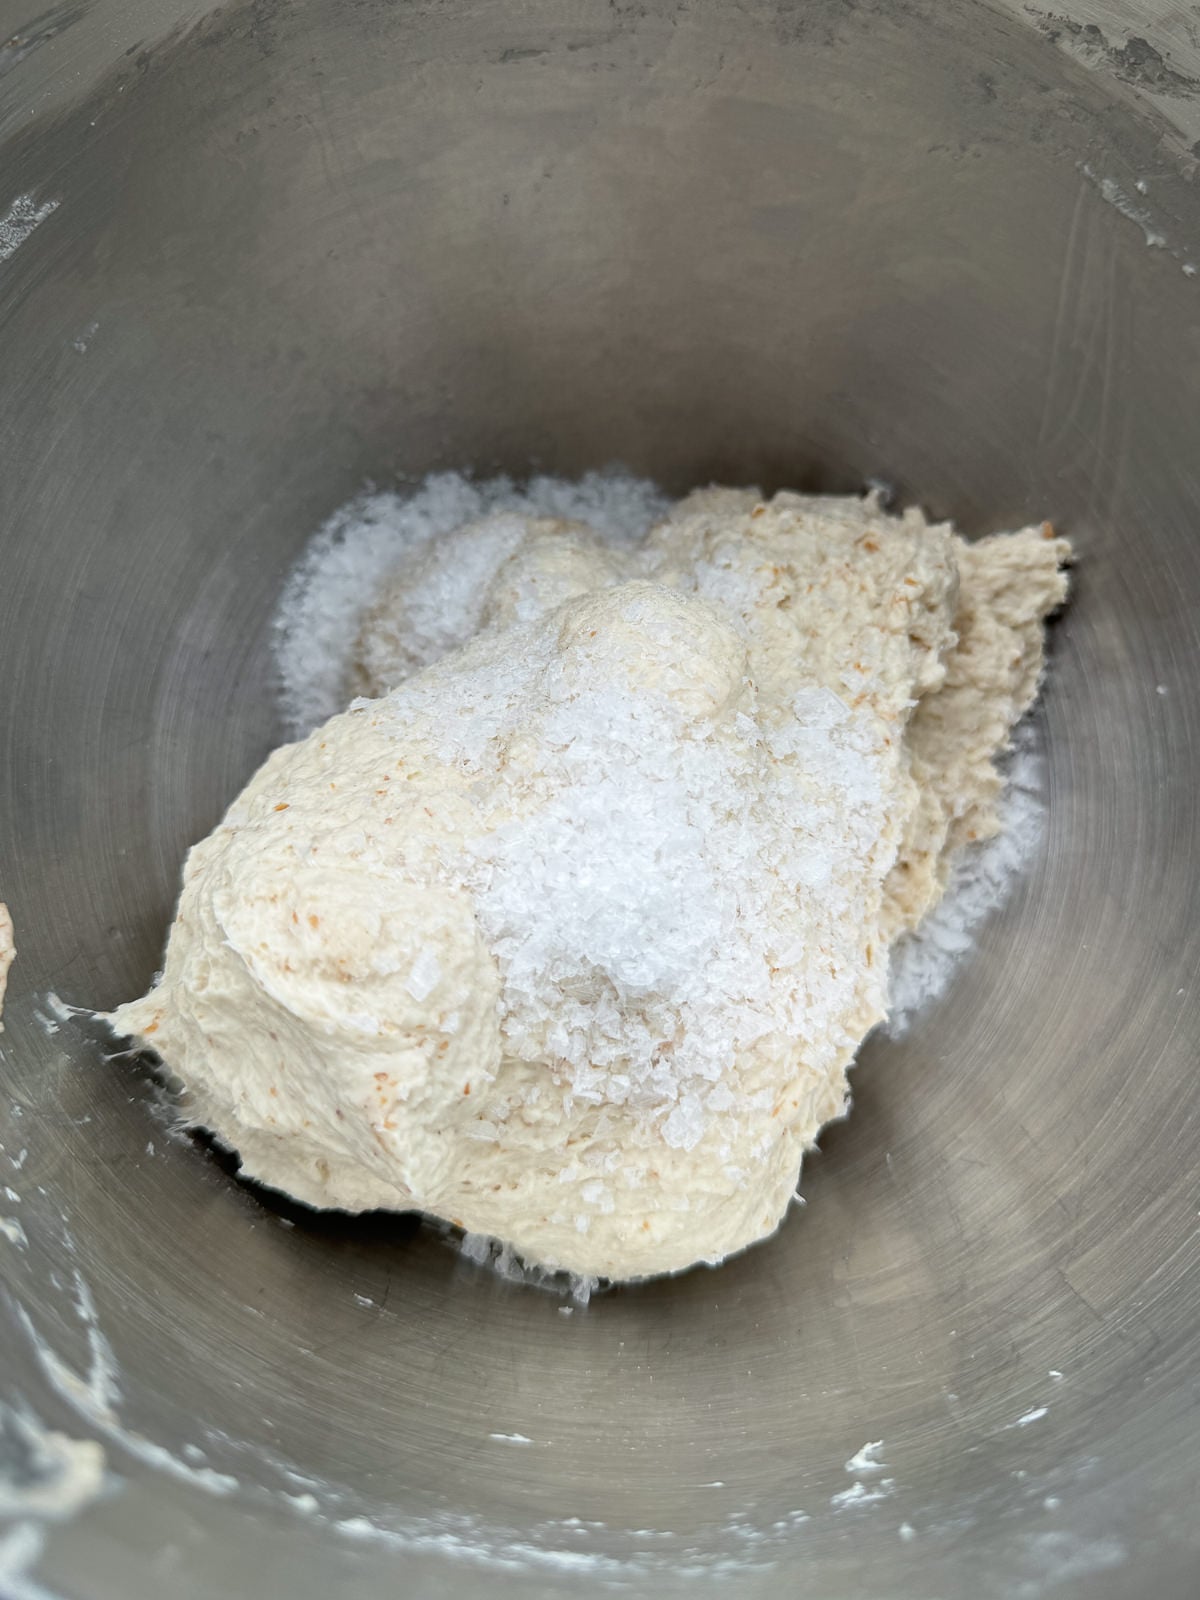
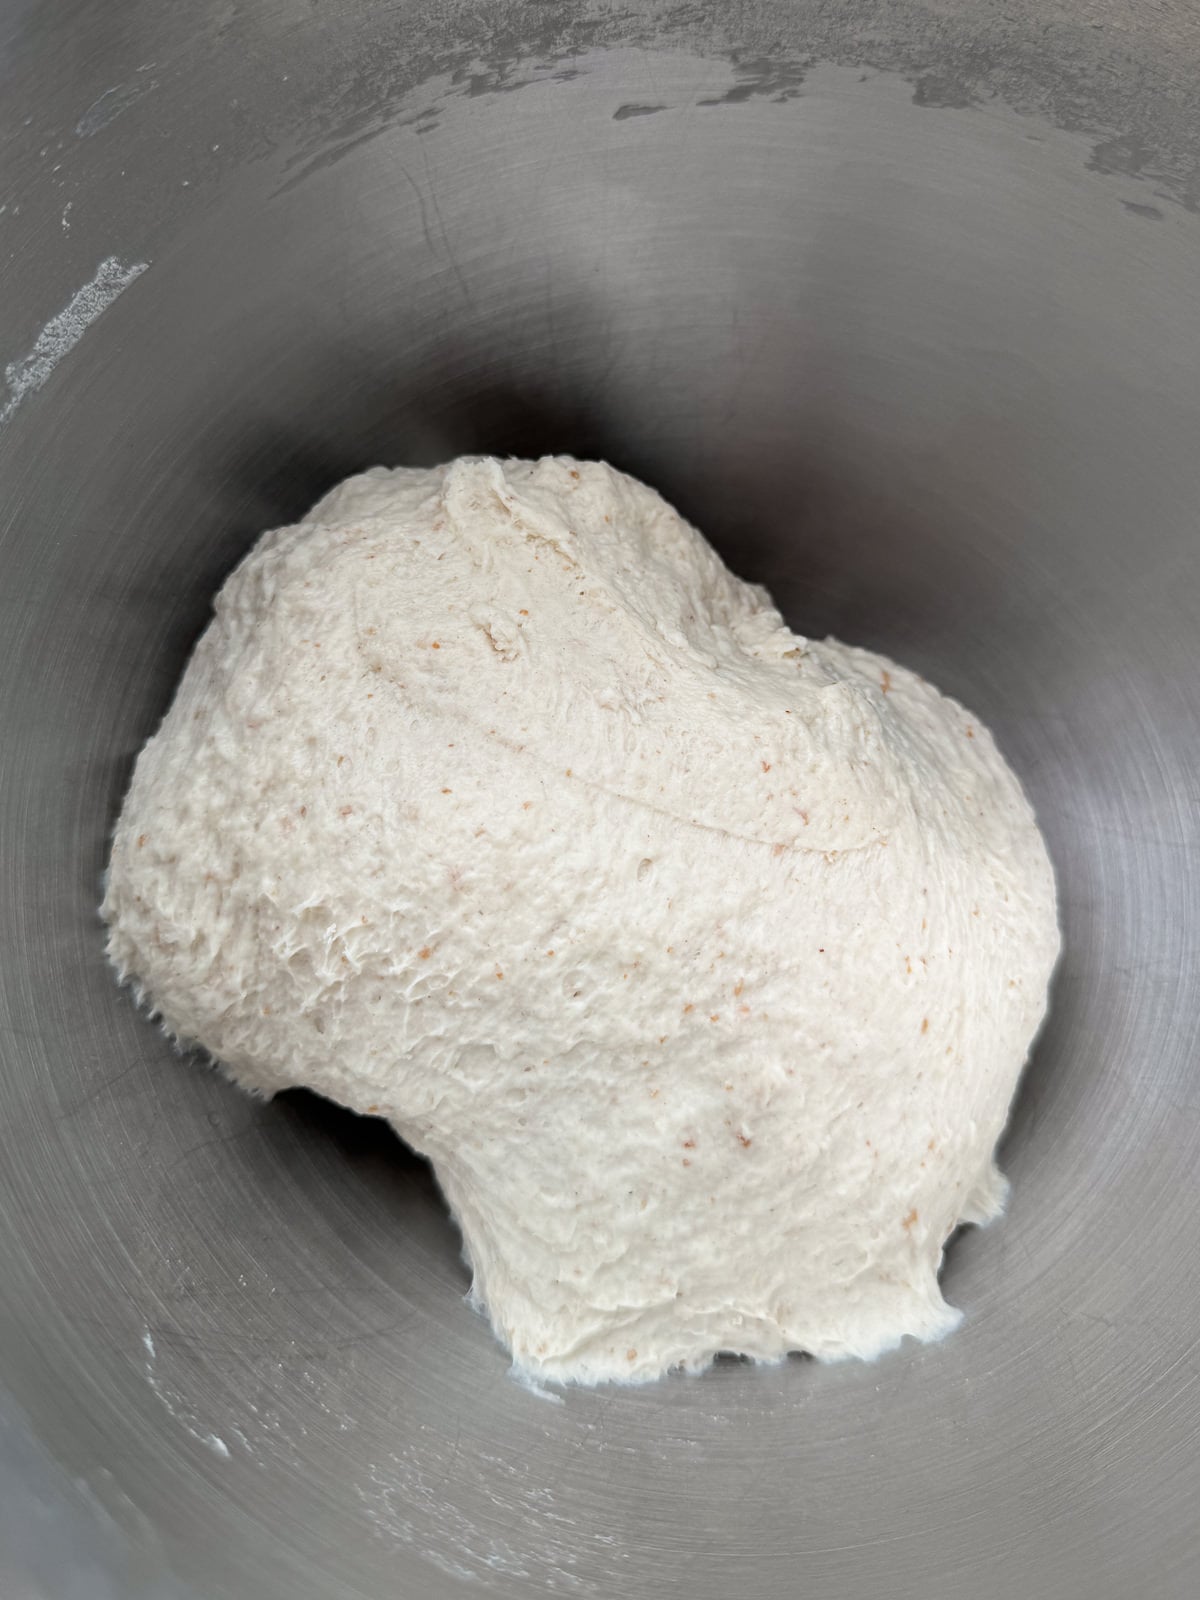
Next, add sea salt into the dough then mix again (on medium-low) to incorporate. Then once the salt is mixed in, continue mixing the dough for another 4-6 minutes until it’s smooth and coming away from the sides of the bowl. We’re going to be folding the dough during the bulk ferment, so the aim here is to bring the dough together, not fully knead it.
4. Bulk Ferment
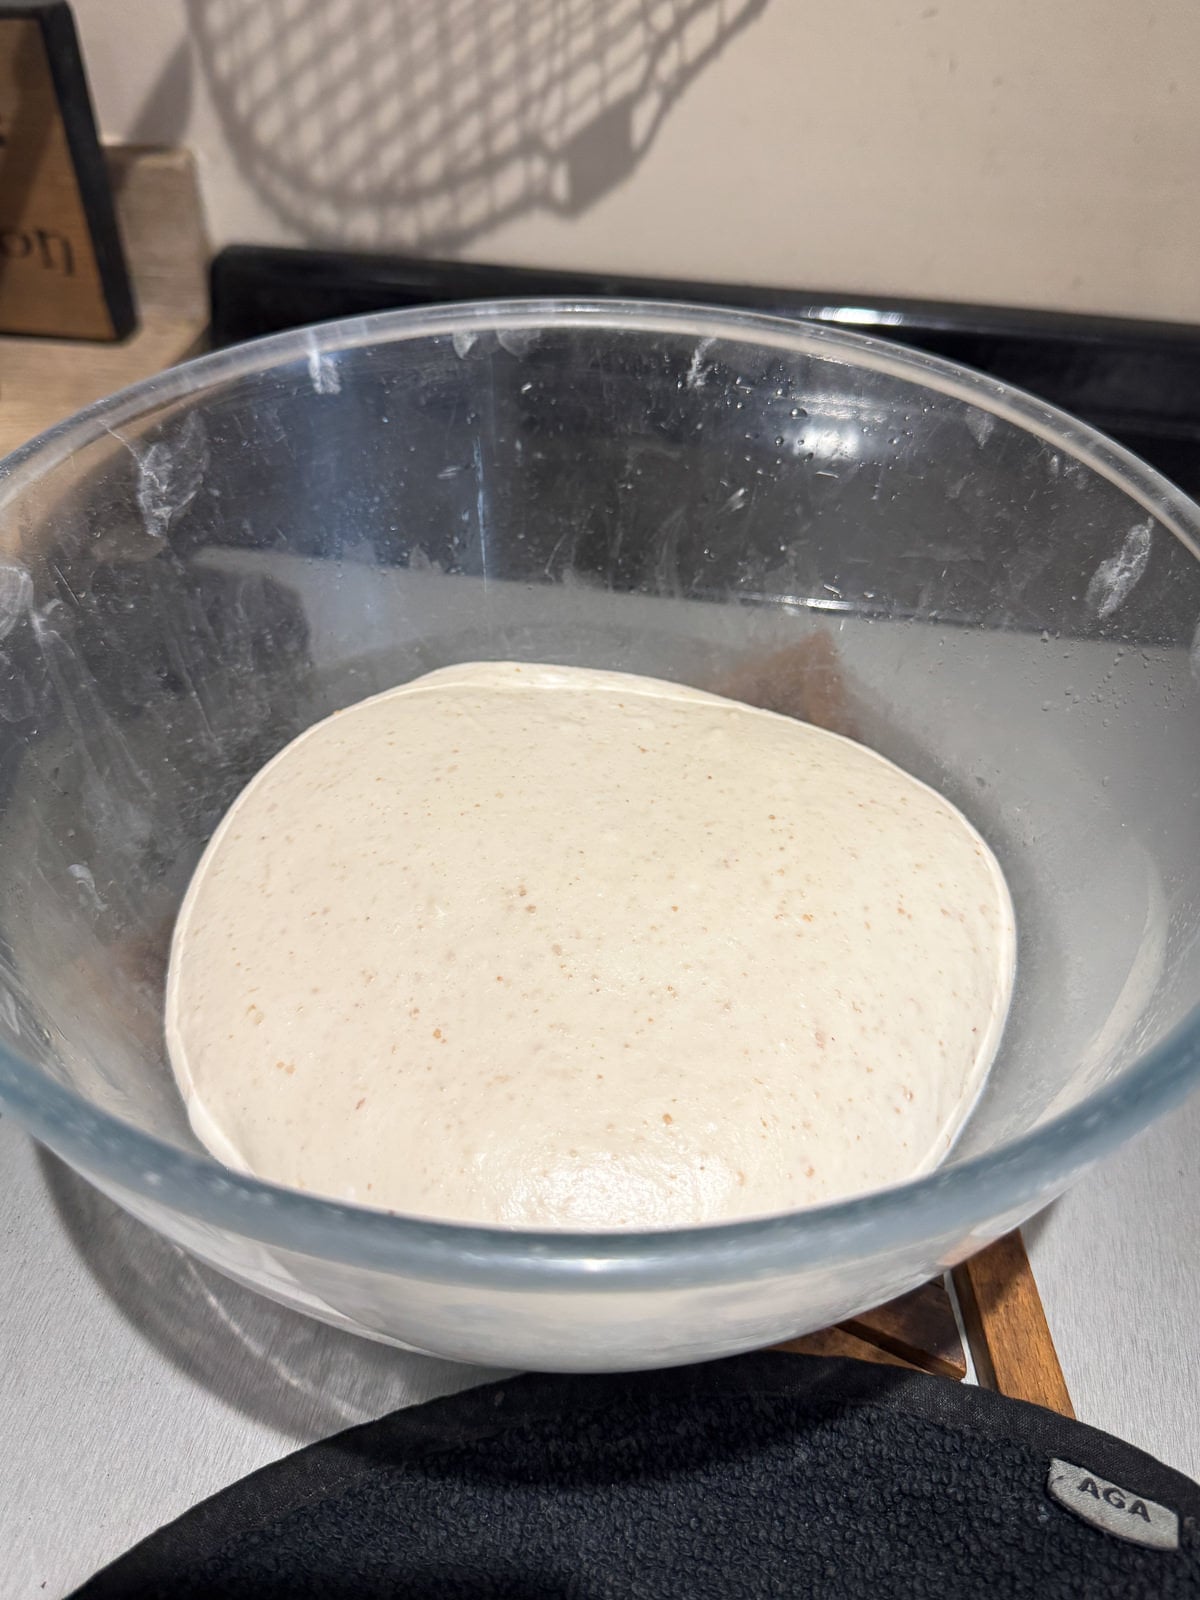
Once the dough has been mixed, I like to transfer it to a lightly oiled glass bowl as this will make it easier to keep an eye on fermentation.
Then it’s time to bulk ferment the dough. This is where you let the dough prove at room temperature in one large mass before dividing into into individual pieces. As we’re cold fermenting this dough, it only needs to ferment at room temperature until it has increased in volume by 50% before it’s divided & chilled.
The bulk ferment will take between 4-7 hours and the bulk ferment starts as soon as the starter is mixed into the dough. You’ll know when the dough has finished its bulk ferment when there’s lots of tiny bubbles around the edges, it’s risen by 50% and top is slightly domed. The bubbles are a sign of proper fermentation!
To further develop gluten in the dough, we’re going to be performing several sets of coil folds, spaced 30 minutes apart during the first part of the bulk ferment (more on this below). There’s not a set amount of folds to do here, you’ll need to do enough to make the dough pass the windowpane test (more on that below as well). Usually this dough will need between 4-6 sets of folds.
5. Divide Dough
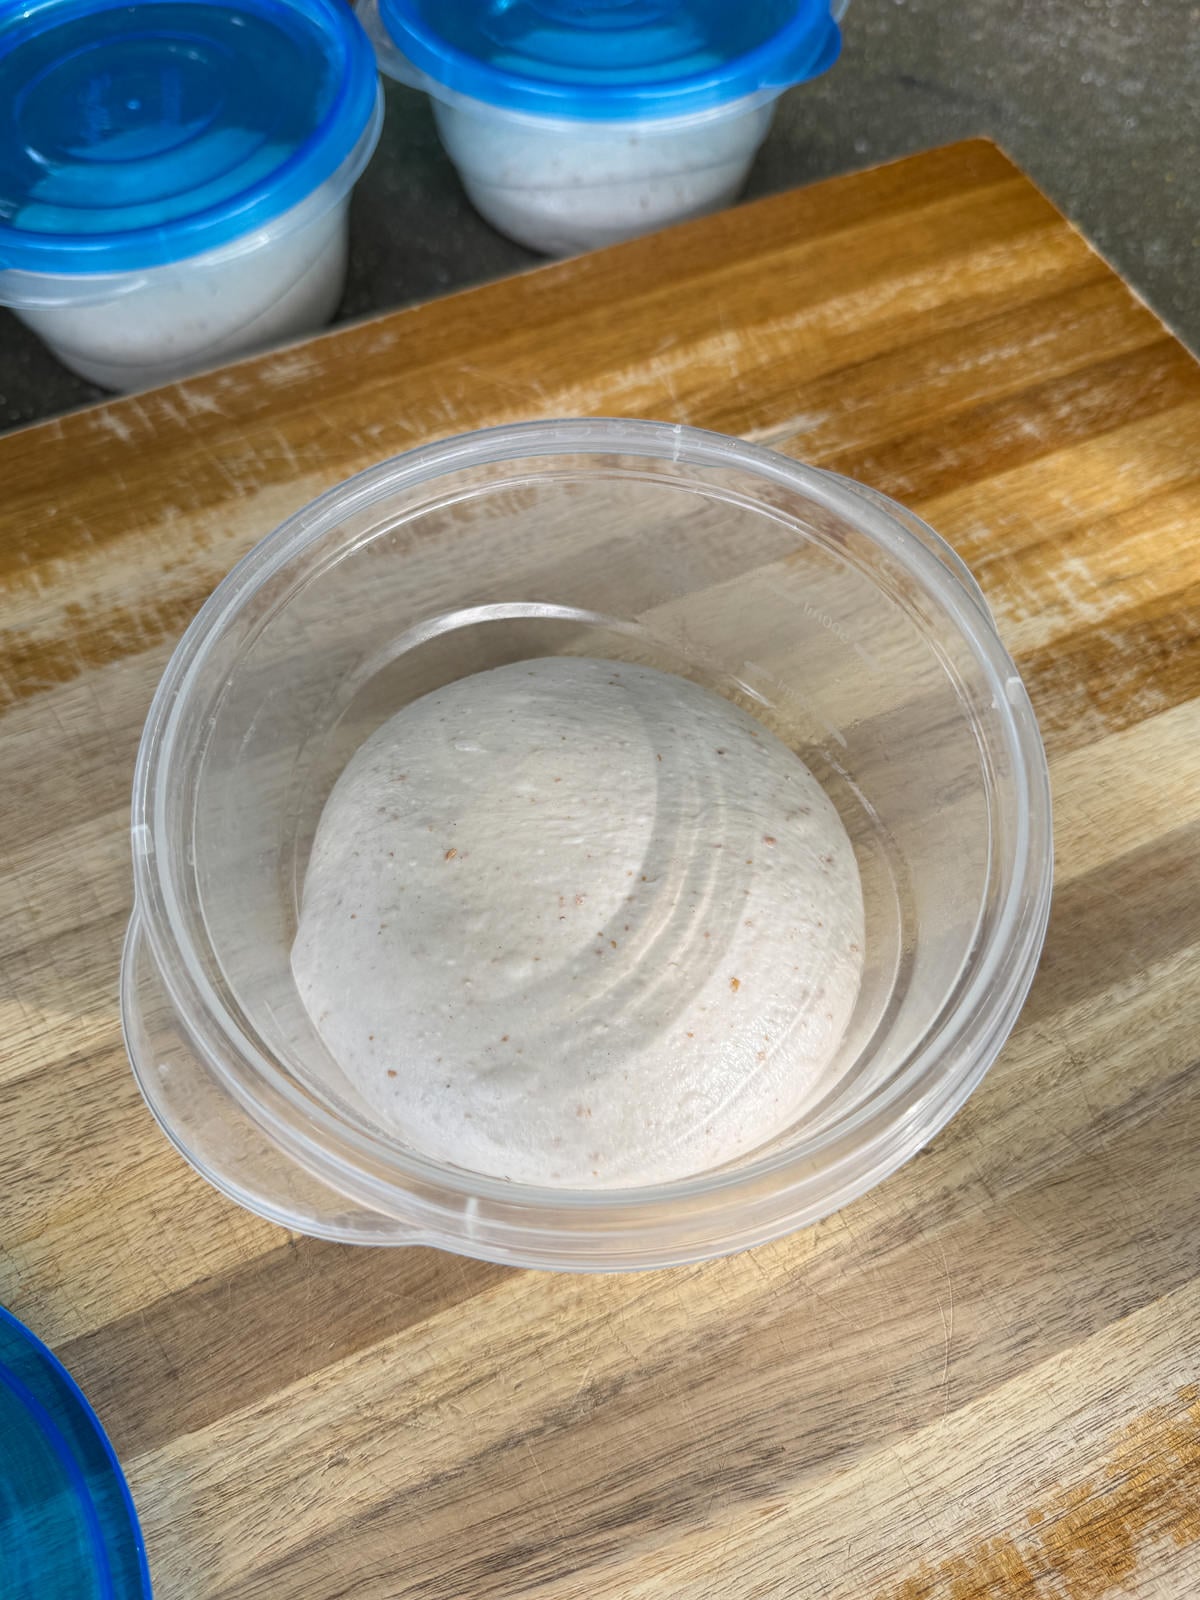
Once your pizza dough has risen in size by 50%, tip it out onto a clean work surface then use a bench scraper to divide the dough into 4x 260 gram pieces. Shape each piece into a ball, place into lightly oiled containers then cover with lids. Or use a dough tray if you’d prefer.
6. Cold Ferment
Now the balls of dough need to cold prove in the fridge for 36-48 hours. You can ferment this dough for up to 72 hours but I’ve found that the sweet spot is 36-48. Once fermented, each ball of dough will have lots of tiny bubbles around the edges & underneath as well.
7. Temper The Dough
Before using the dough for pizza, you’ll need to let it sit out at room temperature for 3-4 hours. This is called tempering the pizza dough and it relaxes the gluten & warms up the cold yeast. This makes the dough easier to work with & ensures that it rises properly in the oven. During this time, the dough will come up to room temperature and will increase in size slightly (almost by 50%).
8. Use For Pizza
Your balls of sourdough pizza dough are now ready to use to make pizzas with! For the best results, I’d recommend using a pizza oven to cook them. I use the “steering wheel” method to open up pizza dough for crusts which is where you rotate the dough in the air (like turning a steering wheel) to stretch the ball of dough into a round crust. I’ve included a step by step guide to doing this in the recipe card at the bottom of this post. Feel free to use whatever method you feel most comfortable with though!
Coil Folds
Coil folds are a way to strengthen dough & develop gluten during the bulk ferment. I use this technique when making regular sourdough bread as well! The folds are the same for all doughs but with different intervals & number of folds. This batch of dough tends to need between 3-4 sets of coil folds but you’ll know when it’s had enough folds when it stretches thin enough to see through (the windowpane test).
For this pizza dough, the dough is mixed until smooth in a stand mixer then folded every 30 minutes during the bulk ferment, until it passes the windowpane test. We want the dough to have an airy, open crumb so gentle folds are a better option than a longer mix in a stand mixer.
How To Perform A Set Of Coil Folds
- With wet hands (this stops the dough from sticking), gently loosen the dough from the sides of the bowl
- Using both hands, gently lift the dough up from the middle until one side is released from the container/bowl.
- Fold the released side back under the dough.
- Turn the bowl 180° and repeat the folding process.
- Now turn the bowl 90° & repeat.
- Finally, turn the bowl another 180° and repeat one last time.
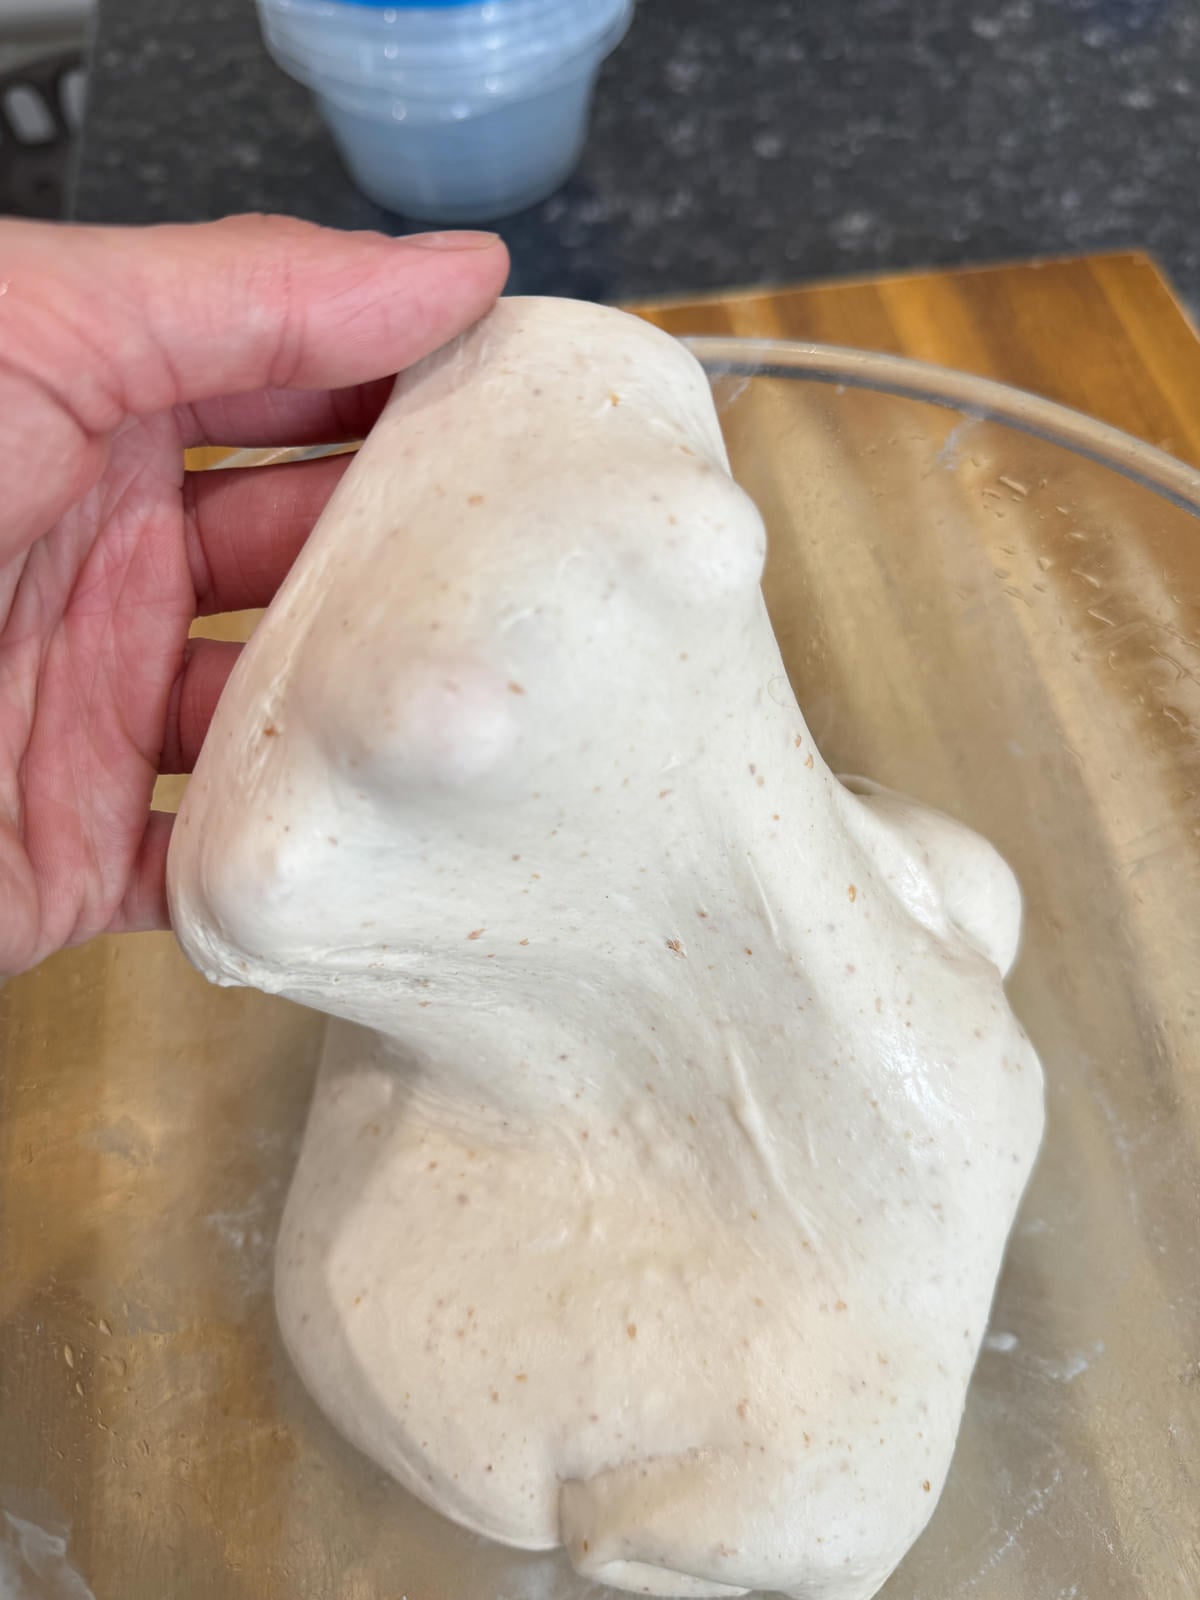
The Windowpane Test
The best way to assess the gluten development in your dough is by using the windowpane test. Here, you take a small piece of dough & stretch it between your fingers. If it stretches thin enough so that you are able to see through it, enough gluten has been developed. If it tears, you’ll need to keep performing coil folds until it does.
Schedule Example
Here’s a schedule example to give you a rough idea on timings for sourdough pizza dough. The time it takes for your starter to peak and the dough to bulk ferment will vary depending on the temperature of your kitchen, the weather & the temperature of your ingredients.
- 8:00 – Feed sourdough starter
- 12:00 – Autolyse dough
- 13:00 – Mix dough
- 13:15 – Start bulk ferment (remember the coil folds!)
- 18:45 – Divide dough
- 19:00 – Start cold fermentation
The Best Way To Cook Sourdough Pizza
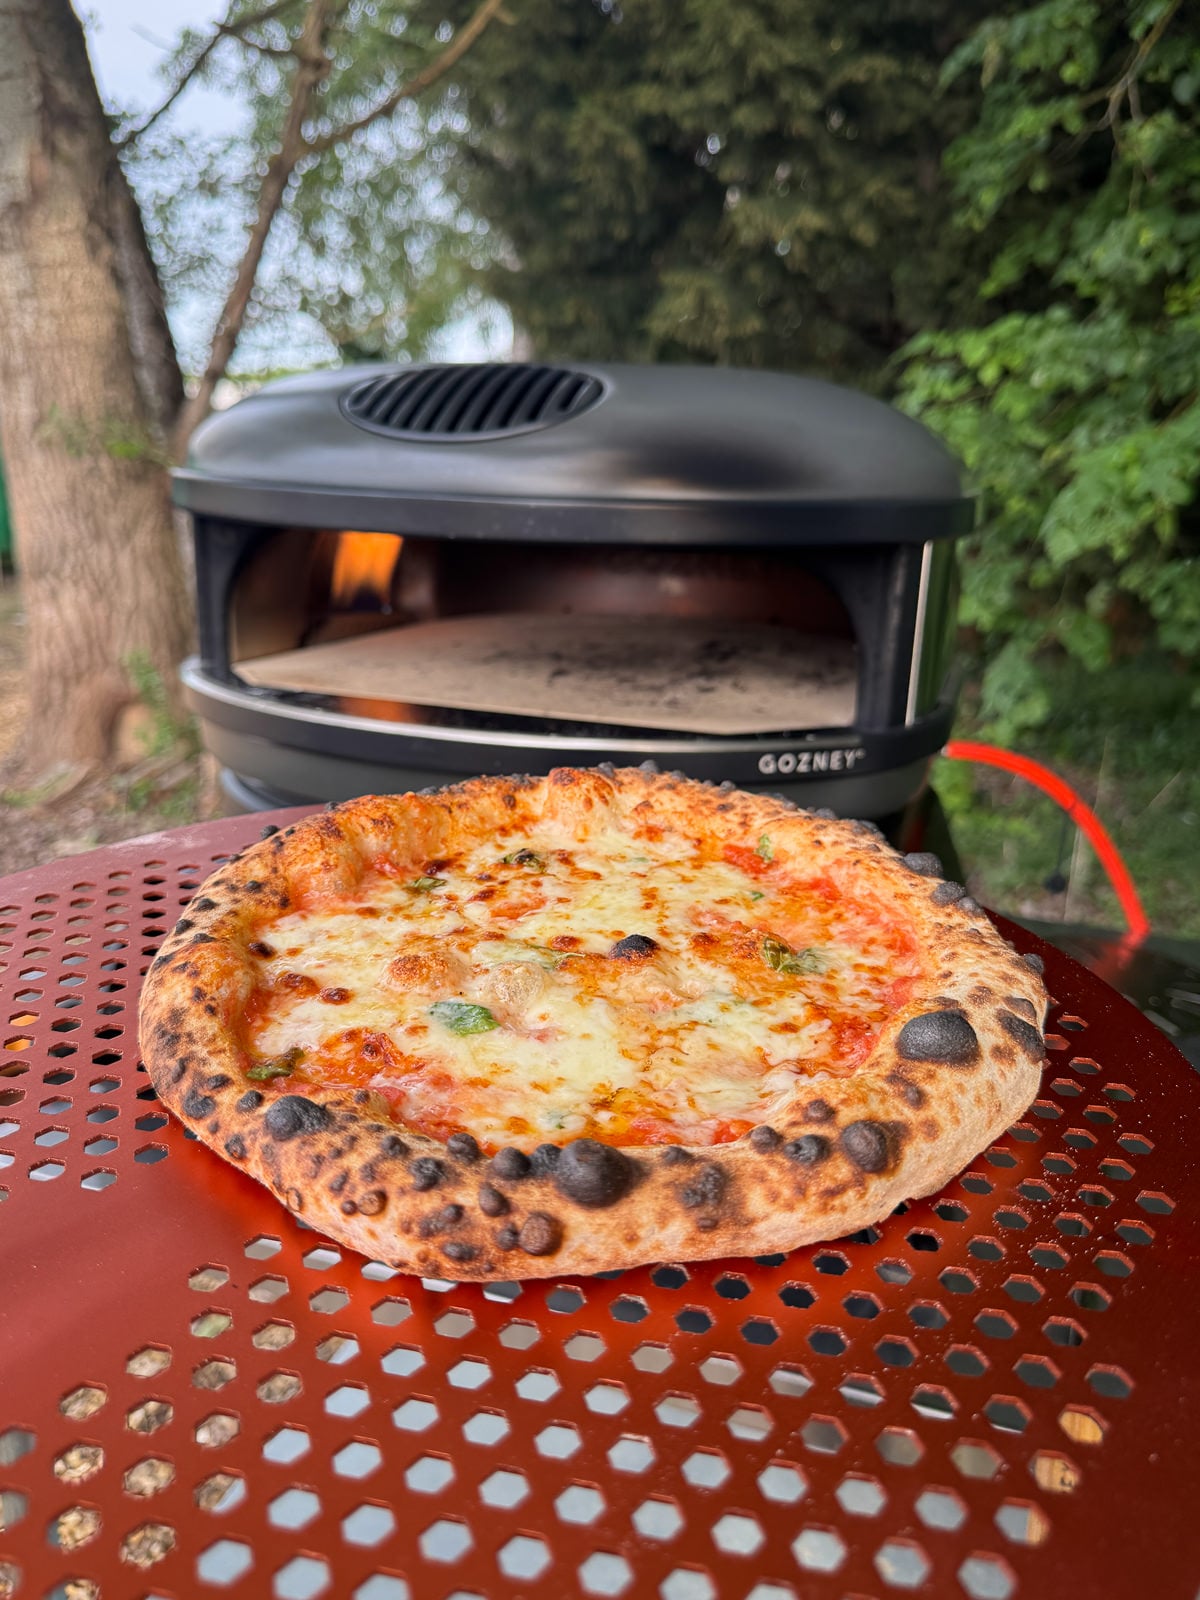
To get the best results with sourdough pizza dough, you’ll want to cook it in a pizza oven, ideally at a temperature between 400°c – 450°c (750°f/840°f)! These aren’t temperatures that you’ll be able to reach in a regular home oven, so I’d recommend using a pizza oven. I use a Gozney Arc xl or Roccbox but gas or wood fired ovens will work.
The reason that you need to cook pizzas at such a high temperature is so that the crust gets the optimum amount of oven spring, with a crisp texture yet fluffy, open crumb. The high heat also ensures that the toppings are properly cooked & the cheese is melted & browned.
If you’re using a Gozney pizza oven like me, I give the stone a good 45 minutes to saturate with heat. As this dough has a thick crust with an open crumb, it’s best to bake it at a slightly lower temperature than a classic Margherita otherwise the dough won’t be cooked properly. I cook the pizzas on a medium-low flame to begin with then turn the heat up to high at the end, if the toppings need more colour.
Tips & Tricks
- Use a good quality 00 flour with a high protein content & W rating. This is key to making doughs with longer, cold fermentations like sourdough pizza dough.
- For the best flavour & oven spring, cold prove the pizza dough in the fridge for 2 days.
- This dough is best baked in an outdoor pizza oven, gas or wood fired will work!
- Make sure that your sourdough starter is active and bubbly. If it’s been in the fridge, it’s best to get it out and feed it at least 2 days before using. I give my starter 2 feeds a day (one in the morning & one at night).
- Stretch the dough out by hand to make a pizza base, using fine semolina underneath to stop it sticking to your work surface. Make sure to shake off any excess flour before cooking your pizza, so that the base doesn’t burn! I use Caputo Semolina Rimacinata for my pizzas.
Frequently Asked Questions
For sourdough pizza dough that’s going to be cooked in a pizza dough, the best choice of flour is a good quality 00 flour. For pizza doughs with a longer, cold fermentation, it’s key to use a flour with a protein content between 12-14% and a W rating between 260-300 (the higher the W rating, the stronger the flour).
Pizza dough can be made with all types of sourdough starter, including discarded sourdough, a stiff starter and a high hydration starter. Though for simplicity, it’s best to use a 100% hydration sourdough starter.
Sourdough pizza dough will keep in the fridge for up to 3 days before being baked but the ideal cold fermentation is between 36-48 hours. I wouldn’t recommend chilling the dough for longer than 72 hours as you’ll risk over fermenting which will affect the texture, flavour and oven spring.
Yes sourdough pizza dough can be frozen and will keep in the freezer for up to 1 month. To freeze, bulk ferment the dough, divide into balls then freeze in individual containers. Before using, let the dough defrost completely in the fridge then leave in the fridge for another 24-48 so that it can finish the cold ferment. Keep in mind that freezing the dough will slightly reduce the oven spring but it will still bake great!
If you haven’t got a pizza oven, sourdough pizza dough can also be baked in a regular home oven. To do this, preheat your oven to its highest temperature with a large baking tray or stone inside then bake your pizza on top. Keep in mind that your pizzas will take a couple of minutes longer to bake like this.
More Pizza Recipe To Try
- 100% Biga Potato Pizza Dough
- 3 Day Poolish Pizza Dough
- 2 Day Pizza Dough
- Pizza Oven Garlic Bread With Burrata
- Classic Tomato & Basil Sauce
- Roasted Garlic White Pizza Sauce
If you have enjoyed this sourdough pizza dough recipe, it would mean a lot if you could leave a review & rating. And if you’d like to stay up to date with future recipes, follow us on Instagram & TikTok or subscribe to our newsletter!

Sourdough Pizza Dough
Equipment
- Stand Mixer
- Digital Food Probe
- Dough Scraper
- 4 Round Storage Pots With Lids
- Pizza Oven
Ingredients
Feeding Your Sourdough Starter
- 60 g Sourdough Starter
- 60 g Water (@ 25.5°c/78°f)
- 30 g Strong White Bread Flour
- 30 g Strong Wholemeal Flour
Pizza Dough
- 600 g 00 Flour (See Notes)
- 355 g Water (@ 25.5°c/78°f)
- 80 g Mature Sourdough Starter (100% Hydration)
- 19 g Fine Sea Salt
Instructions
Feeding Your Sourdough Starter
- Feed your starter as you normally would but use at least the quantities of flour, water & starter above. This makes enough starter for this batch of dough with some remaining so that you can continue feeding it.
- Leave your starter at room temperature until it has risen to its peak & just before it starts to fall. This should take between 4-6 hours.
Autolyse
- An hour before your starter is ready, add the flour & water for the dough into the bowl of a stand mixer then mix on a low speed (with the dough hook) until just combined. Don't over mix the dough, a few dry patches are fine.
- Cover the bowl with a damp tea towel then leave to autolyse at room temperature for 1 hour, or until your starter is ready.Don't worry if the autolyse lasts slightly longer than an hour!
Mixing The Dough
- Once your starter is ready, weigh 80 grams of it into the dough then mix on a medium-low speed until combined.
- Add the salt to the dough then continue mixing on medium-low, until the salt is mixed in and the dough is smooth & coming away from the sides of the bowl. This will take around 4-6 minutes of mixing.
- Once mixed, transfer the dough to a lightly oiled bowl then cover with a damp tea towel.I'd recommend using a glass bowl, so you can keep an eye how the dough is fermenting.
Bulk Ferment
- Let the dough prove at room temperature and perform a set of coil folds every 30 minutes until the dough passes the windowpane test. This will take around 4-6 sets of folds.If you're not familiar with coil folds or the windowpane test, there's guides to both in the post above.
- Once the dough has passed the windowpane test, let it prove at room temperature until it has risen in size by 50% & there's lots of tiny bubbles around the edges. The total time for the bulk ferment (including the coil folds) will roughly be between 4-7 hours.It's key to give the dough a long enough bulk ferment, otherwise it will puff up too much in the middle when you cook it! You'll know when it's done when the dough has risen in volume & there's signs of fermentation (lots of tiny bubbles).
Dividing The Dough & Cold Ferment
- Once the dough has proved, transfer it to a clean work surface then use a bench scraper to divide into 4 equal pieces. Shape each piece into a tight ball with your hands. Each piece of dough should weigh around 260 grams.
- Lightly oil 4 round storage containers then place a ball of dough into each. Cover each container with a lid then place the dough in the fridge & leave to ferment for 36-48 hours.You can leave the dough in the fridge for up to 72 hours but for the best flavour, I like to go as close to 48 hours as possible. A dough tray will work as well, if you'd prefer.
Making Pizza
- Take the dough out of the fridge & leave to sit at room temperature for 3-4 hours before using. You'll know when the dough is ready to use when it has risen in size by almost 50% & will no longer feel cold.
- Whilst your dough is coming up to temperature, preheat your pizza oven to 400°c – 450°c (750°f/840°f), allowing plenty of time for the stone to saturate with heat.
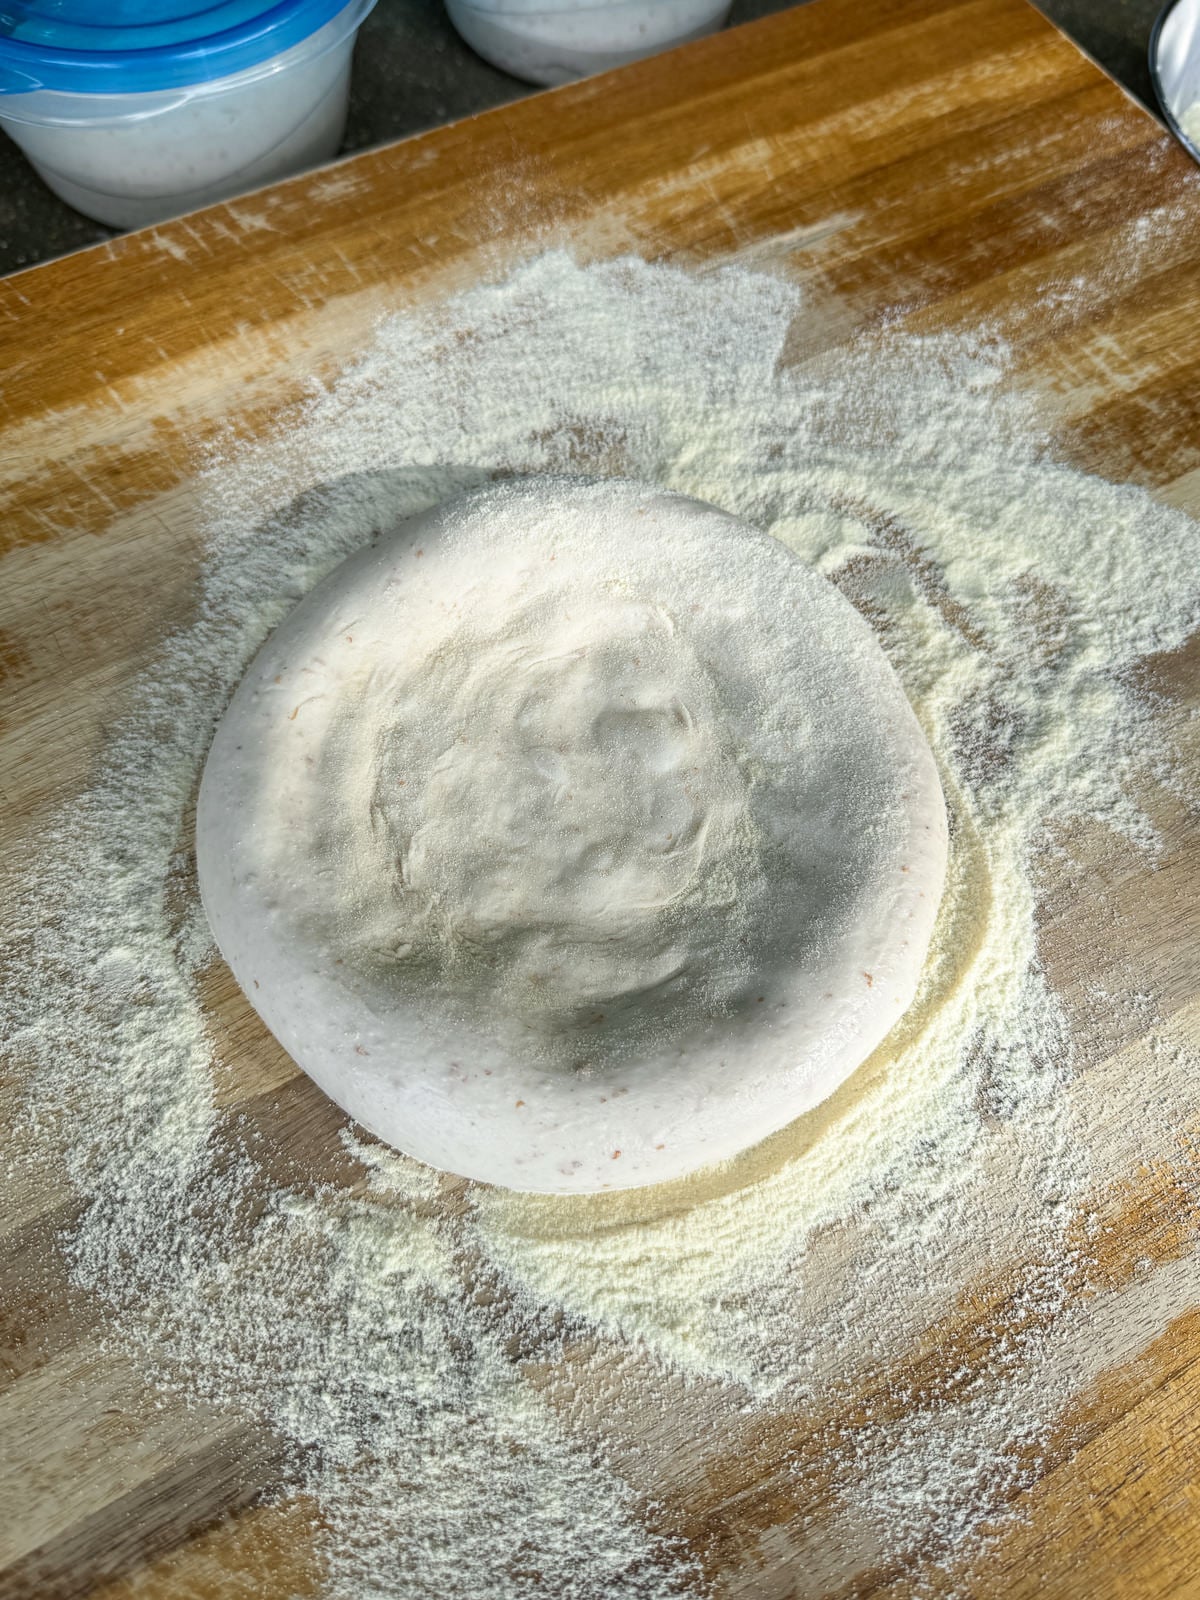
- To make a pizza, first tip the dough out onto a semolina dusted work surface then flip over so that the dough is facing the same was as it was in the container.Fine semolina is best! I use Caputo Semola Rimacinata.
- Using your fingertips, press the dough into a disc. Starting from the centre & working to the edge, making sure to leaving a 1-2 cm border (this will be the crust).
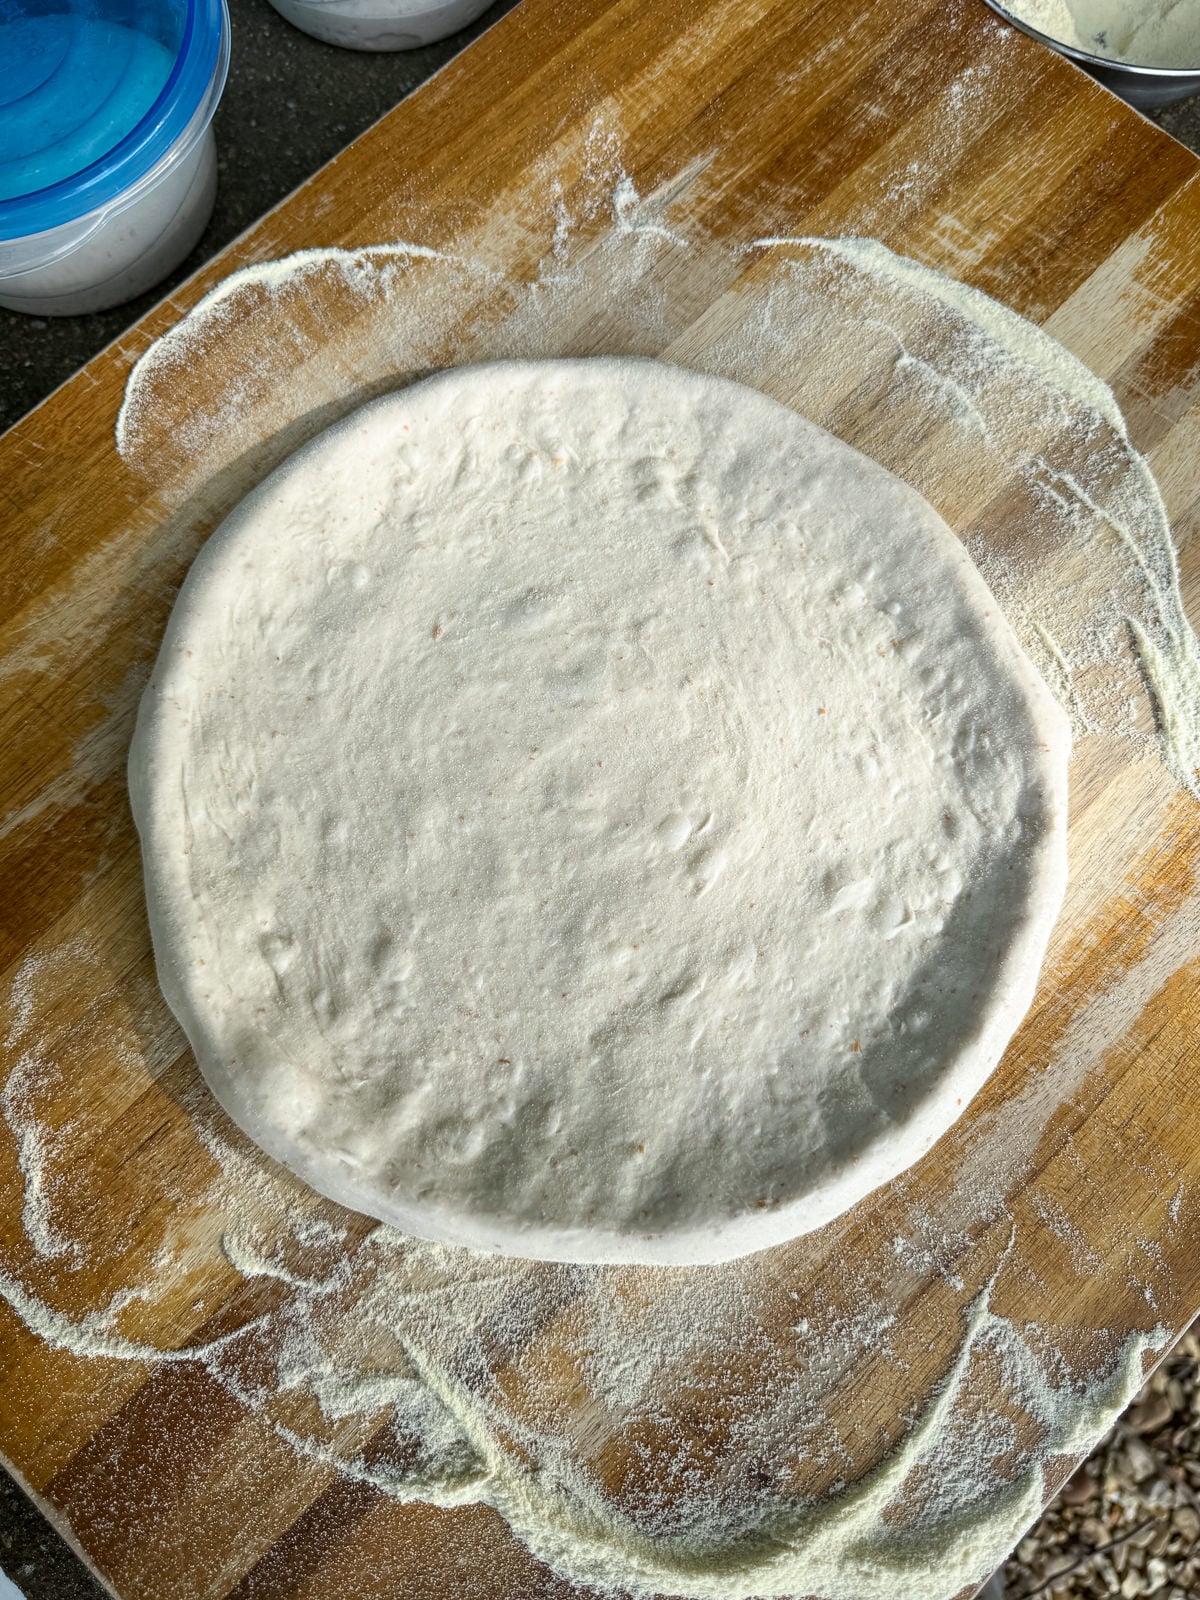
- To open up the dough, I like to use a method know as "The Steering Wheel" stretch. Here's how…Using both hands, pick the dough up from one edge & hold it in front of you like a steering wheel. Now rotate the dough in your hands, pinching to form a crust as you do so. As the dough rotates, gravity will stretch it into a large circle.With this method you have full control on the thickness of the crust. If you'd prefer a thinner crust, pinch the dough nearer the edge. For a thicker crust, pinch more towards the centre.
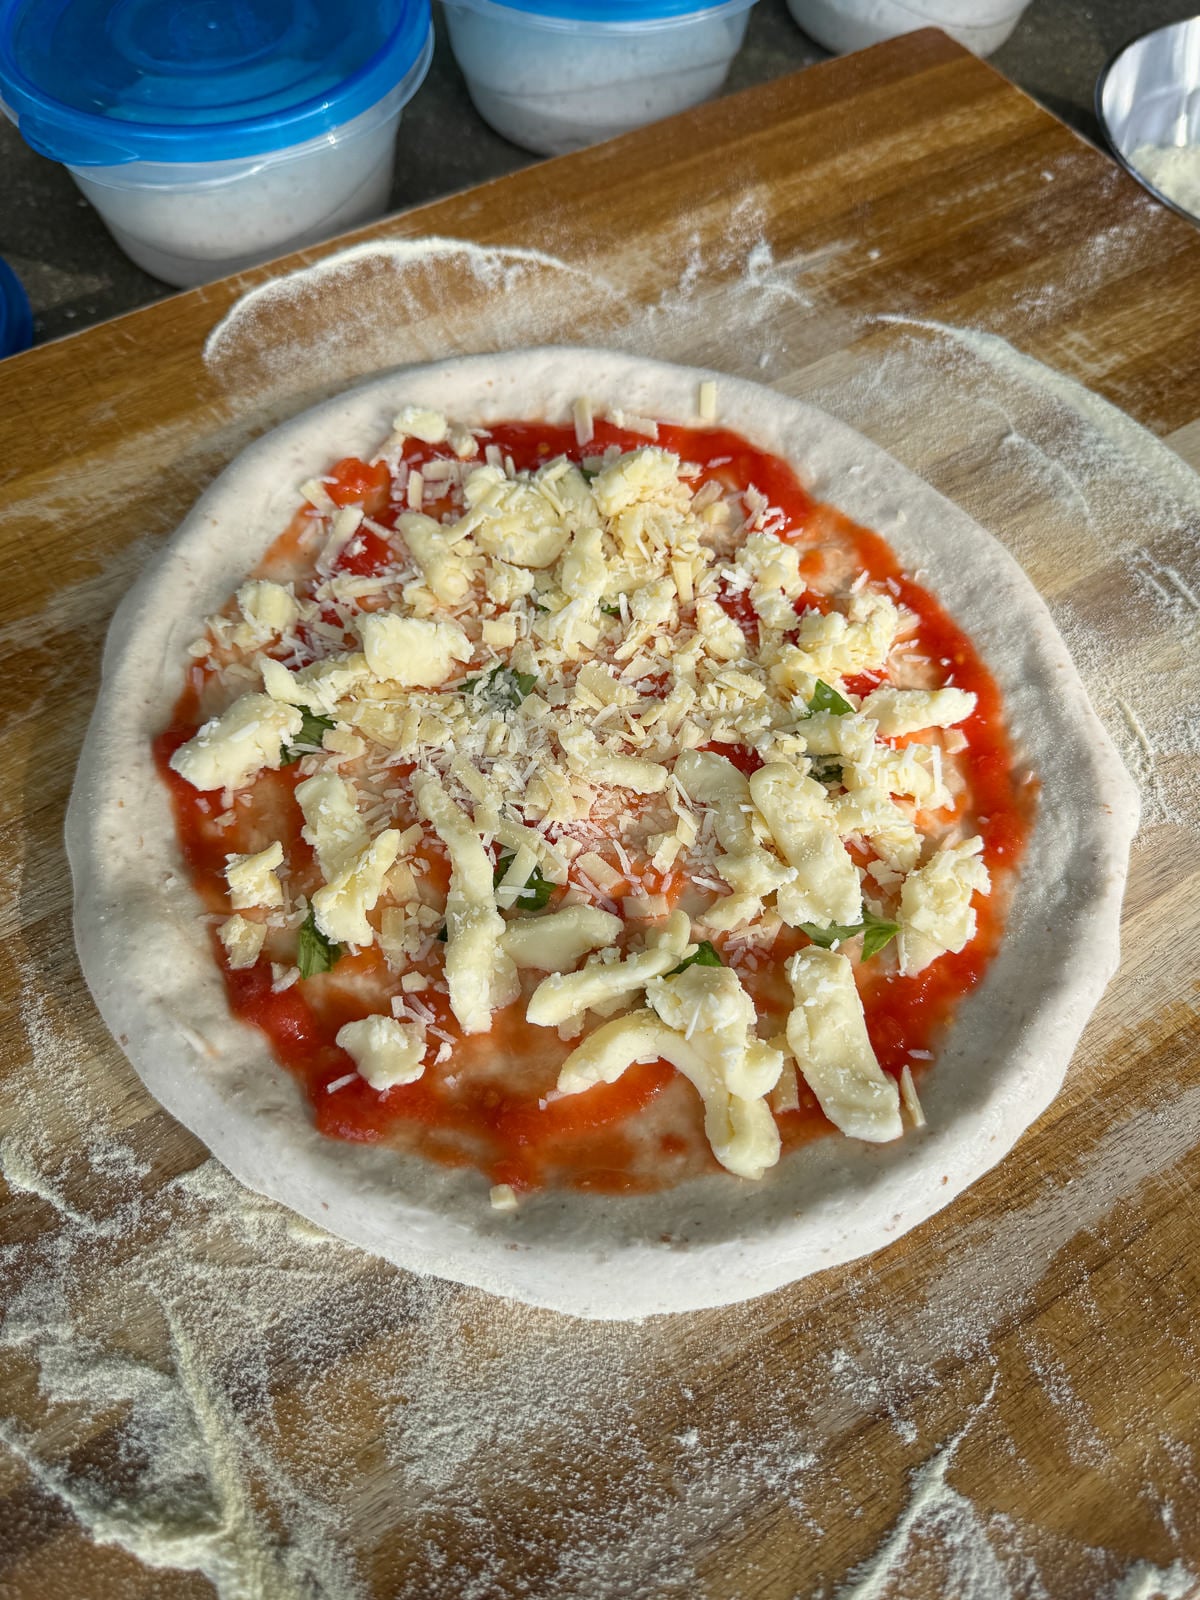
- Top the dough with a light layer of toppings then transfer to a peel. Gently stretch the dough out to a 10-12 inch circle (depending on how thick you want the crust to be) then redistribute the toppings.
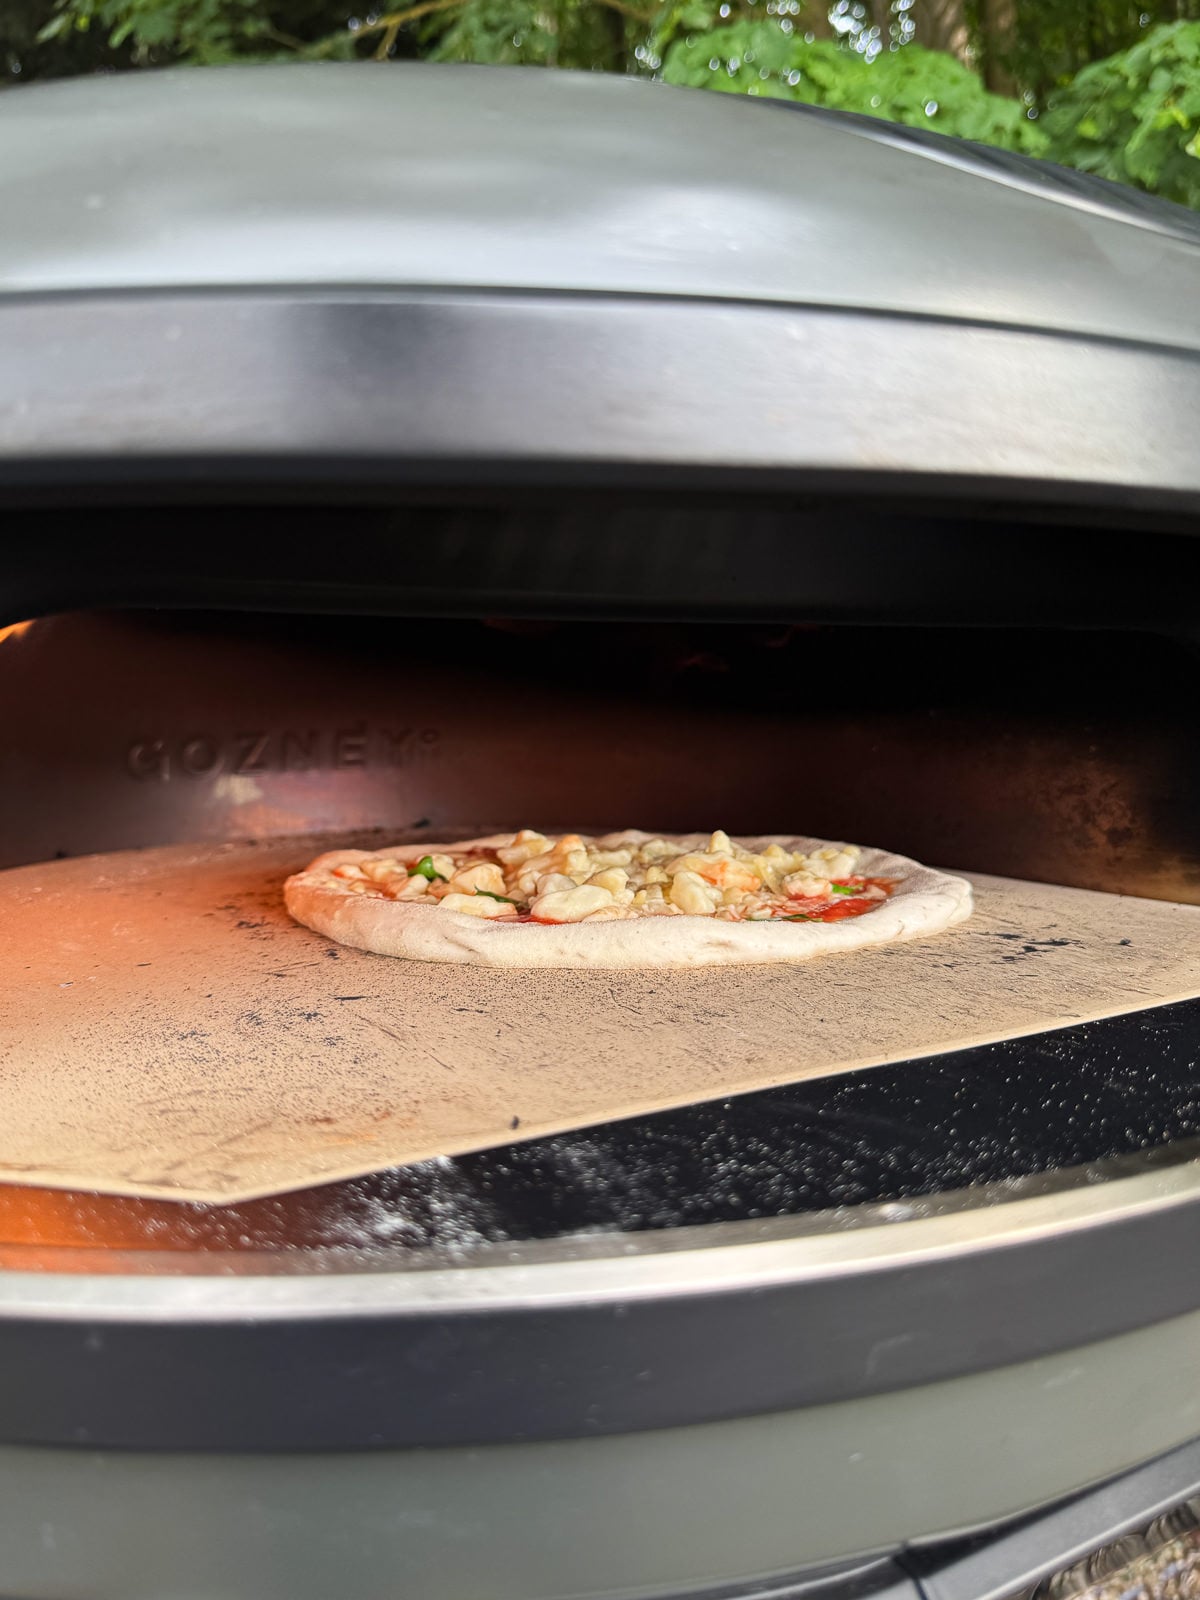
- Cook your pizza in your preheated pizza oven for 1-1½ minutes turning regularly with a peel to stop it burning.I use a Gozney gas pizza oven for my pizzas. For this dough, I cook the pizzas with the flame on medium-low then turn it up at the end if the toppings need some colour.
Notes
❤️ Stay connected with Salt Butter Smoke
The Prep List is my free weekly newsletter with seasonal recipes, kitchen notes and behind-the-scenes from my kitchen. Add Salt Butter Smoke as a Google Preferred Source to see more of my recipes in Search.