Almond Angel Cake Slices
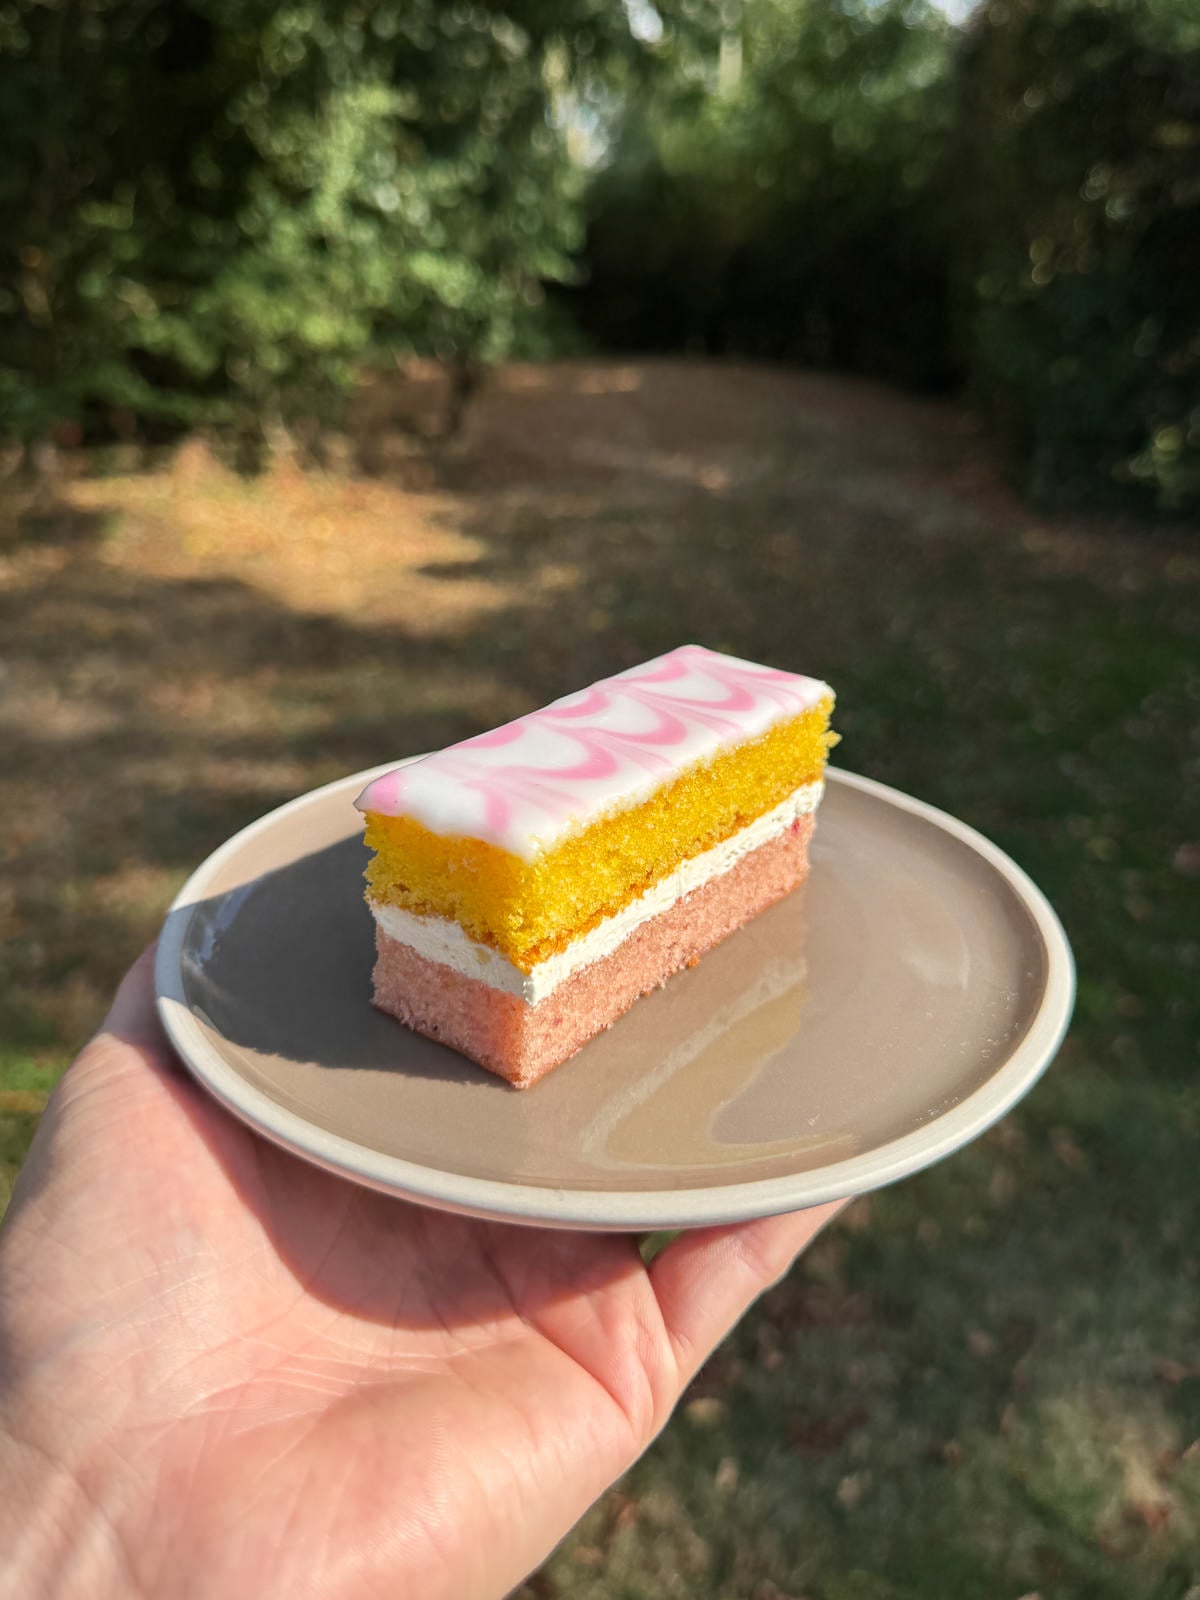
We’re giving classic angel cake slices a serious upgrade! This version has layers of soft almond sponge, vanilla Italian meringue buttercream and fondant icing.
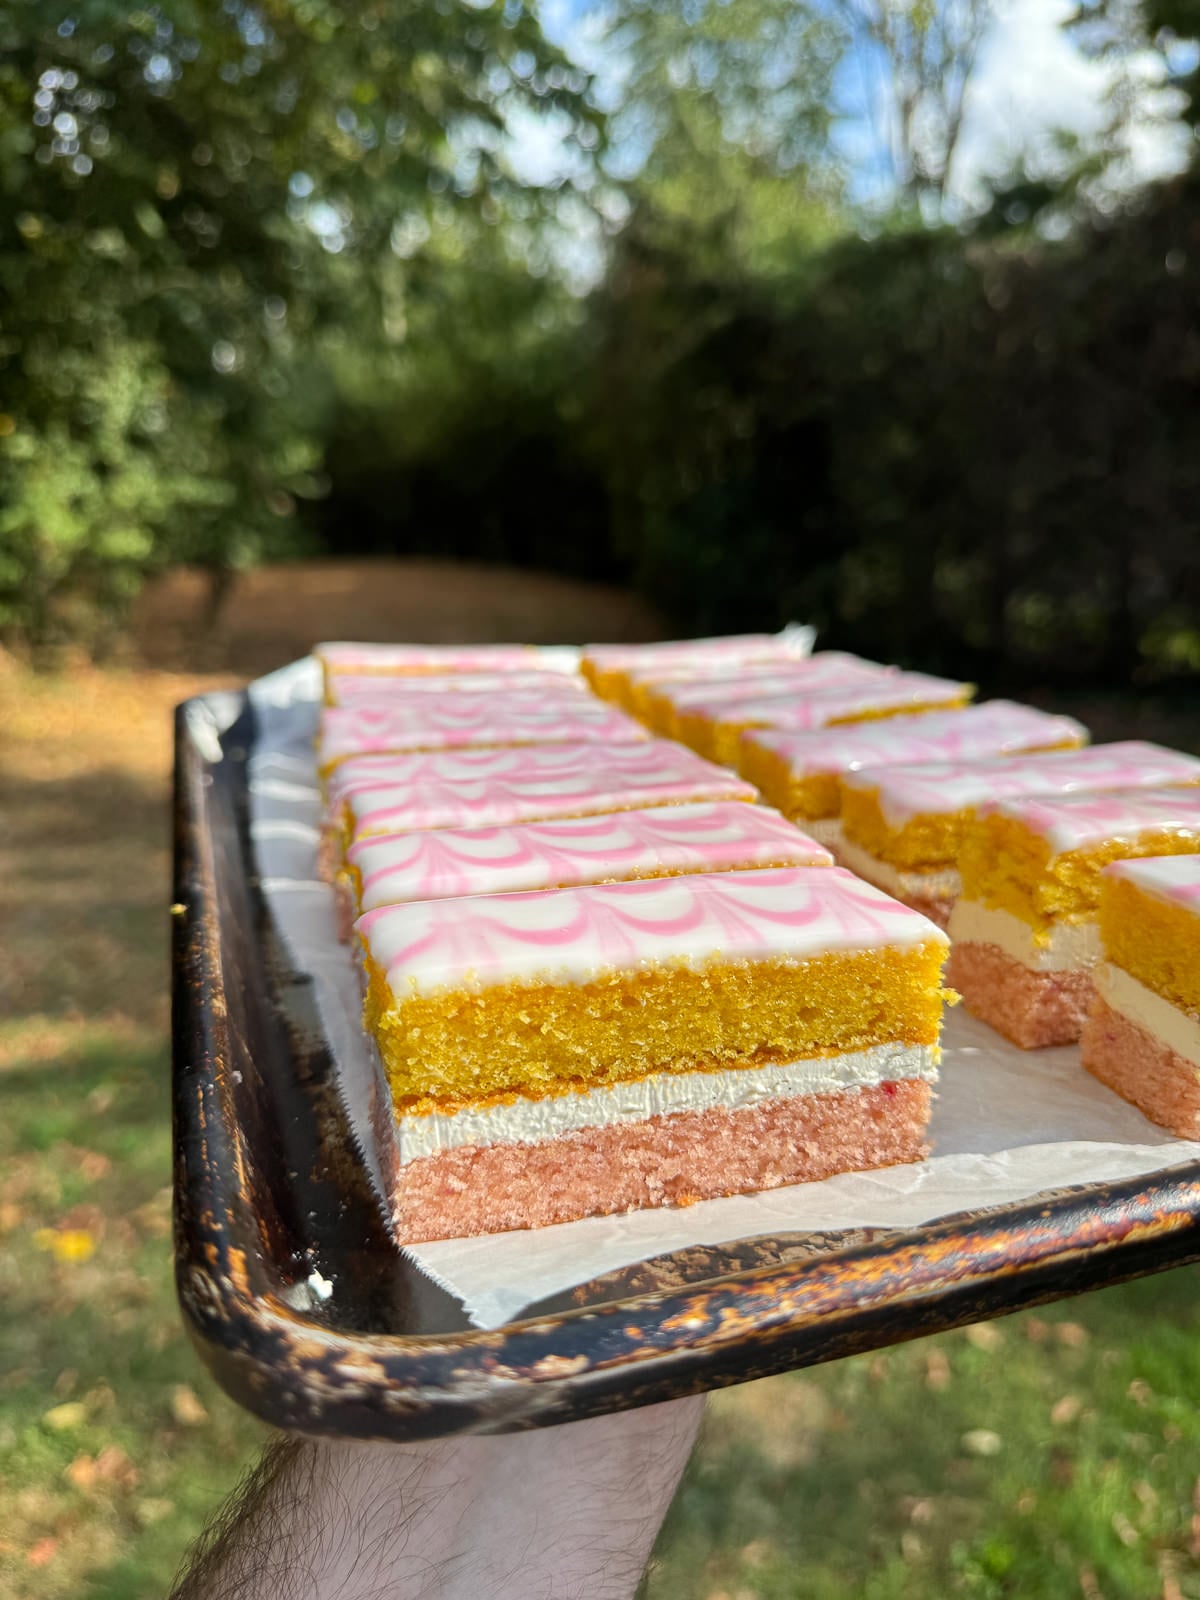
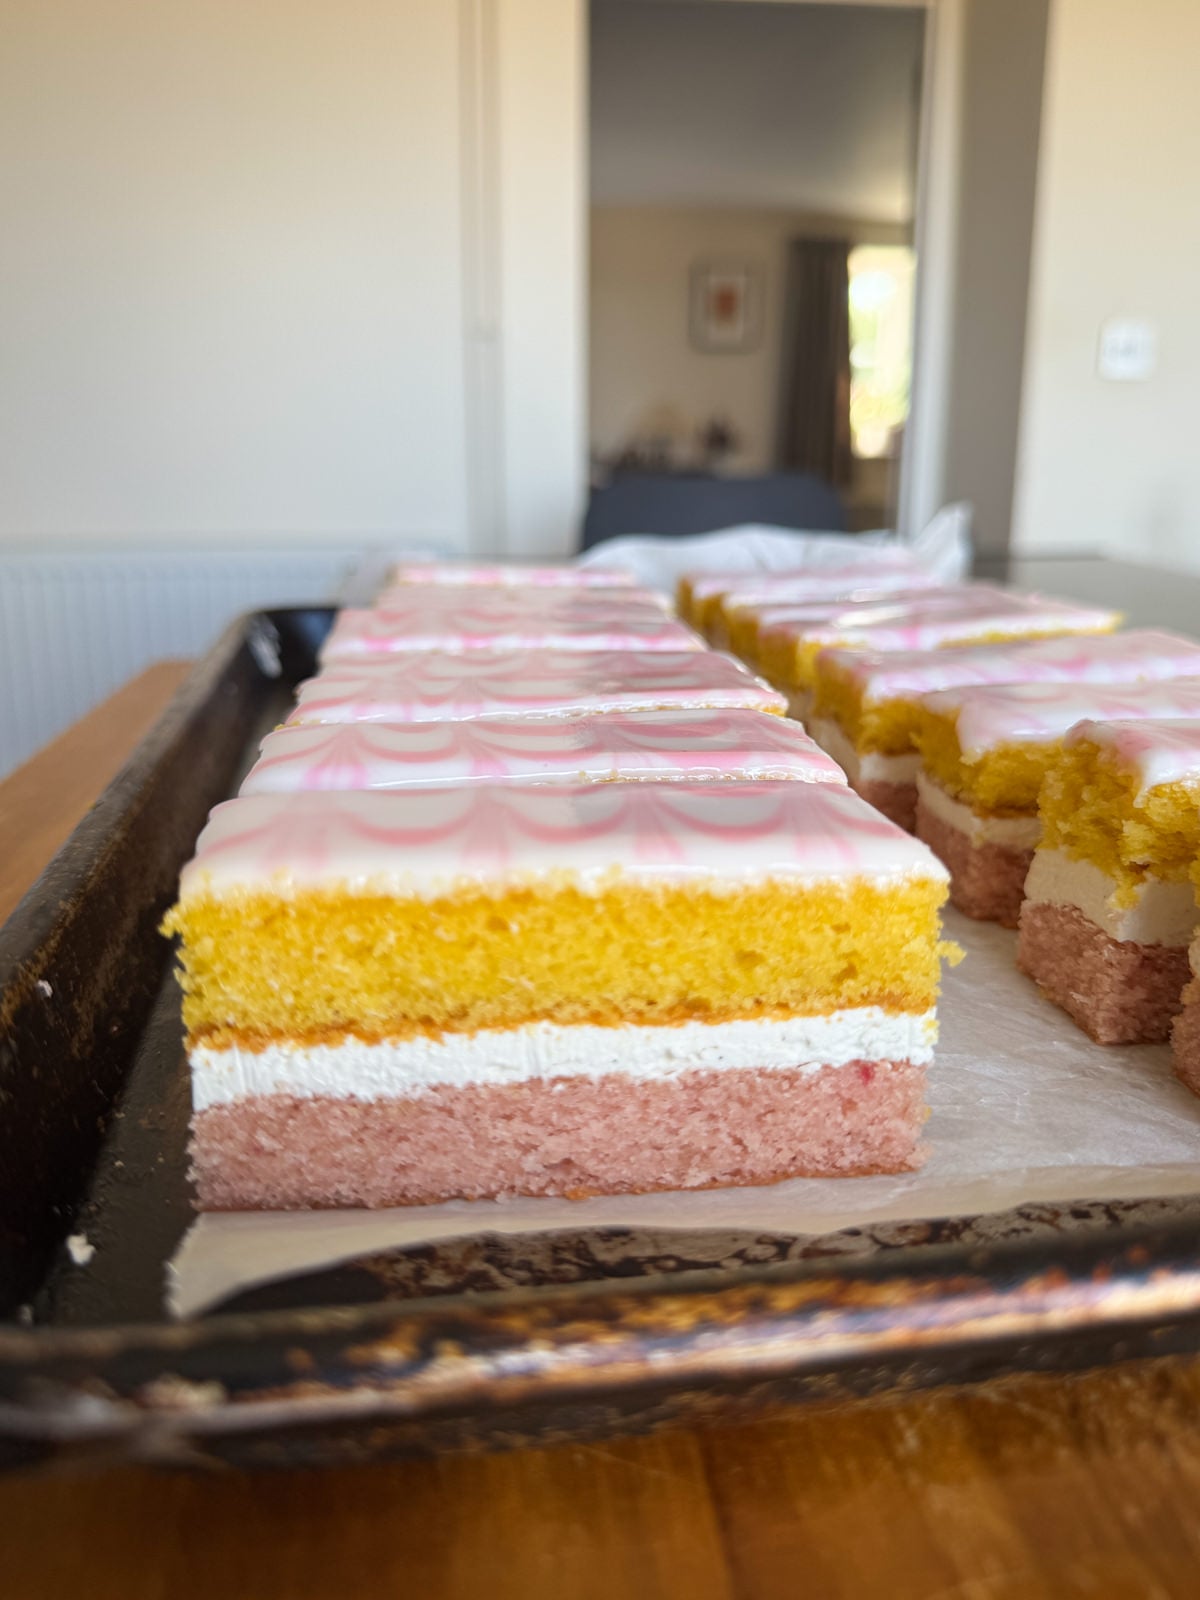
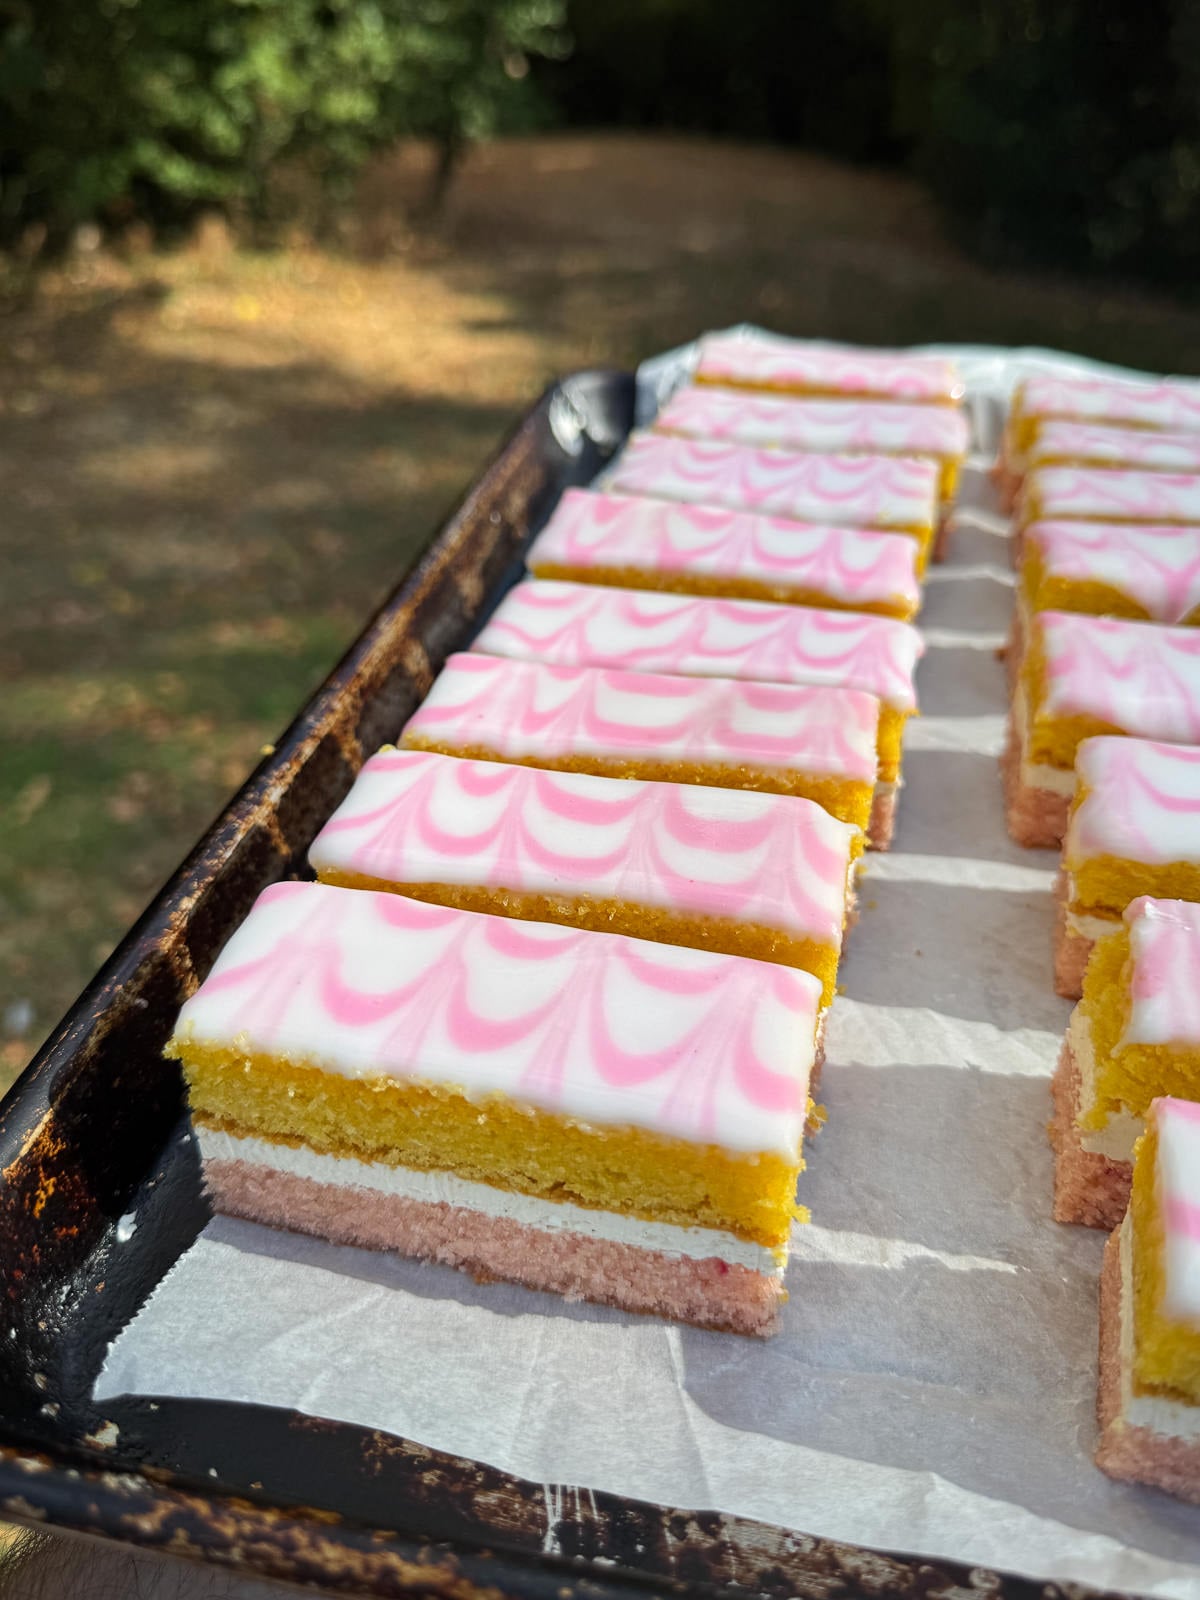
If you’re a fan of a classic British angel cake slice then you’re going to love this homemade version! This is my twist on the Mr Kipling snack and features layers of soft pink & yellow almond and vanilla sponge, a light Italian meringue buttercream that’s flavoured with vanilla and a good pinch of salt and topped with the signature white & pink fondant icing.
This recipe makes a generous number of cake slices, so there’s plenty to share! These cake slices only have 3 components (sponge, buttercream & icing) and are surprisingly easy to make. Don’t worry if you’ve never made Italian meringue buttercream before, it’s super simple and I’ll walk you through it in the recipe card. The rest is nice and straightforward. The sponge cake is made the traditional way by creaming butter & sugar together and the icing is just icing sugar & water!
For more baking recipes, check out every growing baking recipe collection! There’s plenty to choose from here, from chocolate chip cookies & brownies, to homemade breads, pastry & loads more. I’d recommend our homemade country slices…
What Are Angel Cake Slices?
If you’re in the UK, you’ve probably seen angel cake slices in the supermarket as they’re a nostalgic bake popularised and sold by Mr Kipling. This cake has layers of pink and yellow sponge that are sandwiched together with vanilla buttercream and topped with a simple fondant icing. Angel slices are not to be confused with Angel food cake which is a light American cake that’s made with egg whites.
Angel Slices Ingredient Notes
- Butter – You’ll need unsalted butter for the cake batter and the buttercream. With baking recipes, I prefer to use unsalted butter then add salt in myself.
- Sugar – This recipes uses caster sugar for the cake & buttercream and icing sugar for the icing.
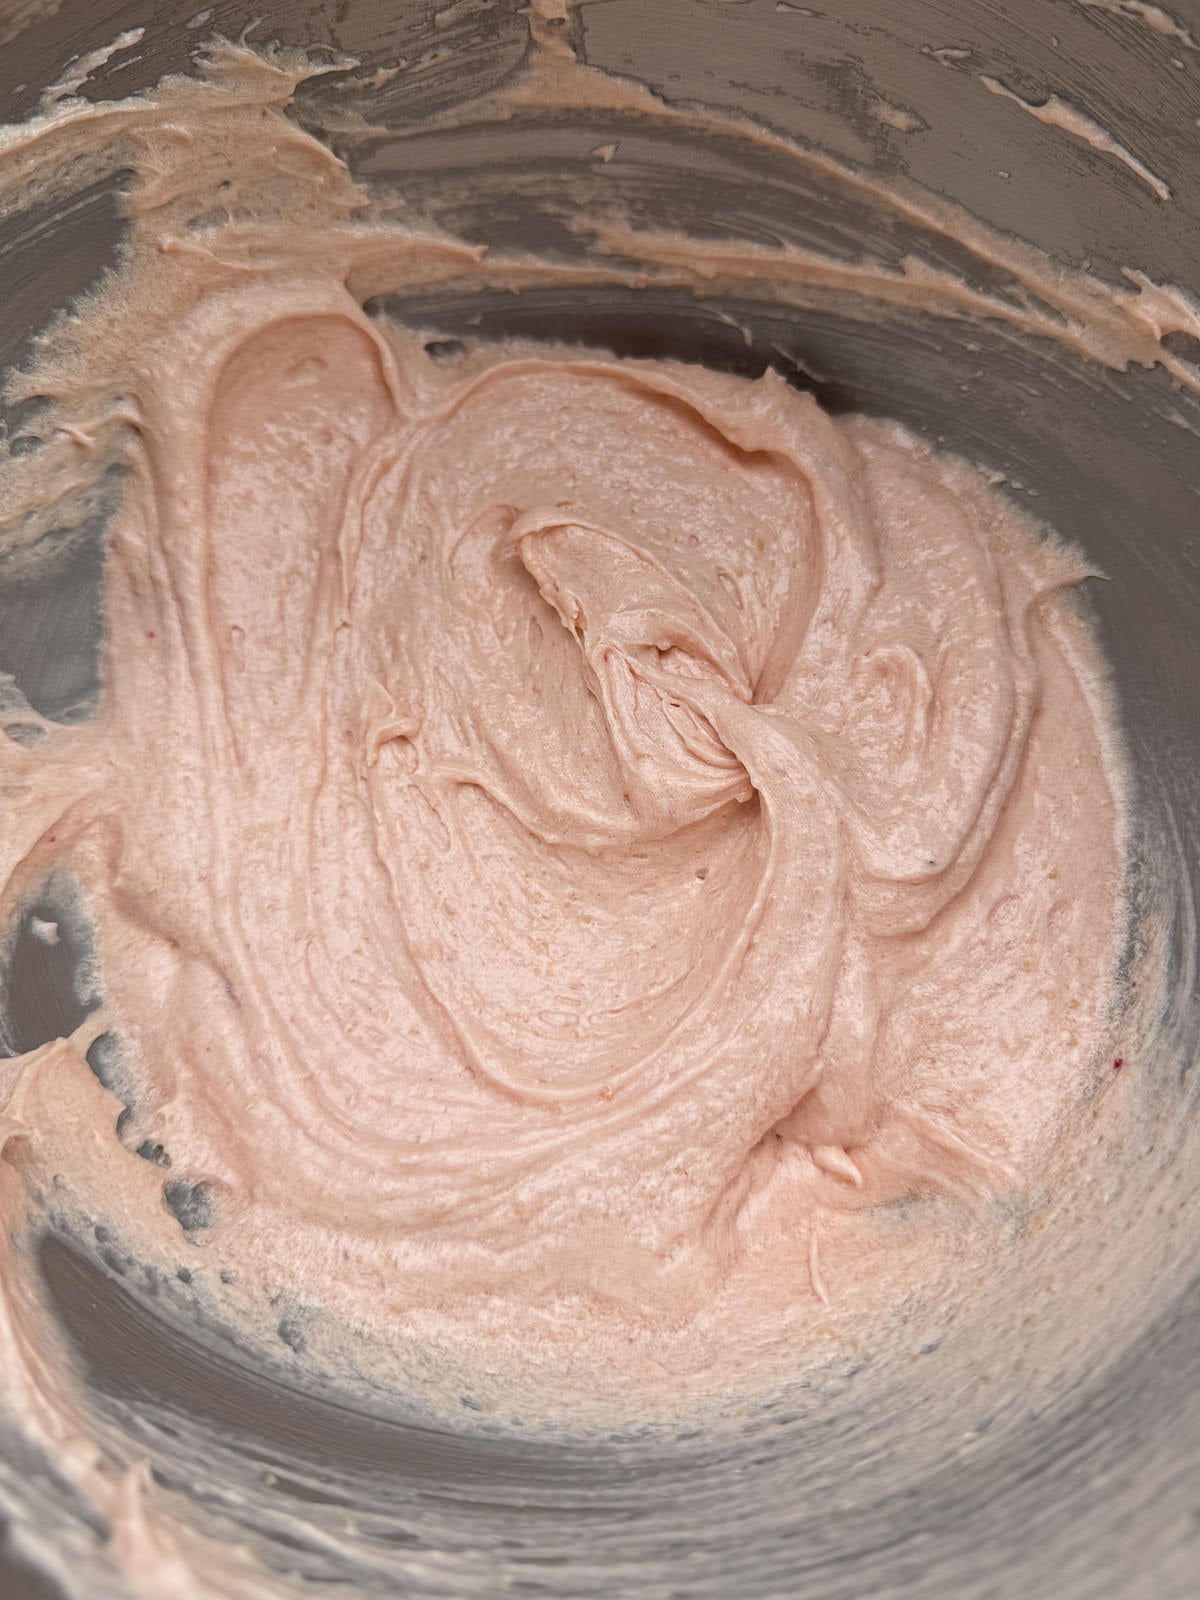
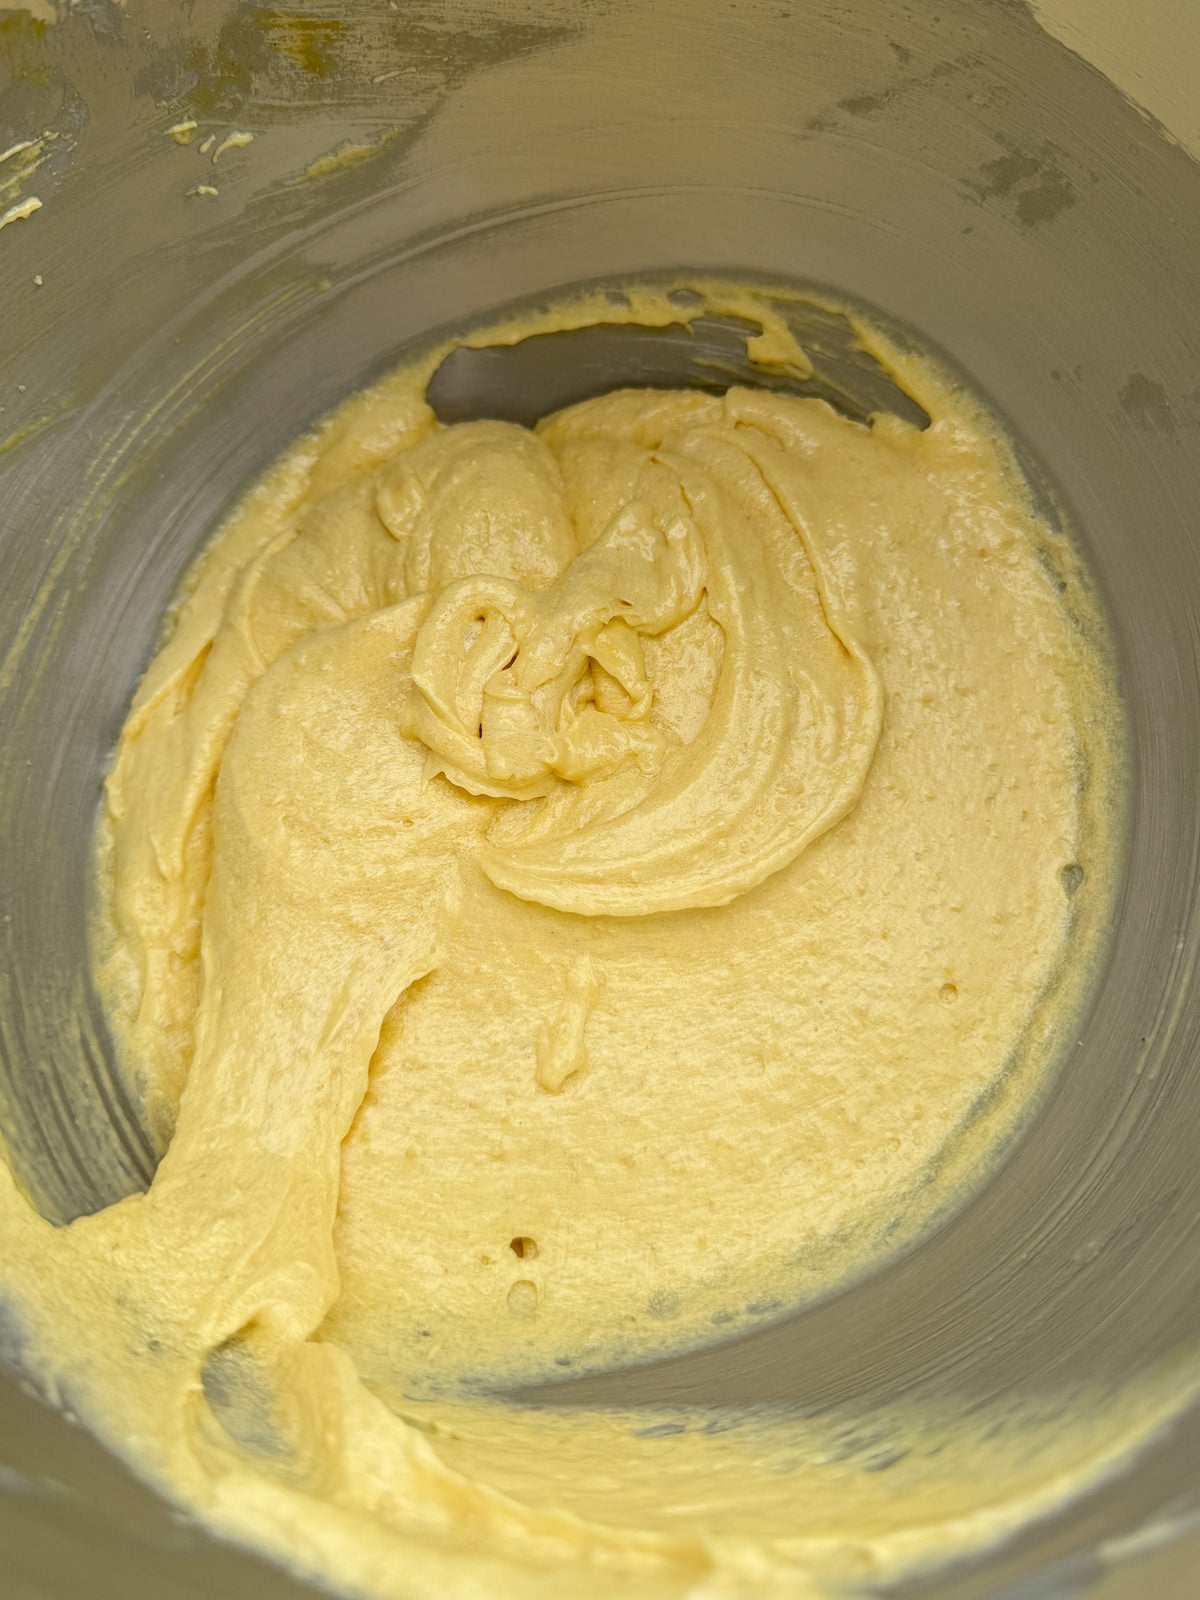
- Food Colouring – Angel cake features layers of pink and yellow sponge, so you’ll need food colouring to dye the batter. And a small amount of pink for the icing. Liquid or gel food colouring will both work and there’s a visual guide to the shades you’re looking for below.
- Ground Almonds – Substituting a small amount of the flour with ground almonds give the cake extra flavour and a moister crumb. I like to add a splash of almond extract into the batter as well, for even more flavour.
- Sour Cream – Sour cream is like a secret ingredient when it comes to cake baking. Adding it to the batter gives cakes a softer, moister crumb without effecting the consistency of the batter.
- Eggs – You’ll need large eggs for the cake batter. Each egg should weigh around 55 grams out of the shell.
- Vanilla – Using good quality vanilla makes all the difference with this recipe! I use extract for the cake batter and paste for the buttercream.
- Flour – We’re using plain (all purpose) flour for the cake batter then adding raising agents in ourself.
- Raising Agents – This recipe uses both baking powder and bicarbonate of soda.
- Cream Of Tartar – Adding a small amount of cream of tartar to the Italian meringue buttercream helps stabilise the mix, preventing it from deflating.
Components Of Angel Cake Slices
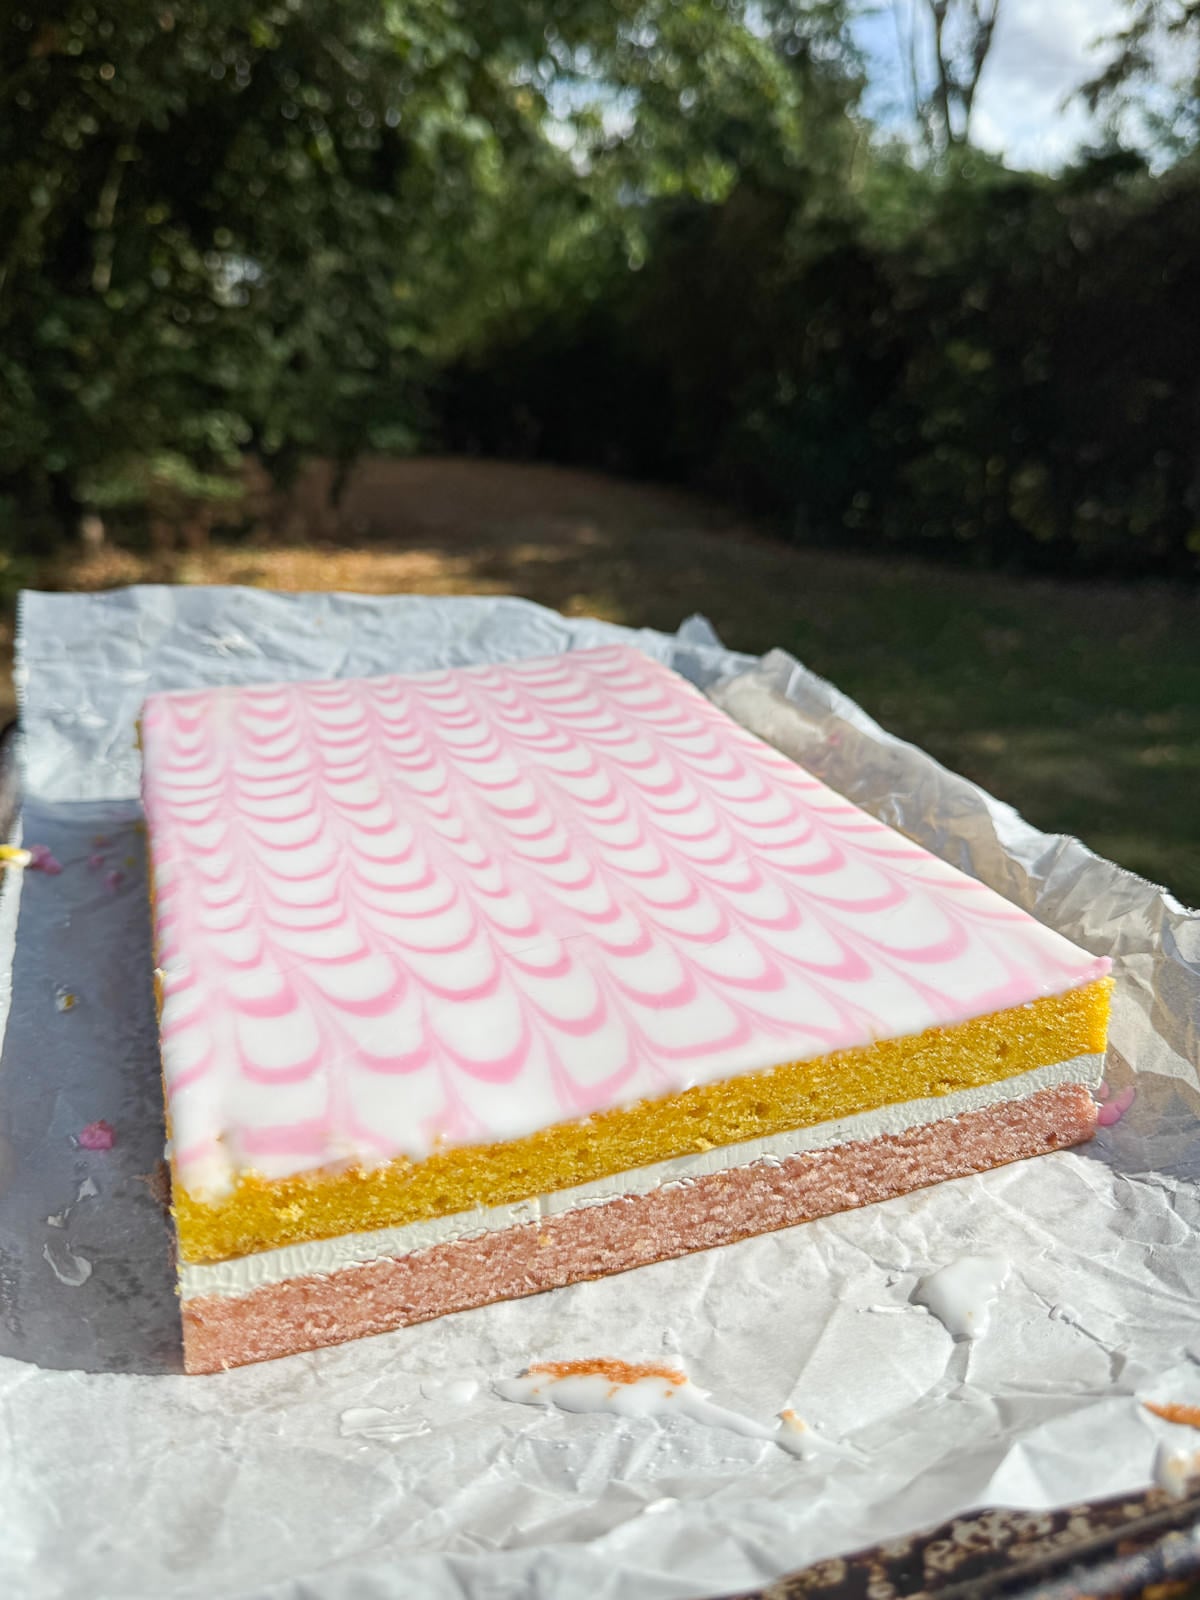
A classic Mr Kipling angel slice features layers of pink and yellow sponge that are sandwiches with vanilla cream and topped with fondant icing. This version is slightly different as I’ve flavoured the sponge with almond and used a vanilla Italian meringue buttercream as the filling. The topping is the same and I’ve kept the pink feathering on top.
Almond Sponge Cake
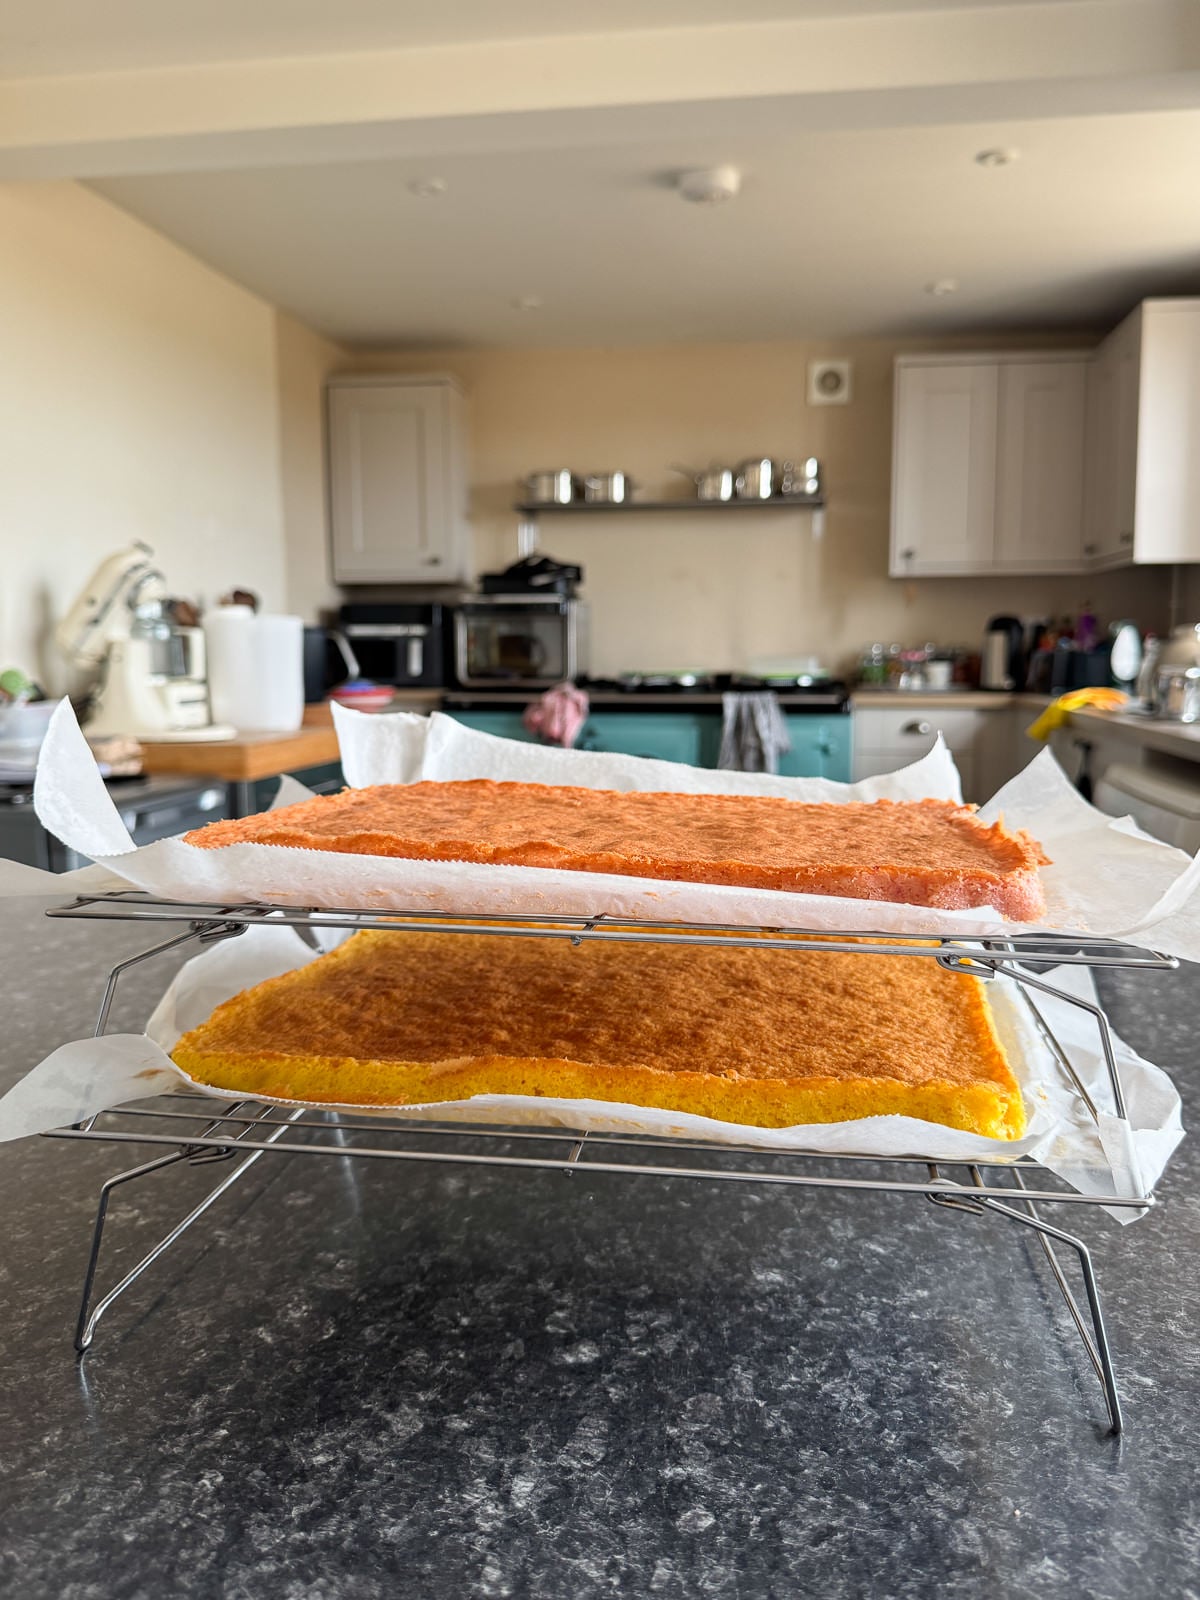
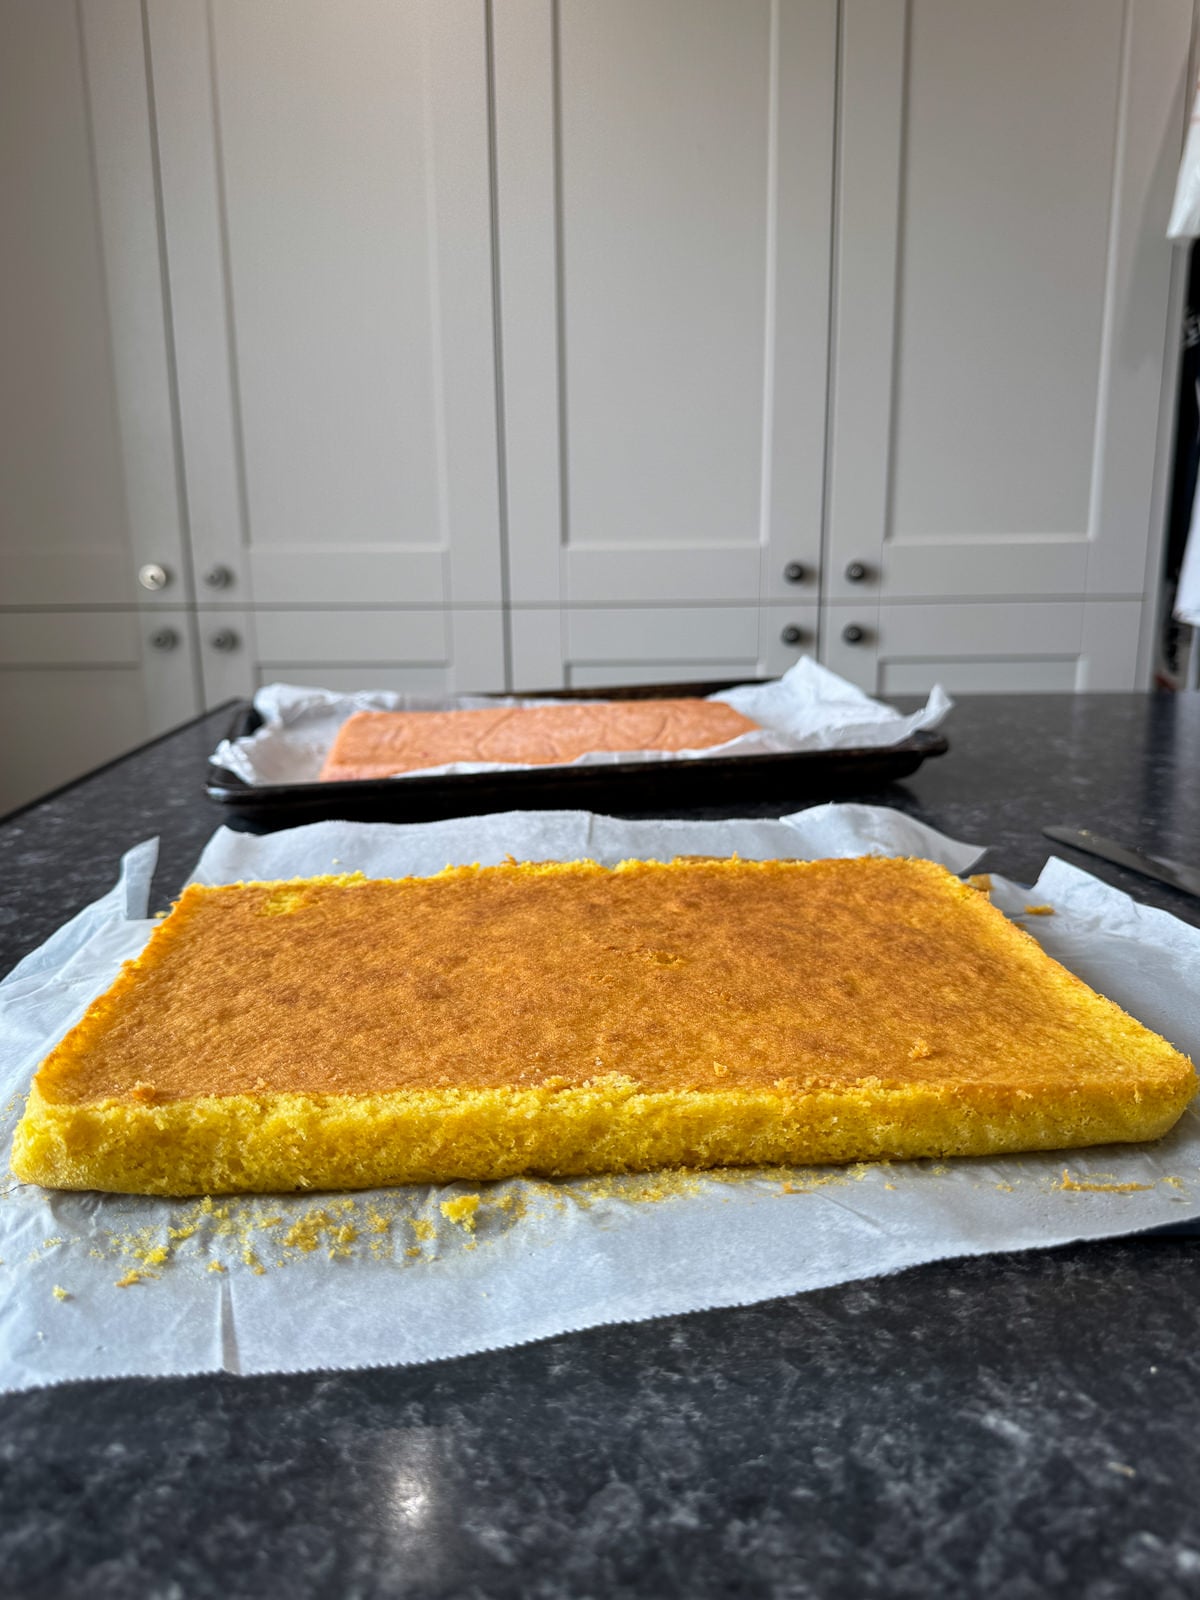
For this cake, we need to make 2 layers of sponge. One that’s pink and another that’s yellow. The best way to make 2 sponges that are the exact same size & thickness, is to weigh the batter out into 2 equally sized tins. Now, if you’re oven isn’t big enough to fit 2 tins in at once, you can easily divide the ingredients for the batter in half and bake them in batches.
This cake batter is made the classic way, by creaming butter and sugar together until pale & fluffy then mixing in eggs, followed by the dry ingredients. For extra flavour, there’s vanilla, almond extract and ground almonds added to the batter. Plus some sour cream, for extra moisture and to give the cake a softer crumb.
Salted Vanilla Italian Meringue Buttercream
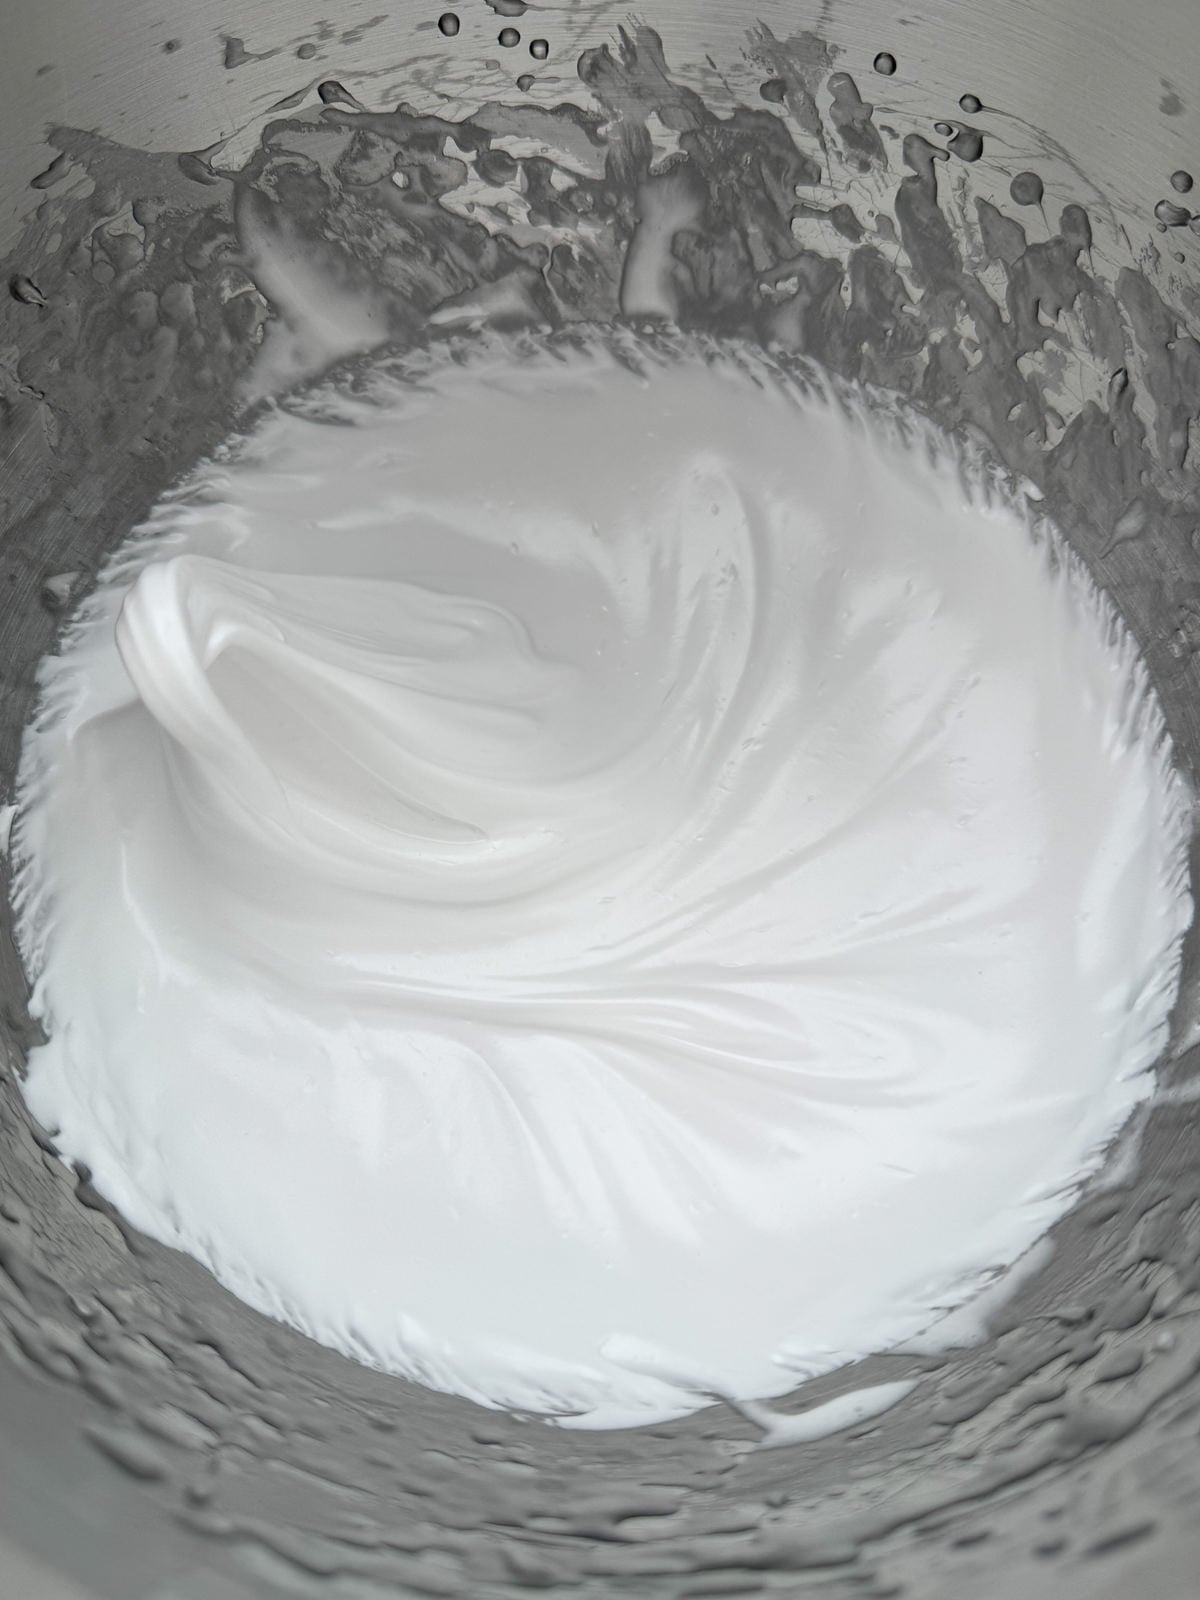
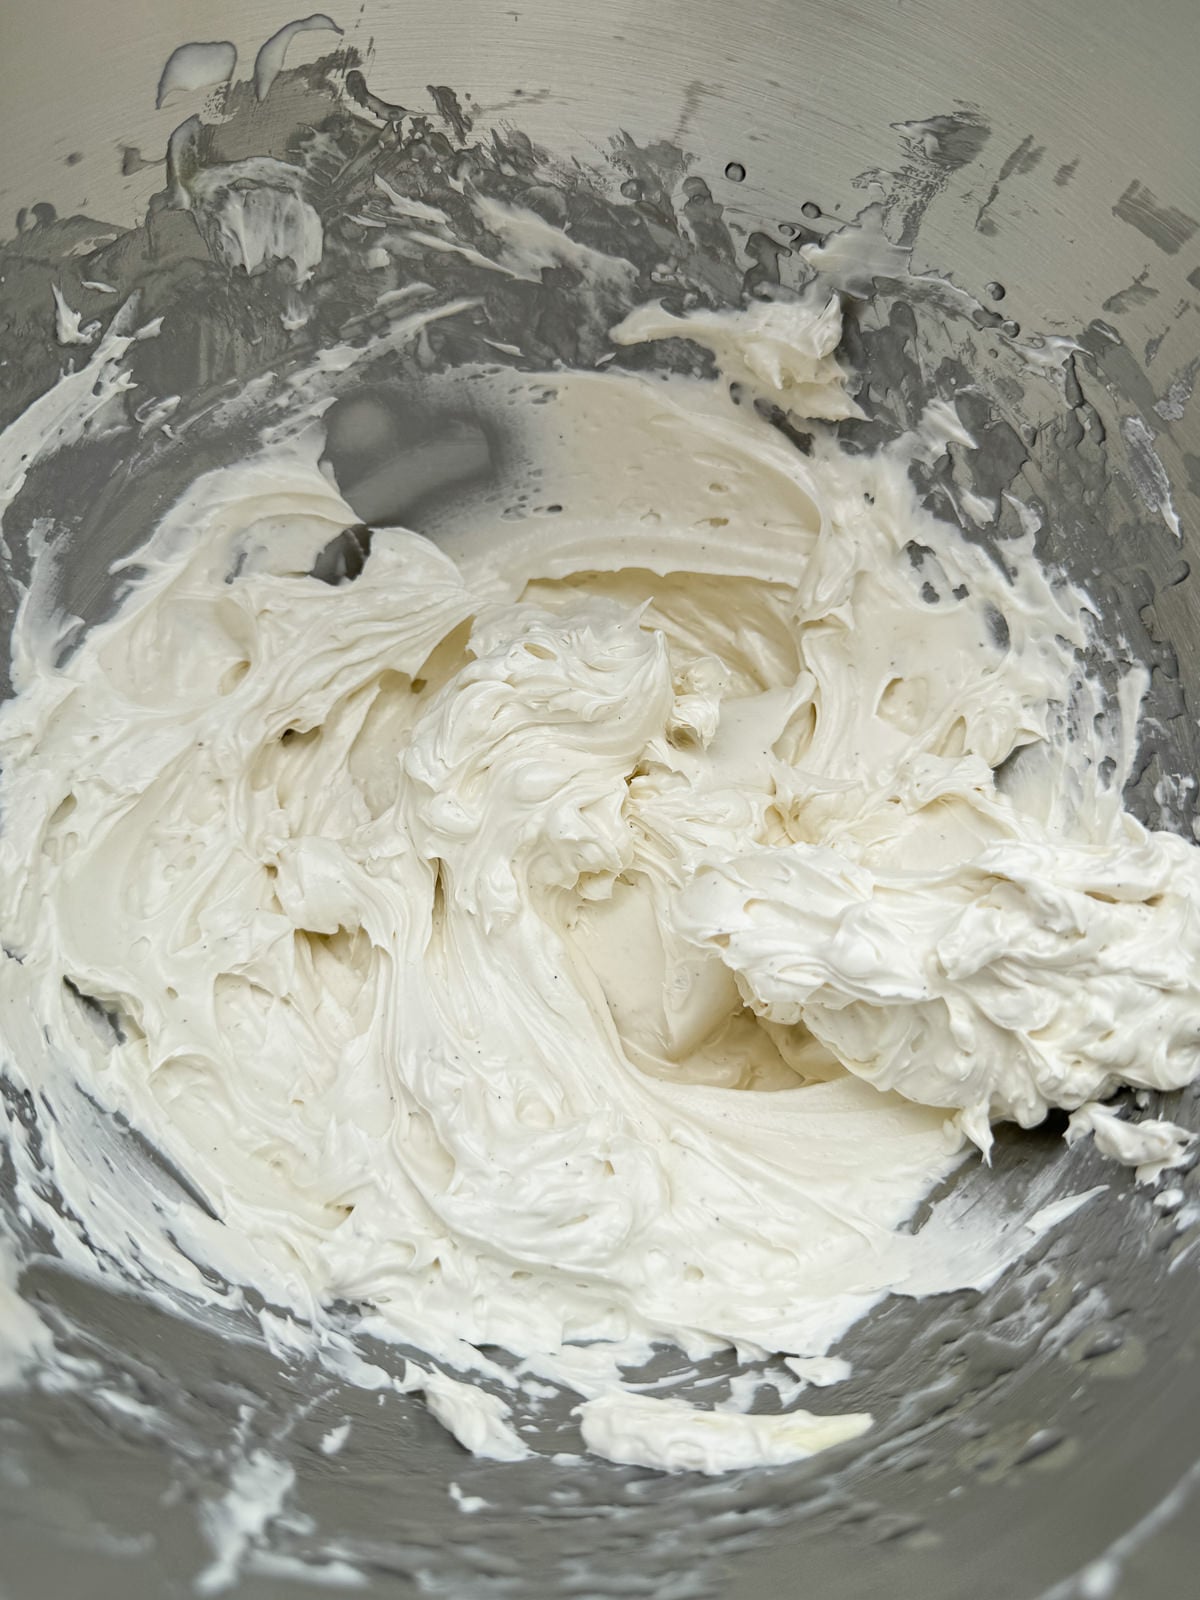
To make the filling as close to the original as possible, I’ve gone with an Italian meringue buttercream that’s flavoured with a good pinch of salt and plenty of vanilla. This buttercream may sound tricky to make but it’s basically just Italian meringue with softened butter whisked in at the end!
Fondant Icing
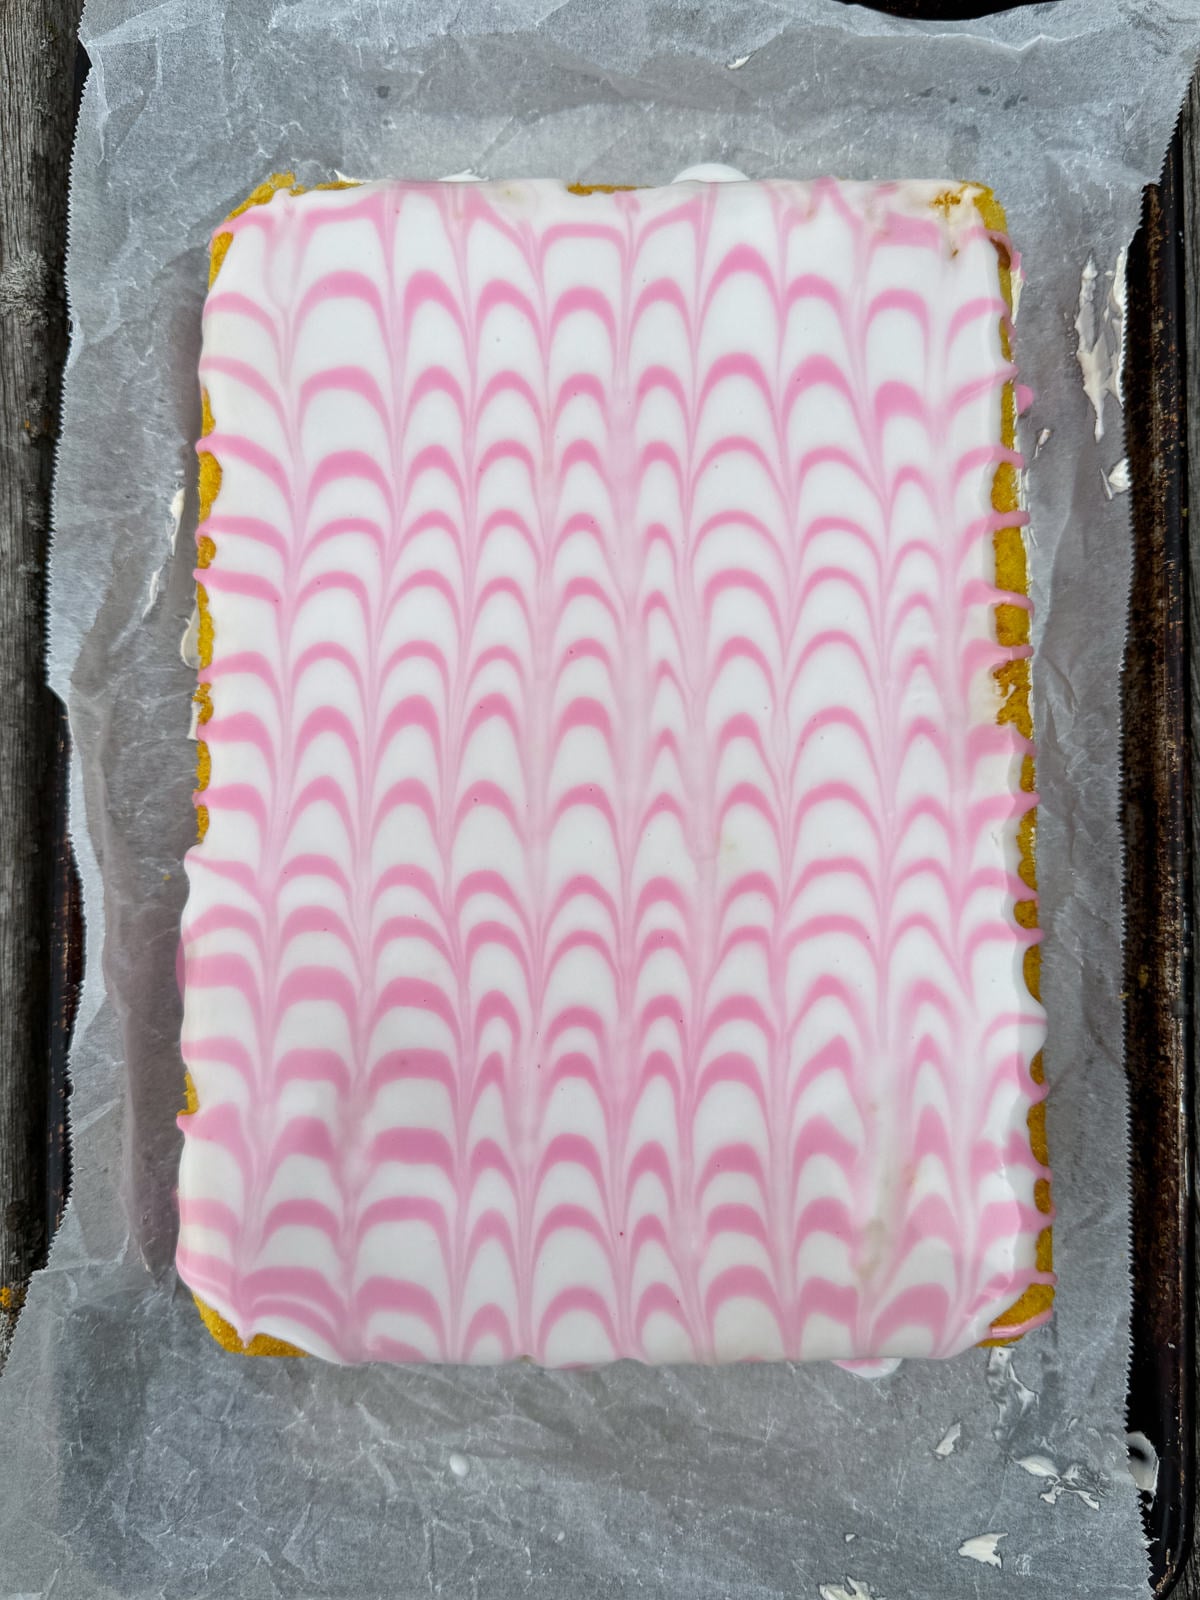
The icing that’s spread on top of angel cake slices is simply icing sugar mixed with water. To make the classic pink and white topping, you keep most of the icing white and start by spreading it on top of the cake. The rest of the icing is mixed with a tiny amount of pink food colouring then piped in rows on top of the white icing. Then you feather the icing by running a skewer through the icing, the opposite way that you piped the pink icing.
How To Assemble Angel Cake Slices
One of the key parts of making any layer cake, is to make sure that you’ve got a flat surface to spread buttercream, frosting or icing on. Fortunately, the sponges for this angel cake bake pretty much perfectly flat already, so there’s very little trimming required. Though I like to flip the sponges upside down, so that the layers stack up neatly.
Don’t worry if the edges aren’t too neat as you assemble the cake. We’ll be trimming the edges to square the cake off before cutting!
Step By Step Assembly
- Carefully lift the sponges out of their tins then use a sharp serrated knife to lightly trim the tops level if needed.
- Take the pink sponge and place it onto a baking tray, so that it’s facing bottom side up.
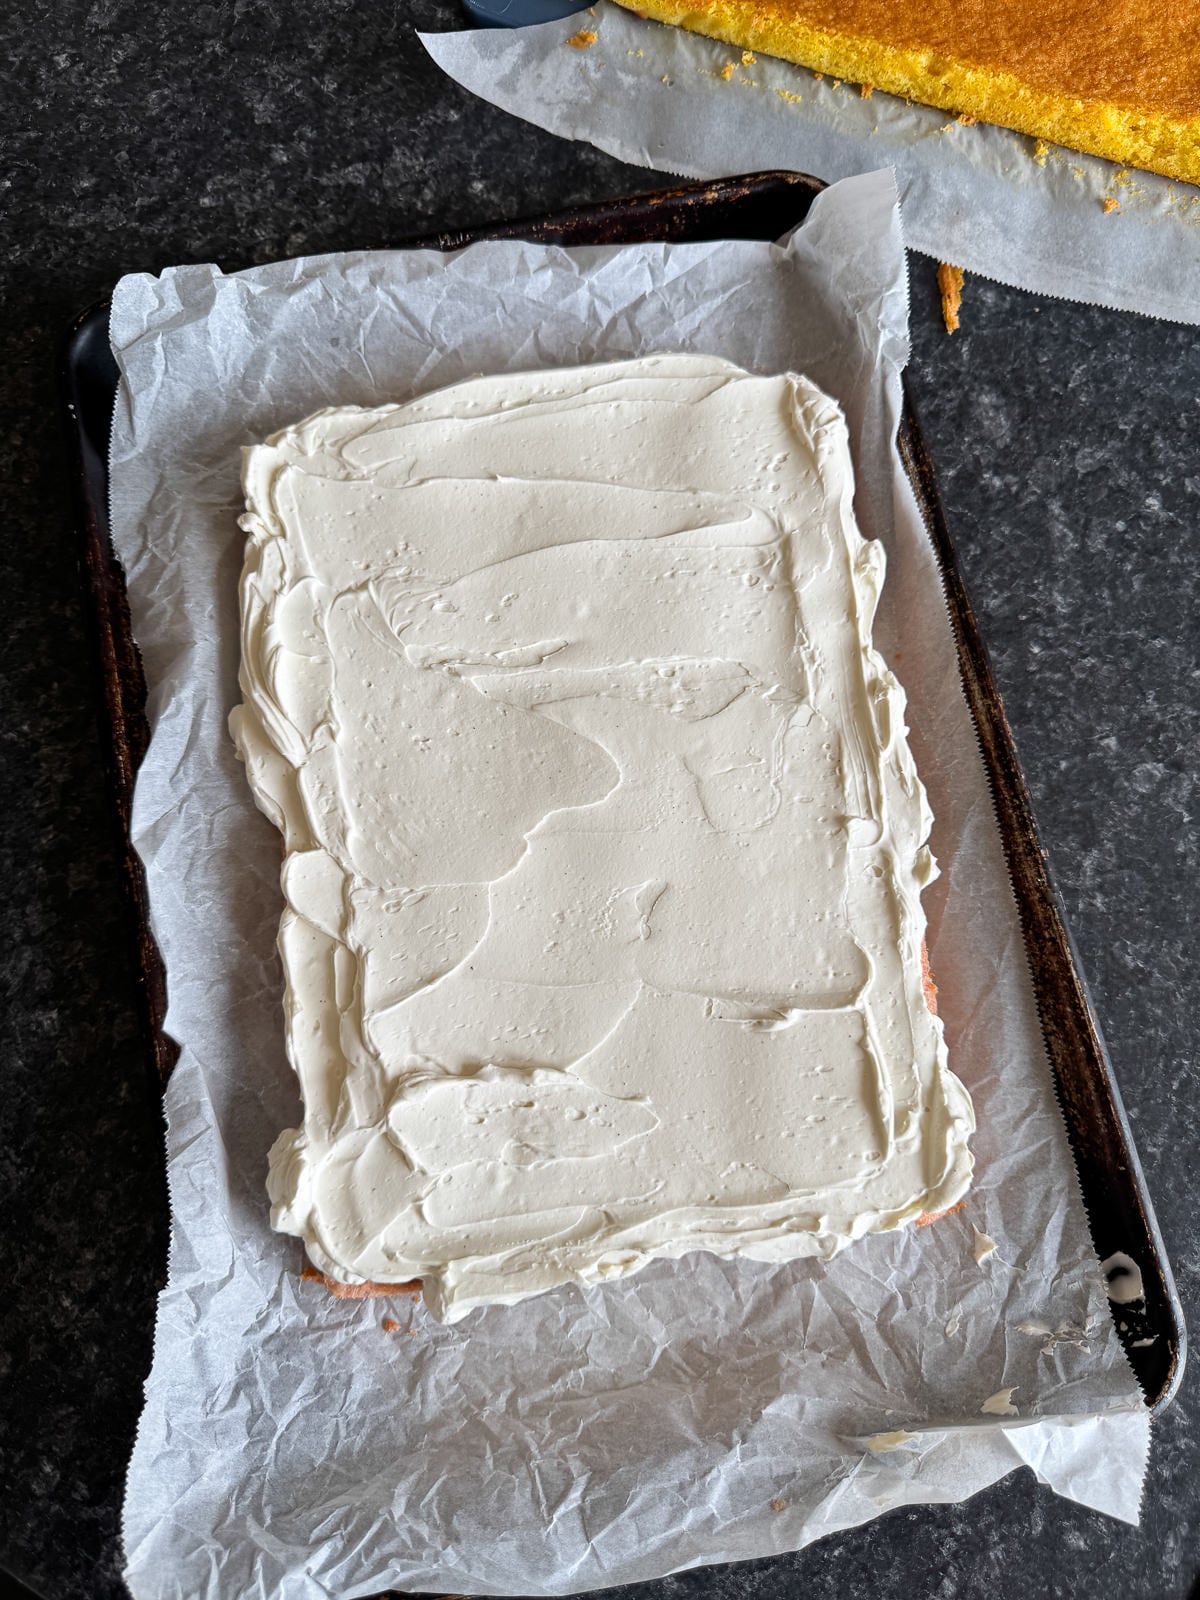
- Spoon the buttercream on top of the sponge then use a palette knife to spread it out into an even layer. Make sure that the buttercream is spread out to the edges.
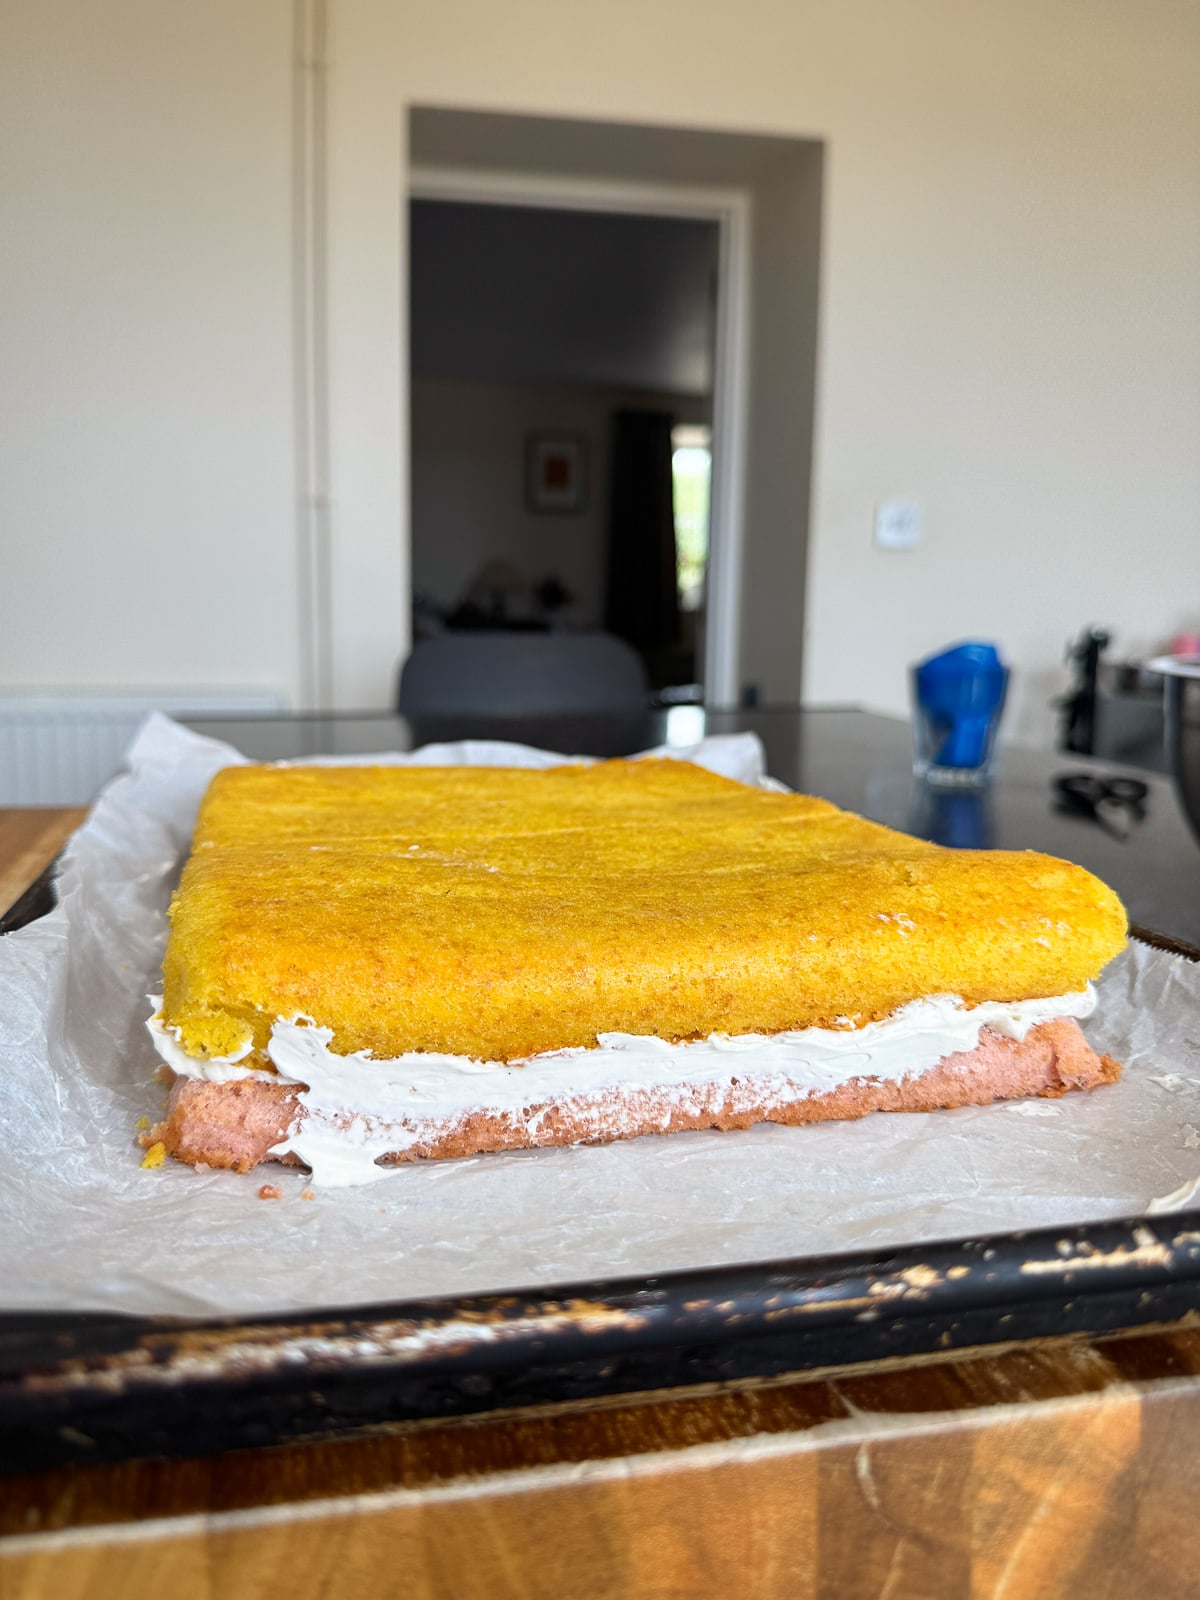
- Place the yellow sponge on top of the buttercream (facing the same way as the pink) then chill the cake in the fridge, whilst you make the icing.
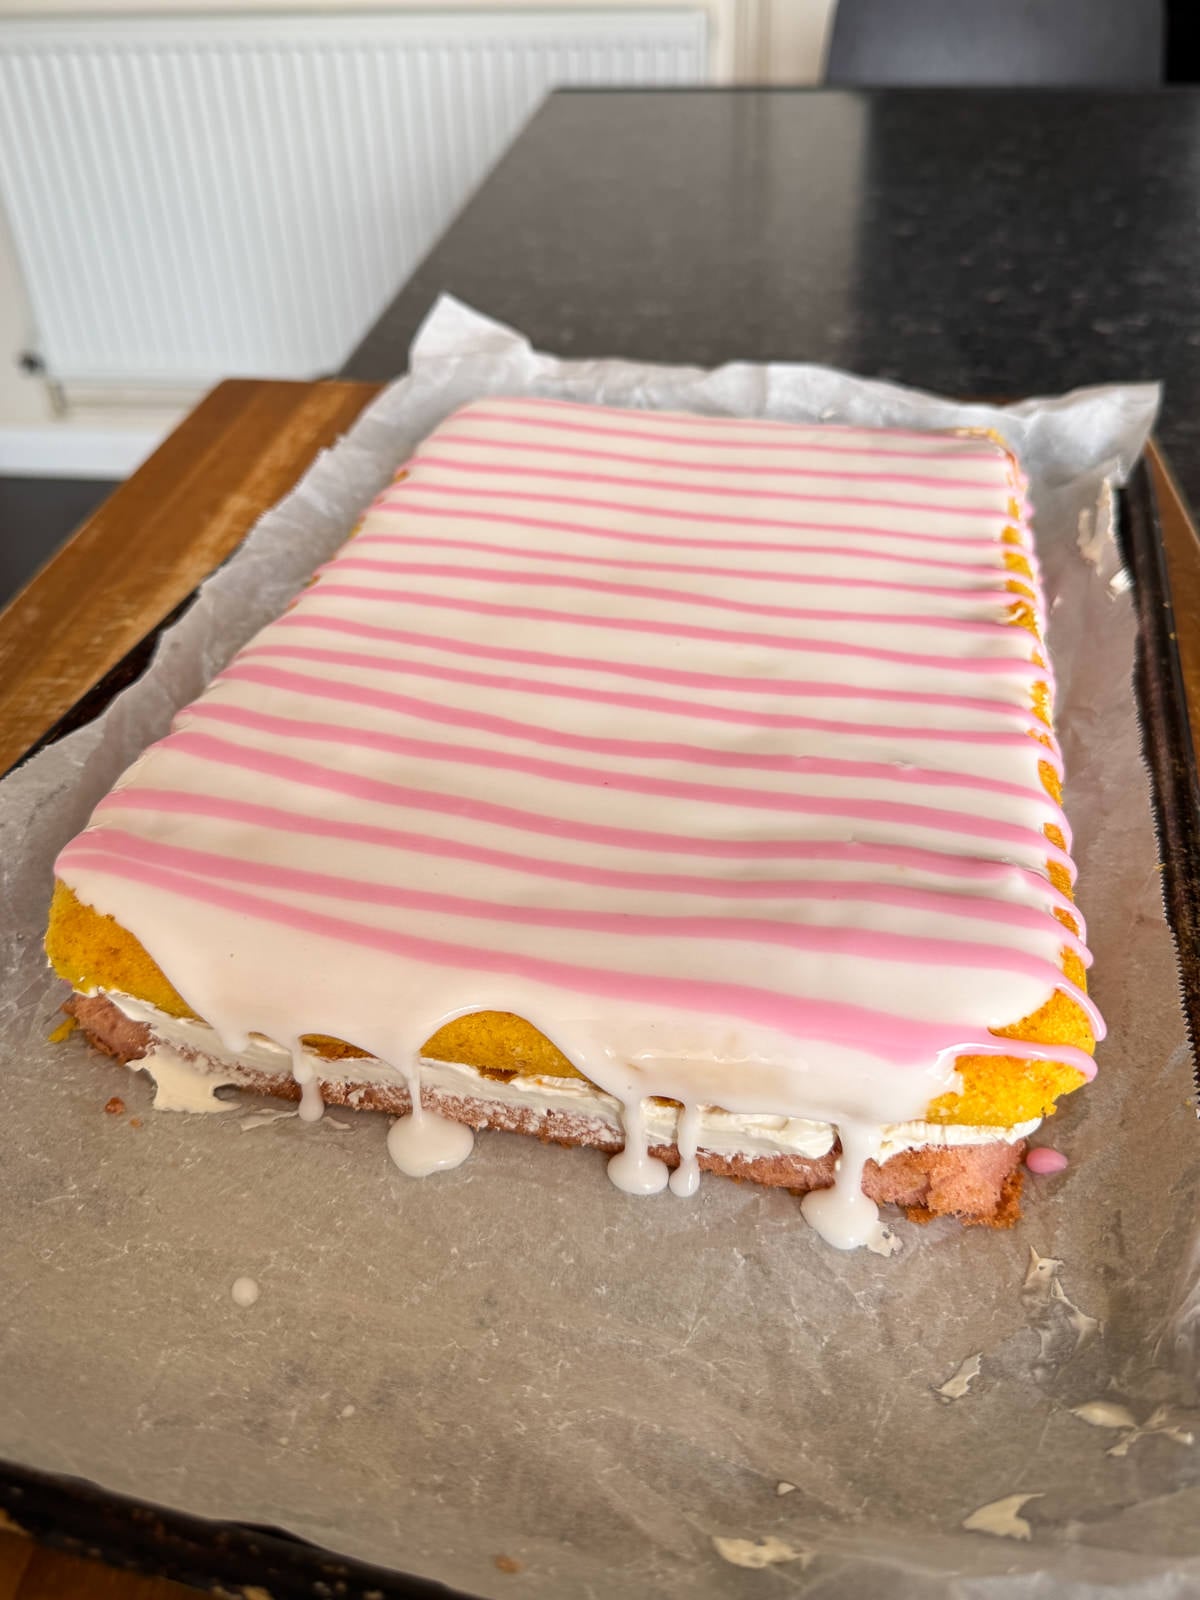
- Spoon the icing on top of the cake then spread it out all the way to the edges, in an even layer.
- Next, pipe rows of pink icing onto the white icing, spaced 1cm apart. Then run a skewer down the icing (in 1cm rows) to feather.
- Chill the cake in the fridge for 30 minutes, to set the icing then trim off the edges, cut the cake into slices and serve.
Frequently Asked Questions
To cook angel cake slices in an Aga, bake the cake on a grid shelf placed onto the floor of the baking oven. Slide a cold plain shelf onto the second from top set of runners just before baking the cake & leave it there for the duration of the bake. Cook the syrup for the meringue on the boiling plate.
As homemade angel cake slices contain Italian meringue buttercream, it’s best to store them in the fridge in an airtight container and eat within 3 days. Make sure to use a deep enough tub, so that the icing doesn’t stick to the lid! For the best texture, I’d recommend letting the cake sit out of the fridge for 20 minutes before serving.
Angel cake slices are a British cake featuring layers of pink & yellow sponge, buttercream and icing. The sponge is made by creaming butter & sugar together and uses baking powder to rise. Whereas angel food cake is an American white cake made with a batter that relies on egg whites to rise.
More Baking Recipes To Try
- Homemade Country Slices
- Thin Brown Butter Chocolate Chip Cookies
- Chocolate Fudge Layer Cake
- Stroopwafel Biscoff Rocky Road
- Classic School Cake
- Brown Butter & Miso Pecan Pie Bars
If you have enjoyed this recipe for angel cake slices, it would mean a lot if you could leave a review & rating. And if you’d like to stay up to date with future recipes, follow us on Instagram & TikTok or subscribe to our newsletter!
Almond Angel Cake Slices
Equipment
- 2 9"x13" Baking Tins
- Stand Mixer
- Mixing Bowls
- Sieve
- Piping Bag
- Skewer
Ingredients
Almond Sponge Cake
- 250 g Unsalted Butter (Softened)
- 260 g Caster Sugar
- 4 Large Eggs (Room Temp – 55g Each Out The Shell)
- 1 tsp Vanilla Extract
- 1 tsp Almond Extract
- 200 g Plain Flour
- 2 tsp Baking Powder
- ¼ tsp Bicarbonate Of Soda
- 60 g Ground Almonds
- ½ tsp Table Salt
- 180 g Sour Cream (Room Temperature)
- Pink Food Colouring
- Yellow Food Colouring
Italian Meringue Buttercream
- 60 g Egg Whites (Roughly 2 Egg Whites)
- ¼ tsp Cream Of Tartar
- 120 g Caster Sugar
- 40 g Water
- 150 g Unsalted Butter (Softened)
- 1 tsp Vanilla Paste
- ¼ tsp Table Salt
Icing
- 350 g Icing Sugar (Sifted)
- 50 g Cold Water
- Pink Food Colouring
Instructions
Almond Sponge Cake
- Preheat an oven to 175°c/155°c fan (347°f/311°f).
- Grease and line 2x 9"x13" baking tins with baking parchment.If your oven isn't big enough to fit 2 tins in at once, make half the amount of batter at a time and bake each colour sponge separately.
- Add the softened butter and caster sugar into the bowl of a stand mixer then beat on a medium speed (with the paddle attachment) until pale and fluffy. This will take at least 5 minutes.Make sure to scrape the bowl down regularly with a spatula as you mix the batter!
- In the meantime, crack the eggs into a jug, add in the vanilla & almond extracts then lightly beat with a fork. Sift the flour, baking powder & bicarbonate of soda into a separate mixing bowl then add in the ground almonds & salt then whisk to combine.
- Keep the mixer running on a medium speed then gradually pour in the beaten eggs. Once all of the egg has been added in, scrape the bowl down with a spatula then give the butter another brief mix, to combine.
- Add the flour into the batter, mix on a low speed until almost combined then add in the sour cream and continue mixing until everything is just combined.
- Next, divide the cake batter into 2 mixing bowls then stir in a small amount of pink food colouring into one and yellow food colouring into the other. The batters should be a pale shade, as the colour will darken slightly as the cakes bake.If you'd like to weigh the batter to be as accurate as possible, each bowl should contain around 550g of batter. See the post above for a visual guide to the colours we're aiming for!
- Once the batters are ready, transfer each colour to its own tin then bake in the preheated oven for 25-30 minutes, until a skewer inserted into the centre comes out clean.Make sure to get the batter in the oven straight away! If you're making half the batter at a time, get started with the other batch when your first cake has almost finished baking.
- Let the baked cakes cool in the tins for 15 minutes then carefully transfer to wire cooling racks and leave to cool completely.
Italian Meringue Buttercream
- Add the egg whites & cream of tartar into the bowl of a stand mixer then set to one side.Make sure that your bowl is clean & dry!
- Add 90 grams of the caster sugar into a small saucepan along with the water then set over a medium-high heat. Bring the mix to the boil then cook until the syrup reaches 121°c/250°f. This will take around 5 minutes.Don't stir the sugar, as it may crystallise.
- As soon as your sugar is on the heat, start whisking the egg whites on a medium speed. After a minute, when the whites are frothy, add the remaining 30 grams of sugar in a small amount at a time. Make sure to let each addition of sugar mix in before adding in more.
- Once all of the sugar has been mixed in, turn the mixer up to medium-high and continue whisking until the whites reach soft peaks. This will take 2-3 minutes, at which point the sugar will be ready.If your syrup isn't quite ready once the whites are, turn the speed down slightly so that they're both ready at the same time.
- Once the syrup has reached 121°c/249°f, turn your mixer down to a medium speed then carefully pour the syrup into egg whites, in a thin, slow stream.It's best to pour the syrup down the side of the bowl, so that it doesn't hit the whisk & go everywhere!
- Continue whisking the meringue on a medium-high speed until it has cooled, reached stiff peaks & is glossy. This will take around 10 minutes. The meringue needs to be cool before you add in the butter, otherwise it will split so make sure to whisk until it feels cool to the touch.
- Next, continue whisking the meringue on a medium speed then add the softened butter in a small amount at a time, making sure to let each addition mix in fully before adding in more.
- Once all of the butter has been added in, give the mixing bowl a quick scrape down then continue mixing on a medium speed until the buttercream is pale, fluffy and smooth. This will take 3-4 minutes of whisking.The meringue may look split at first but keep whisking and it will come together!
- To finish, add the vanilla and salt into the buttercream then whisk again briefly, to combine.
Assembly
- Line a baking tray with baking paper then set to one side.
- Next, transfer the pink cake to a chopping board and use a sharp serrated knife to lightly trim the top so that it's level (if necessary).Keep the sponge on the baking paper as it will be easier to lift/move. Make sure to get rid of any crumbs/trimmings before you move onto the next step.
- Flip the sponge over onto your line tray then peel the parchment off the top. Then spoon the buttercream on top of the sponge and use a palette knife to spread it out into an even layer. Don't worry if the buttercream isn't neat around the edges, we'll be trimming the cake later on.
- Next, trim the yellow sponge the same way as the pink sponge then carefully flip it over, on top of the buttercream. Peel the piece of parchment off the top then chill the cake in the fridge whilst you make the icing.Flipping the sponge over means that we'll have a flat surface to spread icing on. The best way to flip the sponge over is to line the edges up then confidently invert the cake onto the buttercream.
Icing
- Sift the icing sugar into a mixing bowl then gradually whisk in the cold water, to make a smooth, thick icing.
- Transfer 60 grams of the icing into a small mixing bowl then stir in a tiny amount of pink food colouring, to turn the icing a pale pink. Transfer the pink icing into a piping bag then set to one side.
- Next, spoon the white icing on top of the cake then use a palette knife to spread it out to the edges. Again, don't worry too much about making the edges neat, as the cake will be trimmed before slicing.
- Cut a small hole in the end of the piping bag then pipe lines of pink icing onto the white icing so they're running horizontally across and are spaced 1 cm apart.
- Run a skewer through the icing, down the length of sponge in 1 cm intervals, to feather the icing. Then chill the cake in the fridge for 30 minutes, to set the icing.
Cutting Into Slices
- Once the icing is set, carefully lift the cake onto a chopping board. Then use a large knife to trim the edges so that the cake is a neat rectangle.I like to use a long serrated knife for this. Rinsing the blade off with warm water then wiping it clean is the best way to make clean cuts.
- Next, cut the cake in half down the length then cut each half into 8 slices. Serve immediately or store in an airtight container, in the fridge. It's best to let the slices sit at room temperature for 20 minutes or so before serving.As these slices are made with Italian meringue buttercream, it's best to store them in the fridge. Make sure to use a tub that's deep enough, so that the lid can go on without touching the icing!
Salt Butter Smoke Magazine
Love seasonal cooking?
Issue 001 features over 20 original autumn recipes, seasonal features, preserving guides and beautiful photography.
Take a Look Inside →Notes
Enjoying This Recipe?
The Prep List is my free weekly newsletter with seasonal recipes, kitchen notes and behind-the-scenes from my kitchen. Add Salt Butter Smoke as a Google Preferred Source to see more of my recipes in Search.