Thin Brown Butter Chocolate Chip Cookies
These thin brown butter chocolate chip cookies have a nutty, caramelised flavour with a soft, chewy texture and crispy edges. They’re easy to make & can be made with any type of chocolate.
Here’s how to make thin brown butter chocolate chip cookies that have a rich, caramelised flavour, the best soft and chewy texture, crisp edges and a whole load of chocolate! The cookie dough is super easy to make and there’s no need to chill the dough before baking, as we want the cookies to spread as much as possible in the oven.
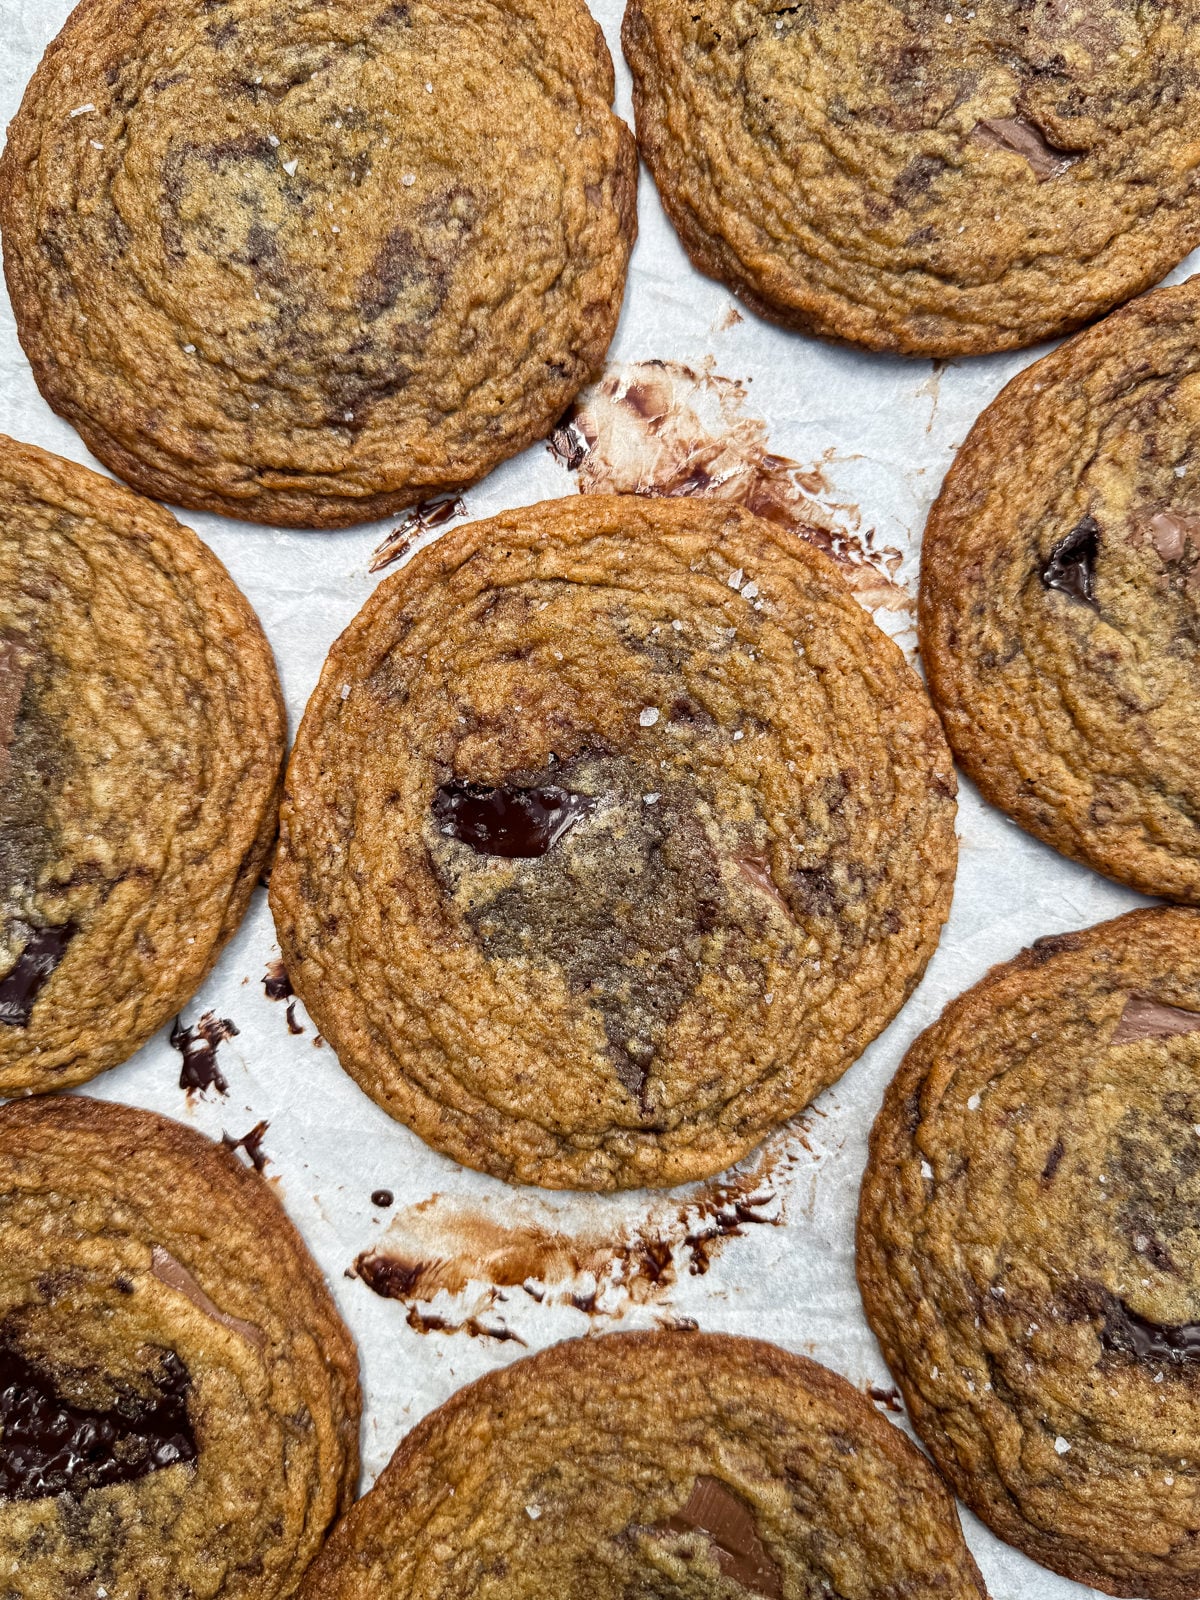
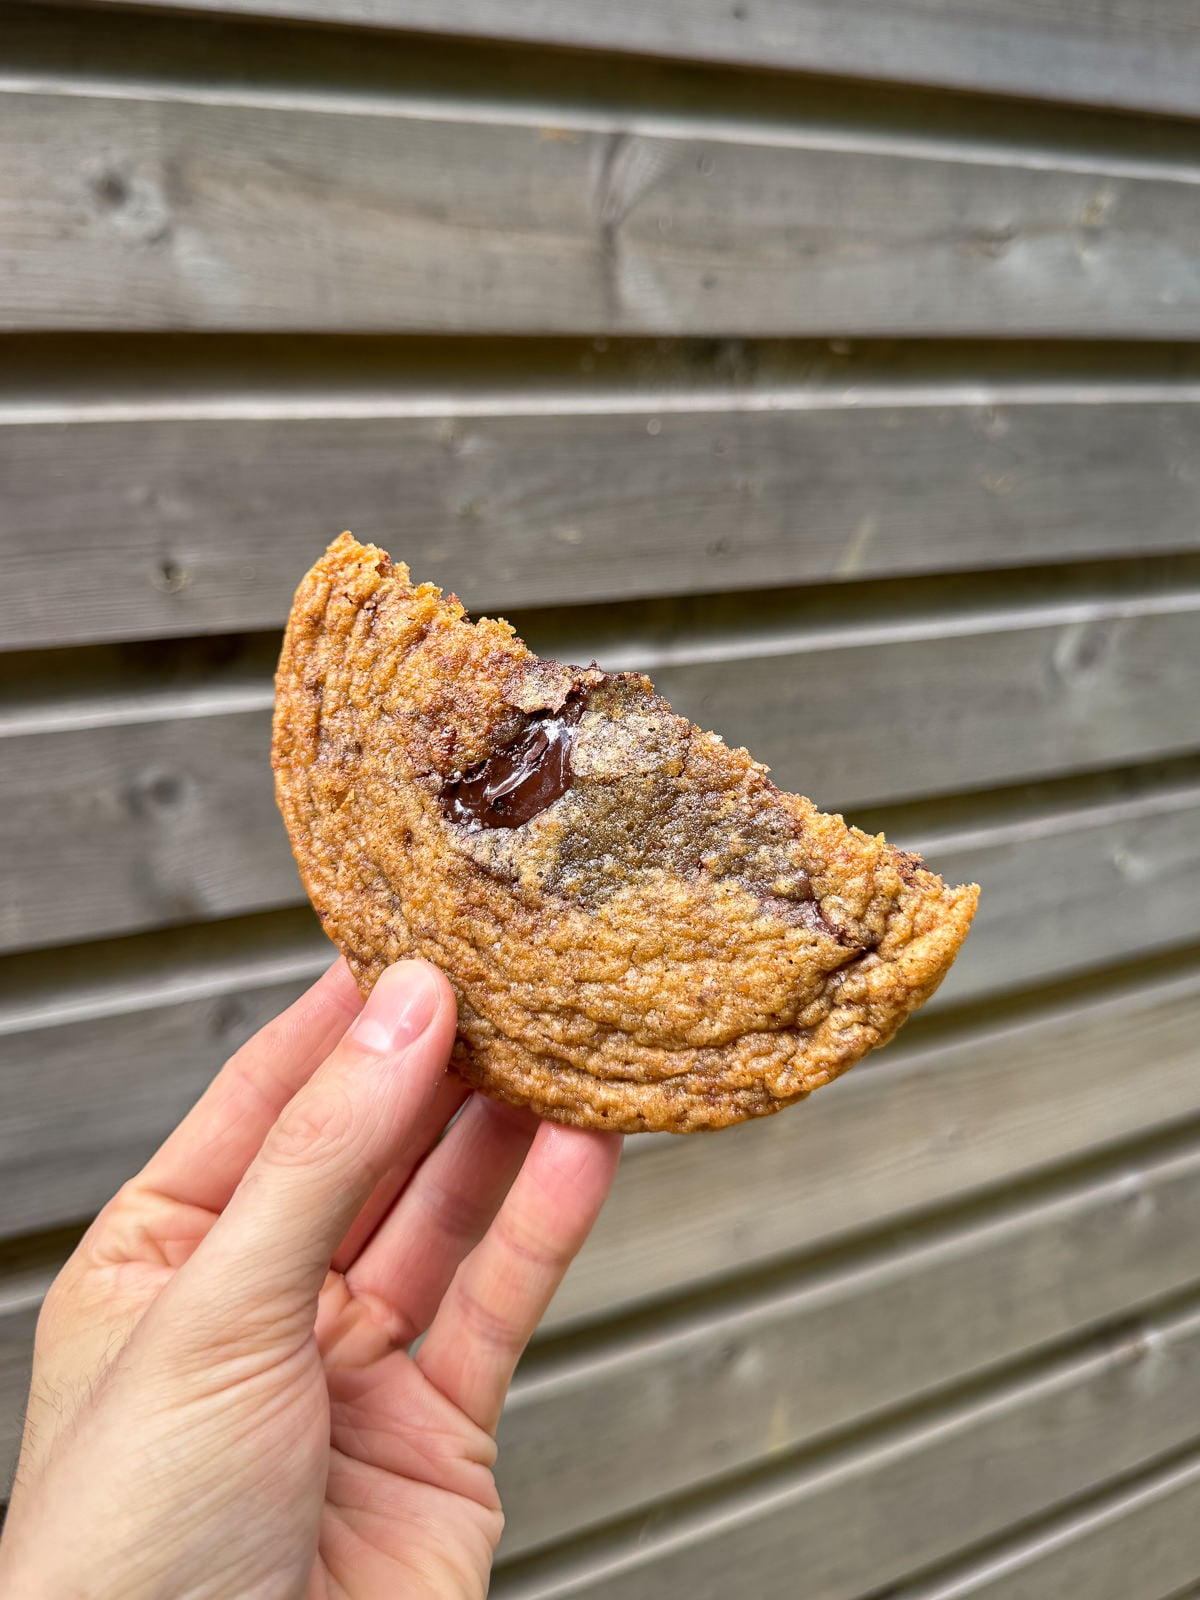
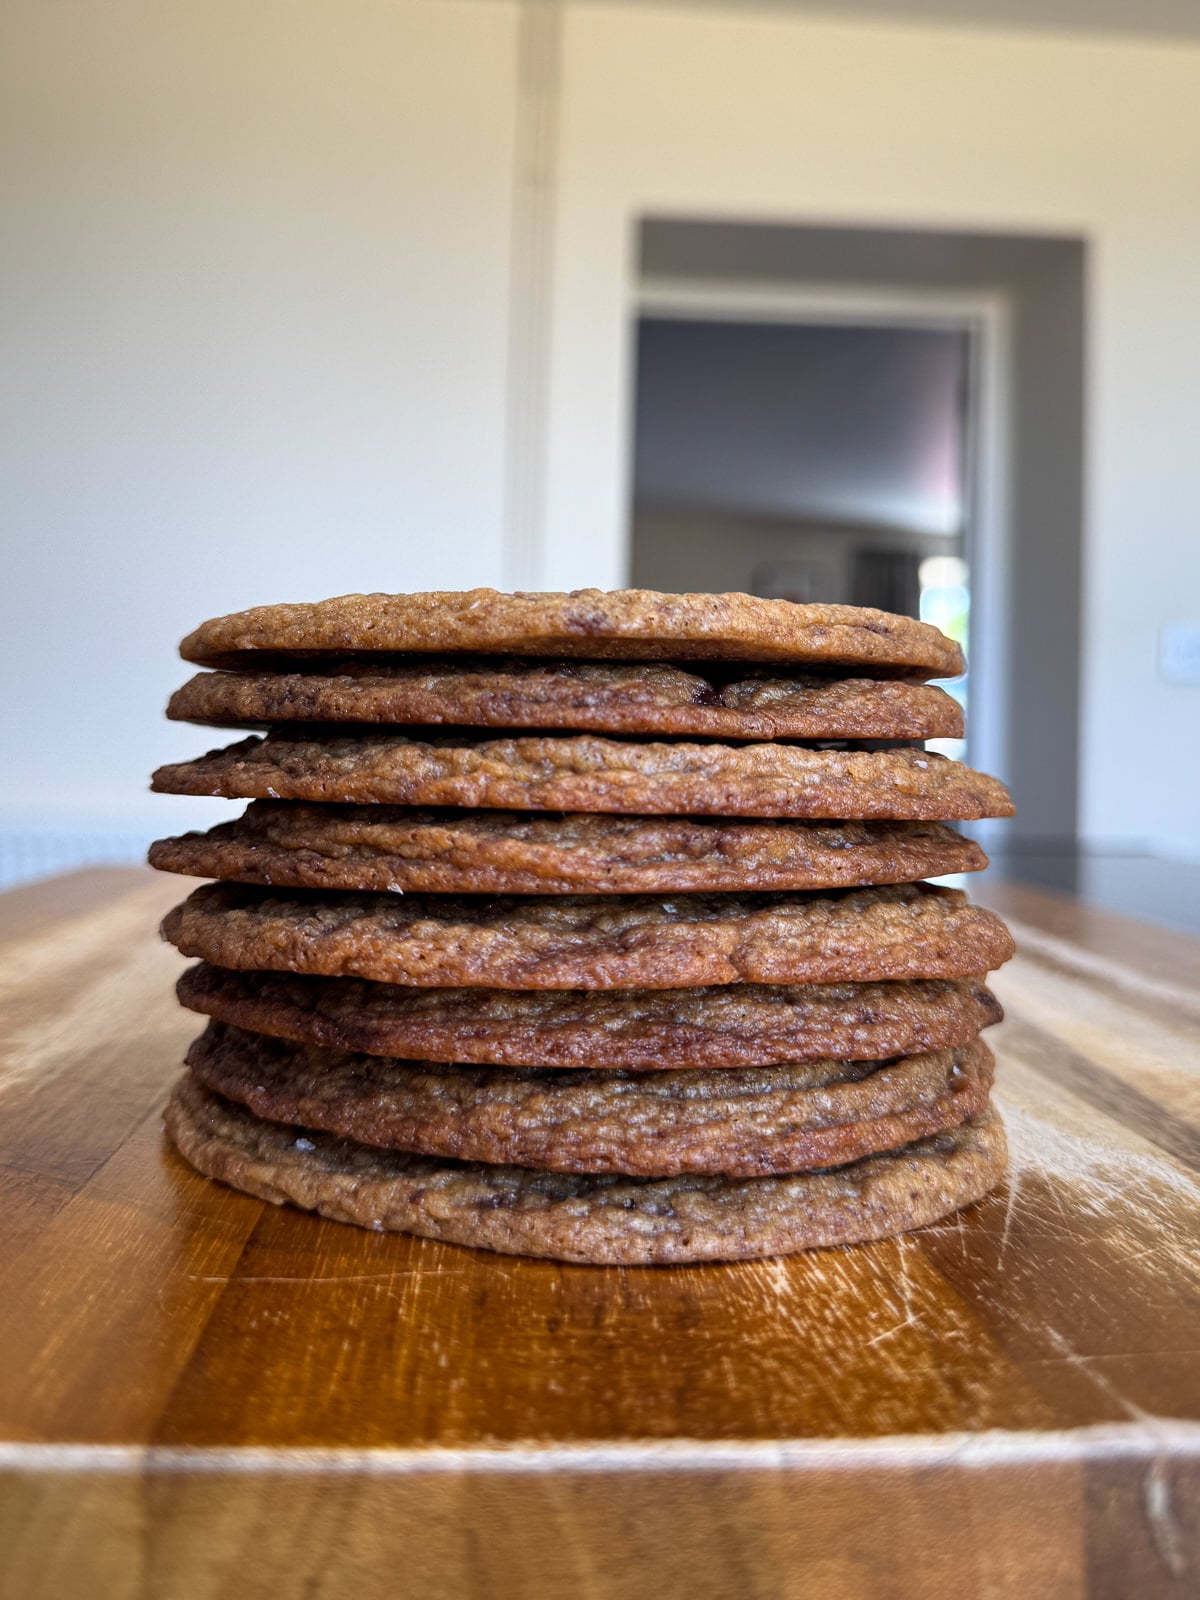
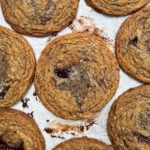
The edges of these cookies are crisp, golden and perfectly wrinkled then as you work your way towards the centre, the texture starts turn fudgy and chewy. There’s chunks of chocolate in every bite, plus molten pools of melted chocolate on the surface. They’re the ultimate chocolate chip cookie and are perfect for when you want a cookie that’s thin & crisp instead of soft & thick.
This is easily one of my new favourite cookie recipes and they can be customised to suit your tastes. I used a mix of milk and dark chocolate but you could use white chocolate instead or a mix of all 3! I also added toasted milk powder to the brown butter, for double the flavour but don’t worry if you haven’t got any they’ll still be really good. It’s just one of those baking tricks that’s used to add extra flavour!
For more cookie flavours, check out our ever growing collection of cookie recipes! There’s a whole load of flavours here, from banana bread, to brown butter oreo & black sesame cheesecake. If there’s a cookie that you’d like to see on the blog, feel free to leave us a comment at the bottom of this post!
Ingredients For Thin & Crispy Chocolate Chip Cookies
- Butter – I like to use unsalted butter for cookies (and most baking recipes!) as it allows more control over how much salt is added. Different brands of butter will contain different amounts of salt, so using unsalted is best!
- Toasted Milk Powder – Added for double the brown butter flavour! This is made by toasted dried milk powder until golden brown & is a super handy ingredient to have in your cupboard. For more info, take a look at my toasted milk powder guide.
- Sugars – This cookie dough is made with both caster & brown sugar, for the best flavour, texture & amount of spread in the oven.
- Eggs – You’ll need a large egg, plus 2 additional yolks for this batch of cookies. A large egg should weigh around 55 grams out of the shell.
- Flour – For the best texture, we’re using plain flour for the cookie dough.
- Bicarbonate Of Soda – This batch of cookies is made with just bicarbonate of soda as we want them to spread without rising.
- Salt – You’ll need 2 types of salt for this cookie recipe. Fine table salt for the cookie dough and sea salt for sprinkling on top of the baked cookies.
- Chocolate – You can use milk, dark or white chocolate for these cookies; I used a mix of milk and dark. It’s best to use a chopped bar of chocolate as it will melt better than chocolate chips.
- Vanilla – Using a good quality vanilla extract adds the best flavour!

How To Make Brown Butter Cookie Dough For Thin Cookies
We’ve taken a classic brown butter chocolate cookie dough and adjusted it slightly to make thinner, flatter cookies with crispy edges & fudgy centres. This includes using just cooled brown butter, using less flour & baking at a lower temperature.
Adjustments To Make For Thinner Cookies
- Use Just Brown Butter
Usually, I use a mix of brown butter & softened butter for chocolate chip cookies. But as we want these cookies to be thinner, we’re using 100% brown butter. - Less Flour
Adding less flour to cookie dough means that it will spread more in the oven. This will make the dough slightly softer, so we chill it briefly before shaping. - Add Milk
Browning the butter removes moisture, so we’re adding it back in with milk. I used whole milk but semi skimmed will work as well. Or you could use almond, oat milk or similar, instead. - Bicarbonate Of Soda
I tend to use both baking powder & bicarbonate of soda when making regular cookies but as we want these to be thin & flat, we’re only using bicarb. Bicarbonate of soda helps cookies spread whereas baking powder would give them a lighter, risen texture. - No Overnight Chill
With regular chocolate chip cookies, you’d chill them before baking to prevent them from spreading out too much in the oven. We want the opposite for these cookies, so we skip the chilling step. - Bake At A Lower Temperature
Cookies baked at a lower temperature will spread out more, as the dough will take longer to set in the oven. This is exactly what we want for this batch of thin cookies!
1. Brown Butter
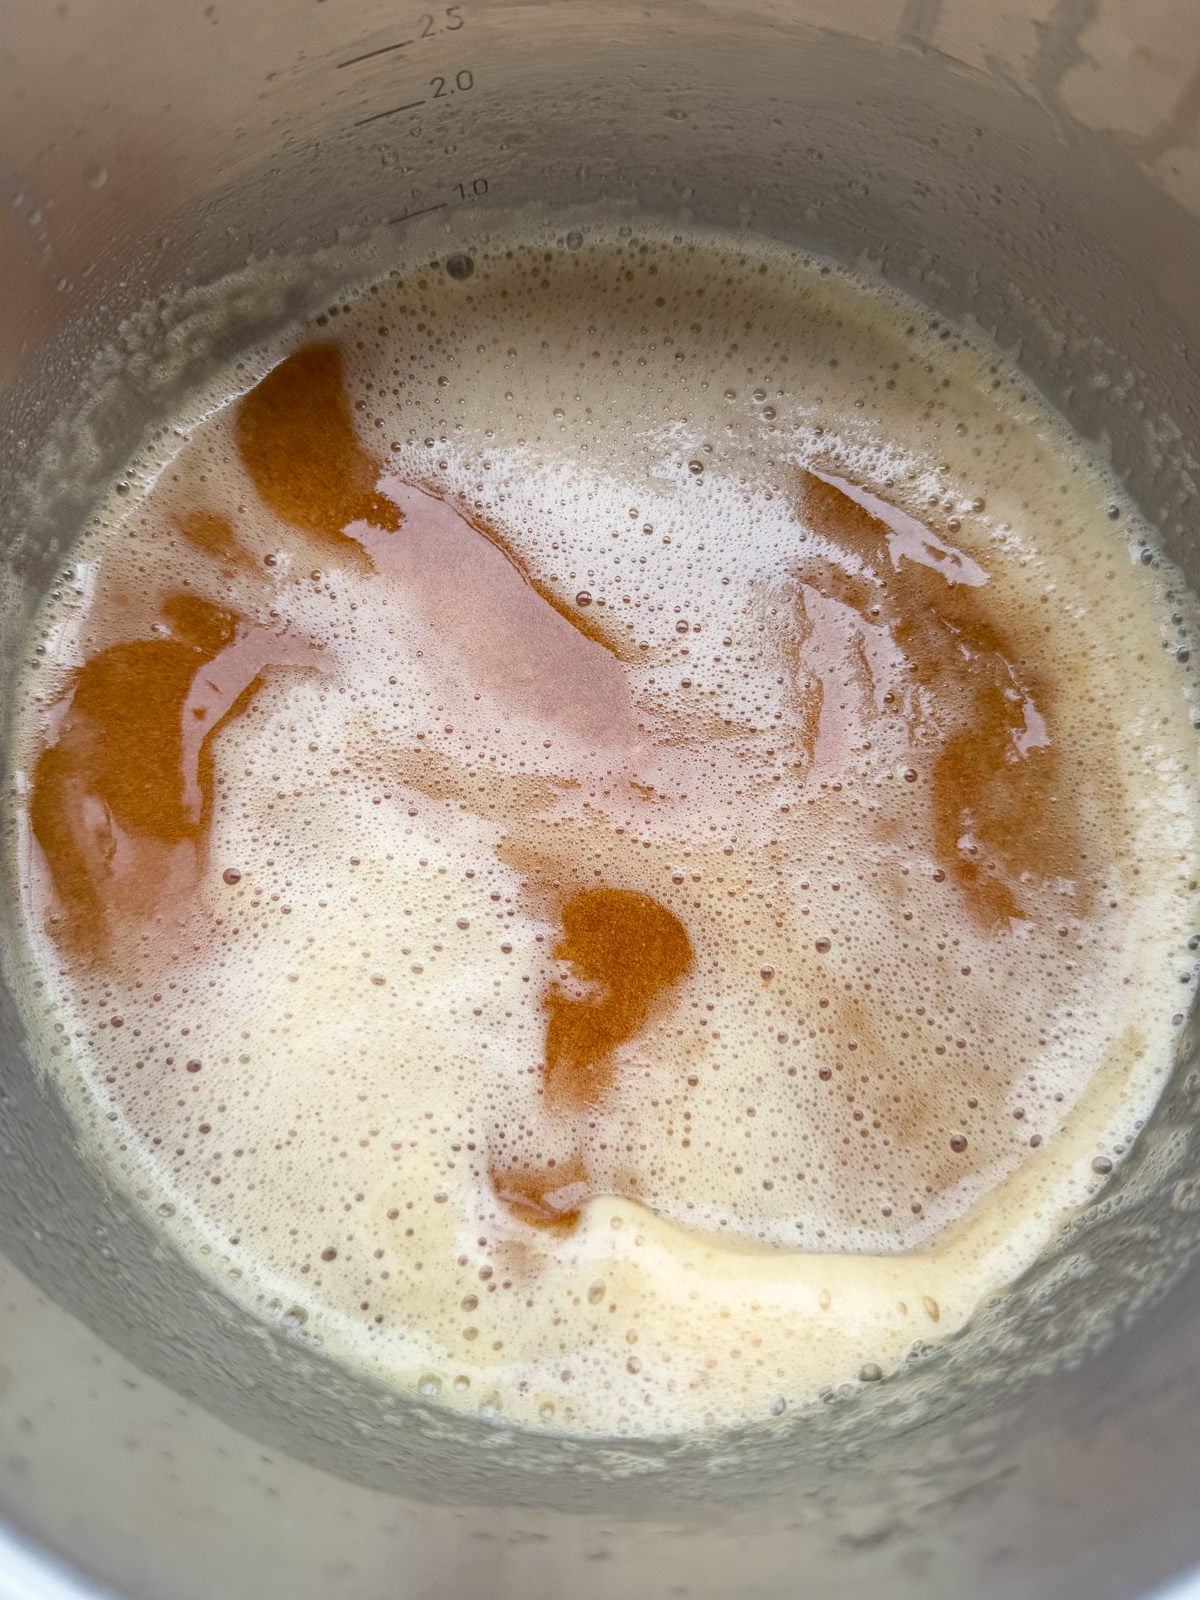
This cookie dough starts with brown butter, which we cook first then leave to cool to room temperature (this is key!). If you’ve never made brown butter, I’d highly recommend checking out my brown butter guide! It’s super easy to make; you cook butter in a pan over a medium heat until it starts to foam, the milk solids have turned a deep golden brown & the butter smells nutty.
For an extra nutty, caramelised flavour stir toasted milk powder into the brown butter as soon as it’s cooked. Toasted milk powder is essentially a powdered version of brown butter & adding it makes double brown butter! This is completely optional though & these cookies will taste great with or without added milk powder.
2. Mix Dough
Once the brown butter has cooled to room temperature, add it to the bowl of a stand mixer along with caster sugar, brown sugar & vanilla extract then mix with the paddle on a medium-low speed until combined (don’t over mix).
Next, gradually add a whole egg, 2 additional yolks and milk to the butter whilst mixing. The butter & sugar will look sandy to begin with but will come together as you mix in the eggs.
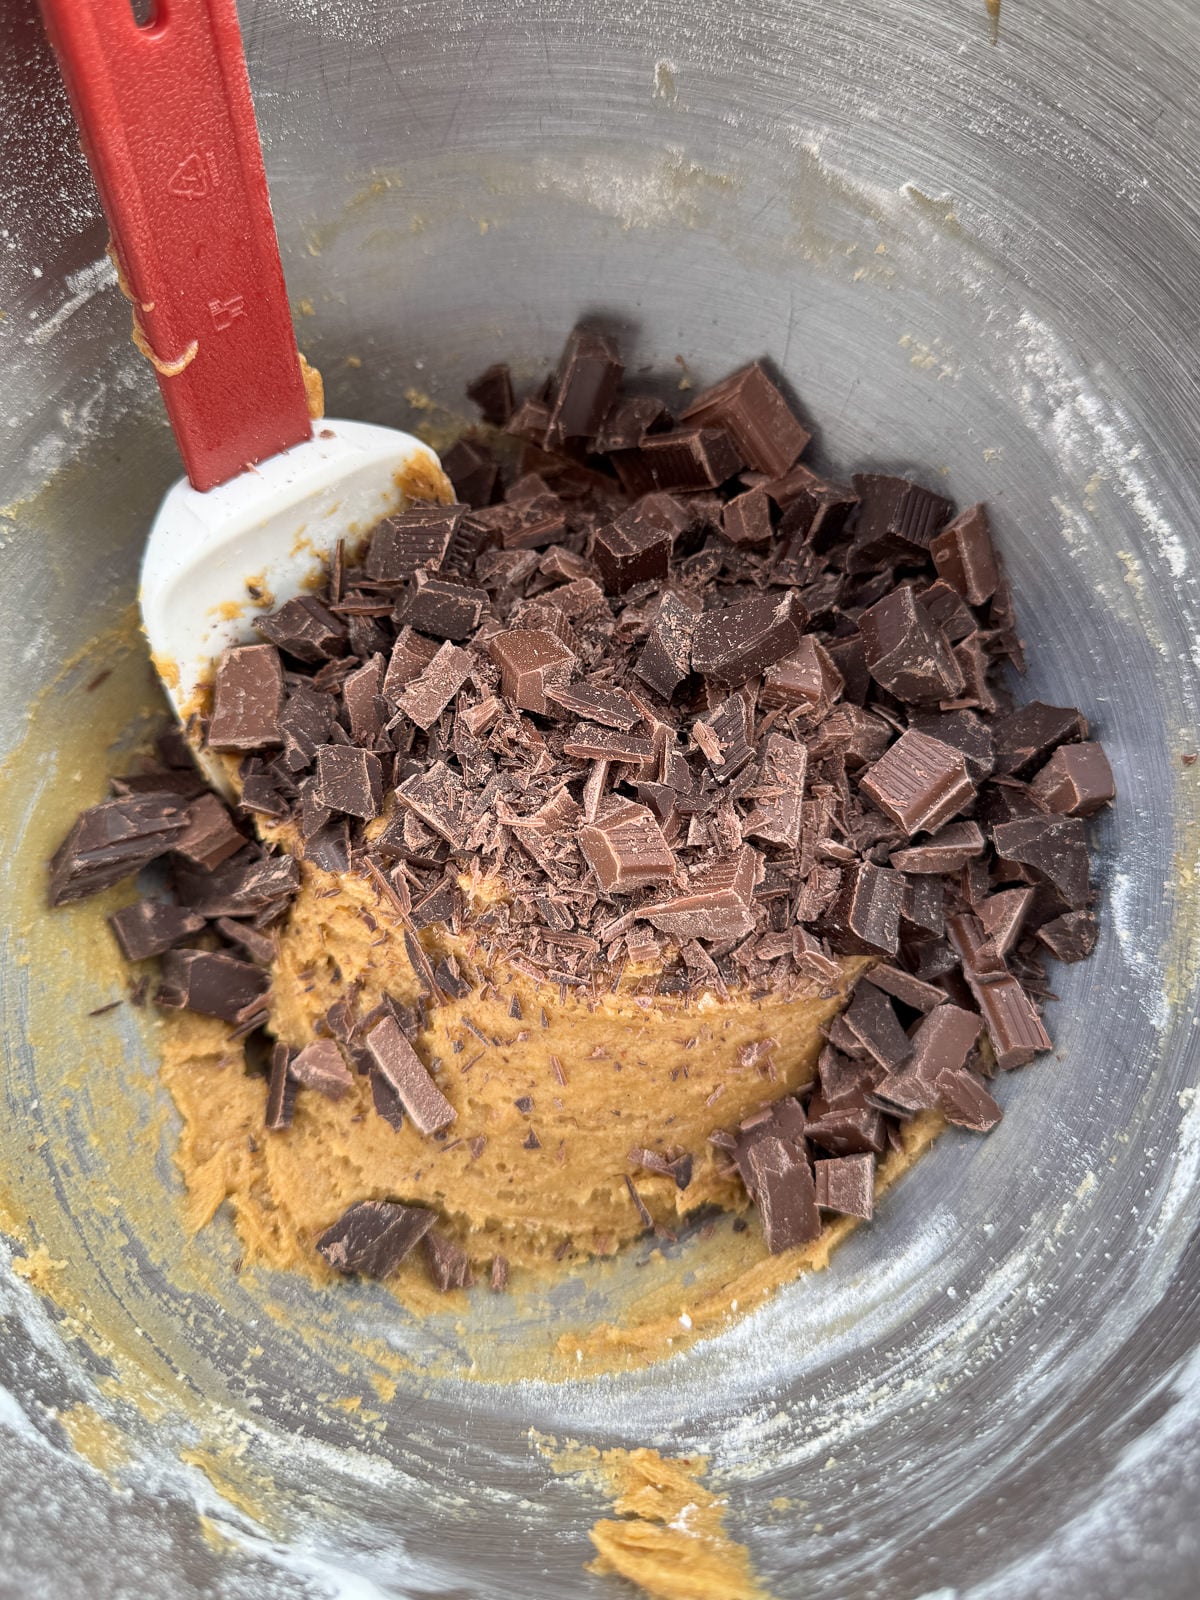
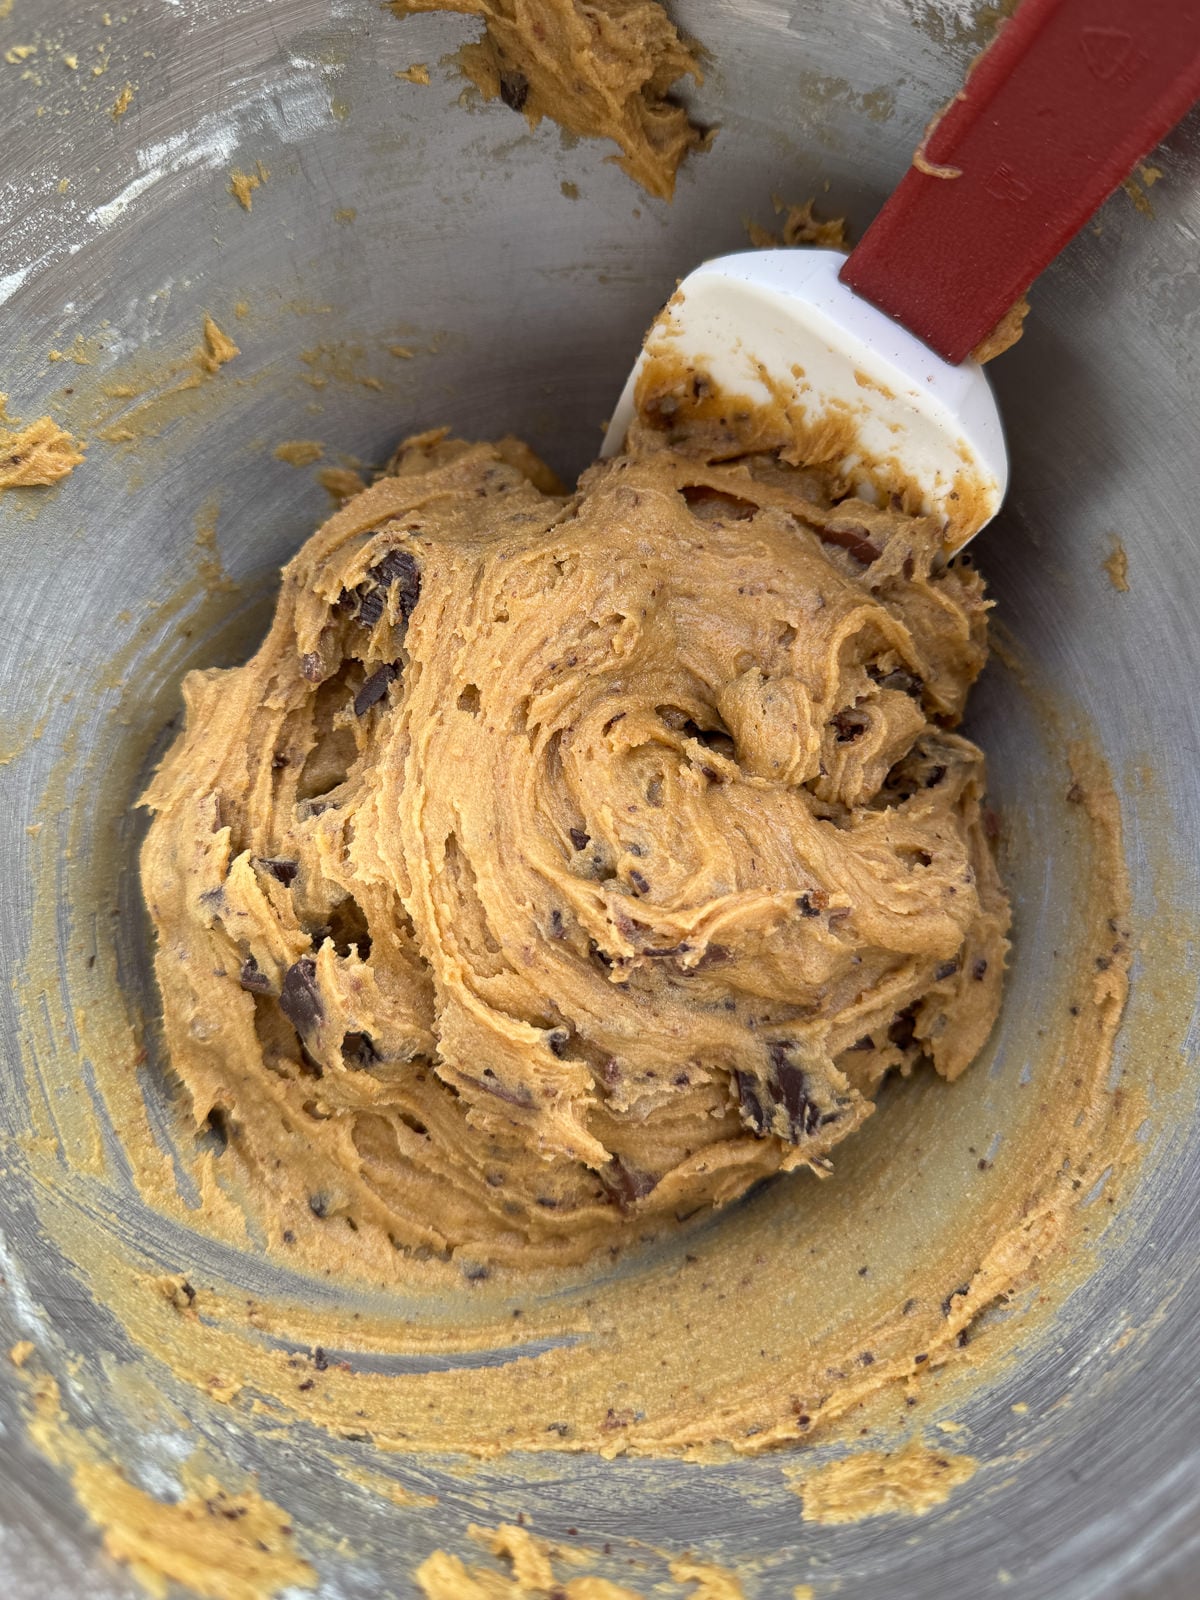
To finish the dough, gently mix in flour, bicarbonate of soda & salt until just combined then fold in chopped chocolate. Stop mixing once the flour has almost all been mixed in then any streaks will be incorporated when you fold in the flour!


3. Chill Then Shape
Once the cookie dough has been mixed, chill it in the fridge for 45 minutes. A short chill firms the cookie dough up slightly, making it easier to scoop & roll. This also gives the flour time to hydrate, preventing greasy cookies.
4. Scoop And Roll
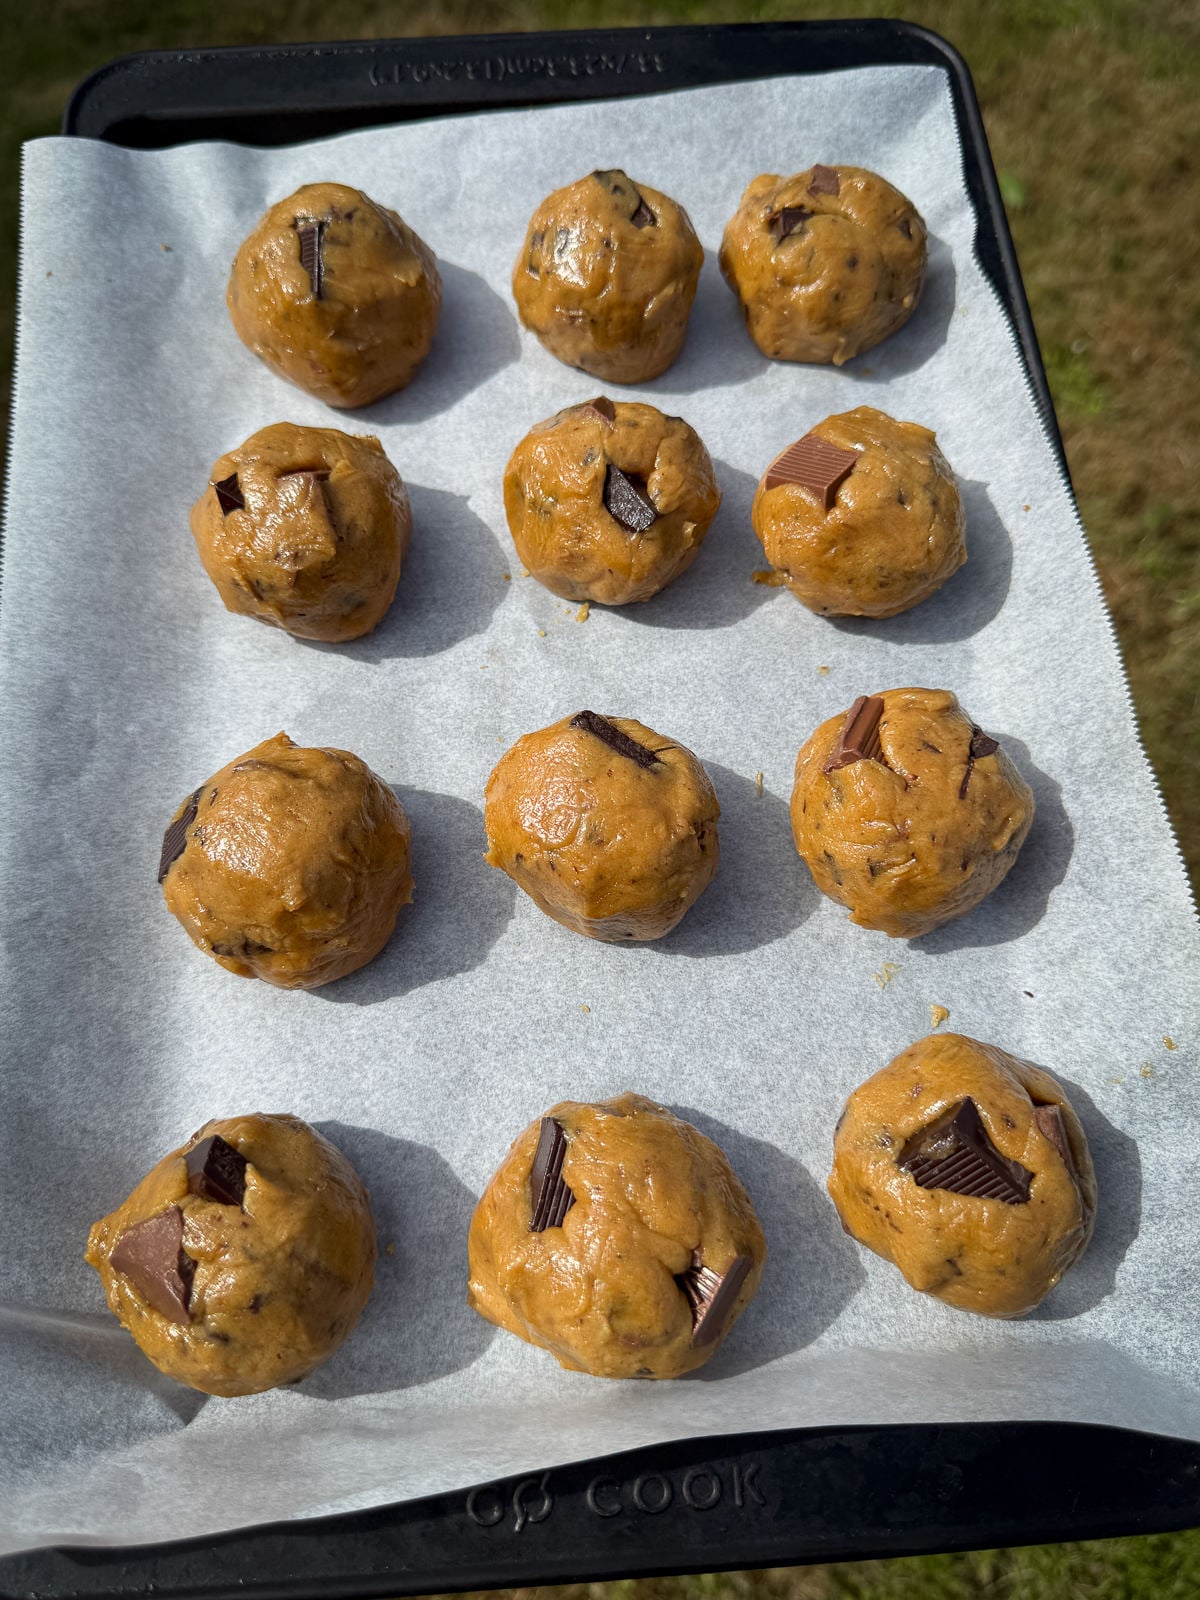
The last step before baking is to scoop the cookie dough into 12 x 65 gram portions. Then use your hands to roll each piece into a ball before pressing dark & milk chocolate chunks on top (one of each).
The Pan Banging Technique For Baking Cookies
I’m a huge fan of the pan banging technique for baking cookies, as it gives them crispier edges, molten pools of chocolate & a fantastic crinkled texture. This technique is perfect for thin cookies, as it helps them spread out more as they bake.
This technique was developed by Sarah Kieffer from The Vanilla Bean Blog and involves banging the tray of cookies onto your oven rack towards the end of the cooking process. It’s super easy to do & I use it for most of my cookie recipes!
Here’s how to bake thin chocolate chip cookies cookies using the pan banging technique.
- Bake the cookies at 175°c/350°f for 6 minutes (undisturbed).
- Next, open your oven door, lift up the baking tray inside the oven by a few inches then let it drop down against the oven rack. Use enough force so that the cookie starts to deflate.
- Bake for another 3 minutes then repeat the pan banging process.
- Bake for another 3 minutes (bringing the total bake time to 12 minutes) then take the cookies out of the oven.
- Give the tray a firm tap on the counter as you take it out of the oven then leave to cool.
The Cookie Scoot
The cookie scoot is a technique used to shape cookies into a perfect circle as soon as they come out of the oven. To do this, take a large circular cutter & use it to move (or scoot) the edges of the cookies, to make a perfect a circle. This is the secret to making a batch of uniform cookies.
As these cookies are thinner & bigger than regular chocolate chip cookies, you’ll need to use a larger cookie cutter or the edge of a smaller one, to scoot a smaller section of the cookie at a time. Or leave the cookies as they are, it’s up to you!
Tips & Tricks
- Add toasted milk powder to the brown butter, for double the flavour!
- Use a chopped up chocolate bar in the cookie dough, as it will melt better than chocolate chips. This recipe will work with milk, dark or white chocolate so use whatever type you like.
- Make sure to scrape the mixing bowl down with a rubber spatula regularly when mixing the dough, to avoid streaks of unmixed ingredients.
- Chill the cookie dough after mixing as it will make it easier to scoop & roll. Bake the dough straight after rolling though, for the perfect amount of spread.
- Use a large round cutter to “scoot” each cookie into a more uniform shape.
- To finish, sprinkle the cookies with sea salt. This brings out the flavours from the chocolate.
Frequently Asked Questions
Thin chocolate chip cookies are best eaten within 3 days & should be stored in an airtight container so they stay fresh.
For thin cookies, it’s best to bake them without chilling so they spread out fully. However, you can chill the cookies for a day or two but you will need to let them come back up to room temperature before baking.
Thin chocolate chip cookies can be made with milk, dark or white chocolate or a mix! It’s best to use chopped bars of chocolate as they will melt better.
I wouldn’t recommend changing brown butter for regular butter as the recipe has been developed using brown butter. Using regular butter instead will affect the texture & flavour of the cookies and how they spread in the oven.
Bake the cookies on a grid shelf placed onto the floor of the baking oven, with a cold plain shelf slid onto the third from bottom set of runners. Use the boiling plate to brown the butter.
More Easy Cookie Recipes To Try
- Brown Butter Oreo Chocolate Chip Cookies
- Lemon Drizzle Cookies
- Kettle Chip Chocolate Chip Cookies
- Chewy Ginger Molasses Cookies
- Brown Butter & Vanilla Glazed Cookies
- Black Sesame Cheesecake Cookies
If you have enjoyed this recipe for thin cookies, it would mean a lot if you could leave a review & rating. And if you’d like to stay up to date with future recipes, follow us on Instagram & TikTok or subscribe to our newsletter!
Thin Brown Butter Chocolate Chip Cookies
Equipment
- Stand Mixer
- Saucepan
- Sieve
- Baking Trays
- Large Round Cookie Cutter
Ingredients
Brown Butter Cookie Dough
- 150 g Unsalted Butter (120g Once Browned – See Notes)
- 2 tsp Toasted Milk Powder (Optional – See Notes)
- 130 g Caster Sugar
- 100 g Dark Brown Sugar
- 2 tsp Vanilla Extract
- 1 Large Egg (55g Out Of The Shell)
- 2 Egg Yolks
- 20 g Milk (Whole Or Semi Skimmed)
- 180 g Plain Flour
- ½ tsp Bicarbonate Of Soda
- ½ tsp Table Salt
- 75 g Dark Chocolate (Roughly Chopped)
- 75 g Milk Chocolate (Roughly Chopped)
For On Top
- 50 g Dark Chocolate
- 50 g Milk Chocolate
Instructions
Brown Butter Cookie Dough
- Start by browning the butter. To do this, chop the butter into evenly sized pieces then place into a medium saucepan. Place over a medium heat & allow to melt, stirring regularly with a spatula. Keep cooking, until the butter starts to foam, smells nutty & you can see that the milk solids in the bottom of the pan have turned golden brown.
- Once the butter has browned, take it off the heat & immediately stir in the toasted milk powder. Transfer the butter to a bowl & leave to cool to room temperature. The butter will take around 30 minutes to cool. It's key to let the butter cool completely before using it, otherwise the cookies may be greasy.
- Add the brown butter, caster sugar, brown sugar & vanilla into the bowl of a stand mixer then using the paddle attachment, mix on a medium-low speed until just combined. Make sure not to over mix the butter. It will look a bit sandy at this point but will come together when you add in the eggs.
- Next, add the egg, yolks & milk into a separate small bowl then beat together with a fork. Then with the mixer running a medium-low speed, gradually pour in the eggs. Make sure to let each addition of egg mix in fully before adding in more then stop mixing once all the egg has been incorporated.
- Sift the flour & bicarbonate of soda into a separate bowl, add in the salt then whisk to combine. Then add into the butter & mix on a low speed until just combined. A few streaks of flour is fine here!This just ensures that the bicarb & salt is evenly distributed through the flour.
- Take the bowl off the mixer, add in the chopped chocolate then use a spatula to fold into cookie dough. Chill the cookie dough in the fridge for 45 minutes.Any streaks of flour will now be mixed in.
Rolling & Topping
- Whilst the cookie dough is chilling, cut the dark & milk chocolate into 24 chunks (12 of each). You'll also need to preheat an oven to 175°c/350°f (155°c/311°f fan).
- Once the cookie dough has firmed up slightly, use a cookie scoop (or a spoon), to portion it into 12 equally sized portions. Each should weigh around 65 grams.
- With your hands, roll a portion of cookie dough into a ball then press a dark & milk chocolate chunk into the top. Repeat with the remaining dough, placing them onto a lined baking tray as you roll.There's no need to chill the cookies before baking, they need to be cooked straight away!
Baking
- Place 3-4 balls of cookie dough onto a large baking tray that's been lined with baking parchment. Make sure to leave plenty of space between each cookie as they will spread in the oven.
- Bake the cookies for 6 minutes then open your oven door, lift up the baking tray inside the oven by a few inches then let it drop down against the oven rack. Use enough force so that the cookie starts to deflate. (This is the “Pan Banging” method.)
- Bake for a further 3 minutes then repeat the pan banging process.
- Bake for another 3 minutes (bringing the total bake time to 12 minutes) then remove from the oven. Tap the tray on the counter when you set it down, to knock any air out of the cookies.
- As soon as the cookies come out of the oven, use a large round cookie cutter to scoot each cookie into a more uniform round shape. Sprinkle each cookie with sea salt then leave to cool completely on the tray.
- Repeat the cooking process with the remaining cookies, baking 3-4 cookies at a time. Make sure to use a cold tray for each batch.
Notes
❤️ Stay connected with Salt Butter Smoke
The Prep List is my free weekly newsletter with seasonal recipes, kitchen notes and behind-the-scenes from my kitchen. Add Salt Butter Smoke as a Google Preferred Source to see more of my recipes in Search.