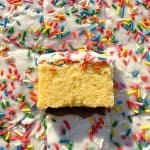
Classic School Cake
A classic school cake made with a soft & fluffy vanilla sponge, a simple white icing & loads of sprinkles! Serve this with custard for a school dinner throwback.
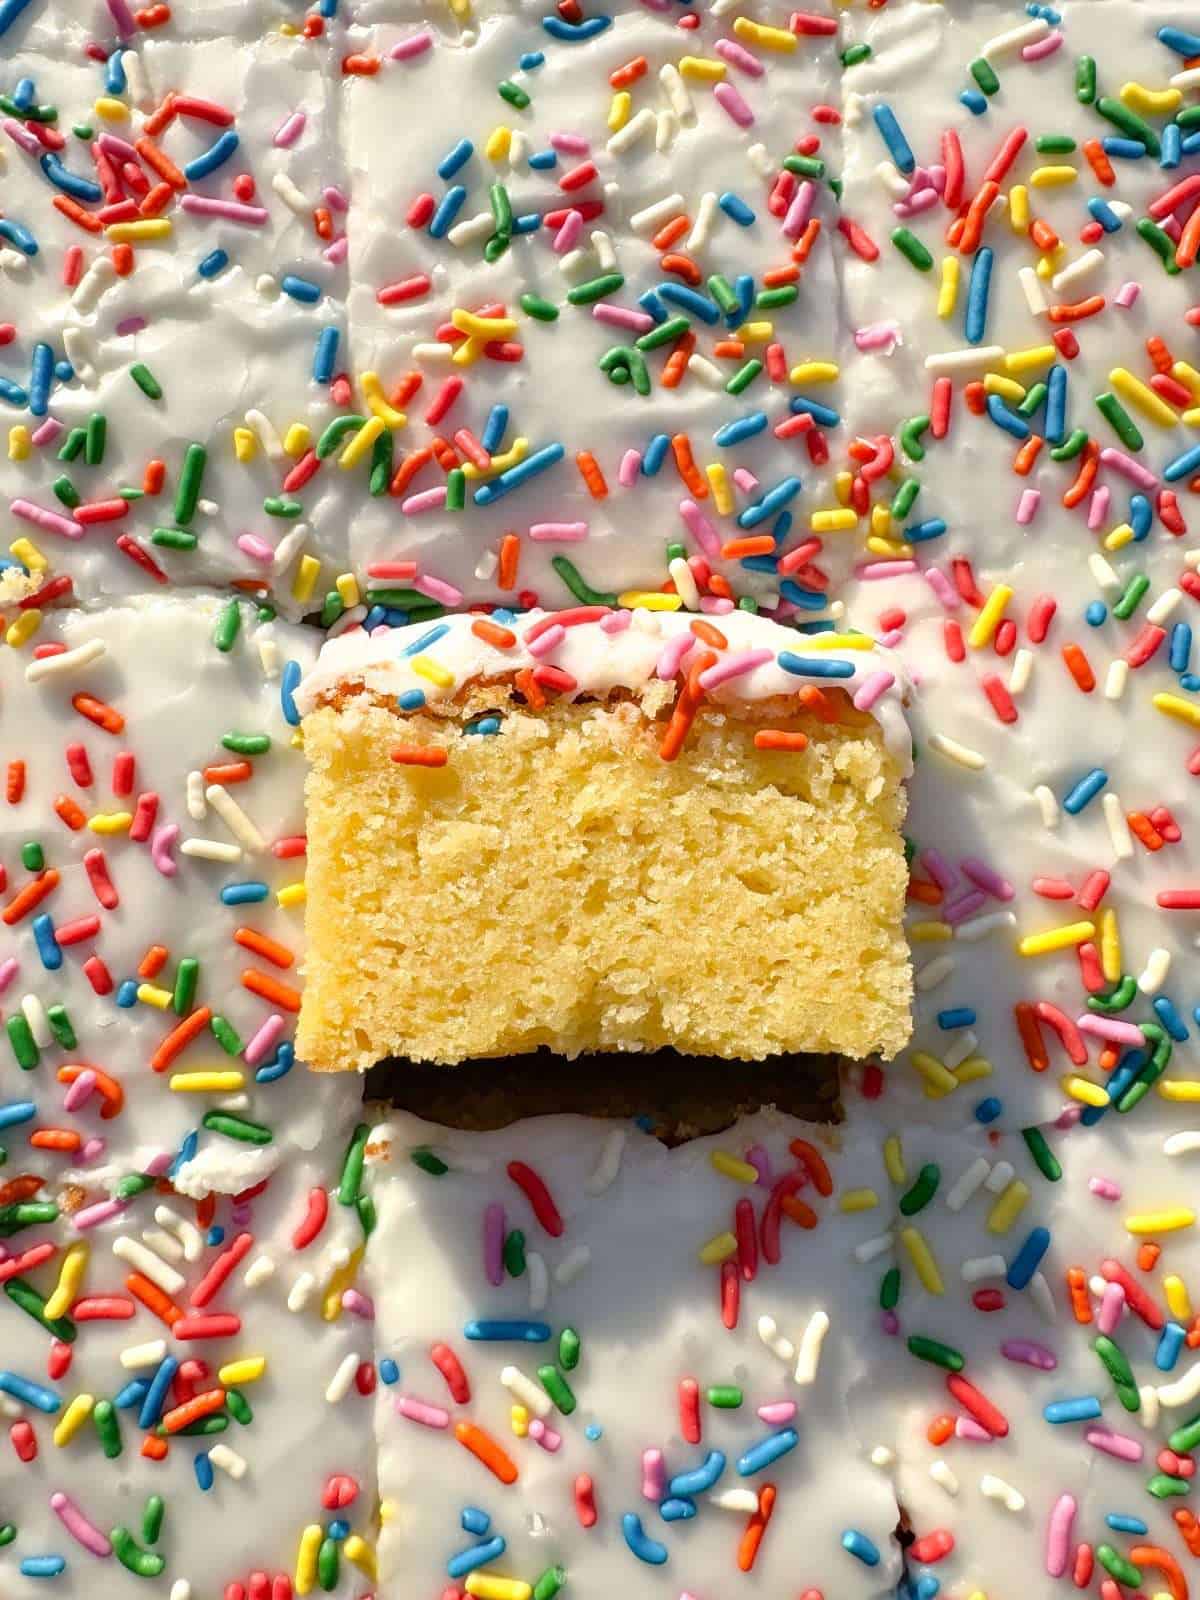
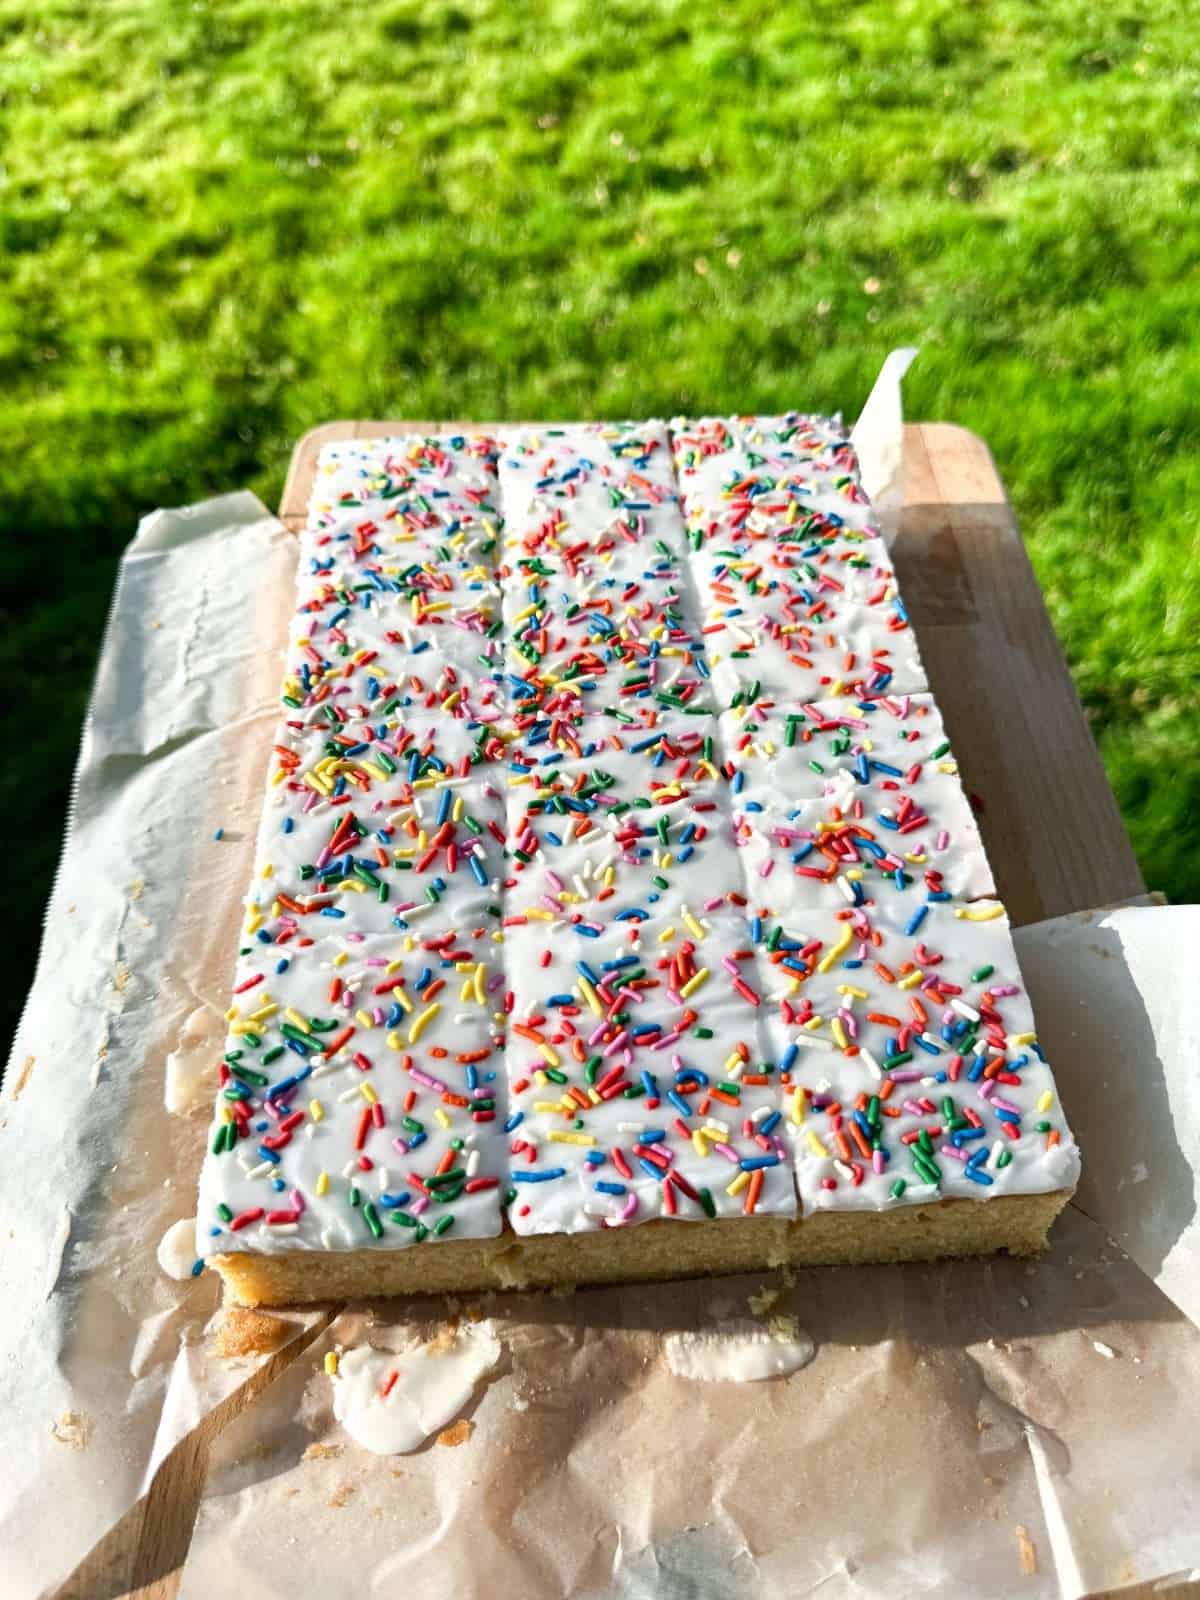
This old school cake is the exact same sponge that you’ll remember from British school dinners. A classic bake that features a soft, fluffy vanilla sponge, a simple white icing & a generous amount of rainbow sprinkles. It’s hard to beat and perfect for packed lunches, Birthday parties and as a dessert.
This is a really simple traybake that’s incredibly easy to make & is a guaranteed crowd pleaser. For the full nostalgic, school dinner experience serve your school cake with plenty of warm vanilla custard. Though it’s just as good served on its own. It’s a no fuss bake that’s iconic for a reason.
For more cakes & bakes, check out our ever growing collection of baking recipes! There’s lots to choose from here, from classic sponge cakes to brownies, cookies & blondies.
Ingredients For Classic School Cake
Here’s everything you’ll need to make an old school cake at home.
- Sprinkles – Any brand of rainbow sprinkles will work. The ones that I use come from Get Baked supplies.
- Butter – Make sure to use unsalted butter, to avoid making the cake batter too salty. Or if you’re using salted butter, use ¼ teaspoon of table salt instead of ¾.
- Sugar – You’ll need 2 types of sugar for this recipe. Caster sugar for the cake batter & icing sugar for the icing.
- Eggs – We’re using large eggs for the cake batter. For the best results, weigh the eggs as you crack them into a jug.
- Flour – Using plain flour (all purpose) gives this sponge a soft, fluffy texture.
- Raising Agents – We’re using both baking powder & bicarbonate of soda for the best rise & texture.
- Sour Cream – Adding sour cream to our cake batter adds extra fat, making the sponge moist & more flavourful. Use full fat sour cream for the best flavour & texture.
- Vanilla – Using a good vanilla extract makes all the difference when making cakes!
- Milk – The icing for our school cake is made with milk & icing sugar. Water would work as well but I find that milk gives a smoother, creamier texture and flavour.

How To Make Classic School Cake
This old school cake is quick, easy & comes together in a few simple steps. There’s only 2 components to make this retro traybake; a soft vanilla sponge & a classic white icing.
Vanilla Traybake
The key things when making a vanilla sponge are to beat the butter & sugar really well (use softened butter!), making sure to scrape the bowl down with a spatula regularly and avoiding over mixing the batter, as this can make the cake tough. Other than that, making this sheet cake couldn’t be easier!
- Beat Butter & Sugar
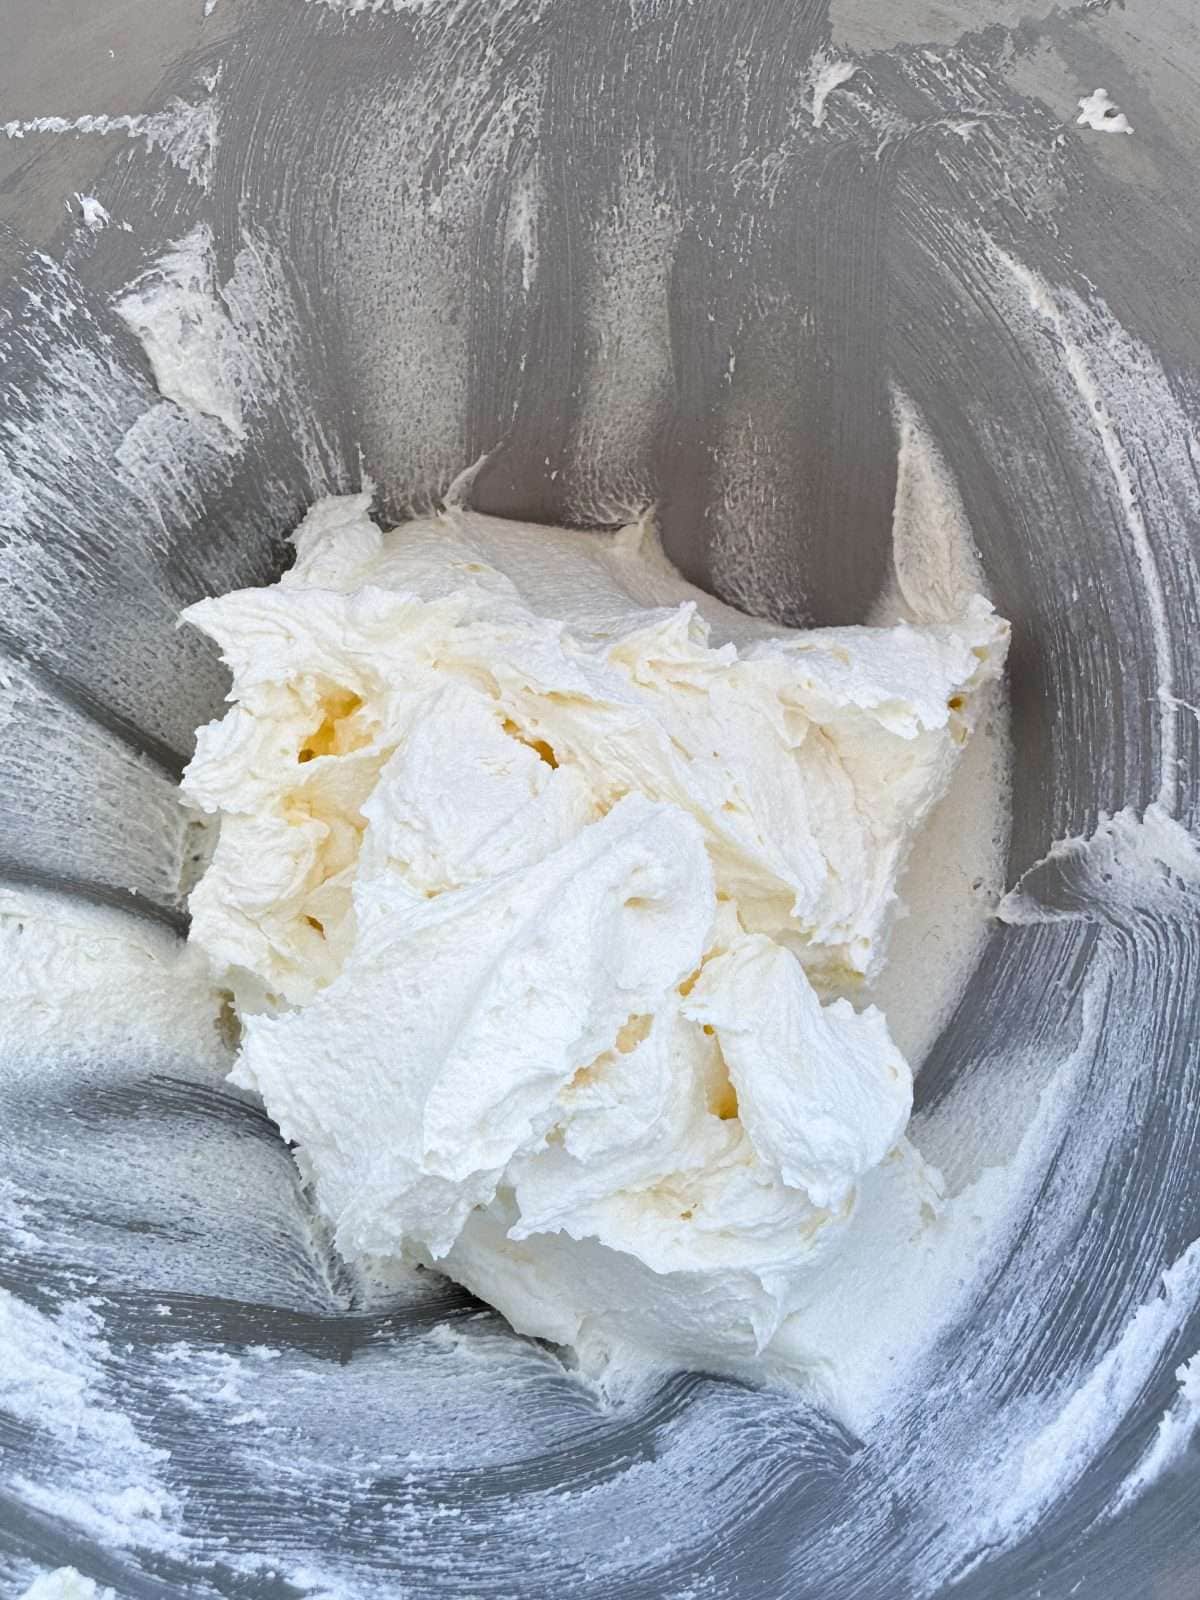
First, add softened butter & caster sugar into the bowl of a stand mixer then beat until pale & fluffy. This will take around 5 minutes on a medium speed. - Combine Dry Ingredients
Whilst the butter is mixing, add flour, baking powder, bicarbonate of soda & table salt into a separate bowl then whisk together. Set this aside for now. - Add In Eggs
Once the butter is ready, gradually mix in beaten eggs & vanilla extract, with the mixer still running on a medium speed. - Fold In Flour & Sour Cream
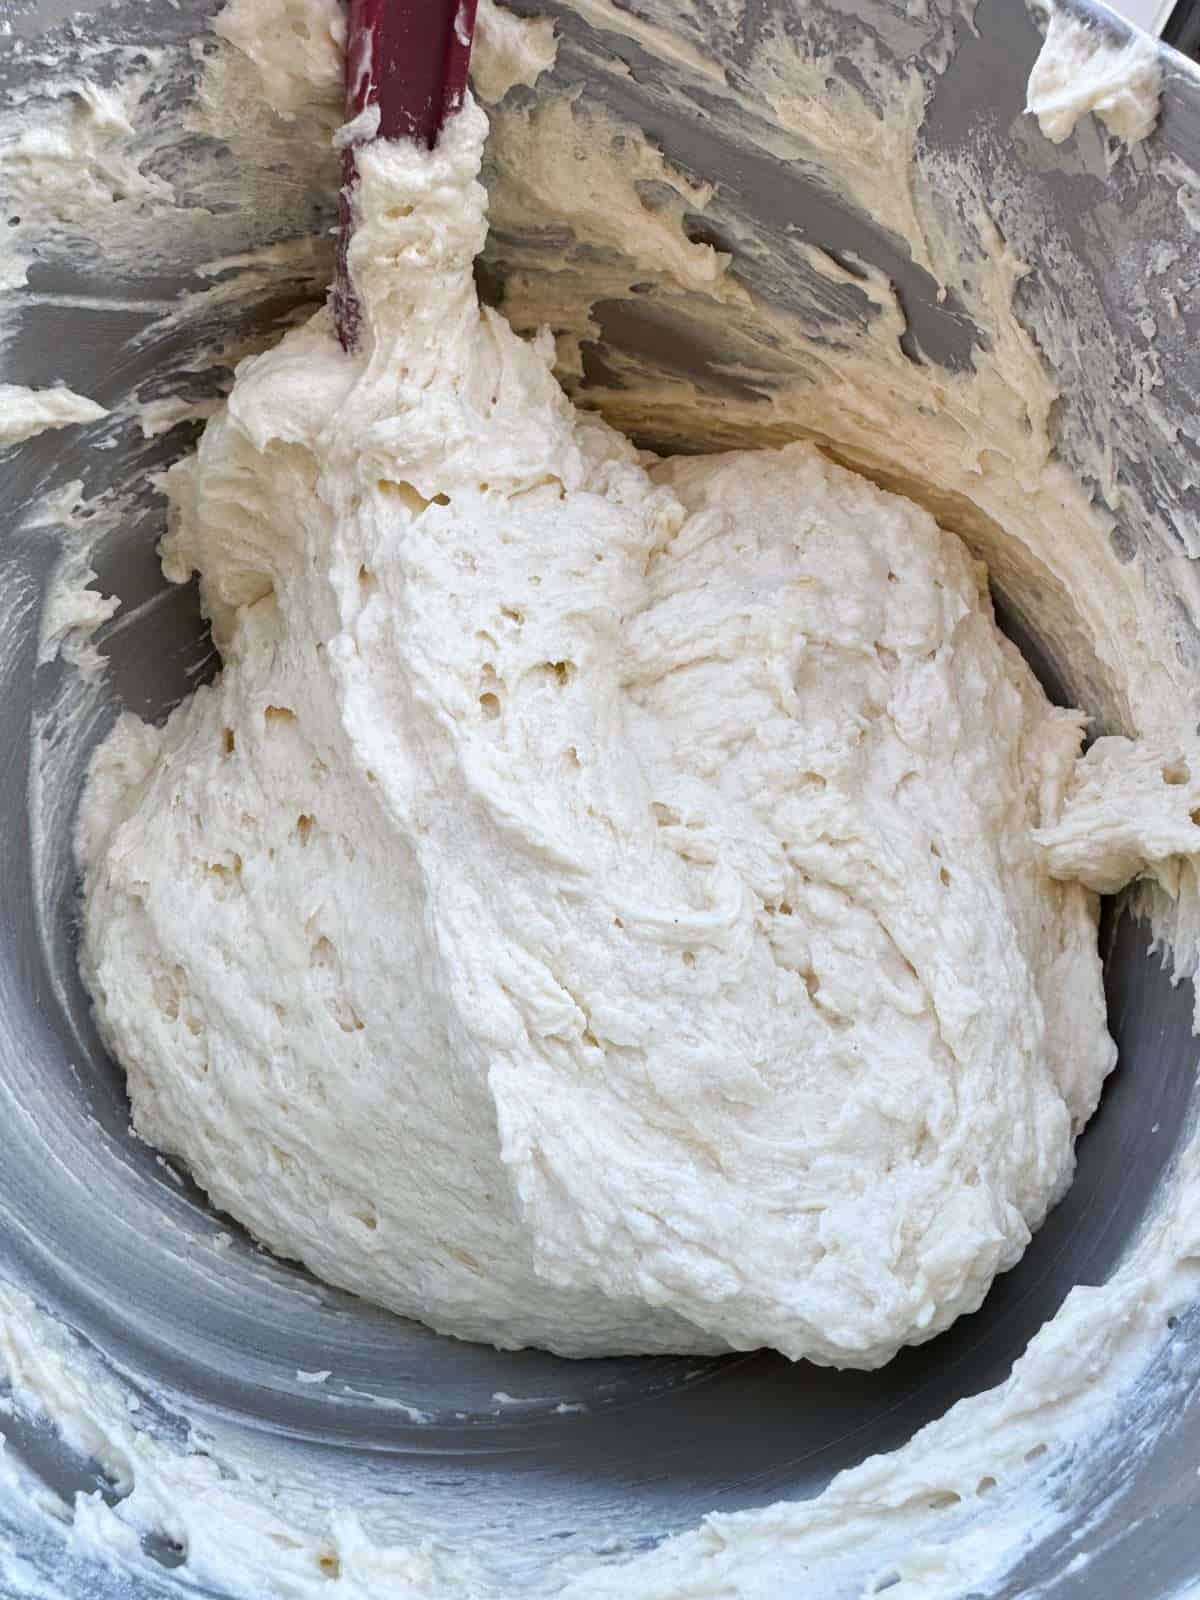
Next, gently fold in half of the dry ingredients with a spatula until just combined, followed by sour cream then the rest of the dry ingredients. Make sure to stop folding when everything is just combined – we don’t want to over mix the batter! Once mixed, the batter needs to be baked as soon as possible as the bicarb will have started to react. - Bake
Now that the batter is ready, tip it into a greased & lined 9″ x 13″ baking tin then bake for 45-50 minutes in an oven that’s been preheated to 170°c/338°f. You’ll know when the cake is done when a skewer inserted into the middle comes out clean. - Cool
Once cooked, let the cake cool in the tin for 10-15 minutes, to let it firm up slightly then carefully transfer it to a wire cooling rack & let it cool completely before topping.

Classic White Icing
The best white icing to use for school cake is made by mixing icing sugar with milk! This sets firm enough to slice, with a glossy finish. Just make sure to top the icing with sprinkles before it sets.
- Make The Icing
Sift icing sugar into a mixing bowl then gradually whisk in milk, to make a thick, spreadable icing. The icing should be thick enough to spread, without running off the side of the cake.
Tip: It’s best to add the milk in slowly. If your icing is too thick, add in more milk. If it’s too thin, add in more icing sugar. - Ice The Cake
Spoon the icing over the top of the cooled cake then use a palette knife to spread it out into an even layer that completely covers the top of the cake. - Top With Sprinkles
Sprinkle a generous amount of sprinkles over the icing before it’s set. You want the sprinkles to set into the icing. - Let It Set
Let the icing set at room temperature for 1 hour, until it has firmed up. If your kitchen is warmer than usual, place the cake into the fridge for 20 minutes instead.
Cutting Into Portions
Once your icing has set, the best way to cut the cake into portions is with a sharp, serrated knife. For clean slices, wipe the blade clean between cuts. For neater portions, you can trim the edges of the cake before slicing but this is optional.

School Cake Tips & Tricks
- Use Room Temperature Ingredients
Using room temperature ingredients helps make an evenly mixed cake batter that’s properly emulsified. - Add Sour Cream To The Cake Batter
Adding sour cream to the batter gives the cake a softer, moister texture. - Don’t Over Mix The Batter & Bake Immediately
Make sure to mix the batter until it’s just combined then get it in the oven straight away. This is key to making a soft, moist sponge with the best texture. - Let The Icing Set
Make sure to let the icing set completely before cutting the cake, to prevent it from running off. - Use Good Quality Sprinkles
For the most vibrant colour, it’s key to use high quality sprinkles. - Store In An Airtight Container
To keep your school cake fresh, make sure to store it in an airtight container. As the icing contains milk, it’s best to store the cake in the fridge but let it sit out at room temperature before serving.
Troubleshooting School Cake
Here are some common issues that can happen when making school cake & how to avoid them.
- Dry School Cake
School cake will become dry if the cake is over baked, if the batter was over mixed or if too much flour was used. To avoid dry cake, mix the batter until the flour is just incorporated & bake until a skewer inserted into the centre comes out clean. - The Cake Didn’t Rise Properly
Your raising agents (baking powder & bicarbonate of soda) are most likely expired or inactive. Make sure to use fresh raising agents and get the batter in the oven as soon as it’s been mixed. - School Cake Sunk In The Oven
You either used too much baking powder/bicarbonate of soda or opened your oven door too soon. Too avoid a sunken cake, measure out the raising agents accurately and let the cake bake for at least 30 minutes before checking it. - Icing Too Runny
Too much milk was added! To fix runny school cake icing, whisk in more icing sugar. - The Sprinkles Bled Into The Icing
Sprinkles can bleed into icing if your kitchen is too warm or if you’re using cheap sprinkles. To avoid, make sure to use high quality sprinkles & store them somewhere cool, like a cupboard or pantry.
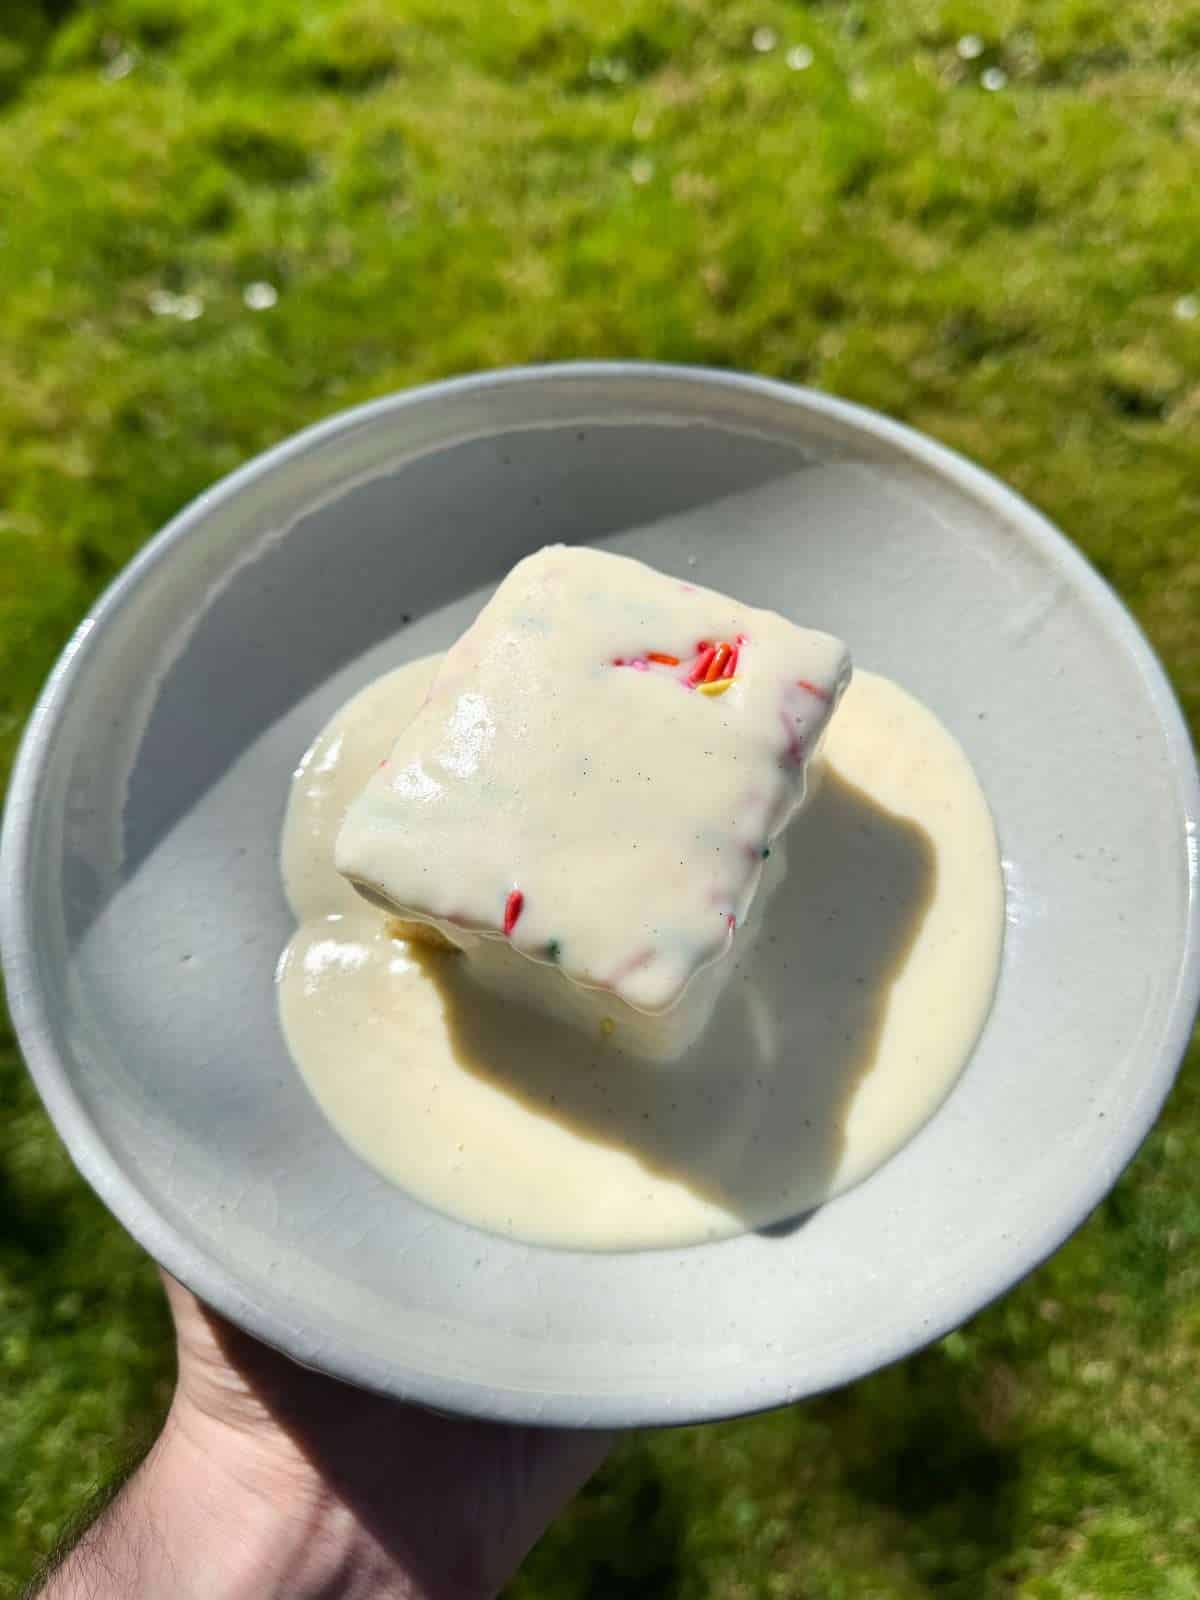
School Cake & Custard
School cake & custard is a classic British school dinner dessert! Here, iced sponge cake is served with warm custard. Either vanilla sponge with vanilla custard or chocolate sponge with pink custard (raspberry or strawberry flavour). It’s the ultimate nostalgic combination!
Our old school cake goes really well with my charred vanilla bean custard but regular vanilla custard or Bird’s custard works great as well. If you’re not a fan of custard, you can serve school cake with vanilla ice cream or pouring cream instead.
Frequently Asked Questions
School cake is best eaten within 3 days of being made & should be stored in an airtight container. If the icing is made with milk, the cake will need to be stored in the fridge but is best served at room temperature.
This style of cake is called school cake as it was traditionally served as dessert for British school dinners. School cake is a nostalgic dessert for many British adults as it reminds them of their school days!
Both water & milk will work for white icing, so you can use either & make a great icing. Milk will make the icing sweeter & richer whereas water will make the icing thinner & not as sweet. For an even richer icing, double cream can also be used.
Sour cream is added to cake batter to add fat, which makes the cake moister once baked. And because sour cream is acidic, bicarbonate of soda can also be used as well as baking powder, to give the cake more rise & a lighter, fluffier texture (bicarb needs acidity to be activated).
Although not essential, it is a lot easier to make school cake with a stand mixer. However if you don’t have a stand mixer, an electric hand mixer will work or you could even use a wooden spoon & a mixing bowl.
School cake can be frozen for up to 3 months but should be left un iced. To serve, let the cake defrost completely then top with icing and sprinkles.
How To Cook School Cake In An Aga
With all of my recipes, I include cooking instructions for conventional ovens, fan ovens & also Agas. Here’s how to cook this recipe on an Aga…
To cook school cake in an Aga, bake the cake on a grid shelf placed onto the floor of the baking oven. Slide a cold plain shelf onto the second from top set of runners just before baking the cake & leave it there for the duration of the bake.
More Baking Recipes To Try!
- Tres Leches Cake (3 Milk Cake)
- Brown Butter & Miso Pecan Pie Bars
- Chocolate Loaf Cake With Dark Chocolate Ganache
- Brown Butter Oreo Chocolate Chip Cookies
- Sour Cream Pound Cake With Vanilla Bean Icing
- Black Tahini Chocolate Sheet Cake
Watch How To Make This Recipe
If you have enjoyed this school cake recipe, it would mean a lot if you could leave a review & rating. And if you’d like to stay up to date with future recipes, follow us on Instagram & TikTok or subscribe to our newsletter!
Classic School Cake
Equipment
- 9" x 13" Baking Tin
- Stand Mixer
- Mixing Bowl
- Palette Knife
- Skewer
- Wire Cooling Rack
Ingredients
Sponge Cake
- 325 g Unsalted Butter (Softened)
- 350 g Caster Sugar
- 6 Large Eggs (See Notes)
- 2 tsp Vanilla Extract
- 325 g Plain Flour
- 2¼ tsp Baking Powder
- ½ tsp Bicarbonate Of Soda
- ¾ tsp Table Salt
- 200 g Sour Cream (Full Fat, At Room Temperature)
Icing
- 400 g Icing Sugar
- 4-5 tbsp Whole Milk
- Sprinkles
Instructions
Sponge Cake
- Preheat an oven to 170°c/150°c fan (338°f/302°f).
- Grease & line a 9"x13" baking tin with baking parchment then set to one side.
- Next, add the softened butter & caster sugar into the bowl of a stand mixer then beat with the paddle attachment until pale & fluffy. This will take around 5 minutes on a medium speed.Make sure to scrape the sides of the bowl down regularly with a spatula, to ensure that you get an evenly mixed batter!
- Whilst the butter is mixing, crack the eggs into a jug then add in the vanilla & whisk together. Add the flour, baking powder, bicarbonate of soda & salt into a separate mixing bowl then whisk to combine. I'd recommend weighing the eggs, you'll need 300 grams of whole egg in total.
- Once the butter is ready, gradually add in the eggs & vanilla with the mixer still running on a medium speed. Stop mixing as soon as the eggs have been incorporated & make sure to scrape down the sides of the bowl down regularly.
- Next, take the bowl off the mixer & sift in half of the dry ingredients. Use a spatula to gently fold the flour into the butter, until mostly incorporated then fold in the sour cream, followed by the remaining flour.Make sure not to over mix the batter!
- Transfer the batter into the lined tin, use a palette knife to spread into an even layer then bake for 45-50 minutes, until a skewer inserted into the middle comes out clean. The cake will be golden brown & will spring back when lightly pressed.The batter needs to be baked as soon as it is mixed, as the bicarb will start to react.
- Once baked, let the cake cool in the tin for 10-15 minutes then carefully transfer to a wire cooling rack & leave to cool completely.
Icing
- Sift the icing sugar into a mixing bowl then gradually whisk in enough milk to make a thick icing.The icing needs to be thick enough to spread on top of the cake. If it becomes too thin, add in some more icing sugar.
- Next, spoon the icing on top of the cake then use a palette knife to spread out to the edges. Top with a generous amount of sprinkles then leave to set. This will take at least an hour.The icing should set at room temperature but if your kitchen is warm, you may need to stick the cake in the fridge for 20 minutes or so to firm the icing up.
- Once the icing is set, use a sharp serrated knife to cut into portions. I like to trim the edges slightly to neaten the cake up but this is optional.
Video
Notes
❤️ Stay connected with Salt Butter Smoke
The Prep List is my free weekly newsletter with seasonal recipes, kitchen notes and behind-the-scenes from my kitchen. Add Salt Butter Smoke as a Google Preferred Source to see more of my recipes in Search.