
Step By Step Sourdough Bread
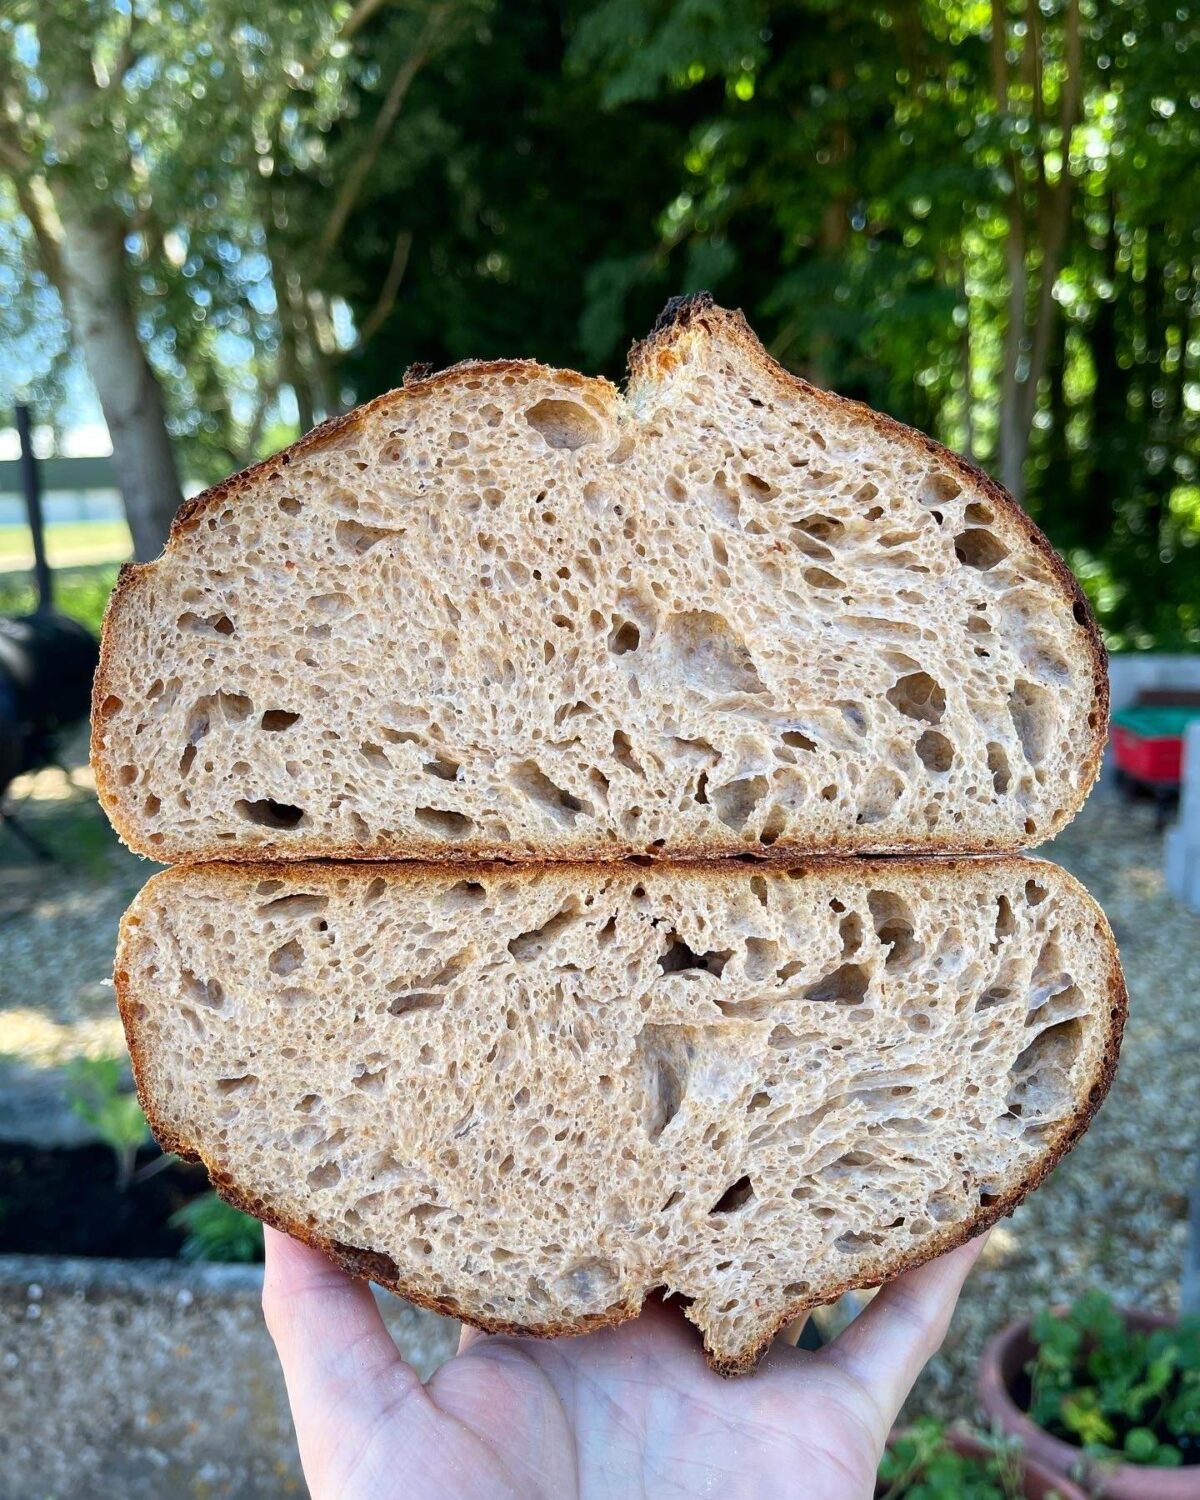
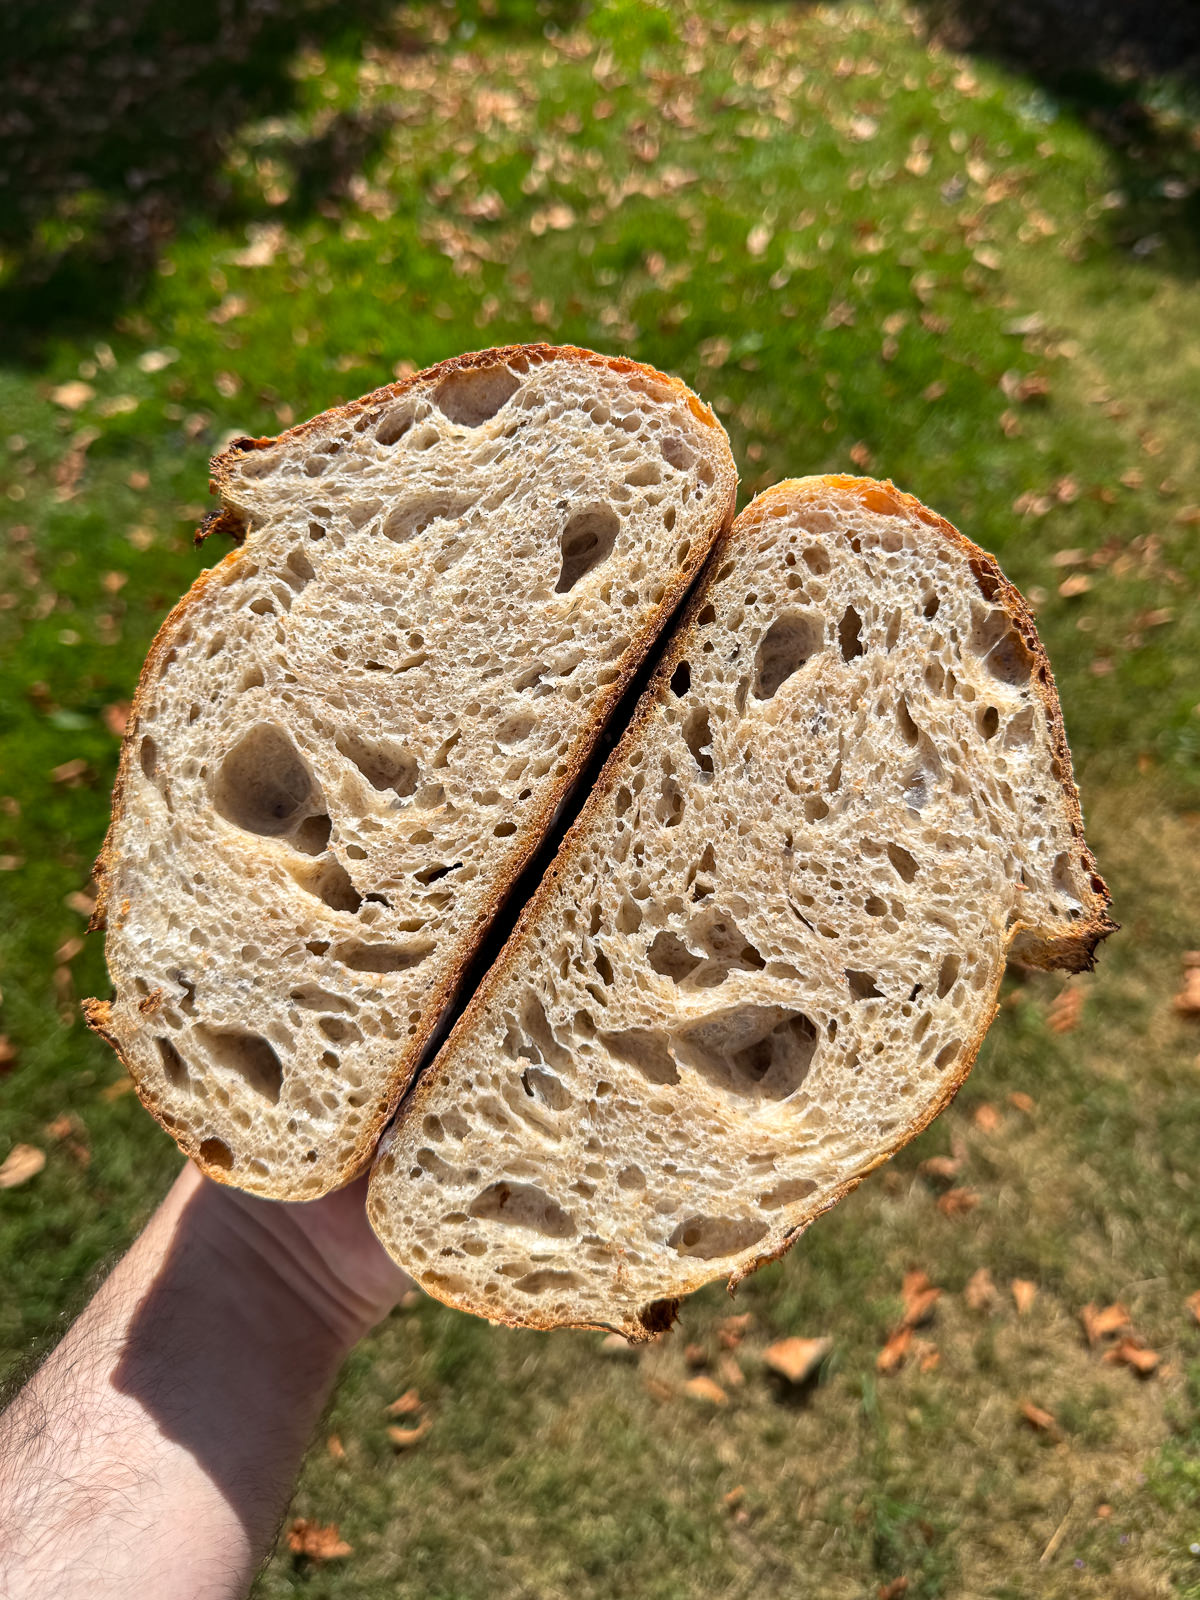
Follow this easy step by step sourdough guide to make a bakery quality loaf of bread, with an impressive ear and soft, open crumb.
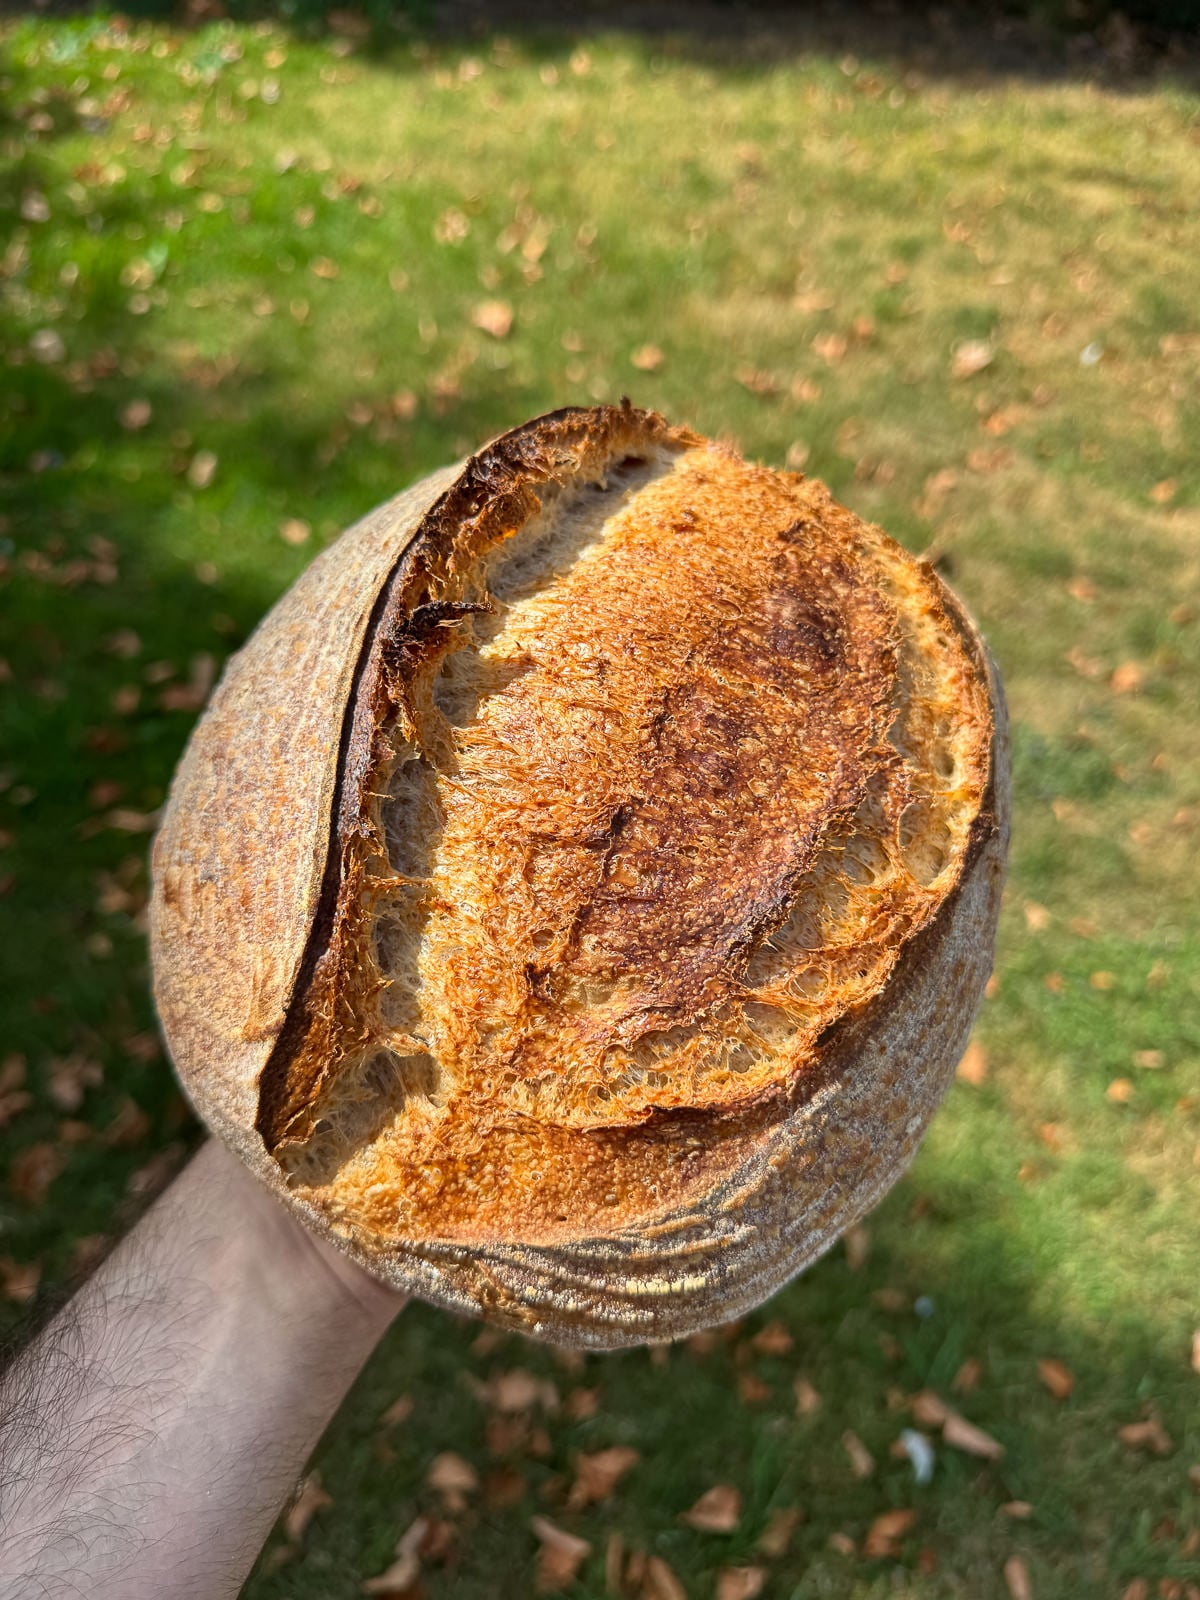
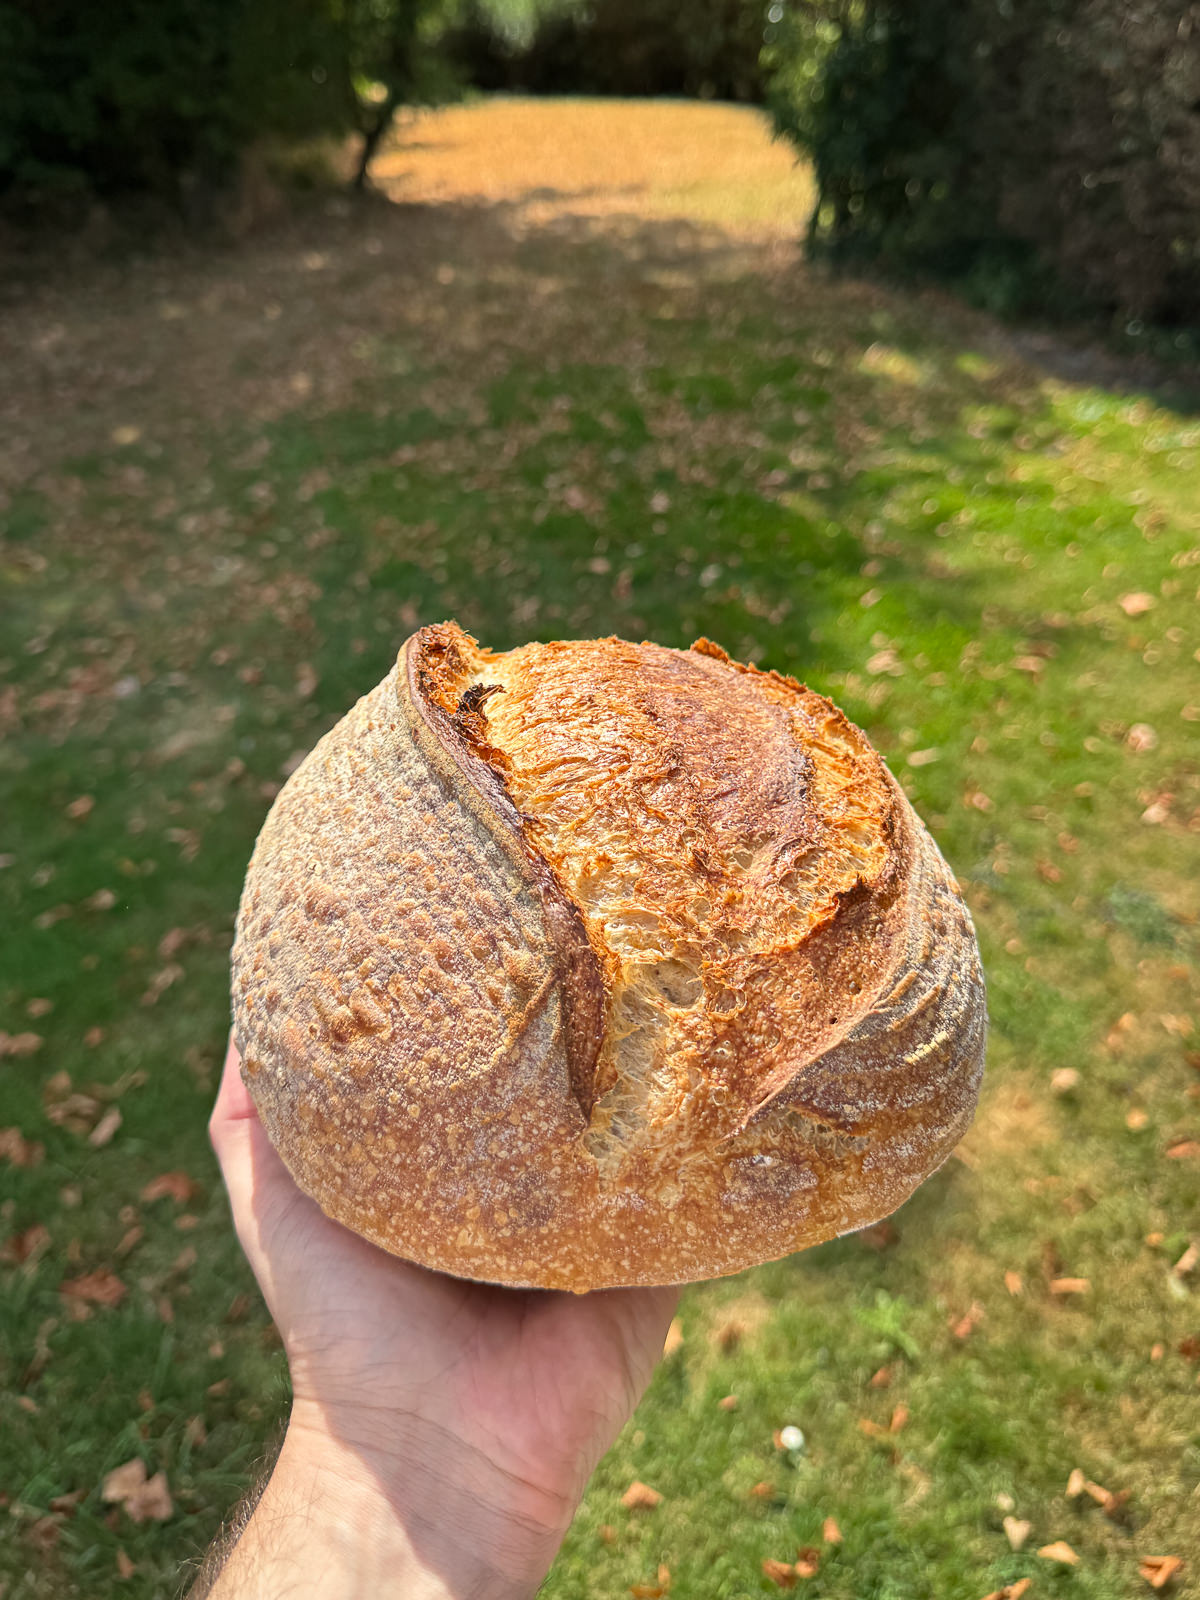
This is my go to recipe for making bakery style sourdough bread at home, with a tall, impressive ear, a soft open crumb and loads of flavour. There’s many different ways to make sourdough but this is the way that I do it. This is a really easy recipe to follow and I can guarantee that you’ll successfully bake a decent loaf of bread using it.
I first started developing this bread recipe during the first lockdown of 2020. I was furloughed from my job so I ended up making sourdough pretty much everyday. Luckily I had managed to buy a big sack of flour at the beginning of the lockdown. This meant that I could get a lot of practise – though my first loaf looked like a pancake!
I’ve experimented with a range of different doughs and this is the one that I’ve found to have the perfect balance between being easy to work but still producing a stunning loaf of homemade bread. I’ve included a detailed guide for each step and process so you know exactly what to look for. This includes an autolyse, feeding your starter, the all important bulk ferment, shaping, cold fermentation, scoring for the best ear and how to bake for the optimum oven spring. If you’re looking to get started with sourdough baking or you just want to make a great loaf of artisanal bread, this is the recipe for you.
For more sourdough breads to try, check out our ever growing collection of bread recipes! There’s classic loaves, pizza dough, pitas and more.
A Note On Temperatures & Timings
The ideal room temperature to ferment sourdough is 78°f (25.5°c). If your kitchen is colder, you should allow your starter and loaf longer to ferment whereas if it’s warmer you should allow less time. Either way a consistent room temperature should be maintained. Using an infrared thermometer is a great way to keep an eye on dough & room temperature.
It is also important to measure the water temperature when making the dough. A digital food probe works best here.
The time schedule used in this recipe is a rough guideline. Both your starter & dough can take either less or more time to ferment than outlined below. Knowing when each step is finished is key. I’ve given visual cues, so you’ll know exactly what to look for.
Baker’s Percentages
When making sourdough, the amount of each ingredient is calculated using baker’s percentages. This is the amount of each ingredient (water, salt, starter & inclusions) in relation to how much flour the recipe uses. This makes it easy to scale the recipe up if you want to make more than one loaf.
The percentages for this loaf of sourdough are:
· 66% Hydration (Water)
· 2% Salt
· 15% Sourdough Starter
I’ve found that using these percentages makes a dough that is easy to work with but still produces a loaf with an open crumb. Increasing the hydration will produce a loaf with a more open crumb but in turn, is slightly harder to work with.
Feeding Your Sourdough Starter Before Using For Bread
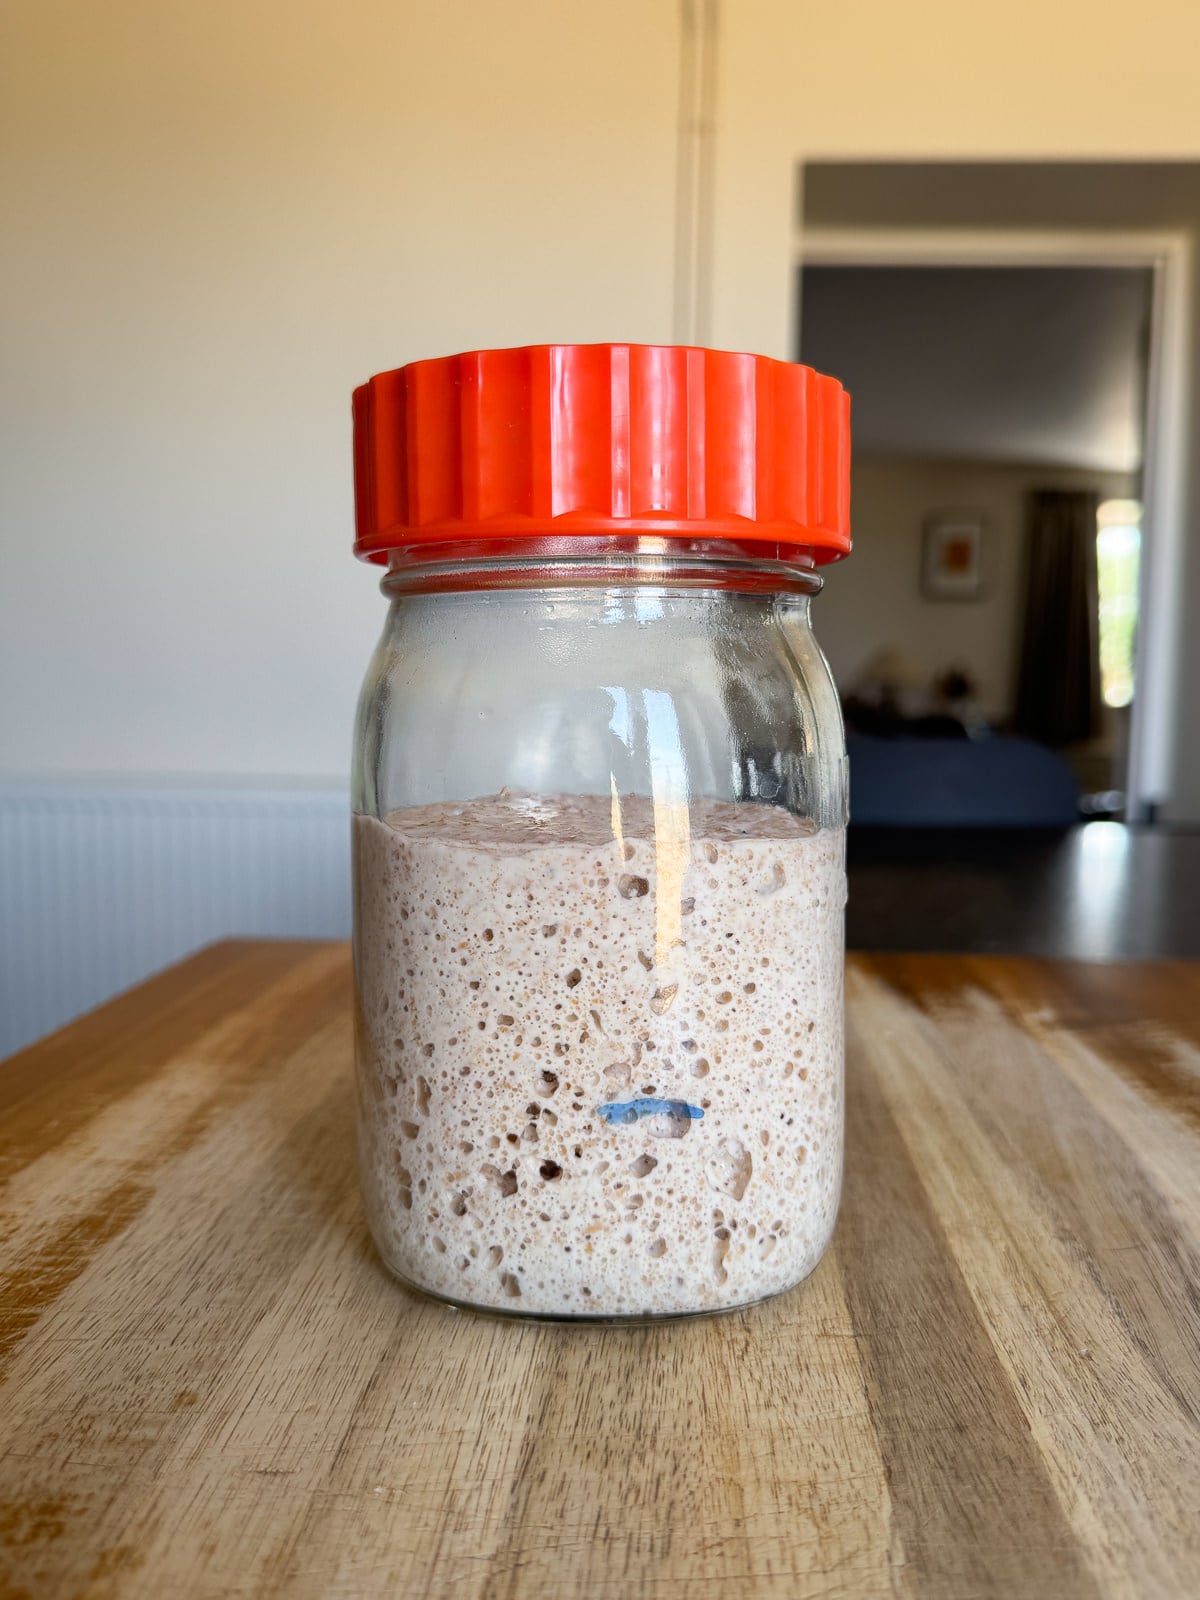
If your starter has been in the fridge, it’s best to take it out & feed it at least 2 days before you plan on using it. I feed my starter every 12 hours using a 1:1:1 ratio (equal amounts flour (50/50 white & wholemeal), water & starter). The flour I use for feeding my starter & to make my loaves are Shipton Mill’s Canadian strong white bread flour & strong wholemeal flour.
To read my step by step sourdough starter guide, click here.
Sourdough Baking Terms, Techniques & Processes
There’s a lot of technical terms with sourdough baking, so to avoid any confusion here’s the definitions for all the techniques used in this baking guide, as well as explanations on how to do them.
Autolyse
The first stage of making the dough is the autolyse. This is where the flour & most of the water are mixed until just combined then left to hydrate for at least 30 minutes but I prefer an hour. This will make your dough easier to work with & will produce a lighter loaf.
Slap & Folds
This technique is used to build strength & develop gluten in sticky, high hydration doughs. This technique is often used instead of a stand mixer, to mix and build strength in the dough.
How To Slap & Fold
- Gently grab the underneath of the end of the dough that is furthest away from you, holding the dough from both the left & right side.
- Lift the dough up off the work surface then slap the dough’s bottom edge back onto the work surface.
- Fold the dough that you are holding over the top of the dough that is on the work surface.
- Rotate the dough 90° & repeat.
Bulk Ferment
The bulk ferment starts a soon as the mature starter is added to the dough & ends when the dough is shaped.
Bulk ferment is the dough’s first rise & is followed by shaping & an overnight, cold ferment in the fridge. The purpose of a bulk ferment is to develop gluten, flavour & to aerate the dough. This is perhaps the most important stage of making a loaf of sourdough, so it’s important to know when it’s complete.
The duration of the bulk ferment will vary every time you make a loaf of sourdough. How long the bulk ferment takes can be affected by the room and dough temperature, the flour used, how much starter was added and the hydration of the dough.
When the bulk ferment has finished, the dough will be aerated, the volume of dough will have increased by roughly 50% and it will wobble if the bowl is gently moved. Also the top of the dough will be slightly domed & you should also be able to see lots of small bubbles around the sides of the bowl (this is why it’s useful to use a clear, glass bowl). I’ve found, on average that bulk fermentation takes between 4-6 hours at 78°F/26°C. Although it can take up to 8 hours at this temperature.
It’s important to ferment your dough for the correct amount of time. If the dough is either under or over proofed, then the final loaf will be affected (amount of oven spring, texture of the crumb, loaf shape, etc.).
Coil Folds
During the bulk ferment, gluten is developed in the dough using a series of folds. There are two methods for doing this. Either stretch & folds or coild folds. For the purpose of this recipe, we’re using the latter.
The coil folds are done at 30 minute intervals until the dough passes the “windowpane” test, I’ve found the average amount of folds to be between 4-6 but it’s best to go by how strong the dough feels then leave it untouched for the rest of the bulk ferment.
How To Perform A Set Of Coil Folds
- With wet hands (this stops the dough from sticking) gently loosen the dough from the sides of the bowl
- Using both hands, gently lift the dough up from the middle until one side is released from the container/bowl.
- Fold the released side back under the dough.
- Turn the bowl 180° and repeat the folding process.
- Now turn the bowl 90° & repeat.
- Finally, turn the bowl another 90° and repeat one last time.
The Windowpane Test
The best way to assess the gluten development in your dough is by using the windowpane test. Here, you take a small piece of dough & stretch it between your fingers. If it stretches thin enough so that you are able to see through it, enough gluten has been developed. If it tears, more coil folds are required.

Adding Inclusions (Mix Ins)
Adding inclusions are a great way to add extra flavour into a loaf of sourdough bread.
When added into sourdough a maximum of 20% of the flour weight should be inclusions. This could be grated cheese, toasted seeds or even porridge.
Lamination
When you add inclusions into your dough, they can hinder gluten formation. To get around this, inclusions should be incorporated using lamination in place of the third or fourth set of coil folds.
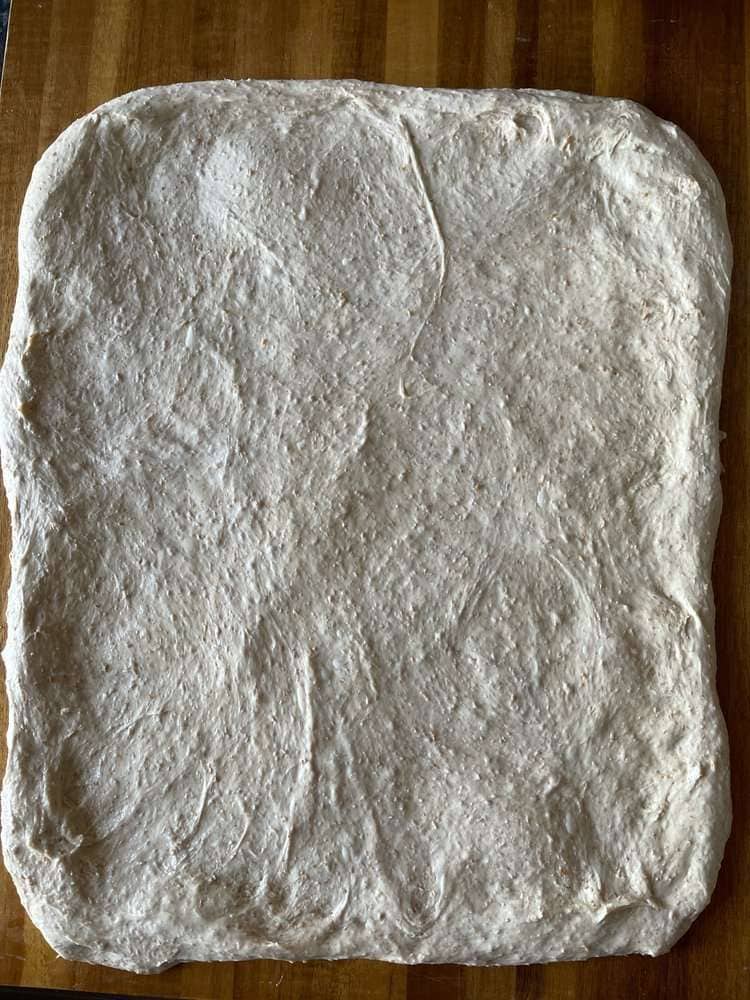
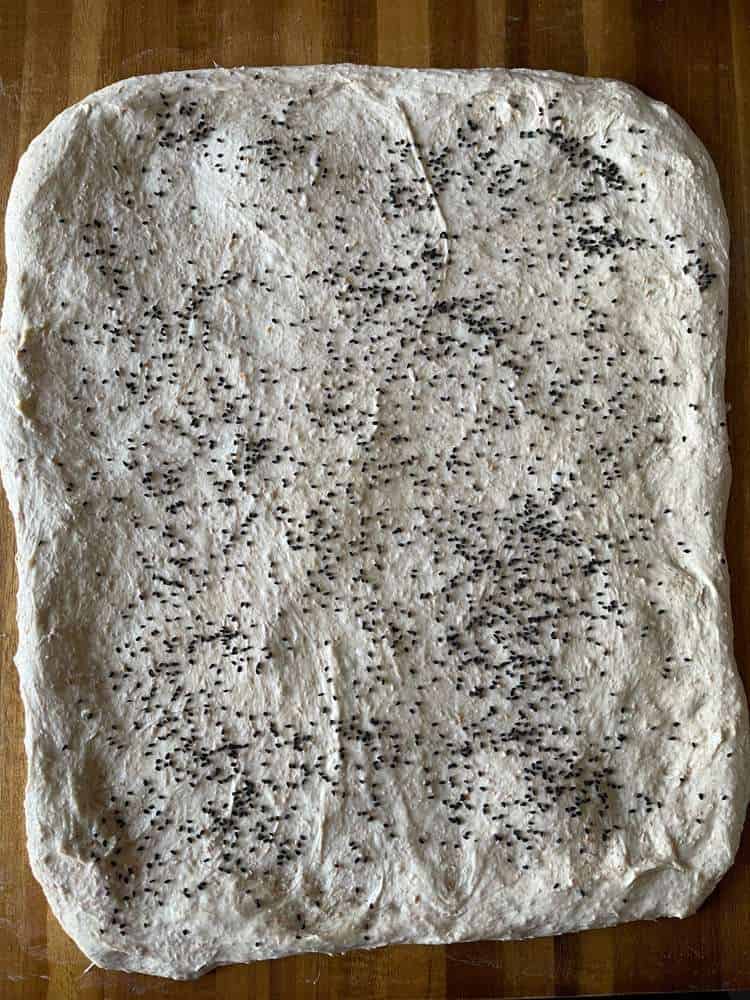
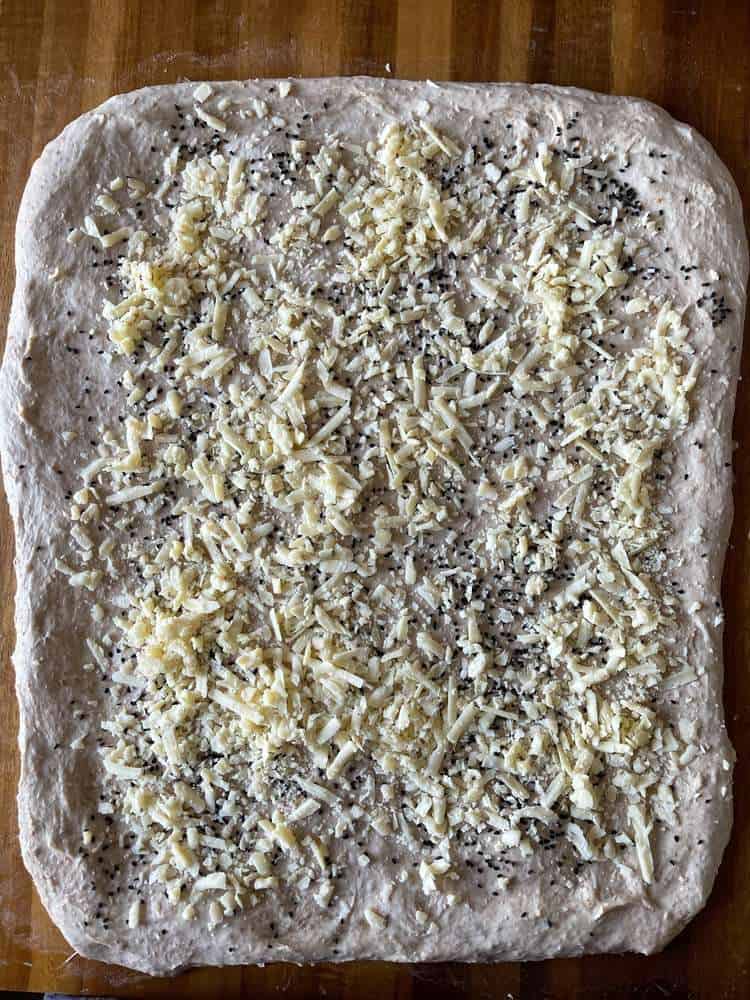
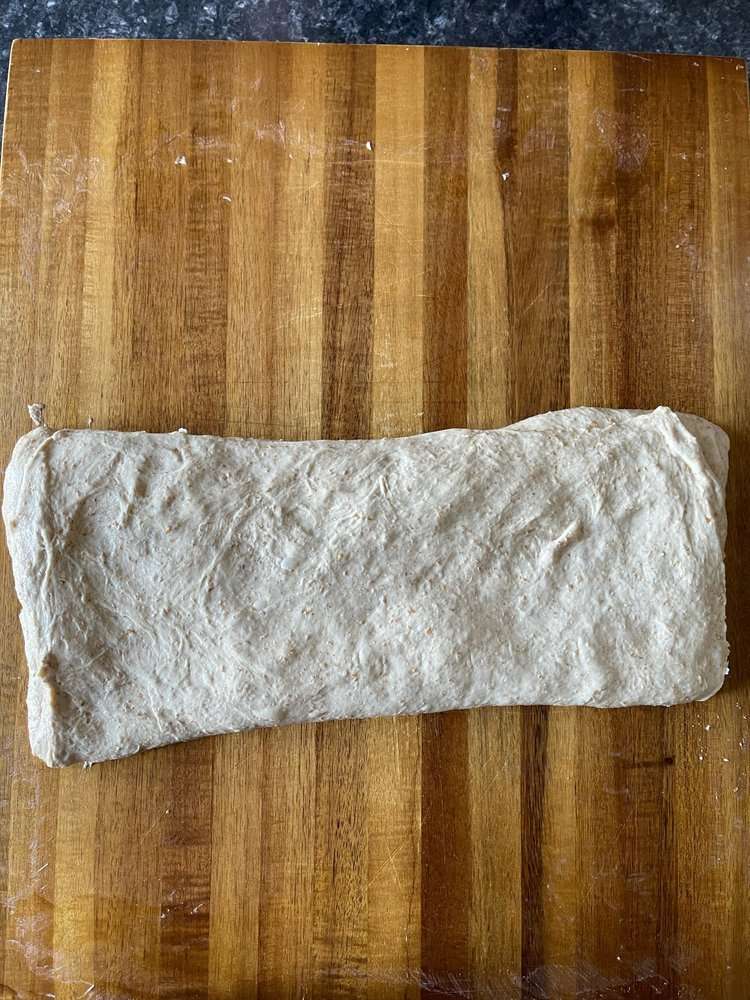
To laminate, the dough is stretched into a large, thin rectangle then the inclusions are scattered over the top. The dough is then folded back up & the bulk ferment/coil folds are continued as normal.
How To Laminate Sourdough To Add In Inclusions
- Allow the dough at least 2 coil folds before laminating.
- Gently transfer your dough to a large work surface that has been lightly sprayed with water.
- Spread your dough gently & evenly from all sides to form a large rectangle. This should be as thin as possible.
- Place the ingredients that you want incorporating into the dough (inclusions) over the entire surface of the sourdough.
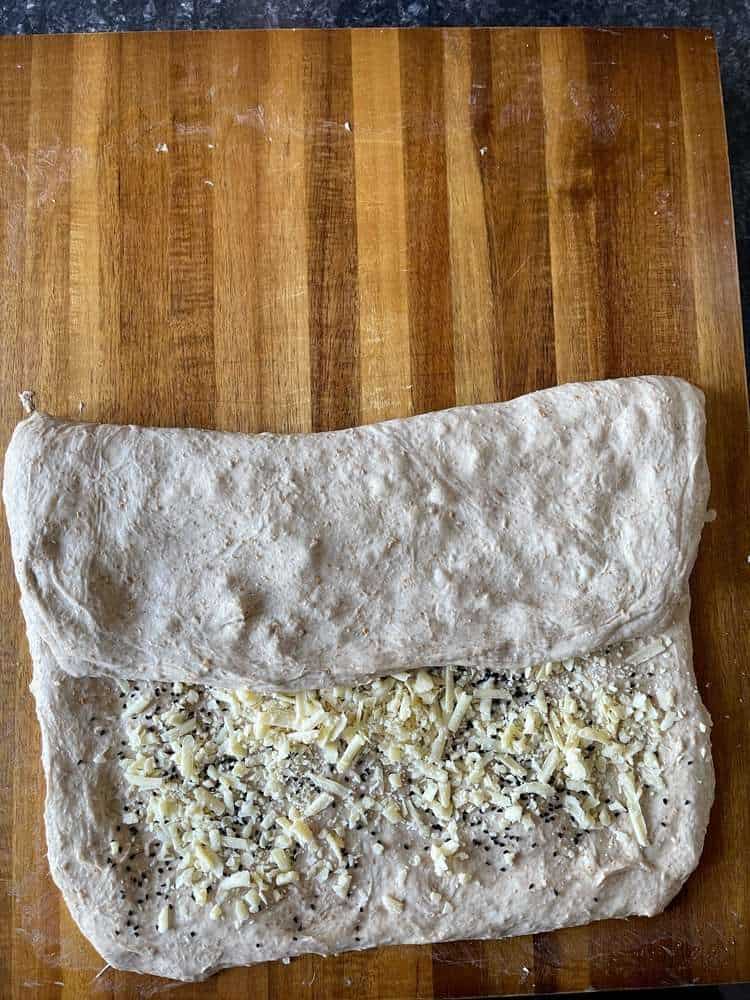
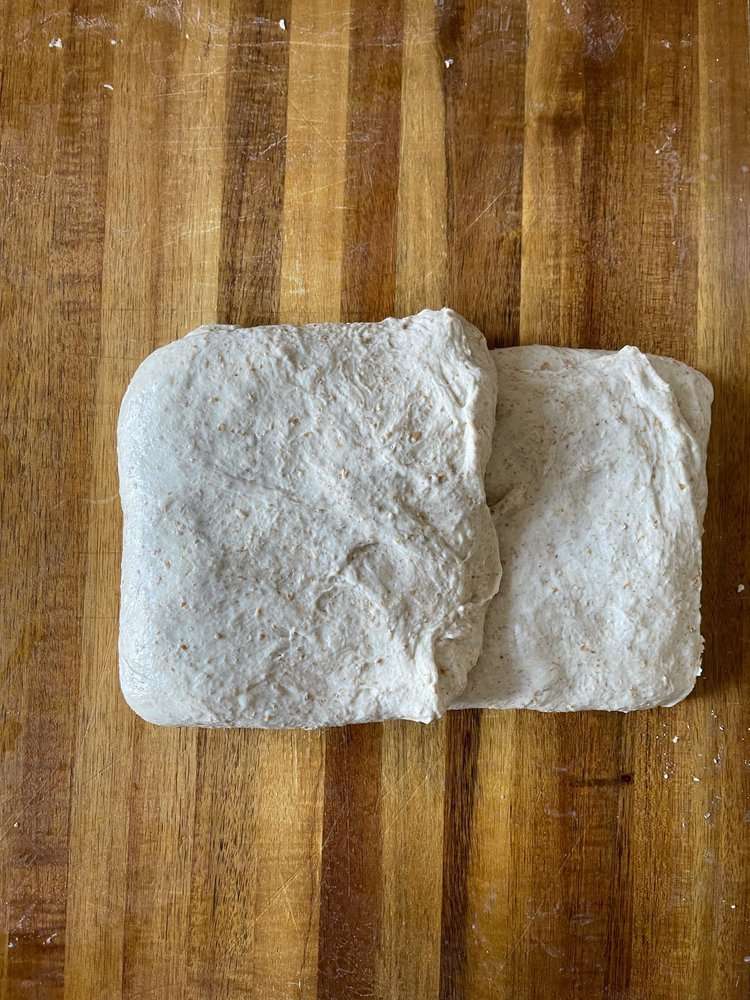
- Fold one side of the dough into the middle.
Pressing down lightly on the dough between folds helps to prevent large air pockets. - Next, fold the opposite side over the folded side.
- Now take one of the remaining sides & fold it into the middle.
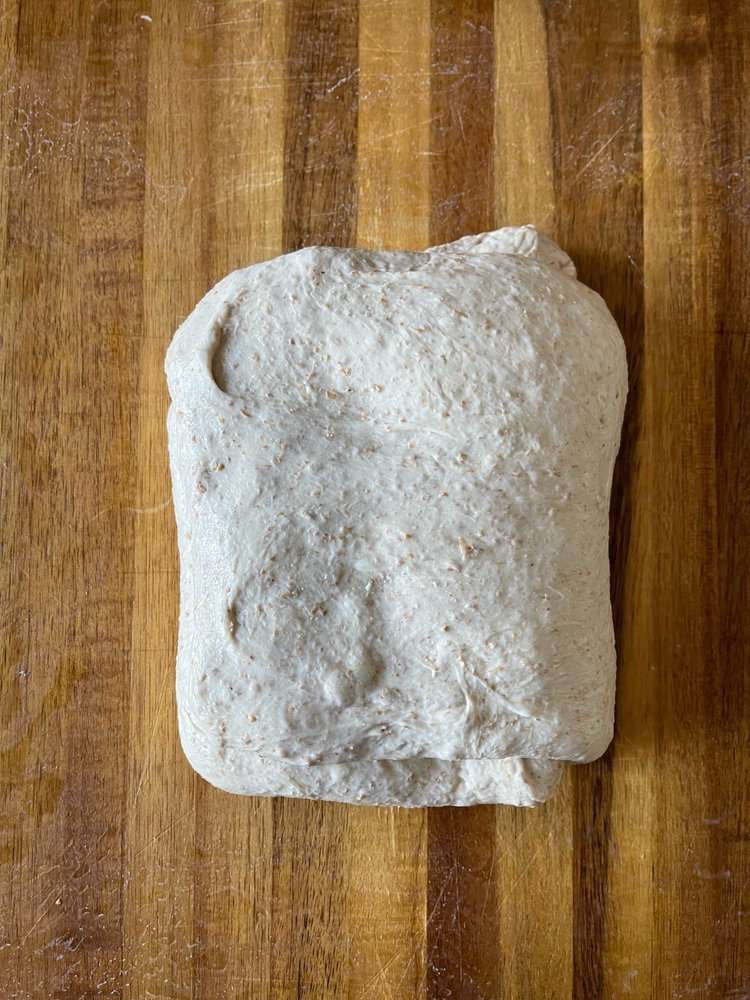
- Finally, take the last side & fold it over the side you just folded.
- Gently place the dough back into the bowl
Pre Shaping
Before shaping the dough, a pre shape is used to help develop tension in the dough’s surface. It also makes shaping the dough a bit easier & improves oven spring.
How To Pre Shape Sourdough
With the help of a dough scraper, gently tip the dough onto a clean, unfloured work surface.
Using a metal bench knife and a hand dipped in water, gently work the dough into a round shape then leave to bench rest for 20 minutes. Don’t shape too tightly though as this could damage the gluten in the dough.
How To Shape Sourdough For An Oval Banneton
Once your dough has bench rested, it’s time to shape it. Now how you do this depends on what shape banneton you’re using. As we’re aiming to get the best ear on our loaf as possible, I’ll be showing you how to shape your dough for an oval banneton as this is the ideal shape for this.
- First, lightly dust an oval banneton with rice flour. This recipe makes enough dough to fill a 500g proving basket. The one that I use measures 24x13x9cm.
- Next, use a bench scraper to gently loosen the pre shaped sourdough then carefully flip it over.
- Pull the bottom side of the dough up & fold it into the middle. Press down lightly to make sure the dough has stuck (press down lightly with every fold).
- Now take the left side, stretch it slightly & fold it roughly ¾ to the right.
- Next, stretch the right side slightly & fold over the left side.
- Take the top side, stretch it away from you then fold it into the centre of the dough.
- Now “stitch” the sourdough. Starting at the top, pinch a small amount of dough from both the left & right sides. Fold the dough from the right side over the centre, followed by the left side. Repeat this process in the middle section of dough then the bottom section. (Imagine the pattern of a laced up shoe).
- Finally, starting from the bottom to the top, carefully roll the dough over itself. Use a bench knife to gently pull the shaped dough towards you, dragging the bottom of the dough on the work surface. This seals the underneath & helps create tension.
- Dust the surface of the dough with rice flour, turn the dough upside down (so that the dough is seam side up) & place into the banneton.

Overnight Cold Prove
When you’ve shaped your dough & placed it into a banneton, it needs to be refrigerated overnight, or for at least 12 hours. This slows down the fermenting process & develops the sour flavour that is associated with sourdough. Keep in mind that the longer the dough stays in the fridge, the stronger the sour flavour. I tend to go for a 12-18 hour cold ferment but feel free to go for a longer one!
Scoring
Before we bake the dough, we need to score the top with a baker’s lame. This is basically a razor blade attached to a handle.
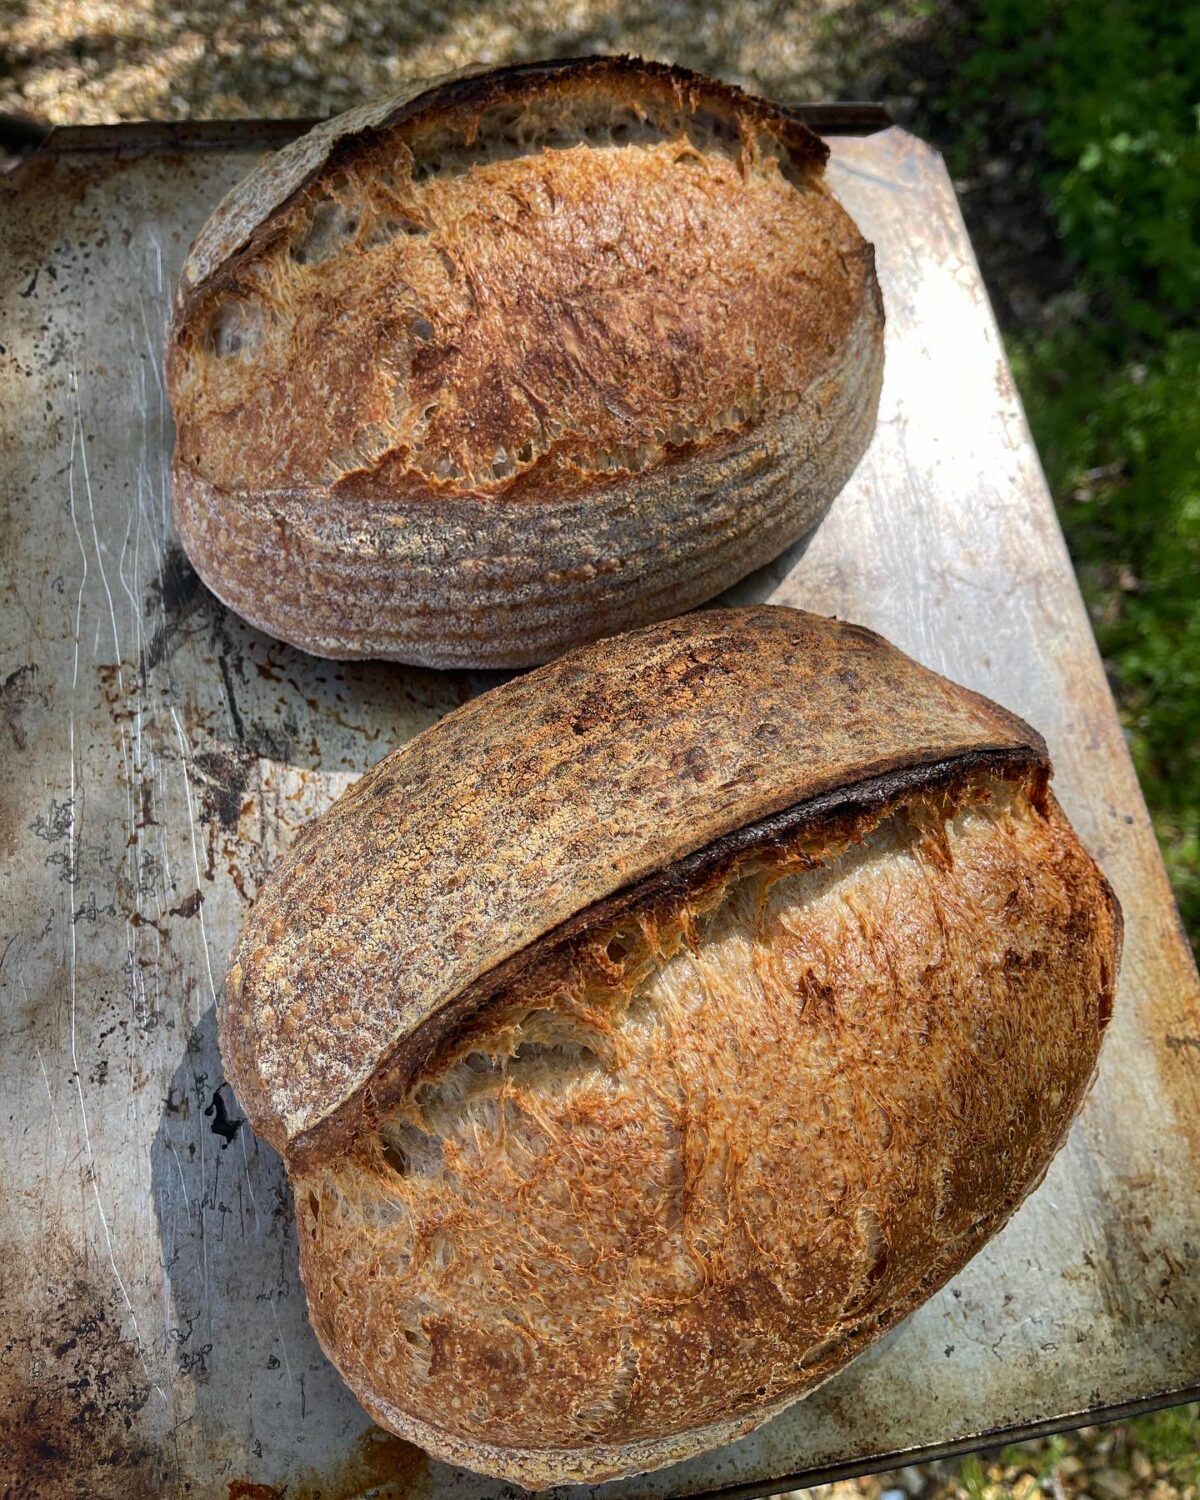
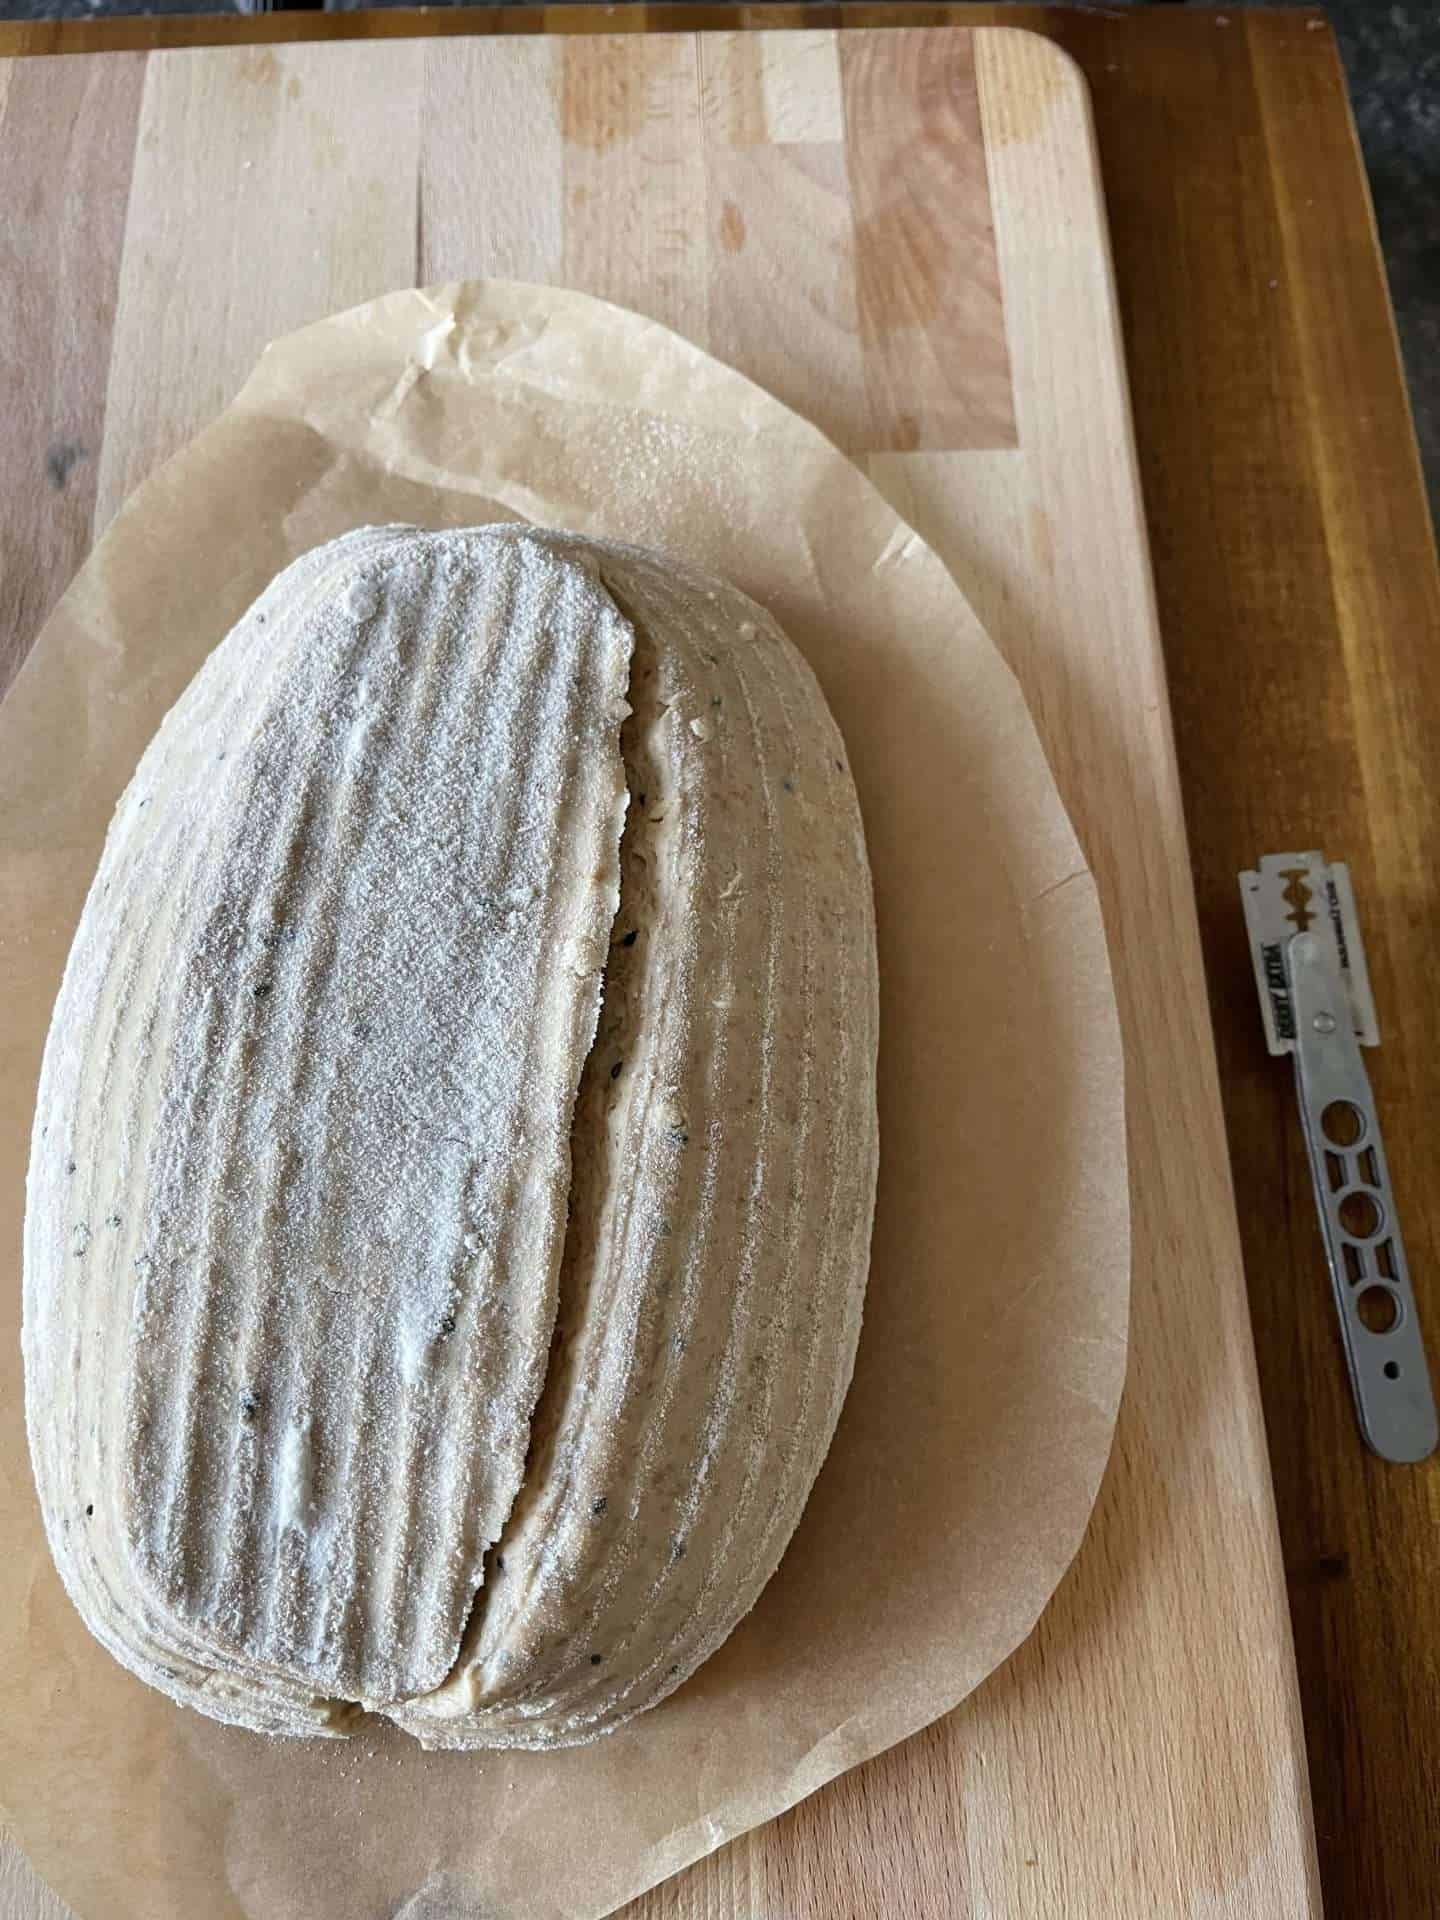
The purpose of scoring is to control how the dough splits as it rises in the oven. To give your loaf an impressive ear, you’ll need to score your dough slightly off centre at a 30° – 45° angle, at least 1cm deep. If you give your dough 30 minutes – 1 hour in the freezer & dip your lame in water before scoring, it will make the process a lot easier.
The Best Way To Bake Sourdough
When you bake sourdough, to get the best possible rise & crust the baking environment needs to be super hot with a good amount of moisture. For this reason I’d recommend using either a Dutch oven or an oval casserole dish with a lid in an oven that has been preheating for at least 30 minutes.
For the first 25 minutes of the cooking time, the bread is cooked covered to keep the environment full of steam. Steam is what makes your dough rise & keeping your loaf covered during this initial stage prevents it from getting too dark.
After 25 minutes, you’ll need to remove the lid from your Dutch oven then continue baking the bread for another 20-25 minutes, until the crust is a deep golden brown. The darker the colour, the more flavour the crust will have. This is up to personal preference but don’t burn it as it will taste bitter!
After the first 25 minutes of cooking (when the dough’s covered), your sourdough will have risen considerably and produced a impressive ear, where you scored the dough! The crust will still be pale though, which is why we then remove the lid and bake uncovered until it’s properly browned.
How To Cool And Store Homemade Sourdough
Once baked, the sourdough needs to be cooled down completely. It’s definitely tempting to slice it warm but the bread needs a good hour or two to cool. Slice into it too soon & the crumb will be gummy & doughy.
Sourdough bread is best eaten on the day that it’s been cooked but kept airtight it will last for several days. Don’t worry if it starts to dry out, it makes great toast!
Sourdough Tips & Tricks To Guarantee Success
- Make sure your sourdough starter has been well maintained and regularly fed before using it to make bread. If you’ve recently made a new starter, it should at least double in size consistently after feeding before you bake with it.
- For the best flavour & texture, use good quality bread flours with a protein content between 12-14%.
- Don’t rely solely on timings when fermenting the dough. Go with the visual guides in the recipe, like how much the dough has risen and what it looks like.
- Cold prove your sourdough in the fridge overnight, for better flavour and improved oven spring.
- For the best oven spring, use a Dutch oven or oval casserole dish to bake your sourdough bread in. Make sure to preheat your oven and dish for at least 30 minutes before baking.
- Give your dough 20-30 minutes in the freezer before scoring & baking. This firms the dough up slightly, making it easier to score, without affecting how it bakes.
How To Cook Sourdough Bread In An Aga
With all of my recipes, I include cooking instructions for conventional ovens, fan ovens & also Agas. Here’s how to cook this recipe on an Aga…
To cook a loaf of sourdough in an Aga, place a Dutch oven/casserole dish onto a grid shelf placed onto the floor of the roasting oven. Let the dish heat up for at least 30 minutes then add in your sourdough & bake for 25 minutes with the lid on then another 20-25 minutes, until the loaf is a deep, brown colour.
More Sourdough Recipes To Try
Step By Step Sourdough
Equipment
- Glass Mixing Bowl
- Digital Food Probe
- Digital Scales
- Laser Temperature Gun
- Plastic Dough Scraper
- Metal Dough Knife
- 500g Oval Banneton
- Baker's Lame
- Dutch Oven/Oval Casserole Dish (With Lid)
- Spray Bottle
- Wire Cooling Rack
Ingredients
To Feed Your Sourdough Starter
- 50 g Strong White Flour
- 50 g Strong Wholemeal Flour
- 100 g Water (78°f/26°c)
- 100 g Ripe Sourdough Starter
Sourdough Bread
- 400 g Strong White Flour
- 100g g Strong Wholemeal Flour
- 330 g Water (78°f/26°c)
- 1 tbsp Olive Oil
- 75 g Mature Sourdough Starter
- 11 g Maldon Salt
- Rice Flour To Dust
Instructions
Feeding Your Sourdough Starter
- Feed your starter as you normally would but use the quantities of flour, water & starter above. This makes enough starter for 1 loaf with some remaining so that you can continue feeding it.
- Leave at room temperature until it has risen to its’ peak & just before it starts to fall. This should take between 4-6 hours.
Autolyse
- An hour before you think your starter has finished rising, add the white & wholemeal bread flours into the bowl of a stand mixer along with 300 grams of the water and the olive oil then mix with the dough hook on a low speed, until just combined.Don't over mix the dough, it should be just combined. A few streaks of flour is fine!
- Cover the bowl with a tea towel then let the dough sit at room temperature until your starter has reached its peak. Don't worry if this is longer than 1 hour, a longer autolyse is fine.
Mixing The Dough
- Weigh the sourdough starter into the dough then mix on a low speed until combined. This will take 3-4 minutes.
- Add the salt & the remaining 30g of water into the dough then continue mixing on a low speed until combined.
- Once the dough has come together, turn the speed up slightly (to medium-low) and continue mixing for another 2-3 minutes, until the dough is smooth & coming away from the sides of the bowl.
Bulk Ferment
- Transfer the dough to a lightly oil glass bowl, cover with a tea towel or clingfilm then leave to bulk ferment at room temperature, until the dough has risen by almost 50% This will take anywhere from 4-10 hours.Using a glass bowl helps you keep an eye on how the dough is fermenting.
- During the first part of the bulk ferment, give the dough a set of coil folds every 30 minutes, until it passes the windowpane test (I find that 4-6 set of coil folds tends to do the trick). Then leave undisturbed for the remainder of the bulk ferment.The bulk ferment starts as soon as the starter is added to the dough & will take anywhere from 4-10 hours (depending on room temperature, dough hydration & flour used). When the dough has finished fermenting, it will have increased in volume by roughly 50%, the top will be domed & you will see lots of tiny bubbles in the dough. There's a guide to coil folds in the post above.
Shaping
- Once the bulk ferment has finished, gently tip the dough out onto a clean work surface, with the help of a dough scraper.
- Using a metal bench knife & a hand dipped in water, gently work the dough into a round shape then leave to bench rest for 20 minutes.Don't shape the dough too tightly, to avoid damaging it. The dough will spread slightly as it rests.
- In the meantime, generously dust a 500g oval banneton with rice flour then set to one side.I use an oval banneton that measures 24cm x 13cm x 9cm.
- Next, lightly dust the top of the dough with rice flour then use a bench scraper to gently loosen it from the work surface before flipping it over.
- To shape, pull the bottom side of the dough up & fold it into the middle. Press down lightly to make sure the dough has stuck (press down lightly with every fold).Now take the left side, stretch it slightly & fold it roughly ¾ to the right.Next, stretch the right side slightly & fold over the left side.Take the top side, stretch it away from you then fold it into the centre of the dough.Now “stitch” the sourdough. Starting at the top, pinch a small amount of dough from both the left & right sides. Fold the dough from the right side over the centre, followed by the left side. Repeat this process in the middle section of dough then the bottom section. (Imagine the pattern of a laced up shoe).Finally, starting from the bottom to the top, carefully roll the dough over itself. Use a bench knife to gently pull the shaped dough towards you, dragging the bottom of the dough on the work surface. This seals the underneath & helps create tension.Dust the surface of the dough with rice flour, turn the dough upside down (so that the dough is seam side up) & place into the banneton.
Cold Ferment
- Cover the top of the banneton with clingfilm & chill in the fridge for 12-18 hours. The longer the dough is left in the fridge, the more sour the final loaf will be. You can prove your dough for up to 24 hours but for the best oven spring, 12-18 is the sweet spot.
Baking
- When you're ready to bake, preheat an oven to 230°c/210°c fan (446°f/410°f). Place your casserole dish/Dutch oven into the oven as it preheats, letting it heat up for at least 30 minutes so that it gets screaming hot.Whilst your oven heats up, place your banneton of dough into a freezer. A 20-30 minute freeze makes it easier to score the dough.The casserole dish I use can be used upside down so that the dough sits on the lid & the casserole dish itself acts as a lid. This means there’s plenty of room for oven spring.
- In the meantime, cut a piece of baking parchment roughly the same size as the inside of your Dutch oven. Just before baking, scrunch the parchment up whilst running it under cold water. Then flatten it back out and place onto a chopping board.You'll also need to fill a spray bottle up with cold water.
- Next, remove the banneton from the freezer. Place your prepared piece of parchment over the top of the banneton then the chopping. Flip the banneton/chopping board over so that the dough is now sat seam side down on the parchment.
- To score the dough, hold a baker's lame so that the razor is at an 30°-40° angle to the dough. Starting at the top end of the dough, slash the dough all the way to the bottom end. The score should be off centre to the right & at least 1cm deep. For best results, try to score in one cut. Dipping the razor in water before scoring helps produce a clean cut.Get the loaf into the oven as soon as you've scored it!
- Using the parchment, slide the dough into the preheated casserole dish. Spray generously all over with cold water & place the lid on the dish.
- Bake the sourdough the preheated oven, covered for 25 minutes then remove the lid & bake for a further 20-25 minutes, until the loaf is a deep, brown colour. For the best flavour, the dough should be fairly dark but not burnt.
- Transfer the dough to a wire rack & leave to cool completely before slicing. This will take a couple of hours.
Salt Butter Smoke Magazine
Love seasonal cooking?
Issue 001 features over 20 original autumn recipes, seasonal features, preserving guides and beautiful photography.
Take a Look Inside →Notes
Enjoying This Recipe?
The Prep List is my free weekly newsletter with seasonal recipes, kitchen notes and behind-the-scenes from my kitchen. Add Salt Butter Smoke as a Google Preferred Source to see more of my recipes in Search.


Love this recipe so much! I followed Brian Lagerstrom’s sourdough recipe initially, and it came up with a pretty good, simple loaf. This recipe really took it to the next level for me, the crust specifically was beautifully blistered. I feel like it will take a few goes for me to really nail this (my crumb wasn’t super open), but it’s a recipe that really holds the potential for a bakery-quality loaf of bread!
(Also, only discovered this blog recently, having been serious-eats exclusive for some time, and what a find! Every recipe is just exactly the kind of food I want to be cooking, and in one week I’ve baked your s’mores cookies, this sourdough, and the milk-bread hot dog buns, all amazing).
That’s awesome, thank you so much! Glad you’re enjoying the recipes