Perfectly Flaky Single Pie Crust
Here’s how to make a homemade single pie crust that’s crisp, flaky & flavourful. This recipe makes enough pastry for a 9″ pie crust that can be used for pecan pie, pumpkin pie & lots more.
Here’s a step by step guide to making a really good single pie crust that can be used for both sweet & savoury pies! Our pastry is made with a mix of butter & lard, which gives it the perfect balance between flavour & flakiness. It’s super easy to work with & makes lining a pie dish & crimping the edges incredibly straightforward.
So this recipe makes enough pastry to line a 9″ pie dish, which seems to be the most common size of pie but you could use it to line several smaller pie dishes or scale the recipe up to make a larger one. There’s some handy tips & tricks in the post as well, which will guarantee that your homemade pie crust is tender, flaky & perfectly baked!
For more bakes to try, check out ever growing collection of baking recipe & for ways to use your pie crust, take a look at our dessert recipes!
What You’ll Need
- Plain Flour – You’ll need to use plain flour (all purpose flour) for your pie crust, as this gives it a tender texture. The lower protein & gluten content means that the pastry won’t shrink as it bakes.
- Butter – You’ll need to use unsalted butter for your pie crust, as this allows us control over the salt content in the pastry. Make sure to use cold butter for the pastry!
- Lard – We’re using a mix of butter & lard in our pie dough. Lard has a higher melting point than butter so gives the pie crust a flakier texture & makes it more pliable & easier to work with.
- Cold Water – Used to bring the pastry together. Make sure that the water is as cold as possible! I like to chill a jug of cold water in the fridge for at least an hour before using. If you’ve got some ice, throw some in the water as well to make it even colder!
- Apple Cider Vinegar – Adding a small amount of vinegar into the pie dough makes it easier to work with & stops the pastry from oxidising if you’re making it a couple of days ahead of time. I like to use apple cider vinegar but white wine vinegar will work as well.
- Egg Yolk – The egg yolks isn’t used in the pie dough but is brushed onto the pie crust after it has been par baked, to seal up any holes from where we docked it.
- A Note On Sugar In Pie Crust – If you like, you can add a small amount of caster sugar to your pie dough, to help it take on a darker golden colour in the oven & for some sweetness. For a 9″ single pie crust, I’d recommend adding in 1-2 tablespoons of sugar. If your pie filling is really sweet (pecan pie for example), I would skip the sugar in the pastry.
Single Pie Crust vs Double Pie Crust
Single & double pie crusts are made with the same type of pastry. The only difference is that a single pie crust is just the base of a pie whereas a double pie crust is the base & lid. If you’re looking for a double pie crust, take a look at our savoury double pie crust recipe.
How To Make A Flaky Single Pie Crust
The key thing when making a pie crust is to keep everything cold! This means chilling the pastry after making it & after you’ve used it to line a pie dish. This keeps the fats in the pastry solid, which gives the pie crust a flaky texture & prevents it from shrinking as it bakes.
Step 1 – Pie Dough
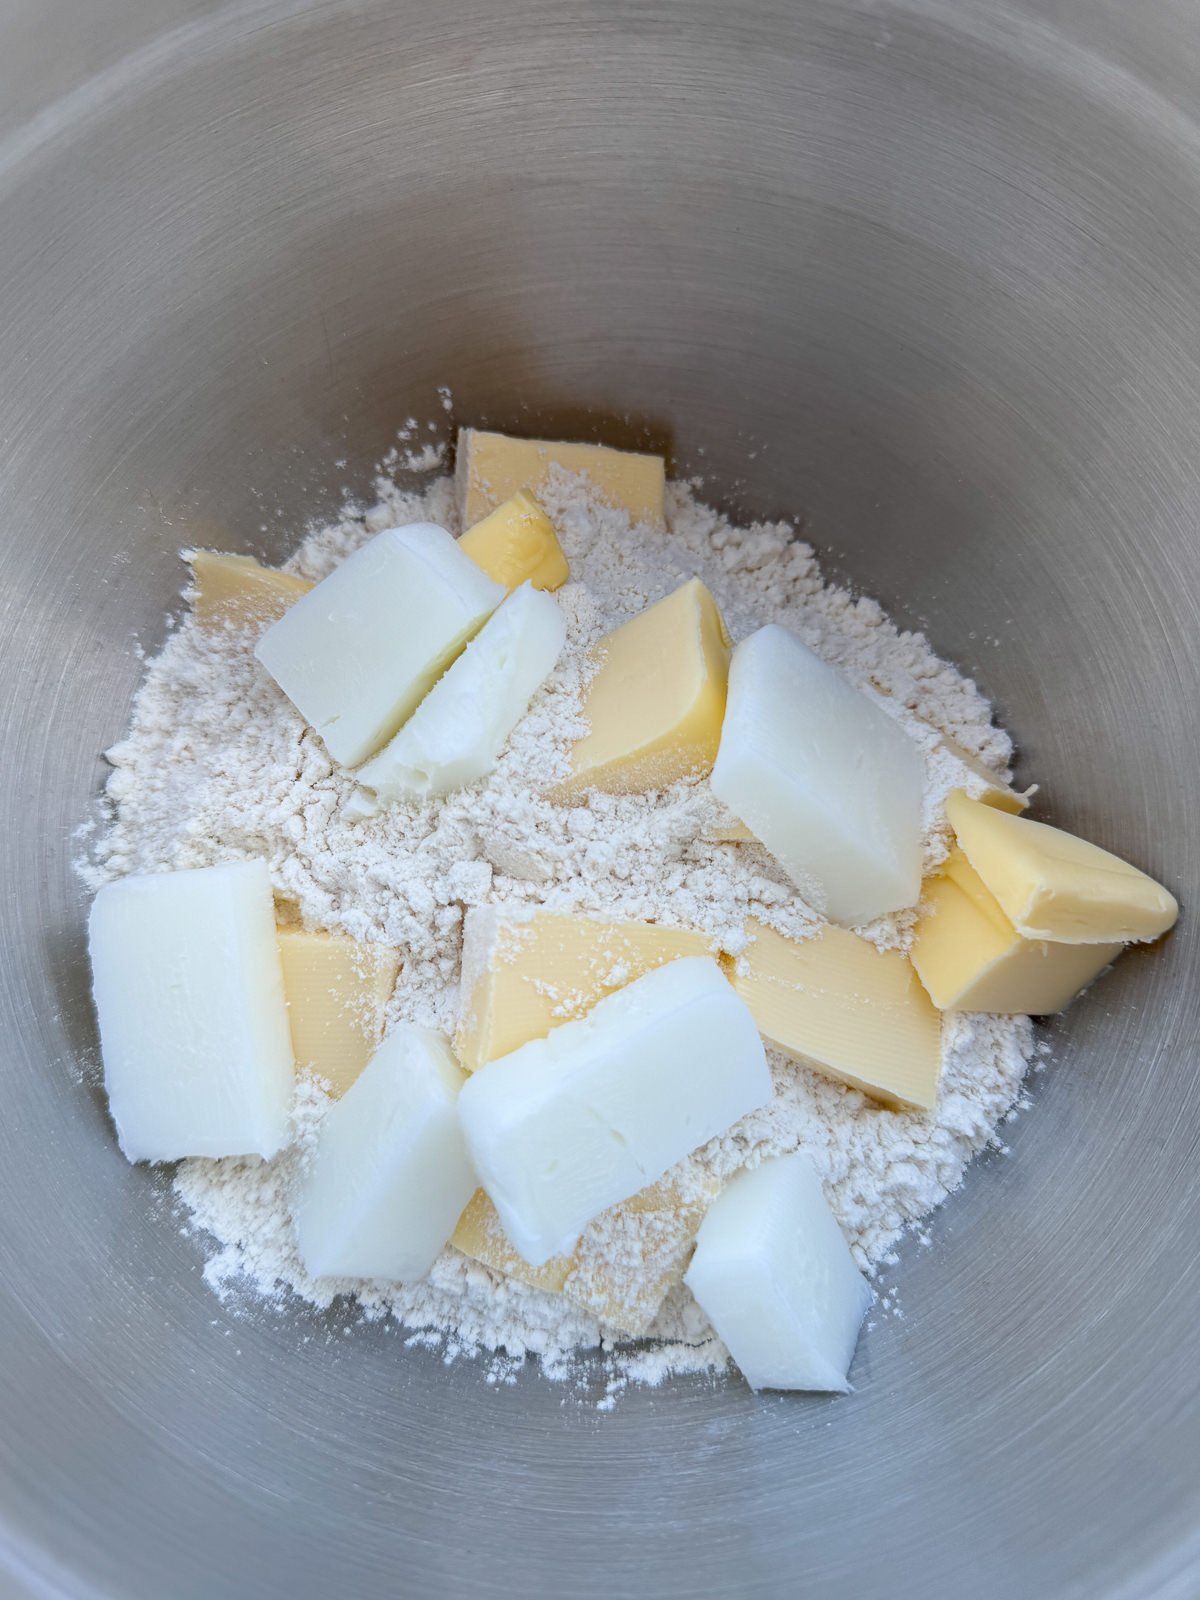
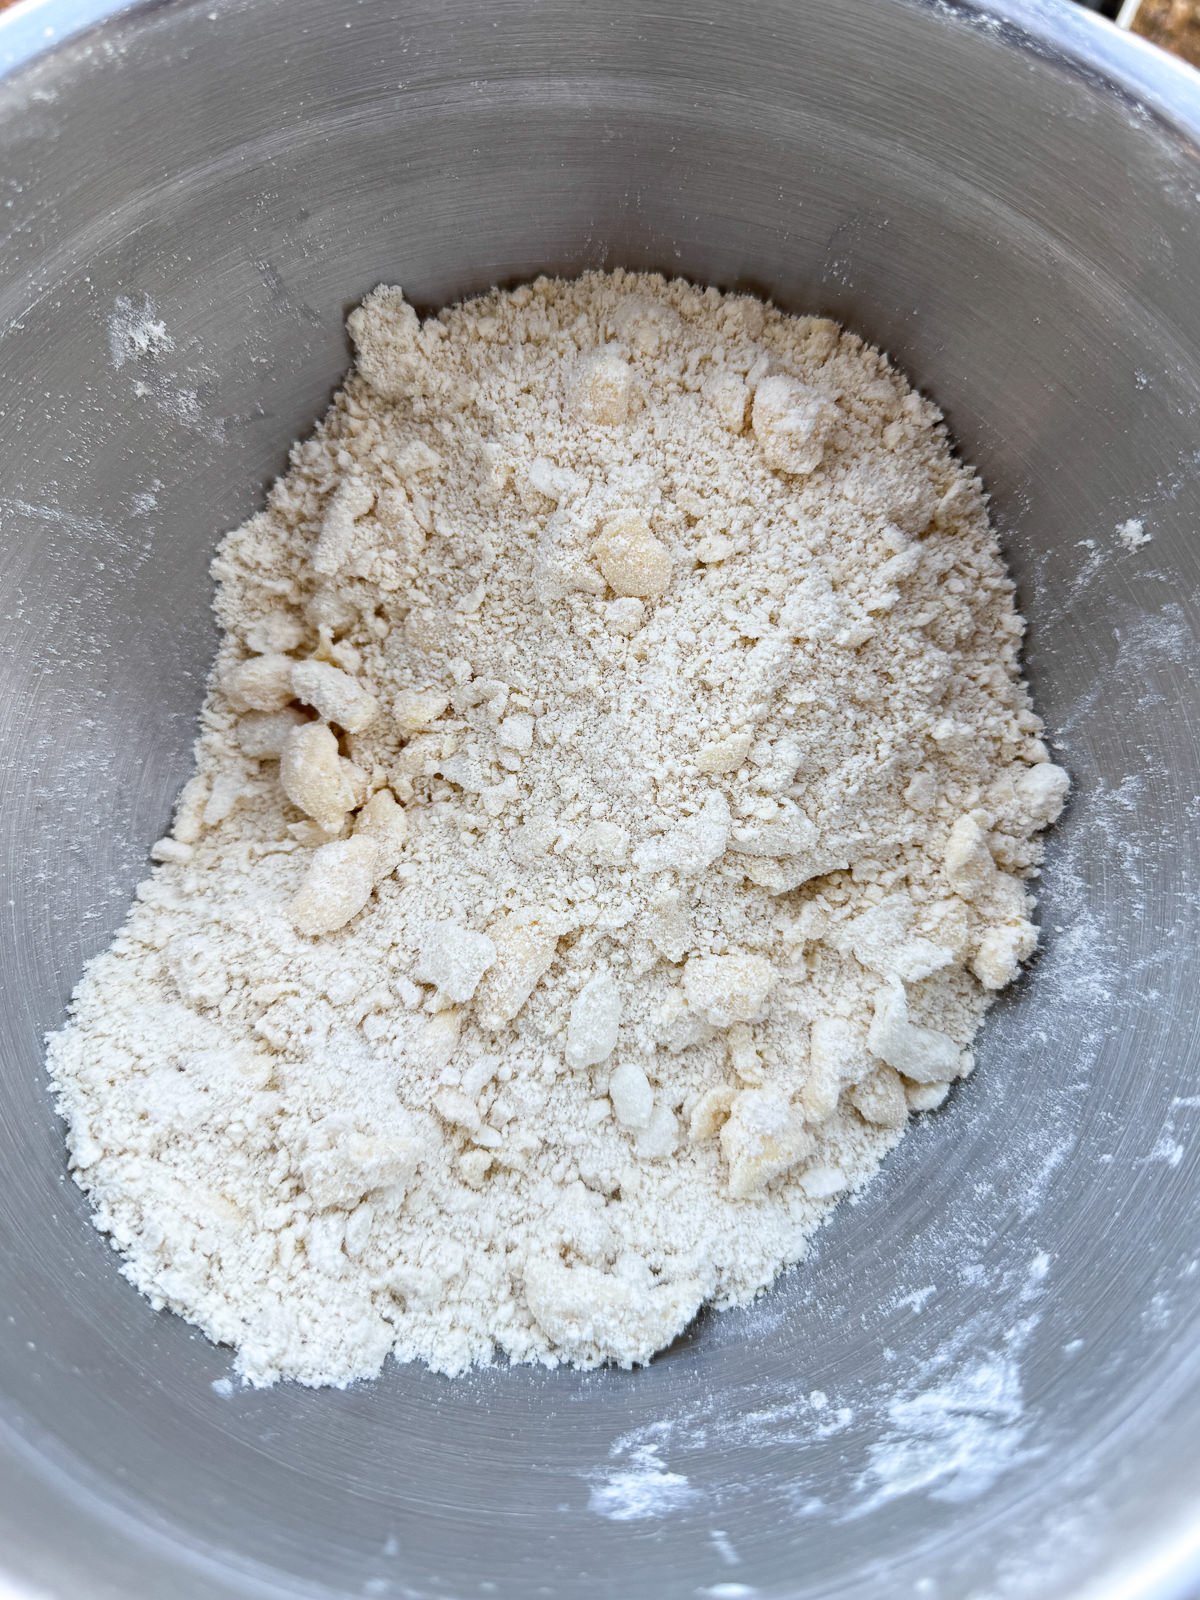
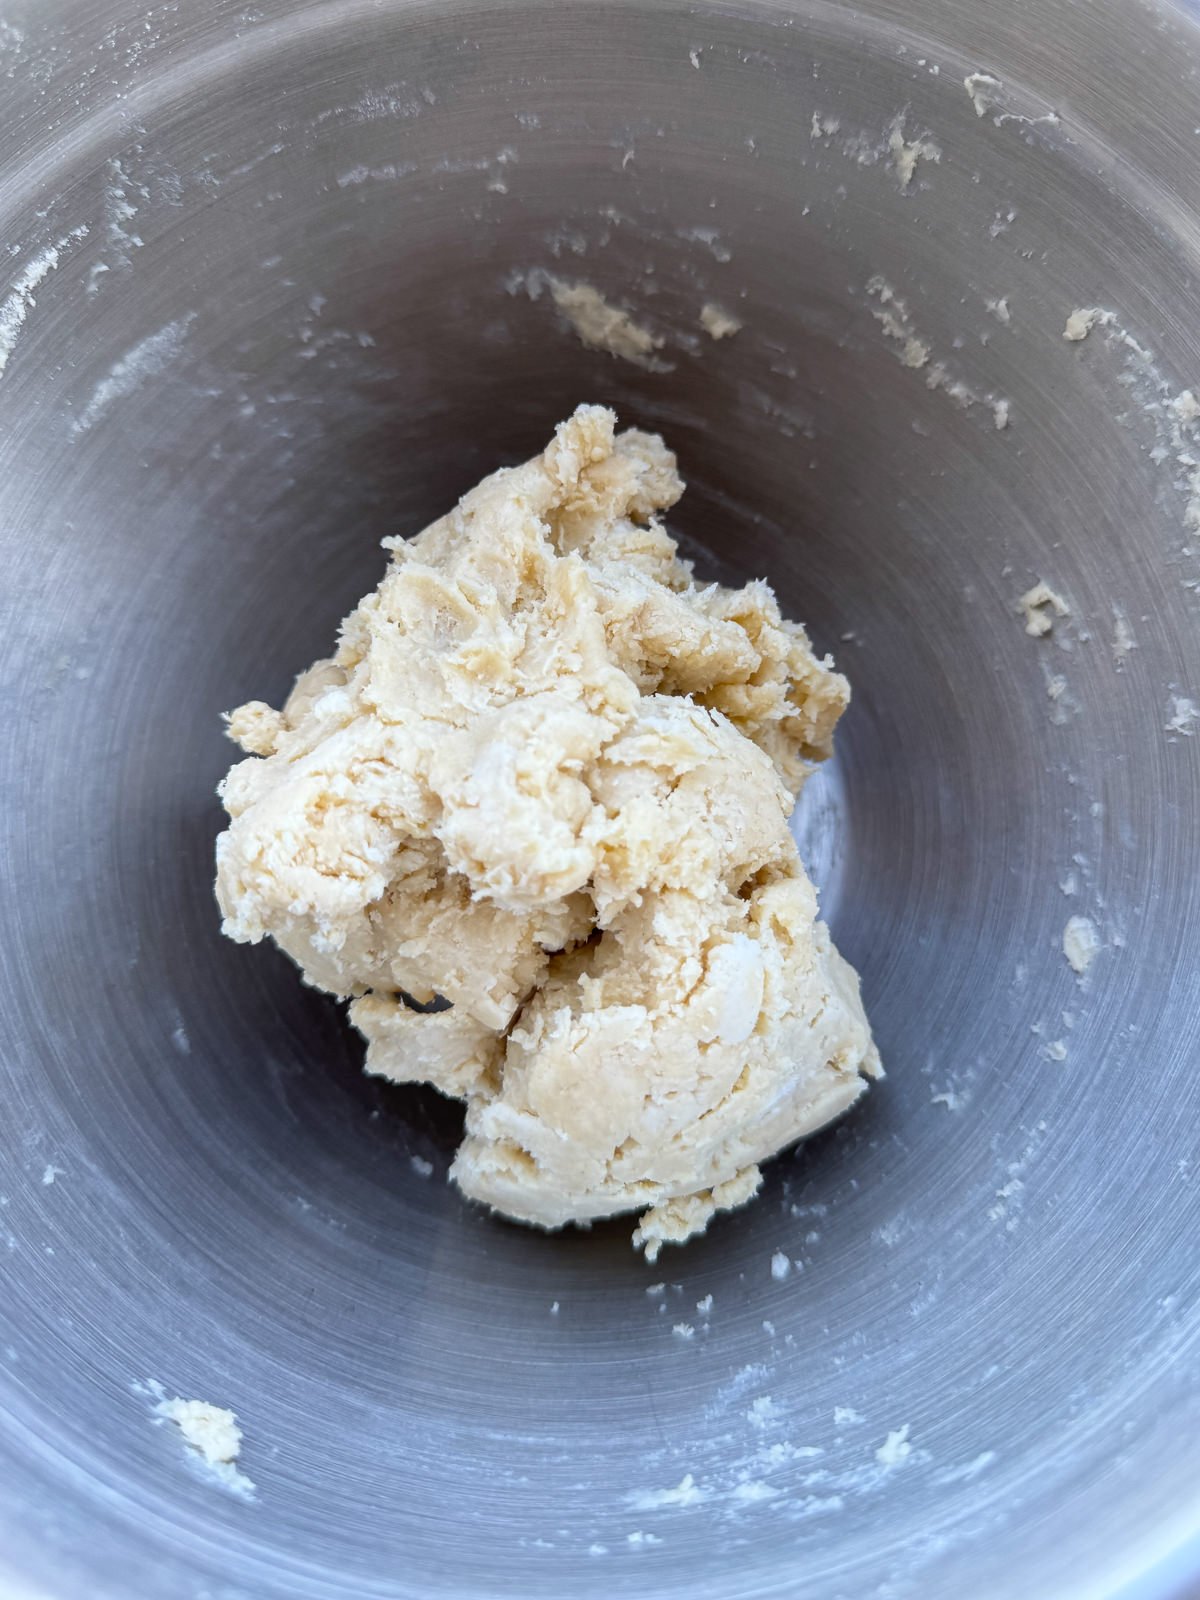
To make our pie dough, we place plain flour & table salt into a mixing bowl, whisk to combine then add in diced unsalted butter & lard, that has been chilled in the fridge. We rub the fats into the flour with our fingertips until the mix resembles coarse breadcrumbs. There should still be some larger chunks of fat though, as this is what makes our pie crust extra flaky!
Once the fats have been rubbed into the flour, we add in ice cold water & a teaspoon of apple cider vinegar then mix by hand to make a rough dough. Next, we tip the dough out onto a clean work surface then gently knead by hand until smooth.
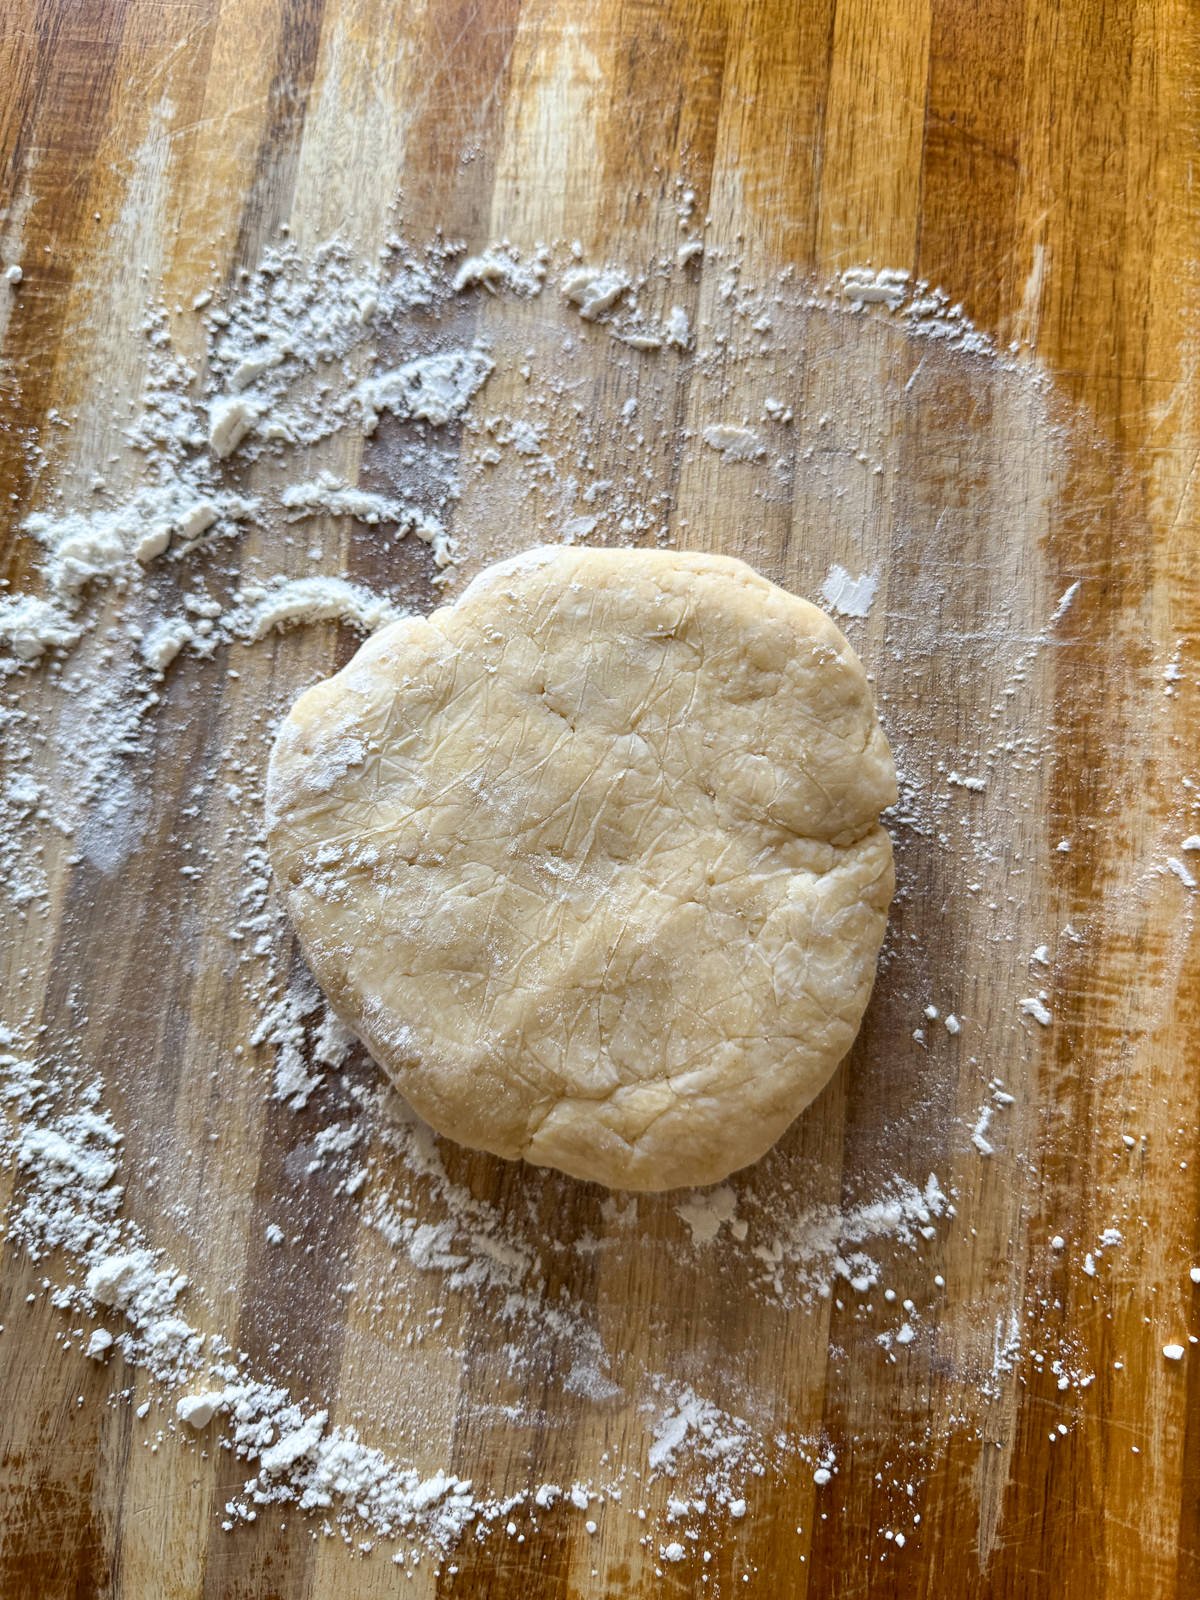
Step 2 – Chilling
Now that we’ve made our pie dough, we need to flatten it into a disc, wrap in clingfilm then chill in the fridge for at least 2 hours before using. Flattening the pastry into a disc ensures that it chills evenly & makes it easier to roll the pastry out later on. The pie dough will keep in the fridge for a couple of days, if you’re planning on rolling it out another time.
Step 3 – Rolling Out
Once chilled, we can roll the pastry out then use to line a pie dish. Before rolling out your pastry out, take it out of the fridge & let it sit out at room temperature for 10-15 minutes, to make it more pliable & easier to roll out.
Next, roll the pastry out on a lightly floured work surface into a disc that’s around 4mm thick. For a 9″ pie dish, you’ll need roll the pastry out into a 12″ disc.
Step 4 – Lining A Pie Dish & Crimping
Lining A Pie Dish
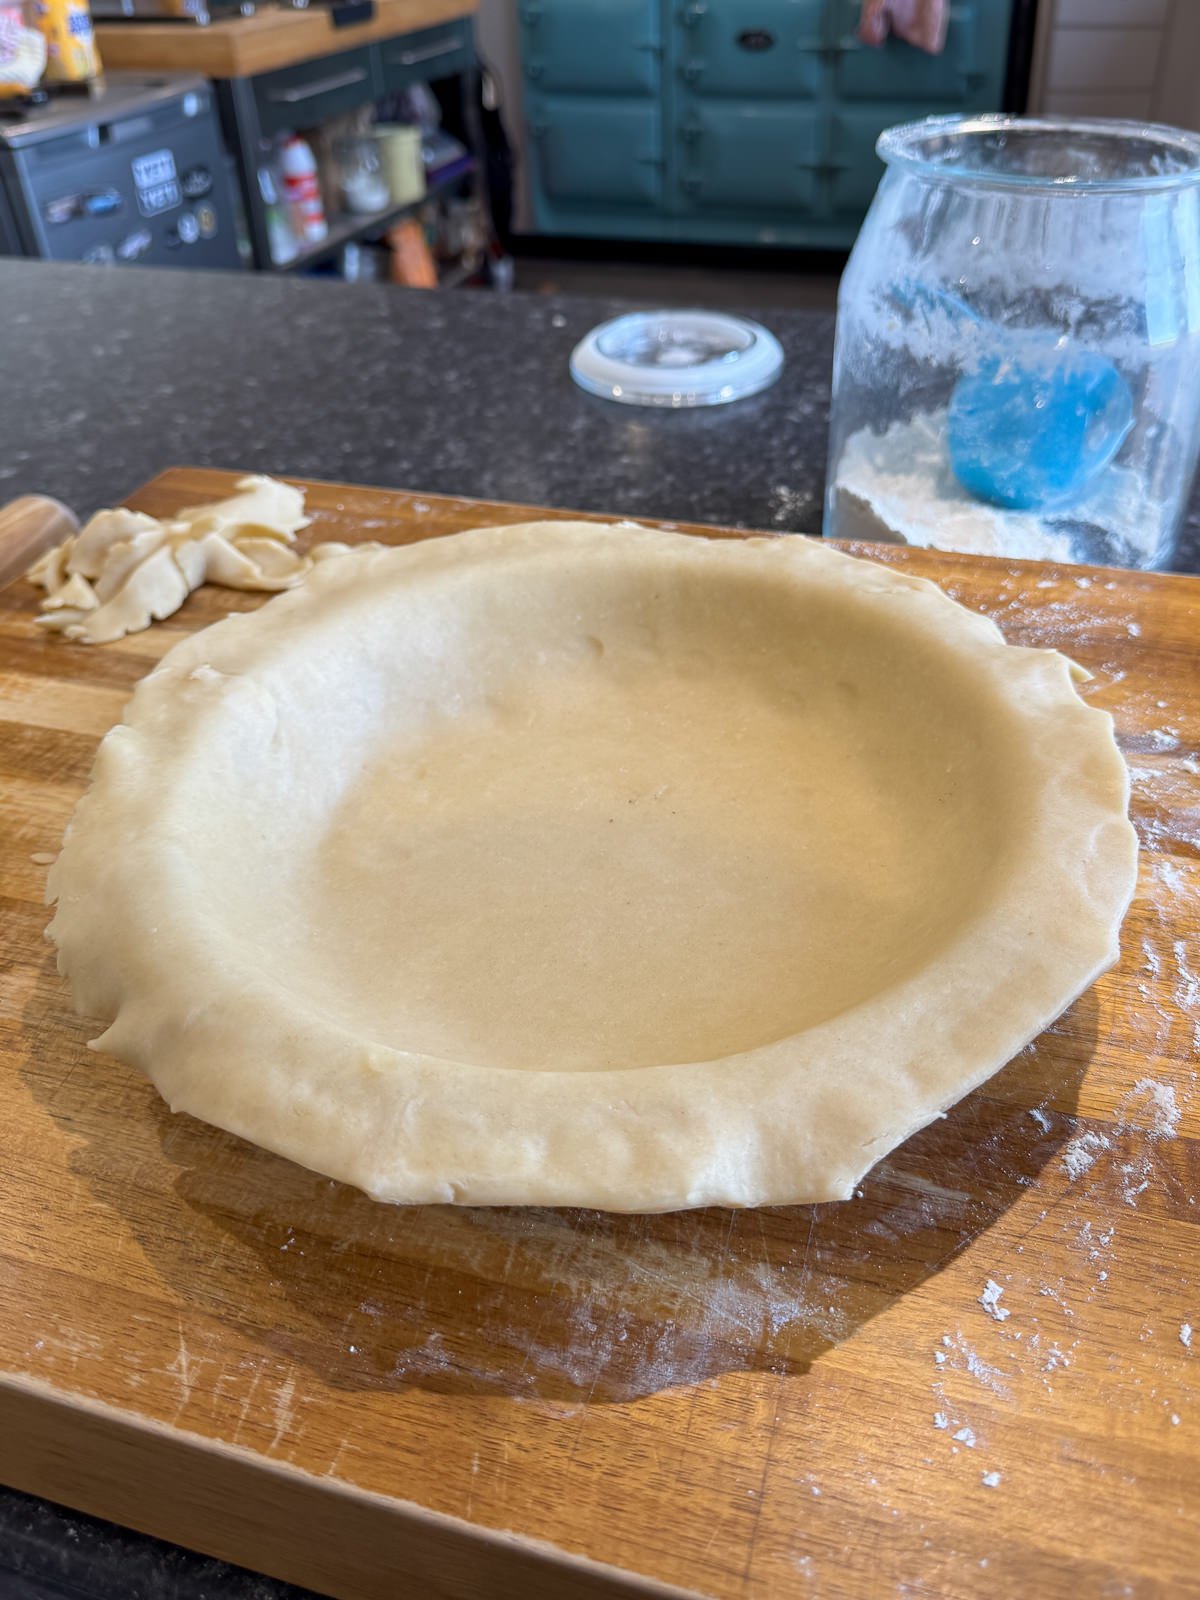
Now that the pastry is rolled out, the best way to transfer it into a pie dish is to roll it around a rolling pin then carefully unroll it into a pie dish that has been greased with butter. We use our hands to gently press the pastry into the dish then use a pair of scissors to trim the overhanging pastry if needed. There should be a couple of centimetres of pastry overhanging the edge of the pie dish.
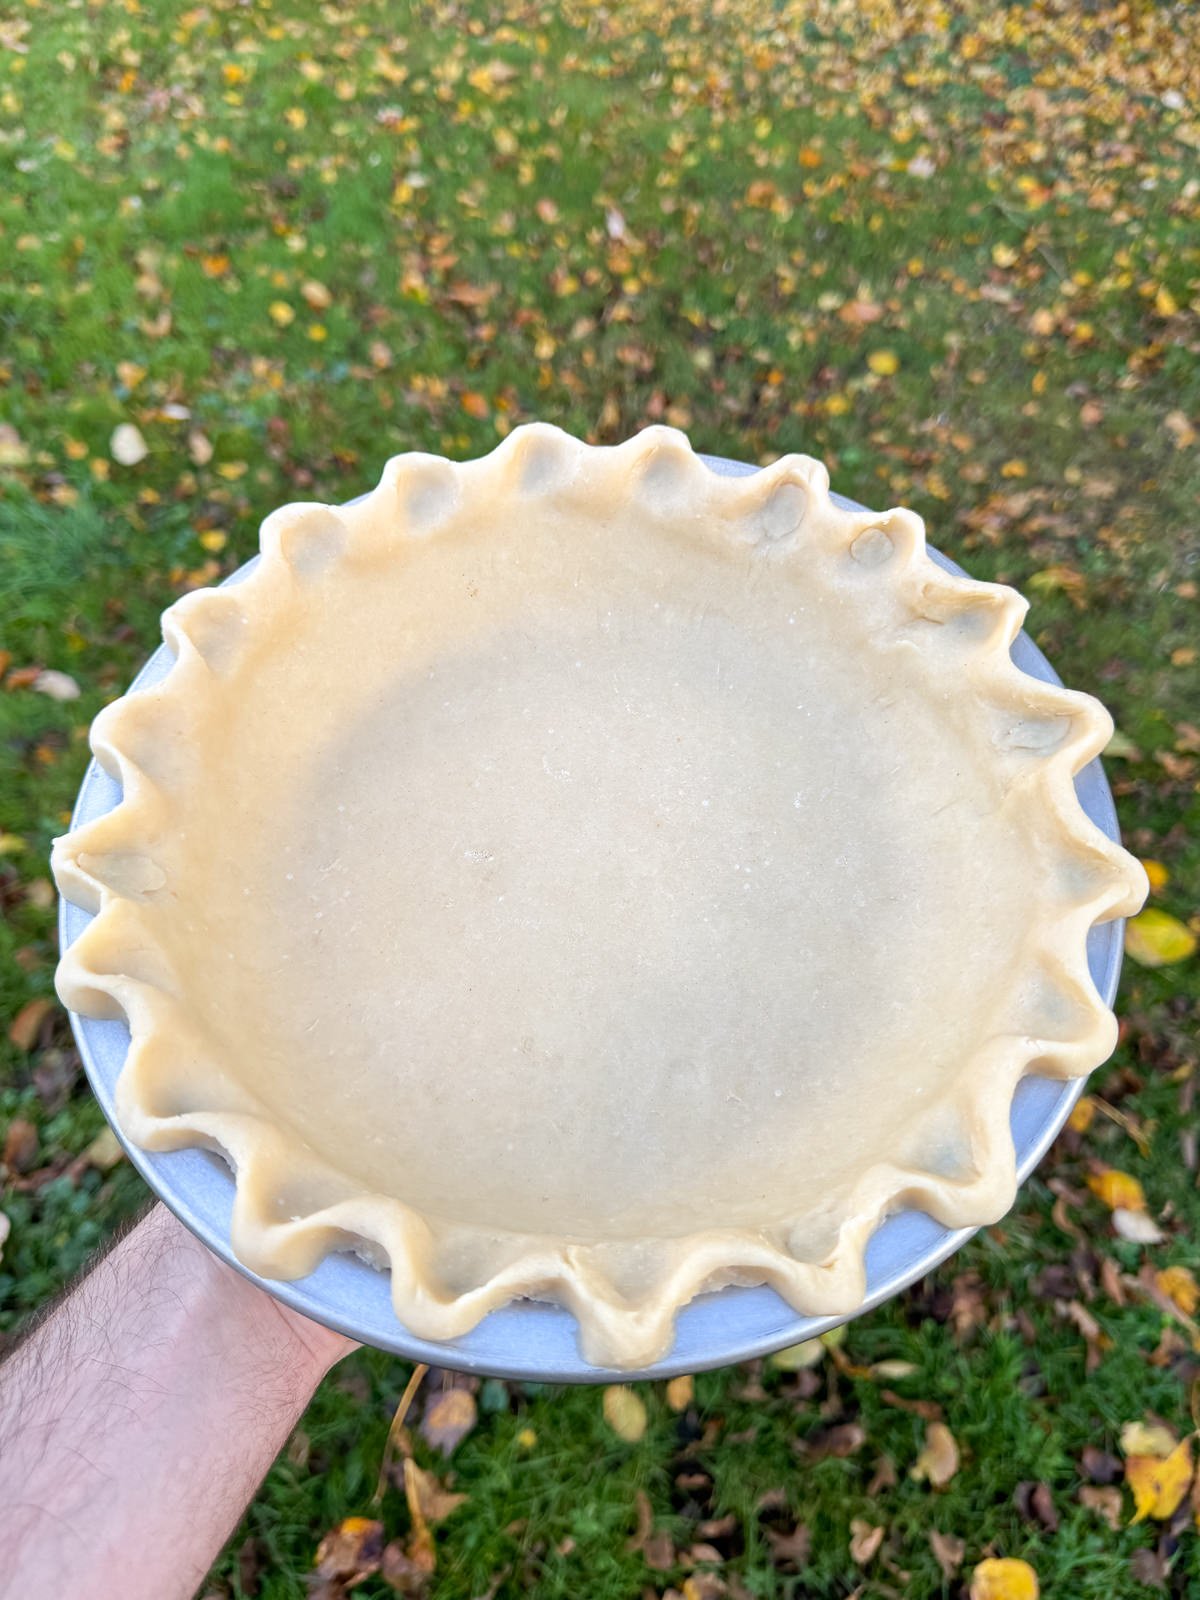
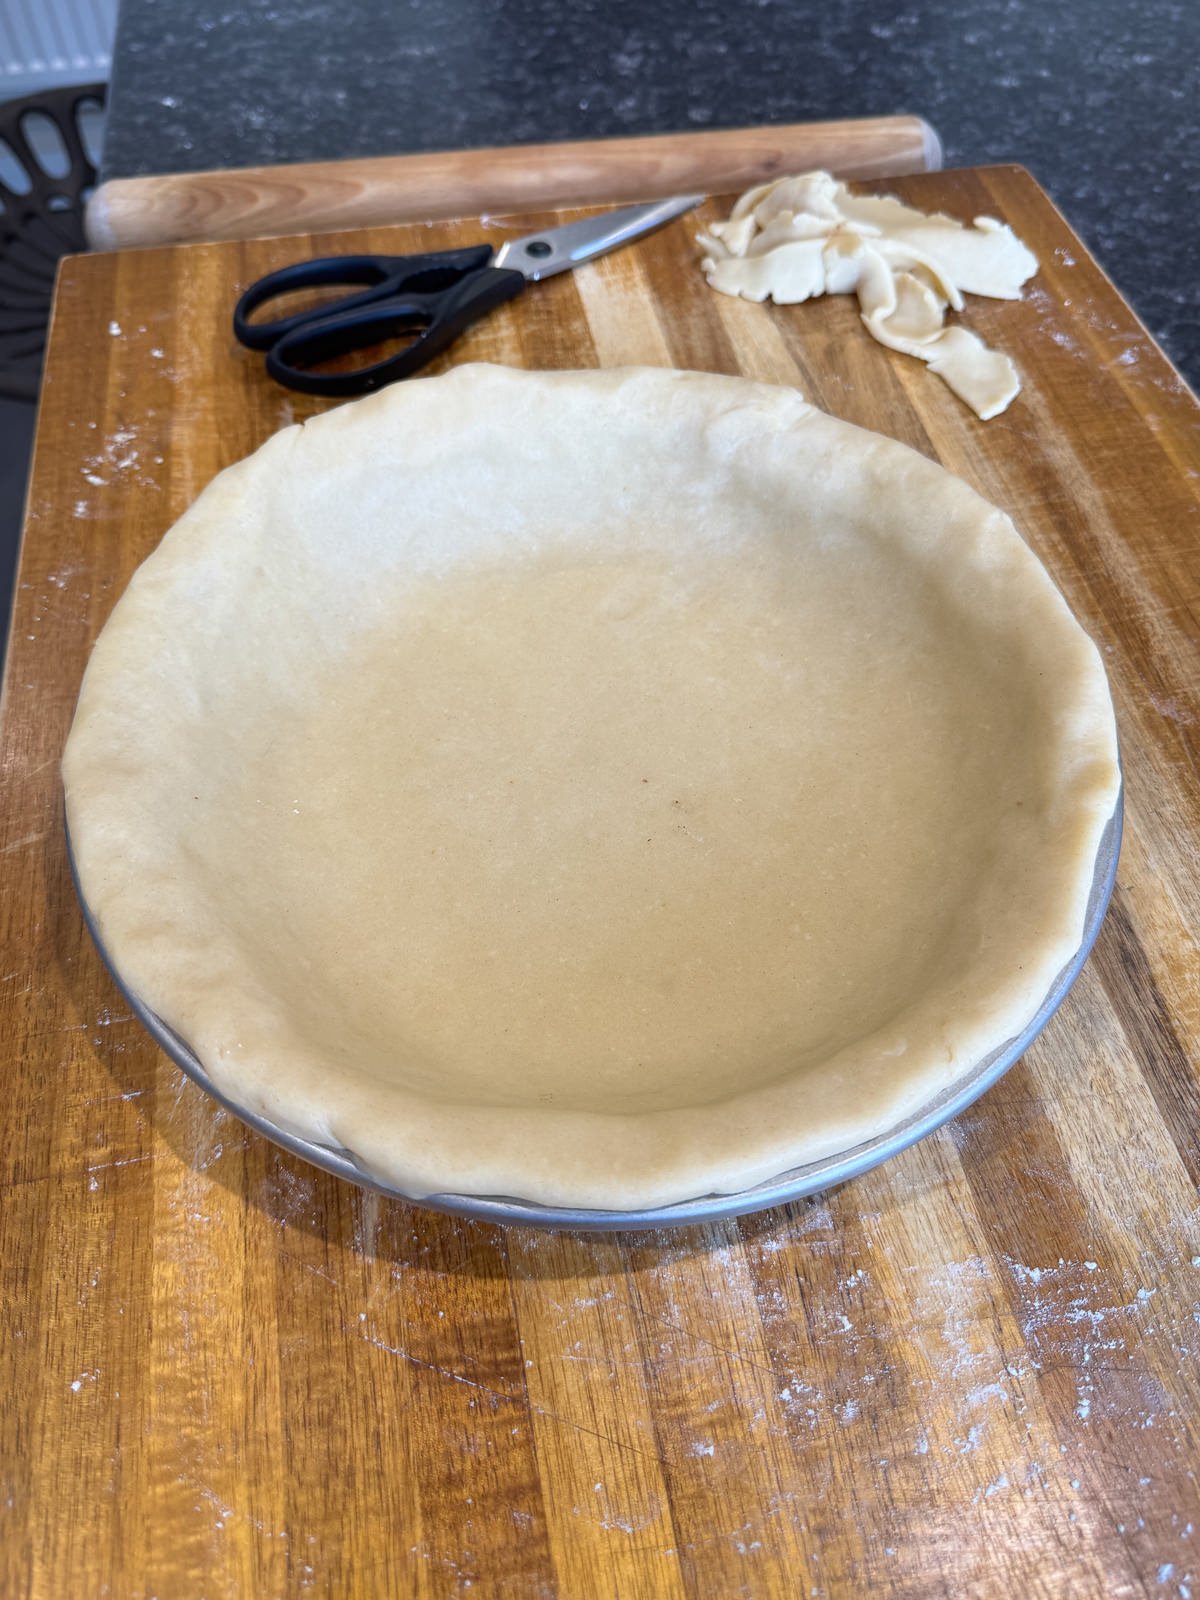
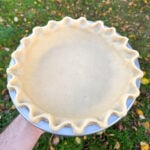
How To Crimp A Single Pie Crust
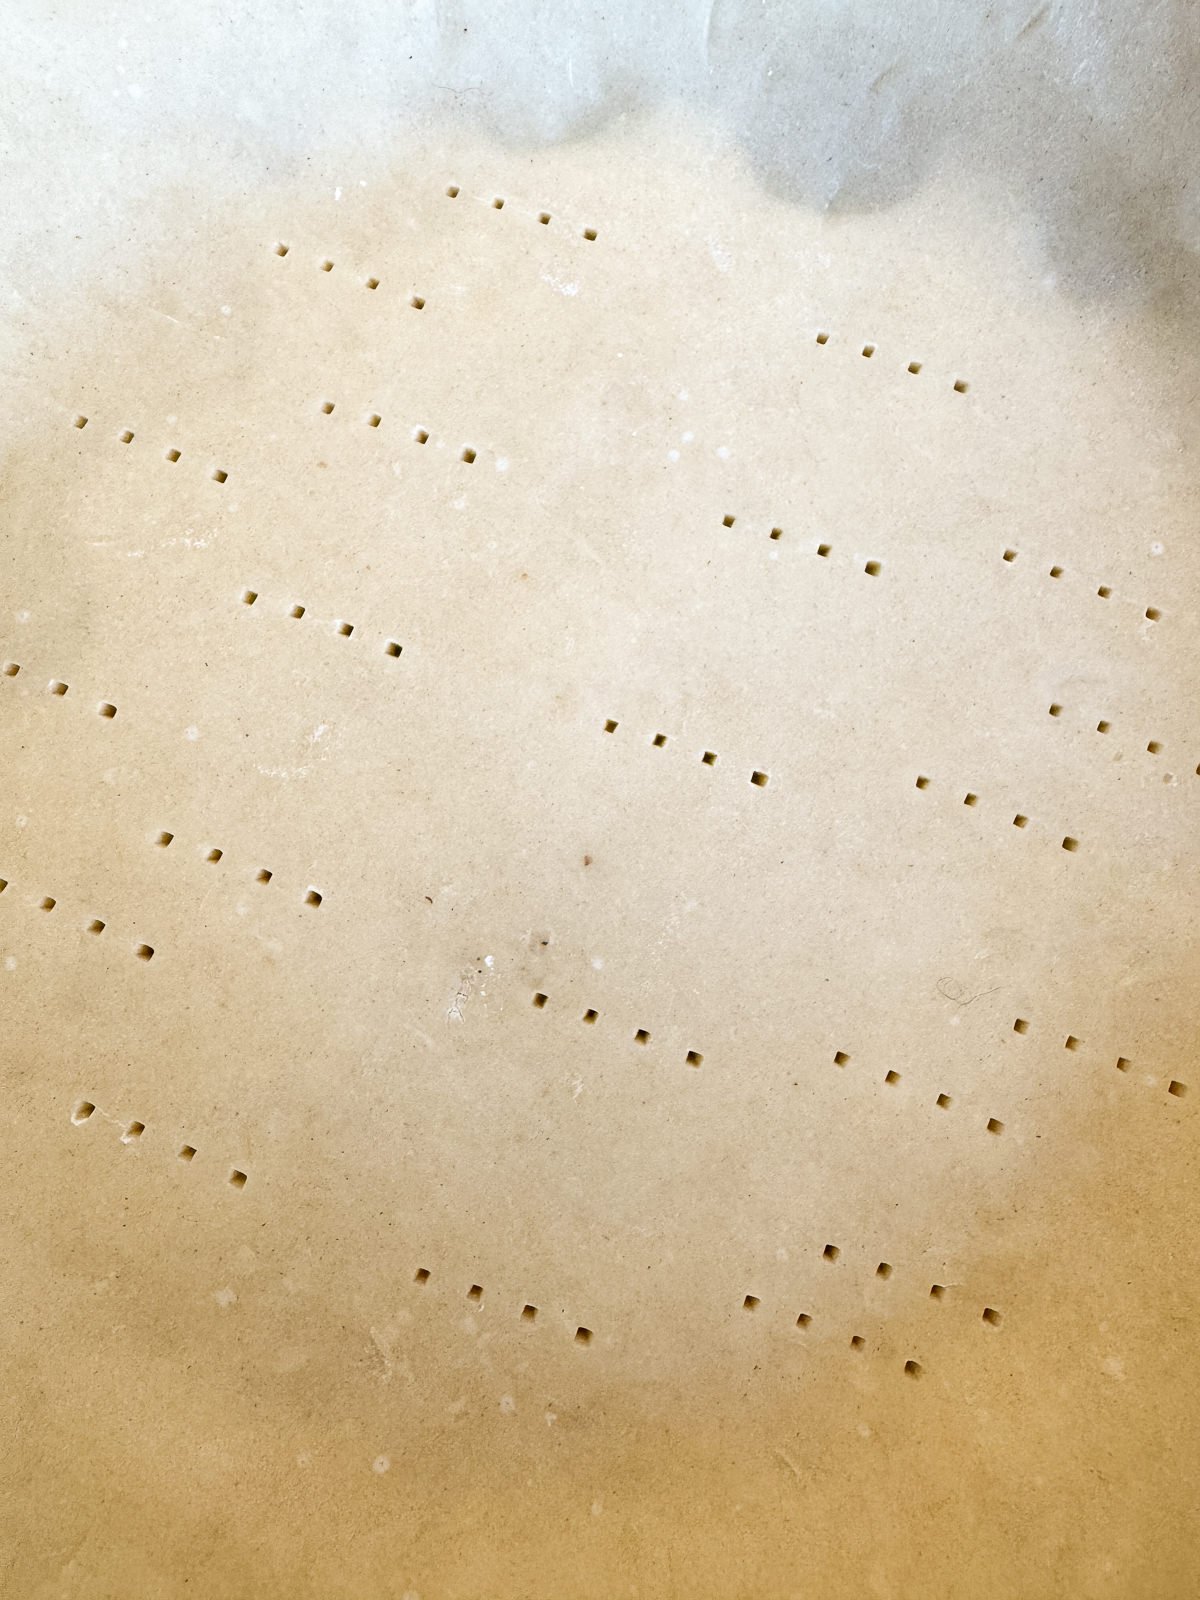
To crimp a single pie crust, take the overhanging pastry & tuck it underneath itself, so that the edge of the pie crust sits flush with the edge of the dish. We’re looking to make a thicker crust around the edge so that we can crimp it. Then we use our fingers or a fork to crimp the pastry along the edge of pie dish, in the desired pattern. If you’re going to be par baking your pie crust, use a fork to dock the base.
Step 5 – Chilling (Again!)
Before using, the pie crust needs to chill in the fridge for at least 2 hours. This prevents the pastry from shrinking as it bakes & gives the pastry a flakier texture. It’s best to use the pie crust within a couple of days, otherwise it can start to discolour.
How To Par Bake A Single Pie Crust
The best way to par bake a single pie crust is at a fairly high oven temperature as this prevents it from shrinking & gives it a crisp, flaky texture. A handy trick when par baking pie crusts, is to heat a baking tray up in the oven then bake the pie crust on top of this tray. The heat from the baking tray gives the base of the pie a head start, ensuring that it is fully cooked & not soggy.
Here’s how to par bake a single pie crust, step by step.
- Preheat an oven to 200°c/392°f. Place a large baking tray into the oven at the same time, so that it can heat up as well.
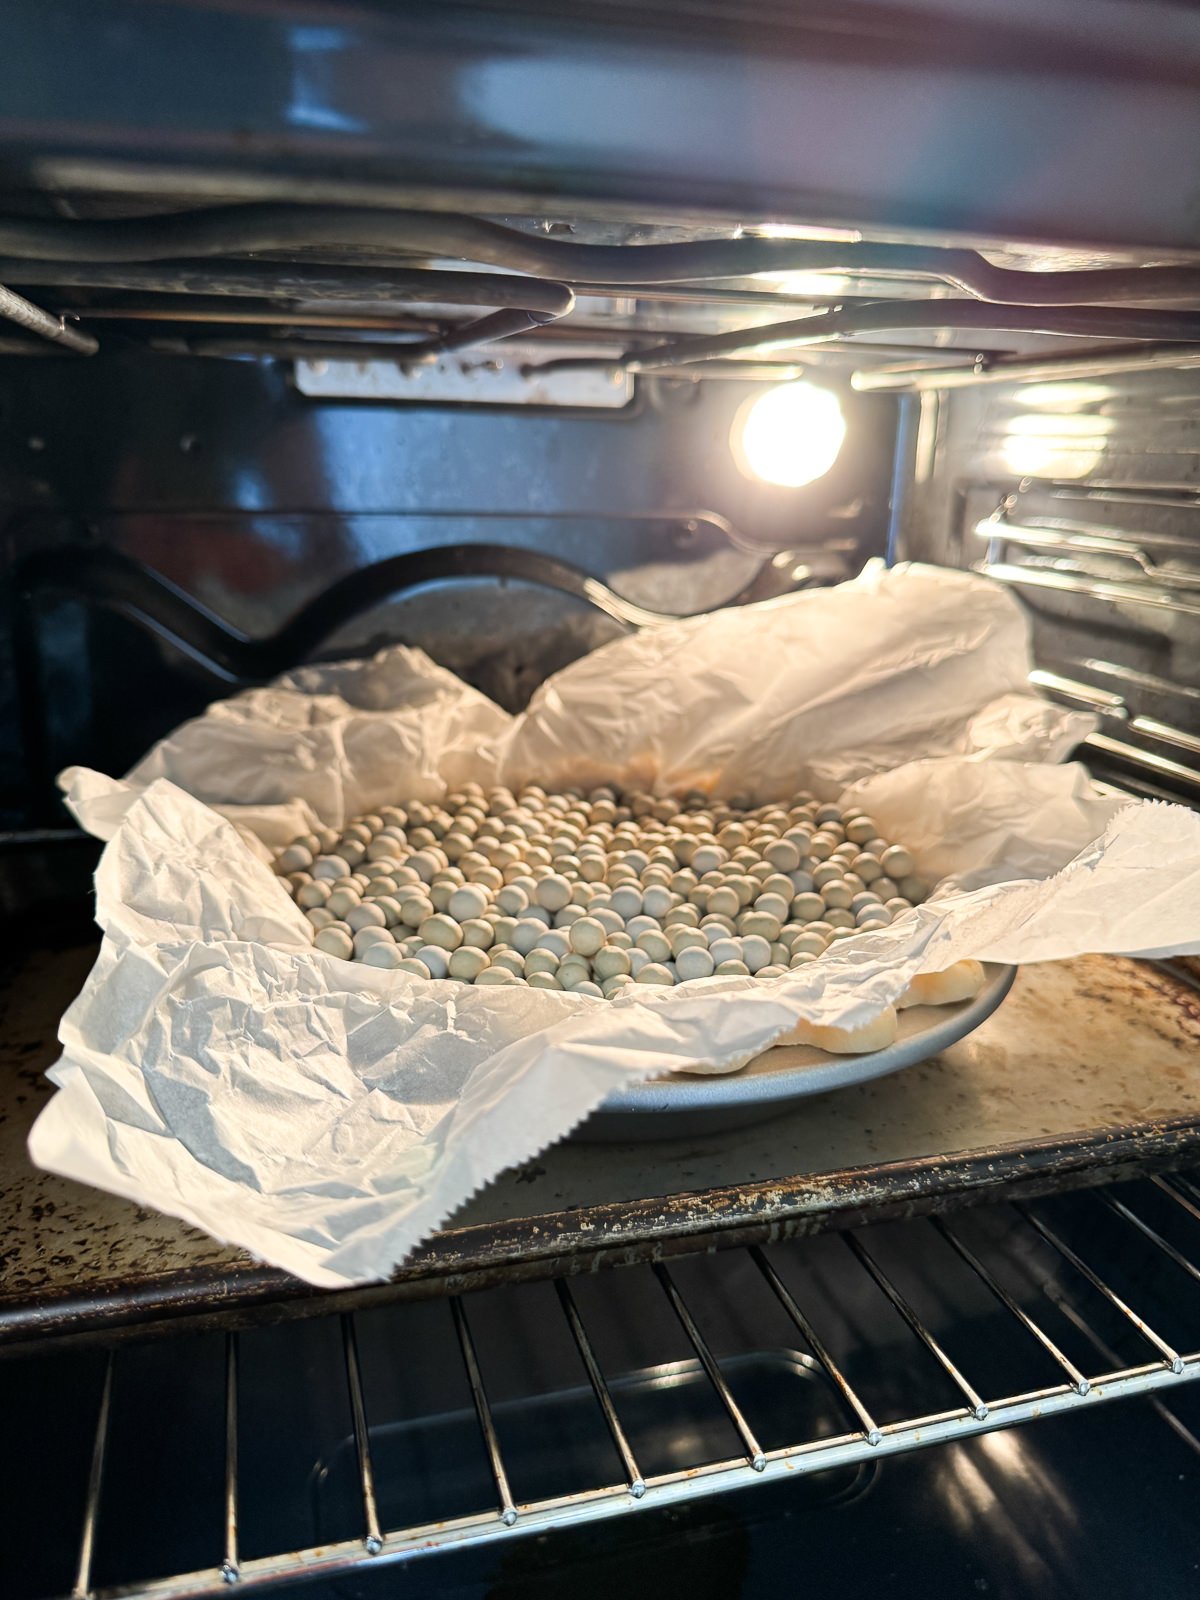
- Next, take a large piece of baking parchment, scrunch it up then place inside your pie crust. Fill the crust with baking beans (or rice) then place the pie dish onto the tray that’s in the oven.
- Bake the pie crust for 15-20 minutes, until the edges are set & starting to turn a light golden brown.
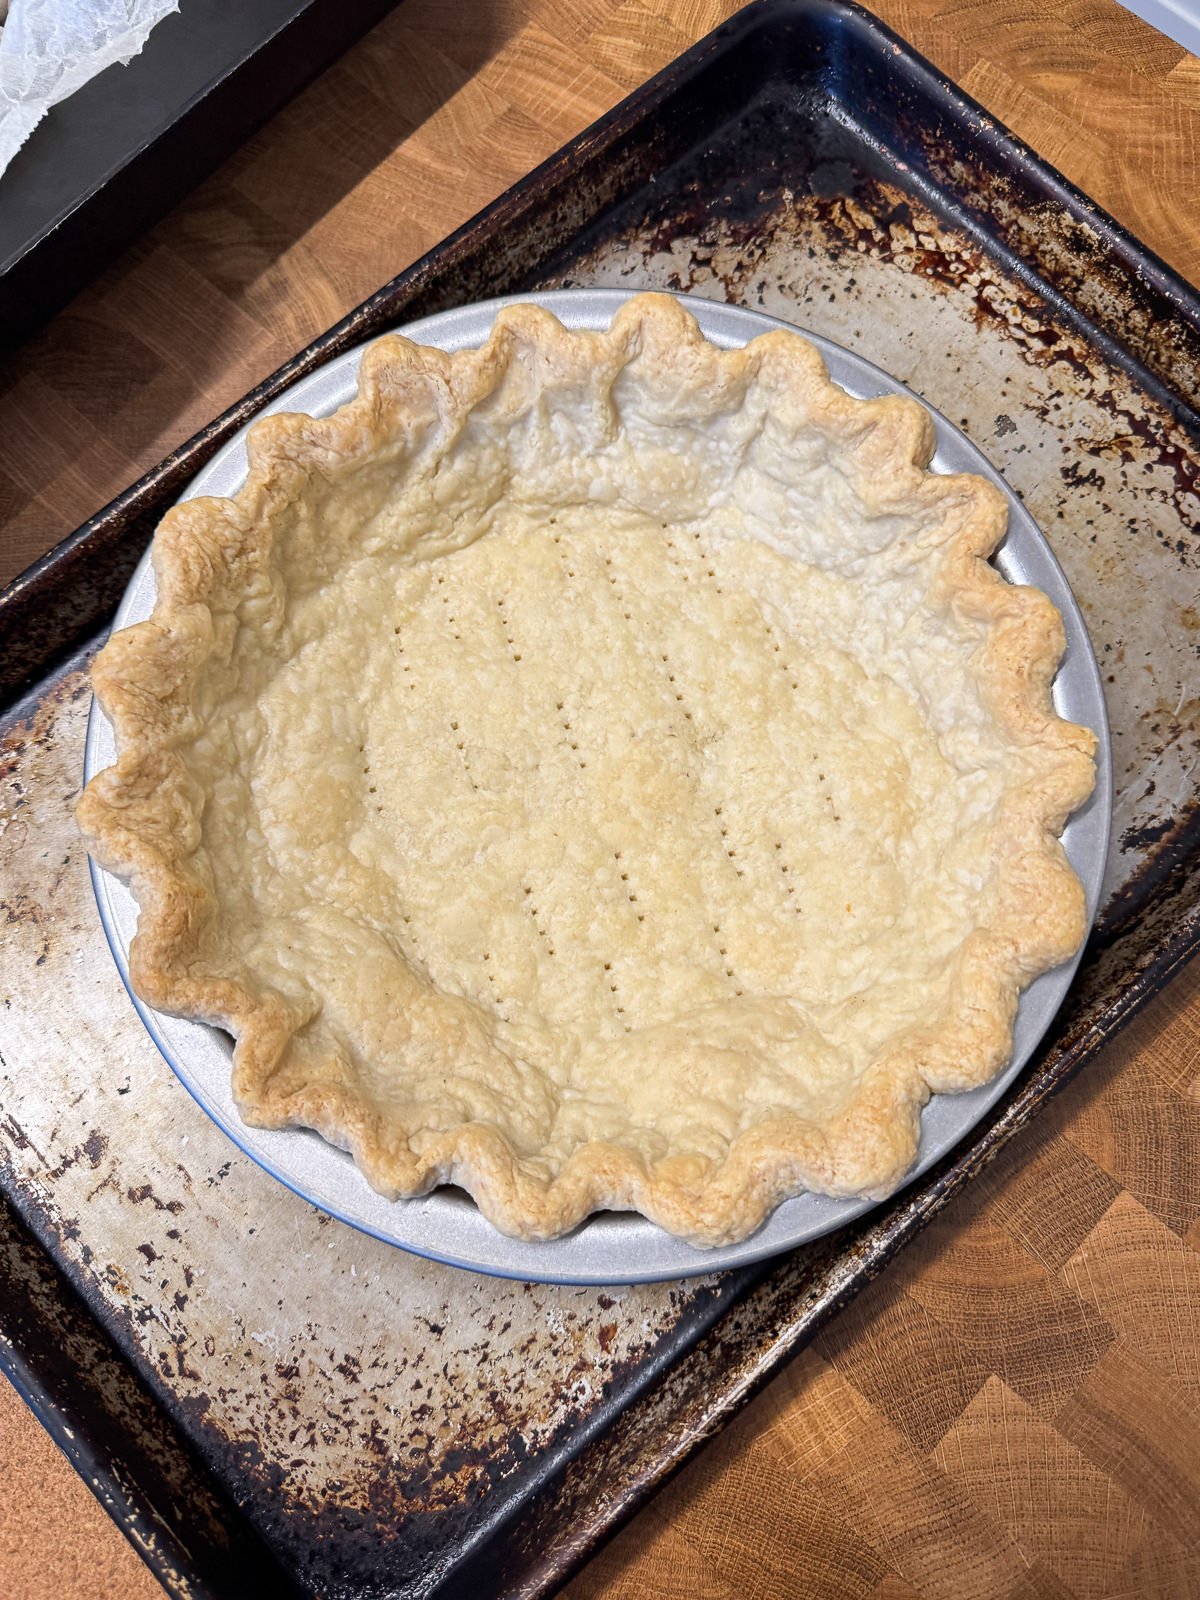
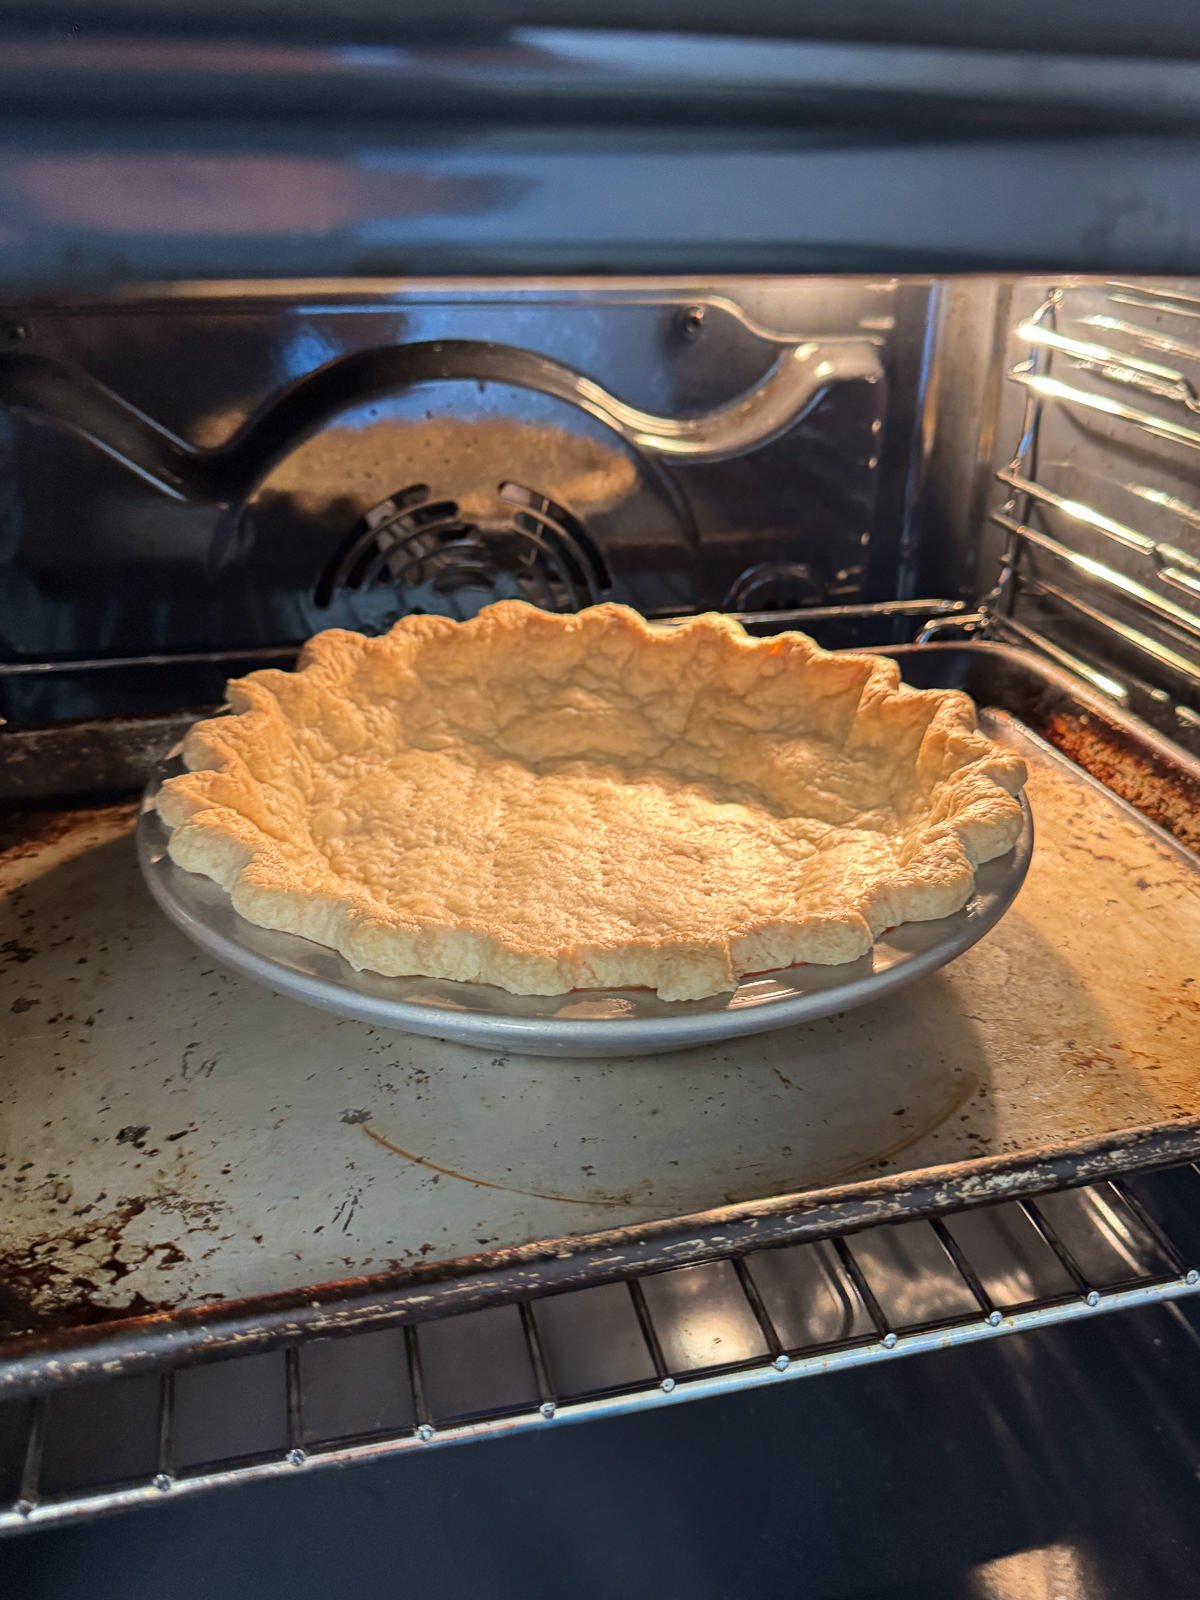
- Carefully lift the parchment & beans out of the pie crust then place back into the oven & cook for another 5-10 minutes, until the inside looks dry & is a light golden brown. If you’re not going to be baking the pie crust again (for an unbaked filling), bake it for 4-5 minutes longer, until a deep golden brown.
- Once cooked, take the pie crust out of the oven, let it cool slightly then brush the bottom with a light coating of egg yolk, to seal up the holes from when we docked it. Leave to cool before using.
Tips & Tricks
- For your pie dough, make sure to use ice cold water & fats that have come straight out of the fridge. This prevents the fat from melting into the flour & is key to making the flakiest pie crusts!
- Chill your pie dough for at least 2 hours after making, to give the flour time to hydrate. And for at least 2 hours after you’ve used it to line a pie dish, so that the pastry is cold completely when it goes into the oven. This gives the pie crust the flakiest texture & prevents it from shrinking.
- Don’t overwork the pastry when making the dough or when rolling it out as this can makes the pastry tough & shrink as it bakes.
- Par bake your pie crust, to avoid getting a soggy underbaked base & to ensure that it’s fully cooked & crisp. Par bake your pie crust on top of a preheated baking tray, to properly cook the bottom of the crust.
Frequently Asked Questions
Yes, you can make pie crust dough in a food processor but I’d recommend making it by hand. Using a food processor can make the pieces of fat too small which will make the pastry less flaky. Using a food processor is more suited to making shortcrust pastry, where you want the fats to be smaller.
To par bake a single pie crust in an Aga, bake on a grid shelf placed onto the floor of the roasting oven.
Pie crusts will keep for up to 3 days in the fridge before being baked. Alternatively, pie crusts can be frozen for up to 3 months, either as a disc of dough or in a lined pie dish. Make sure to wrap the pastry well in clingfilm to keep it airtight & to avoid freezer burns.
Adding a small amount of apple cider vinegar helps keep the dough from oxidising & makes it a bit easier to work with. Don’t worry if you haven’t got any though, you can make the pastry without it. You only need to add a small amount of vinegar to pie crust dough. For a 9″ pie, I add a teaspoon of apple cider vinegar to the dough.
I would recommend docking a single pie crust before par baking, as it prevents the pastry from puffing up as it cooks. To dock pastry, use a fork to poke holes in the bottom before baking. To seal up the holes after your pie crust has been par baked, brush a light coating of egg yolk onto the base of the pastry a few minutes after it comes out of the oven.
Yes, you can double a single pie crust recipe to make a double pie crust. Although, you’ll end up with more pastry than you need. For a 9″ single pie crust, you’ll need a 12 inch disc of pastry. Whereas for a double pie crust, you’ll need a 12 inch disc of pastry for the base & a 10 inch disc for the lid. So you won’t need quite as much pastry. If you’re looking at making a double pie crust, I would recommend scaling the recipe up by 80% or check out our double pie crust recipe!
More Baking & Dessert Recipes To Try!
- Classic Cherry Pie
- Cake Crumb Treacle Tart
- Brown Butter Hobnob Cheesecake
- Apple & Walnut Strudel
- Pain Aux Raisin Danish Pastries
- Marmite & Red Leicester Scones
If you have enjoyed this pie crust recipe, it would mean a lot if you could leave a review & rating. And if you’d like to stay up to date with future recipes, follow us on Instagram & TikTok!
Perfectly Flaky Single Pie Crust
Equipment
- 9" Pie Dish
- Mixing Bowl
- Rolling Pin
Ingredients
- 220 g Plain Flour
- ½ tsp Table Salt
- 90 g Unsalted Butter (Cold & Diced)
- 60 g Lard (Cold & Diced)
- 30 g Ice Cold Water
- 1 tsp Apple Cider Vinegar
For Par Baking
- 1 Egg Yolk
Instructions
Pastry
- Place the flour & salt into a mixing bowl, whisk together then add in the butter & lard. Rub the fats into the flour by hand until the mix resembles coarse breadcrumbs but with some larger chunks of fat still visible.Don't make the fats too small! The larger chunks are what makes the pie crust flaky.
- Add in the cold water & vinegar then mix by hand to make a rough dough.
- Tip the dough out onto a clean work surface & knead gently until smooth (be careful not to overwork the pastry) then flatten into a disc & wrap in clingfilm. Refrigerate for at least 2 hours.
Rolling Out
- Take the pastry out of the fridge & leave to sit at room temperature for 10-15 minutes. This makes the pastry more pliable & easier to roll out.
- Roll the pastry out on a lightly floured work surface into a disc that's around 4mm thick. For a 9" pie dish, your disc of pastry should be around 12" wide.Lightly dust the top of the pastry with flour as well, to stop your rolling pin from sticking! Don't use too much flour though as this can dry the pastry out.
- Carefully roll the pastry around your rolling pin then unroll into a 9" pie tin that has been lightly greased with butter. Gently press the pastry into the tin. The pastry should be overhanging the edge by a couple of centimetres. Use a pair of scissors to trim any excess pastry off if necessary.
- Take the overhanging pastry & tuck it underneath itself, so that the edge of the pie crust sits flush with the edge of the dish. We're looking to make a thicker crust around the edge so that we can crimp it.A small amount of the overhanging pastry might go down the inside edge of the pie dish as you fold it to form the crust. This is totally fine!
- Next, use your fingers or a fork to crimp the pastry along the edge of the pie dish. Chill the pie crust in the fridge for at least 2 hours before baking, or for up to 3 days. If you're going to be par baking your pie crust, dock the base with a fork.
Par Baking (If Needed)
- To par bake (or blind bake) your pie crust, first preheat an oven to 200°c/180°c fan (392°f/356°f). Place a metal baking tray into the oven now as well, so that it can heat up. We'll be baking the pie crust on top of the tray, so that the base cooks properly.Make sure to give your oven & the tray plenty of time to fully saturate with heat. This is key to baking a crisp, flaky pie crust!
- Next, take a large piece of baking parchment, scrunch it up then place inside your pie crust. Fill the crust with baking beans (or rice) then place the pie dish onto the tray that's in the oven.
- Bake the pie crust for 15-20 minutes, until the edges are set & starting to turn a light golden brown.
- Carefully lift the parchment & beans out of the pie crust then place back into the oven & cook for another 5-10 minutes, until the inside looks dry & is a light golden brown. If you're not going to be baking the pie crust again (for an unbaked filling), bake it for 4-5 minutes longer, until a deep golden brown.Make sure to have a large dish/tray handy, that you can place the hot baking beans into to cool down.
- Once cooked, take the pie crust out of the oven, let it cool slightly then brush the bottom with a light coating of egg yolk, to seal up the holes from when we docked it. Leave to cool before using.Make sure to let the pastry cool for a minute or two, otherwise the yolk will scramble! We just want it to set.