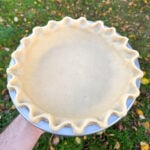
Perfectly Flaky Single Pie Crust
Here's how to make a homemade single pie crust that's crisp, flaky & flavourful. This recipe makes enough pastry for a 9" pie crust that can be used for pecan pie, pumpkin pie & lots more.
Servings: 1 9" Pie Crust
Equipment
- 9" Pie Dish
- Mixing Bowl
- Rolling Pin
Ingredients
- 220 g Plain Flour
- ½ tsp Table Salt
- 90 g Unsalted Butter (Cold & Diced)
- 60 g Lard (Cold & Diced)
- 30 g Ice Cold Water
- 1 tsp Apple Cider Vinegar
For Par Baking
- 1 Egg Yolk
Instructions
Pastry
- Place the flour & salt into a mixing bowl, whisk together then add in the butter & lard. Rub the fats into the flour by hand until the mix resembles coarse breadcrumbs but with some larger chunks of fat still visible.Don't make the fats too small! The larger chunks are what makes the pie crust flaky.
- Add in the cold water & vinegar then mix by hand to make a rough dough.
- Tip the dough out onto a clean work surface & knead gently until smooth (be careful not to overwork the pastry) then flatten into a disc & wrap in clingfilm. Refrigerate for at least 2 hours.
Rolling Out
- Take the pastry out of the fridge & leave to sit at room temperature for 10-15 minutes. This makes the pastry more pliable & easier to roll out.
- Roll the pastry out on a lightly floured work surface into a disc that's around 4mm thick. For a 9" pie dish, your disc of pastry should be around 12" wide.Lightly dust the top of the pastry with flour as well, to stop your rolling pin from sticking! Don't use too much flour though as this can dry the pastry out.
- Carefully roll the pastry around your rolling pin then unroll into a 9" pie tin that has been lightly greased with butter. Gently press the pastry into the tin. The pastry should be overhanging the edge by a couple of centimetres. Use a pair of scissors to trim any excess pastry off if necessary.
- Take the overhanging pastry & tuck it underneath itself, so that the edge of the pie crust sits flush with the edge of the dish. We're looking to make a thicker crust around the edge so that we can crimp it.A small amount of the overhanging pastry might go down the inside edge of the pie dish as you fold it to form the crust. This is totally fine!
- Next, use your fingers or a fork to crimp the pastry along the edge of the pie dish. Chill the pie crust in the fridge for at least 2 hours before baking, or for up to 3 days. If you're going to be par baking your pie crust, dock the base with a fork.
Par Baking (If Needed)
- To par bake (or blind bake) your pie crust, first preheat an oven to 200°c/180°c fan (392°f/356°f). Place a metal baking tray into the oven now as well, so that it can heat up. We'll be baking the pie crust on top of the tray, so that the base cooks properly.Make sure to give your oven & the tray plenty of time to fully saturate with heat. This is key to baking a crisp, flaky pie crust!
- Next, take a large piece of baking parchment, scrunch it up then place inside your pie crust. Fill the crust with baking beans (or rice) then place the pie dish onto the tray that's in the oven.
- Bake the pie crust for 15-20 minutes, until the edges are set & starting to turn a light golden brown.
- Carefully lift the parchment & beans out of the pie crust then place back into the oven & cook for another 5-10 minutes, until the inside looks dry & is a light golden brown. If you're not going to be baking the pie crust again (for an unbaked filling), bake it for 4-5 minutes longer, until a deep golden brown.Make sure to have a large dish/tray handy, that you can place the hot baking beans into to cool down.
- Once cooked, take the pie crust out of the oven, let it cool slightly then brush the bottom with a light coating of egg yolk, to seal up the holes from when we docked it. Leave to cool before using.Make sure to let the pastry cool for a minute or two, otherwise the yolk will scramble! We just want it to set.
Notes
1. Par Baking In An Aga - Par bake the pie crust on a grid shelf placed onto the floor of the roasting oven.
2. Fats - For the flakiest texture, I use a mix of butter & lard for my pie crust. However, feel free to use just butter if you'd prefer. The pastry will be richer but slightly less flaky.
3. Vinegar - Adding a small amount of apple cider vinegar helps keep the dough from oxidising & makes it a bit easier to work with. Don't worry if you haven't got any though, you can make the pastry without it.
4. Chilling - Make sure to chill the dough for at least 2 hours after making it & after lining the pie dish. This prevents the pie crust from shrinking as it bakes & ensures that the pastry is as flaky as possible. It's key that the fats in the pastry are cold & solid when the pie crust goes into the oven!
5. Docking - If you're going to be par baking your pie crust, I'd recommend using a fork to dock (or poke holes) into the base, to stop it from puffing up as it bakes. After baking, I like to brush a small amount of egg yolk onto the base, to seal up the holes from the fork.
6. Making Ahead Of Time - Once made, it's best to use your pie crust within 3 days. If you've used the pastry to line a pie dish, make sure to cover it with clingfilm to prevent any oxidisation.
❤️ Stay connected with Salt Butter Smoke
The Prep List is my free weekly newsletter with seasonal recipes, kitchen notes and behind-the-scenes from my kitchen. Add Salt Butter Smoke as a Google Preferred Source to see more of my recipes in Search.