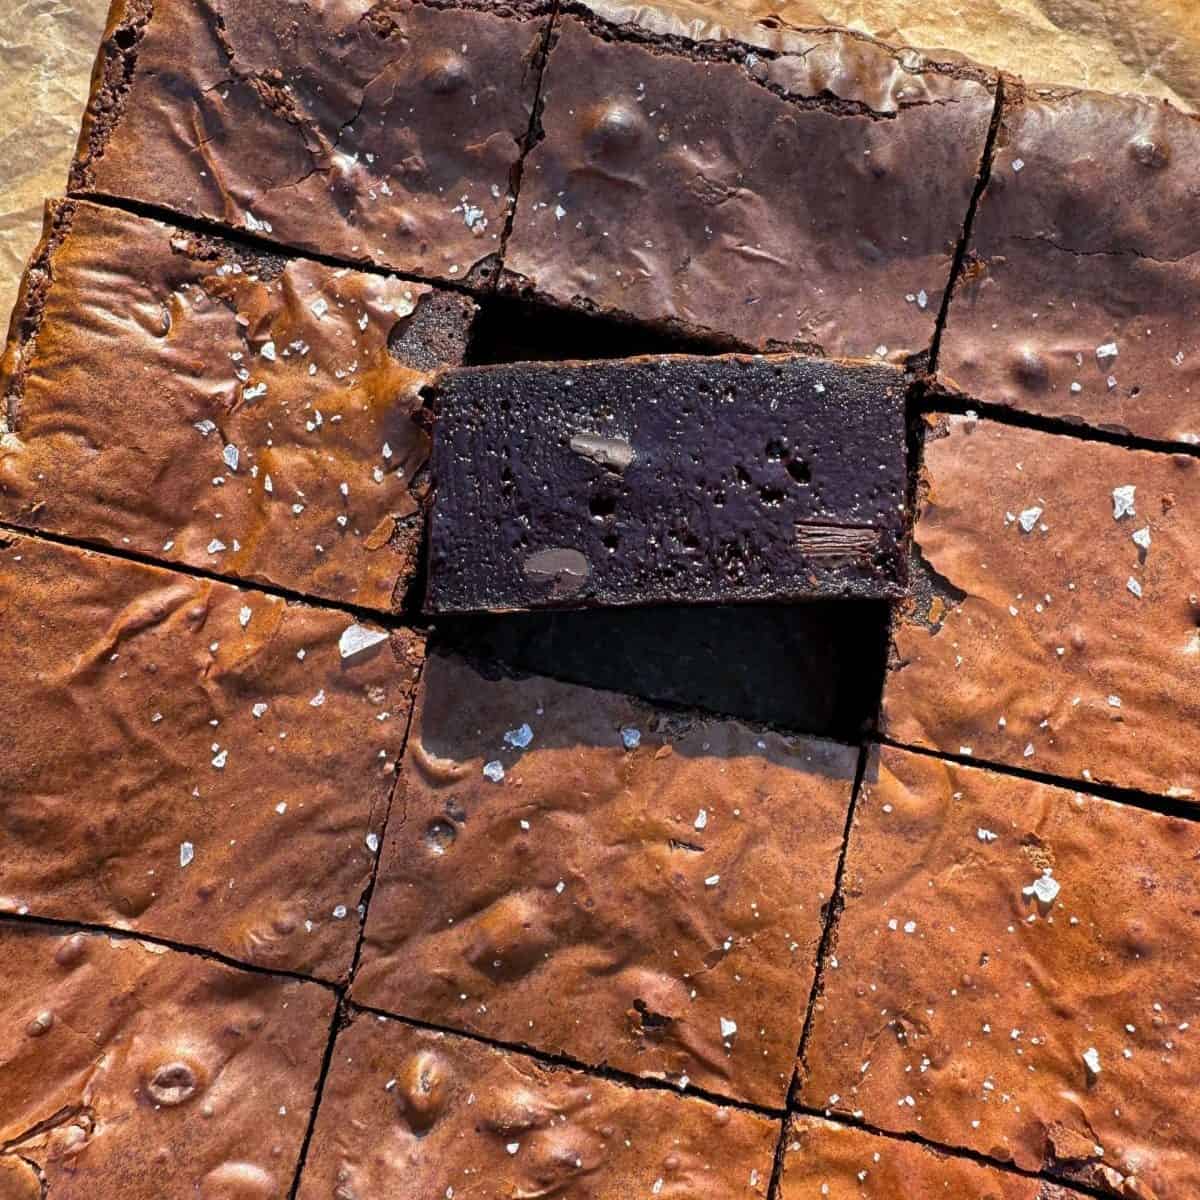
Chocolate Fudge Layer Cake
The ultimate chocolate fudge cake! There’s layers of moist chocolate sponge that’s made with black cocoa, rich chocolate fudge frosting & an intense dark chocolate ganache.
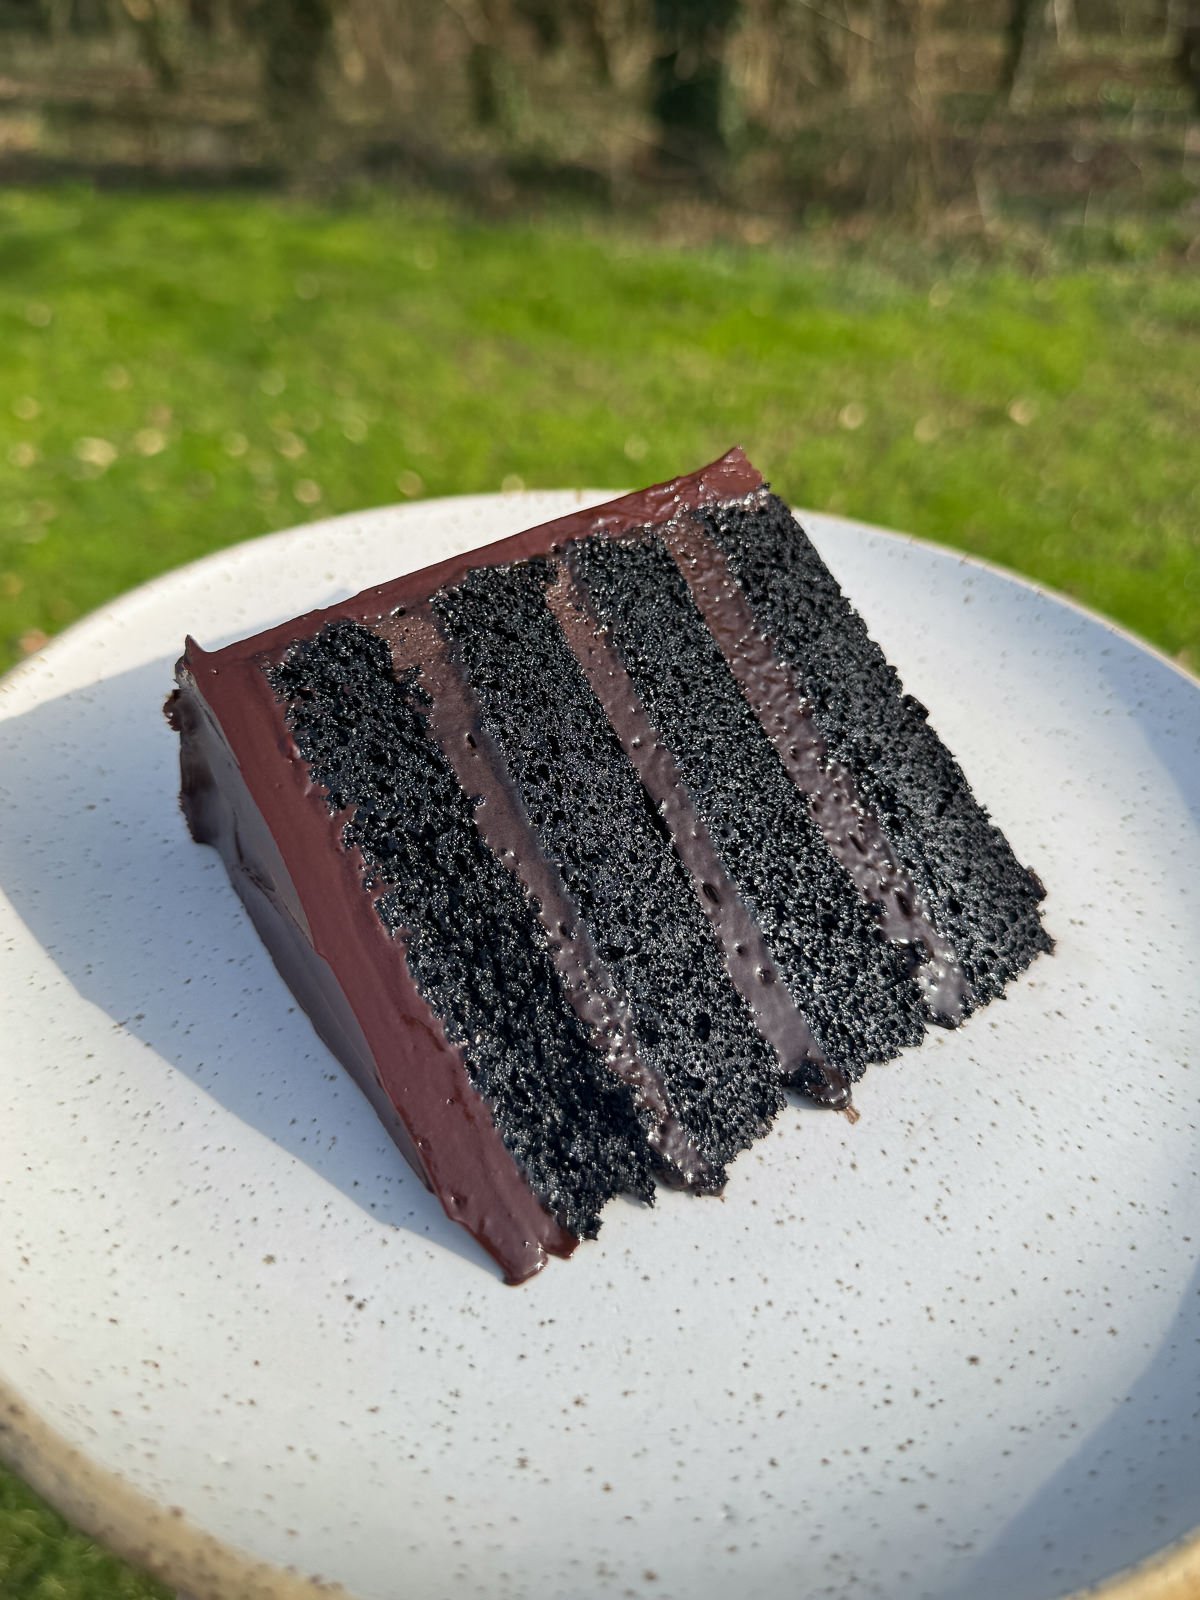
If you’re a huge fan of chocolate cake, like I am then this is the recipe for you! This chocolate fudge layer cake is insanely chocolatey, looks really impressive & is incredibly easy to make. You really can’t go wrong with this layer cake & it’s perfect for celebrations, dinner parties or for when you just fancy some cake.
In this post, we’re going to be taking a deep dive into what makes the perfect chocolate fudge cake. From the moist, slightly dense chocolate sponge that’s made with black cocoa to give it that deep colour. To the perfect chocolate fudge frosting and a rich dark chocolate ganache that’s made to be easily spreadable. Plus, there’s some handy tips & tricks included that can be used to make any other chocolate cake levels above the rest! We’re talking how to bloom cocoa powder for a more intense flavour, how to make a seriously moist sponge & how to get the glossiest finish on your ganache.
This is just a really good chocolate cake and it’s perfect served at room temperature, with a drizzle of pouring cream…
For more baking recipes, check out every growing baking recipe collection! There’s plenty to choose from here, from chocolate chip cookies & brownies, to homemade breads, pastry & loads more.
Components Of This Cake
In my opinion, a chocolate fudge cake should be super rich & almost too chocolatey! However, it’s best to keep things simple; a moist chocolate sponge, rich chocolate frosting & an intense chocolate ganache. If you like, you could use just the ganache (or frosting) for the whole cake but I like the contrasting textures & flavours that you get by using both…
- Chocolate Fudge Cake – A dense, moist chocolate cake made with dark cocoa for that signature deep colour & intense flavour.
- Chocolate Frosting – The ultimate chocolate fudge frosting! This is made like a classic frosting but with the addition of dark cocoa, melted dark chocolate & mascarpone.
- Chocolate Ganache – A glossy dark chocolate ganache that also includes mascarpone, to give it a more spreadable consistency.
Ingredient Notes
There’s a few ingredients that you’ll need to use for this recipe that will really make a difference & set your chocolate fudge cake apart from a regular chocolate sponge. Here I’ve added substitutions that can be used & where there might not be any.
- Black Cocoa Powder – If you want your chocolate cake & frosting to have a deep, dark colour & intense flavour, you’ll need to use a black Dutch processed cocoa powder. I had to buy this online but regular Dutch processed cocoa will work as well. I wouldn’t recommend using regular cocoa powder for this recipe.
- Dark Chocolate – I developed the ganache & frosting recipes using a 72% dark chocolate, so that’s what I’d recommend that you use. It’s key that you use bars of dark chocolate (not chips) as this melts the best.
- Sugars – Make sure to use the sugars specified in the recipe. We’re using a mix of caster & dark brown sugar for the cake, for the perfect balance between texture & flavour, so I wouldn’t recommend changing the ratio of this.
- Golden Syrup – Added to both the frosting & ganache for sweetness & to give them a glossy finish. Golden syrup can be substituted for light corn syrup.
- Sour Cream – Added to the cake batter to make the sponges extra soft, tender & moist.
- Mascarpone – We’re adding mascarpone to the ganache & chocolate fudge frosting to make them more spreadable & so that they set slightly softer.
The Key To Making Moist Chocolate Fudge Cake
A chocolate fudge cake sponge is one of my favourite types of cakes to make, mainly because it’s so easy! It’s the sort of batter where you mix the dry ingredients together then add in the wet ingredients & stir to make a smooth batter. There’s no creaming of butter & sugar involved & it takes literally minutes to make!
When you eat a chocolate fudge cake, you expect the sponge to be dense, moist & super chocolatey, right? So the key to achieving this, mainly comes down to the ingredients & ratios used. For the perfect texture, we’re using a mix of melted butter & vegetable oil in the batter. For a rich chocolate flavour, we’re using a black Dutch processed cocoa powder, which we’re going to be blooming in boiling water. And to make a moist sponge, we’re adding a generous amount of sour cream into the batter as well.
Chocolate Fudge Frosting
I used the fudge frosting from my chocolate sheet cake as the base for the frosting for this cake, with a few changes & addition to make it richer, fudgier & more chocolatey! This stuff’s not as heavy as some fudge icings, which is why we’re using a ganache as well. Plus as it’s made with black cocoa, it has a sort of oreo flavour. It’s really good.
This frosting is made with melted chocolate, dark cocoa powder that’s been bloomed in warm cream, golden syrup & mascarpone. And it’s made pretty much the same way as a regular American frosting, by beating butter with icing sugar until fluffy then we mix in mascarpone, cooled melted chocolate, cocoa powder & golden syrup. That’s pretty much it!

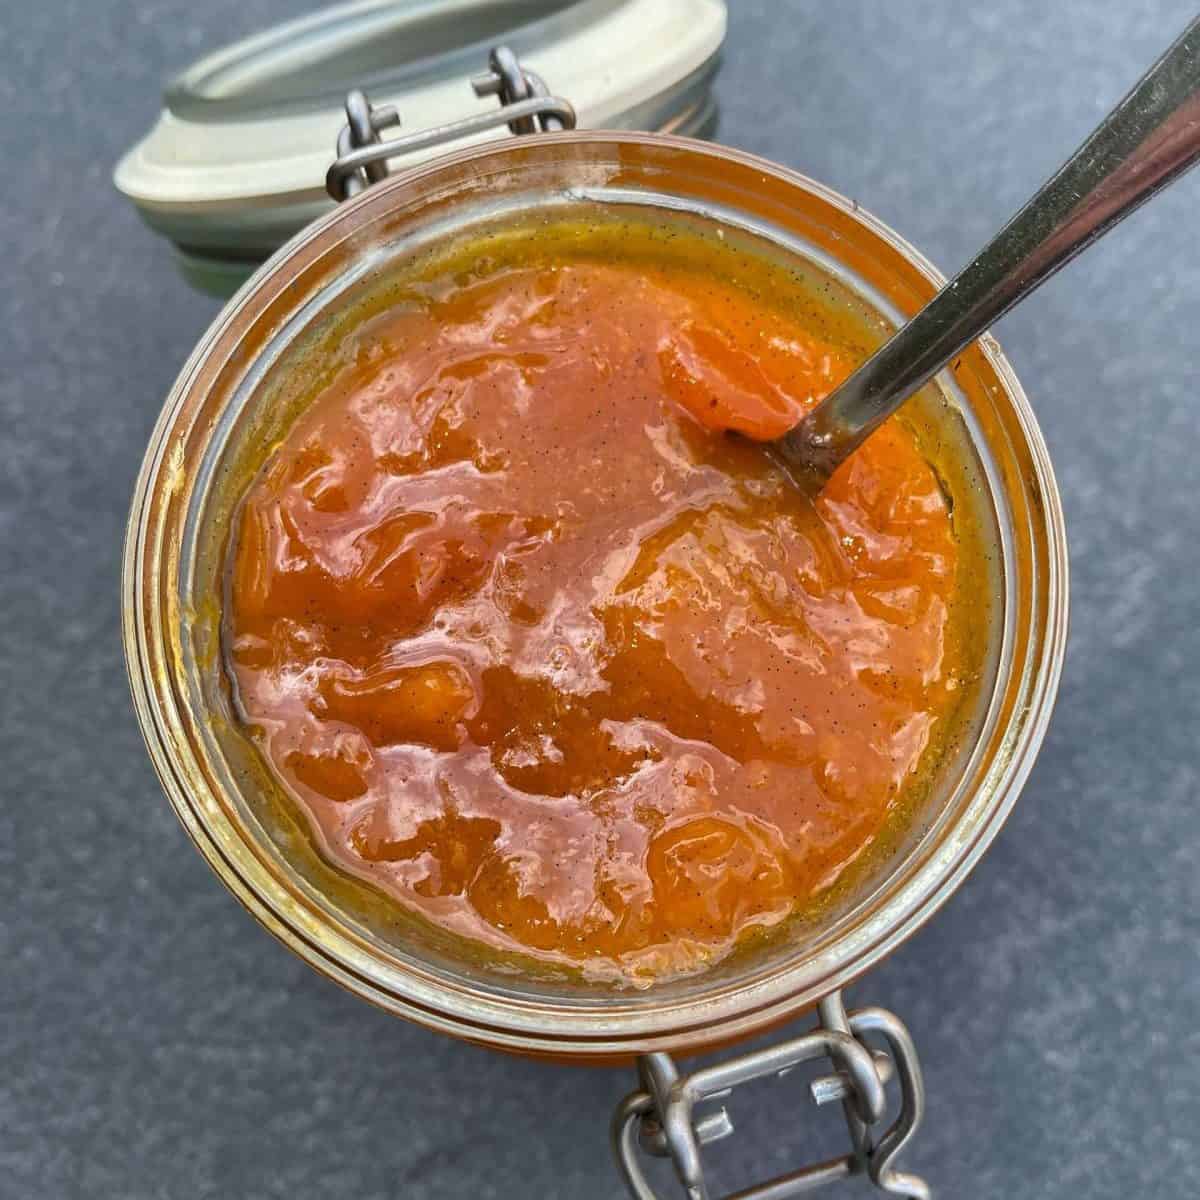
Spreadable Chocolate Ganache
I find that a regular dark chocolate ganache (with a 1:1 ratio of chocolate & cream) can set quite firmly & can be hard to spread if it cools too much. Fortunately, there’s a few ways to get around this. First, we’re going to be adding butter & golden syrup into the cream then once the ganache is mixed, we’re going to use a stick blender to blend mascarpone in. The added ingredients make the ganache more spreadable & using a stick blender ensures that the ganache emulsifies properly & doesn’t split.
So this style of ganache is made the same way as a regular chocolate ganache but with the addition of the extra ingredients that we mentioned earlier. We warm cream, butter & golden syrup on the stove until steaming hot then pour this mix over chopped dark chocolate & a pinch of salt. This gets left to stand for 2 minutes then we stir to combine. Then to finish, we add in mascarpone, blend to combine then pour into a container & leave to set at room temperature until thick & spreadable.
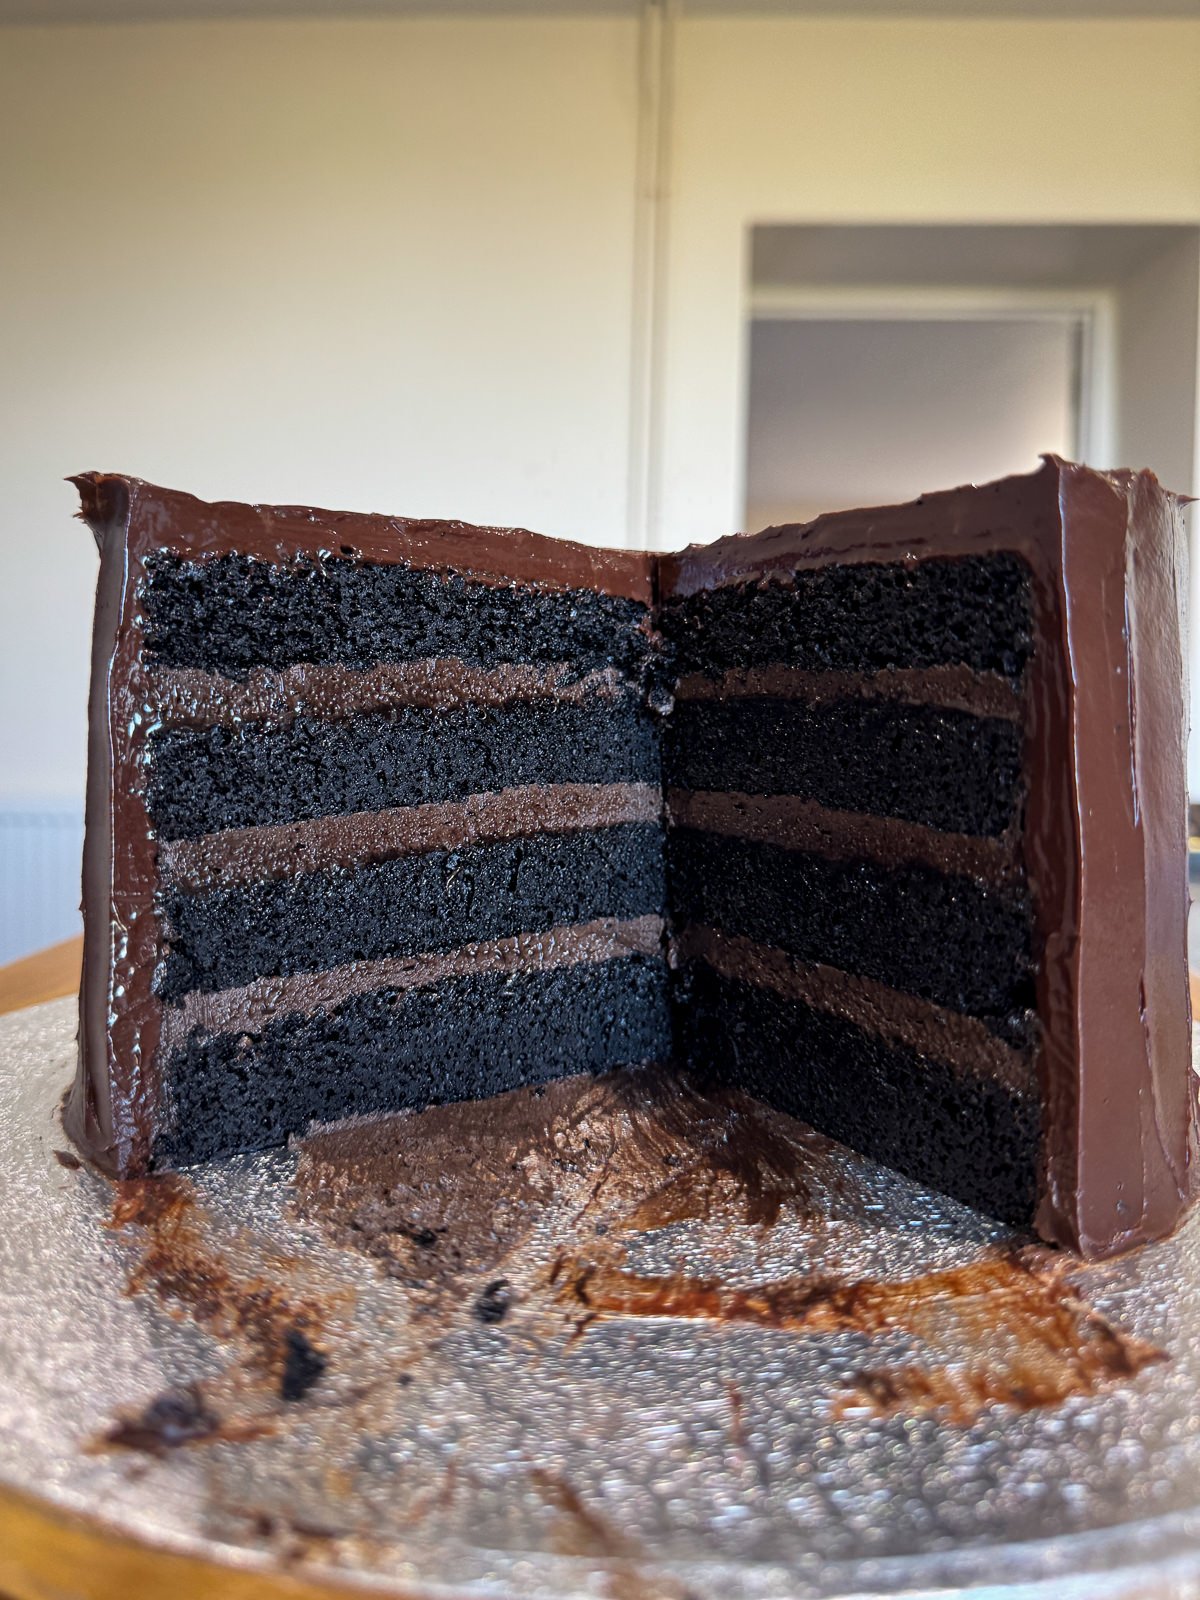
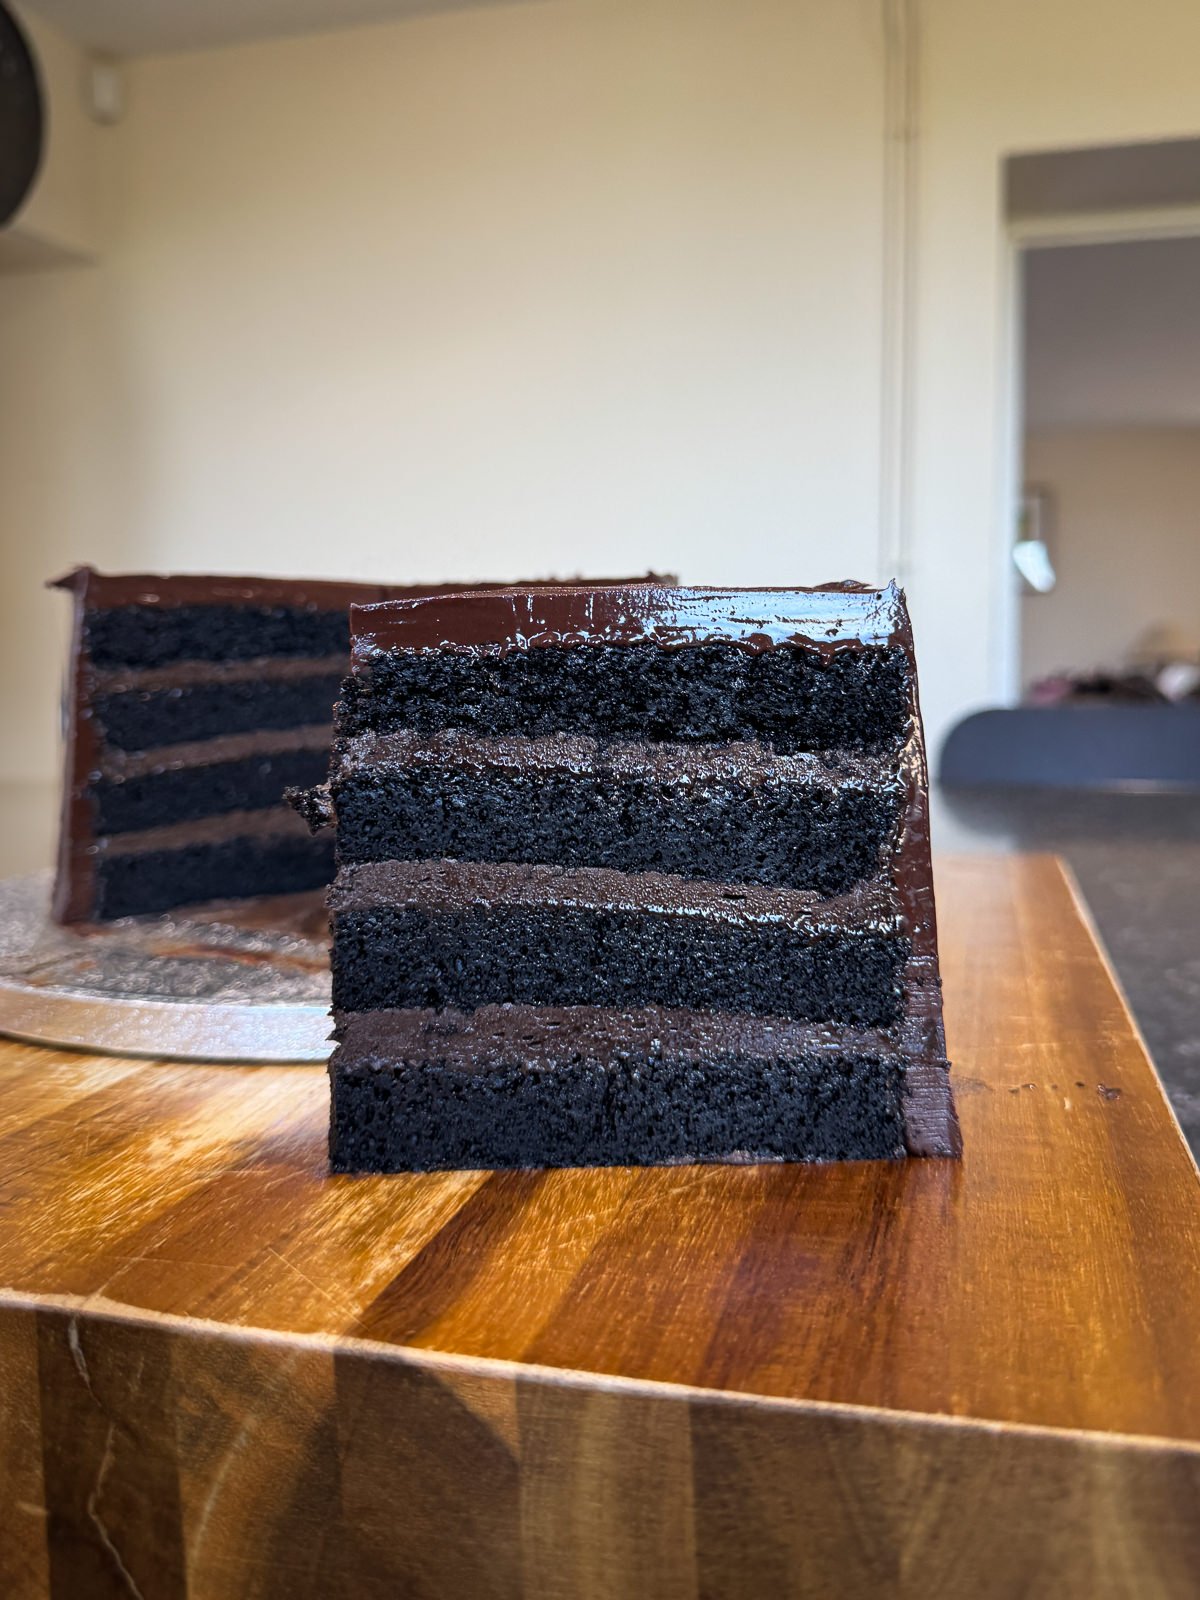
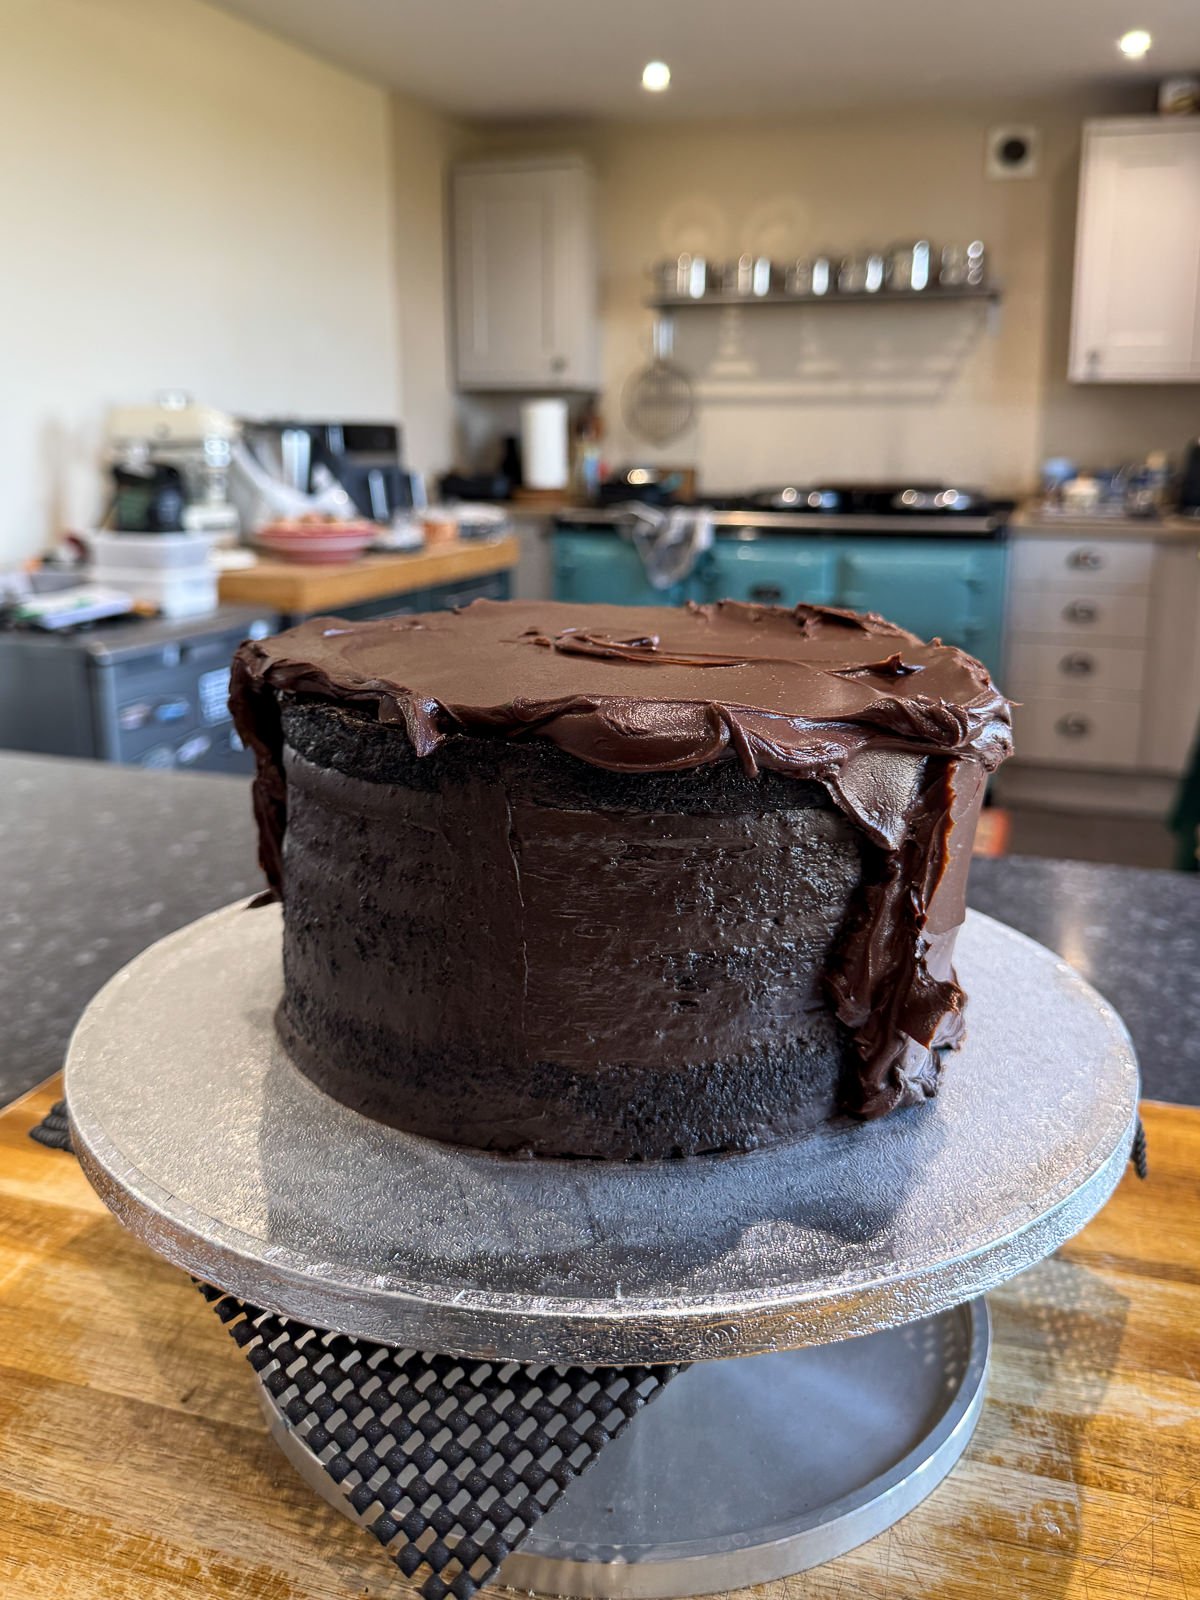
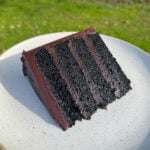
How To Assemble A Chocolate Fudge Layer Cake
The key when assembling any layer cake is to take your time, making sure that your layers are even & stacked up straight. Other than that, it pretty straight forward! We alternate layers of cake & frosting then cover the whole thing in a thick layer of chocolate ganache. A handy trick is to have a slightly cloth to hand, for wiping up and frosting or ganache from around the base of the cake. This keeps presentation clean & tidy!
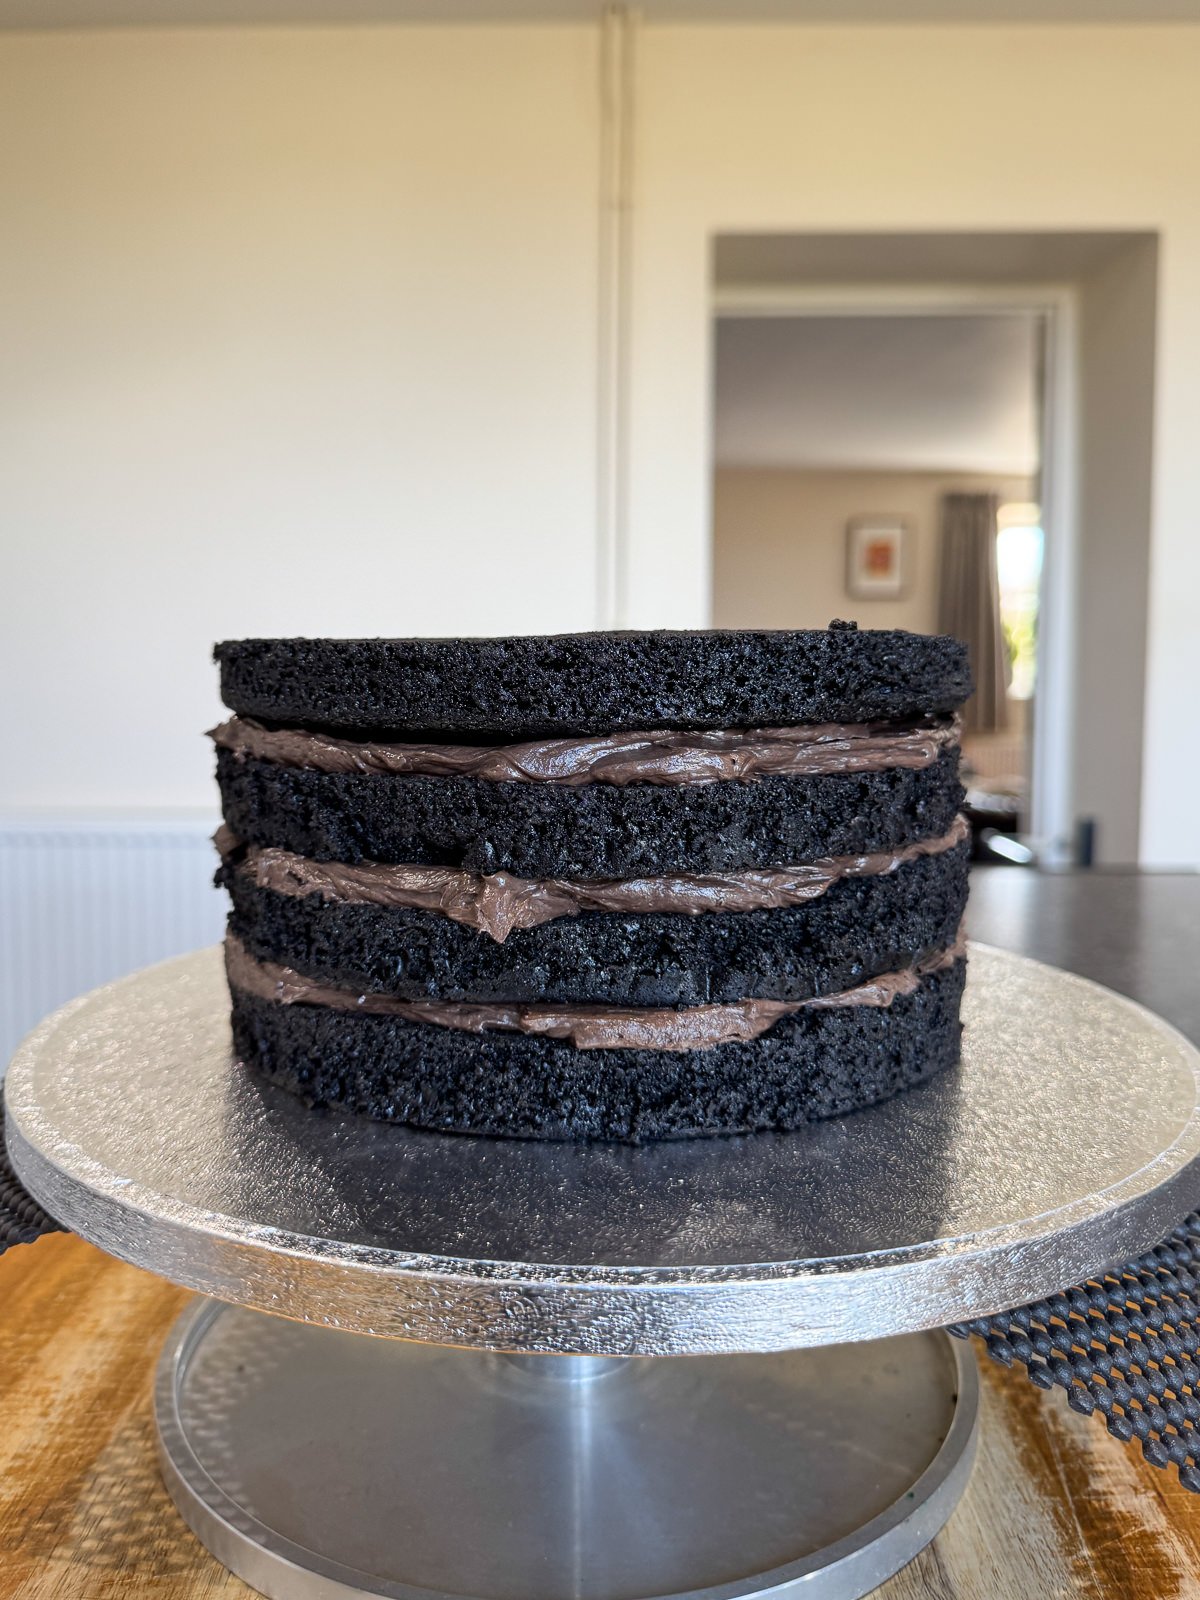
Before assembling the cake, we need to cut the 2 chocolate sponges in half horizontally, to give us 4 thinner layers of cake. To make this step easier, we’re going to be chilling the sponges in the fridge overnight (this also helps develop flavour) before cutting them. I like to use a sharp serrated knife to cut my cake into layers but if you’ve got a cake leveller cutter, this will work as well.
- First, if you’ve got a cake decorating turn table, it’ll make your life a whole lot easier! So if you’ve got one, place a non slip mat on top followed by a cake board/serving plate.
- Next, spoon a small blob of frosting onto the middle of the plate, spread it out then place a layer of chocolate cake on top. The frosting stops the cake from sliding around.
- Place 2 generous spoonfuls of frosting on top of the sponge then use a palette knife to spread it out into an even that completely covers the top of the cake.
- Place another layer of cake on top of the frosting then repeat the frosting & cake layers twice more. You’ll end up with 4 cake layers & 3 frosting layers. We’re aiming to use just under a third of the frosting per layer, which will leave us a small amount to use for a crumb coat.
- Next, spread the small amount of remaining frosting onto the outside & top of the cake, to make a thin crumb coat. This doesn’t have to be neat, it’s just gives us an even surface to spread on the ganache.
- At this point, it’s best to chill the cake in the fridge for an hour so that the frosting can set up slightly.
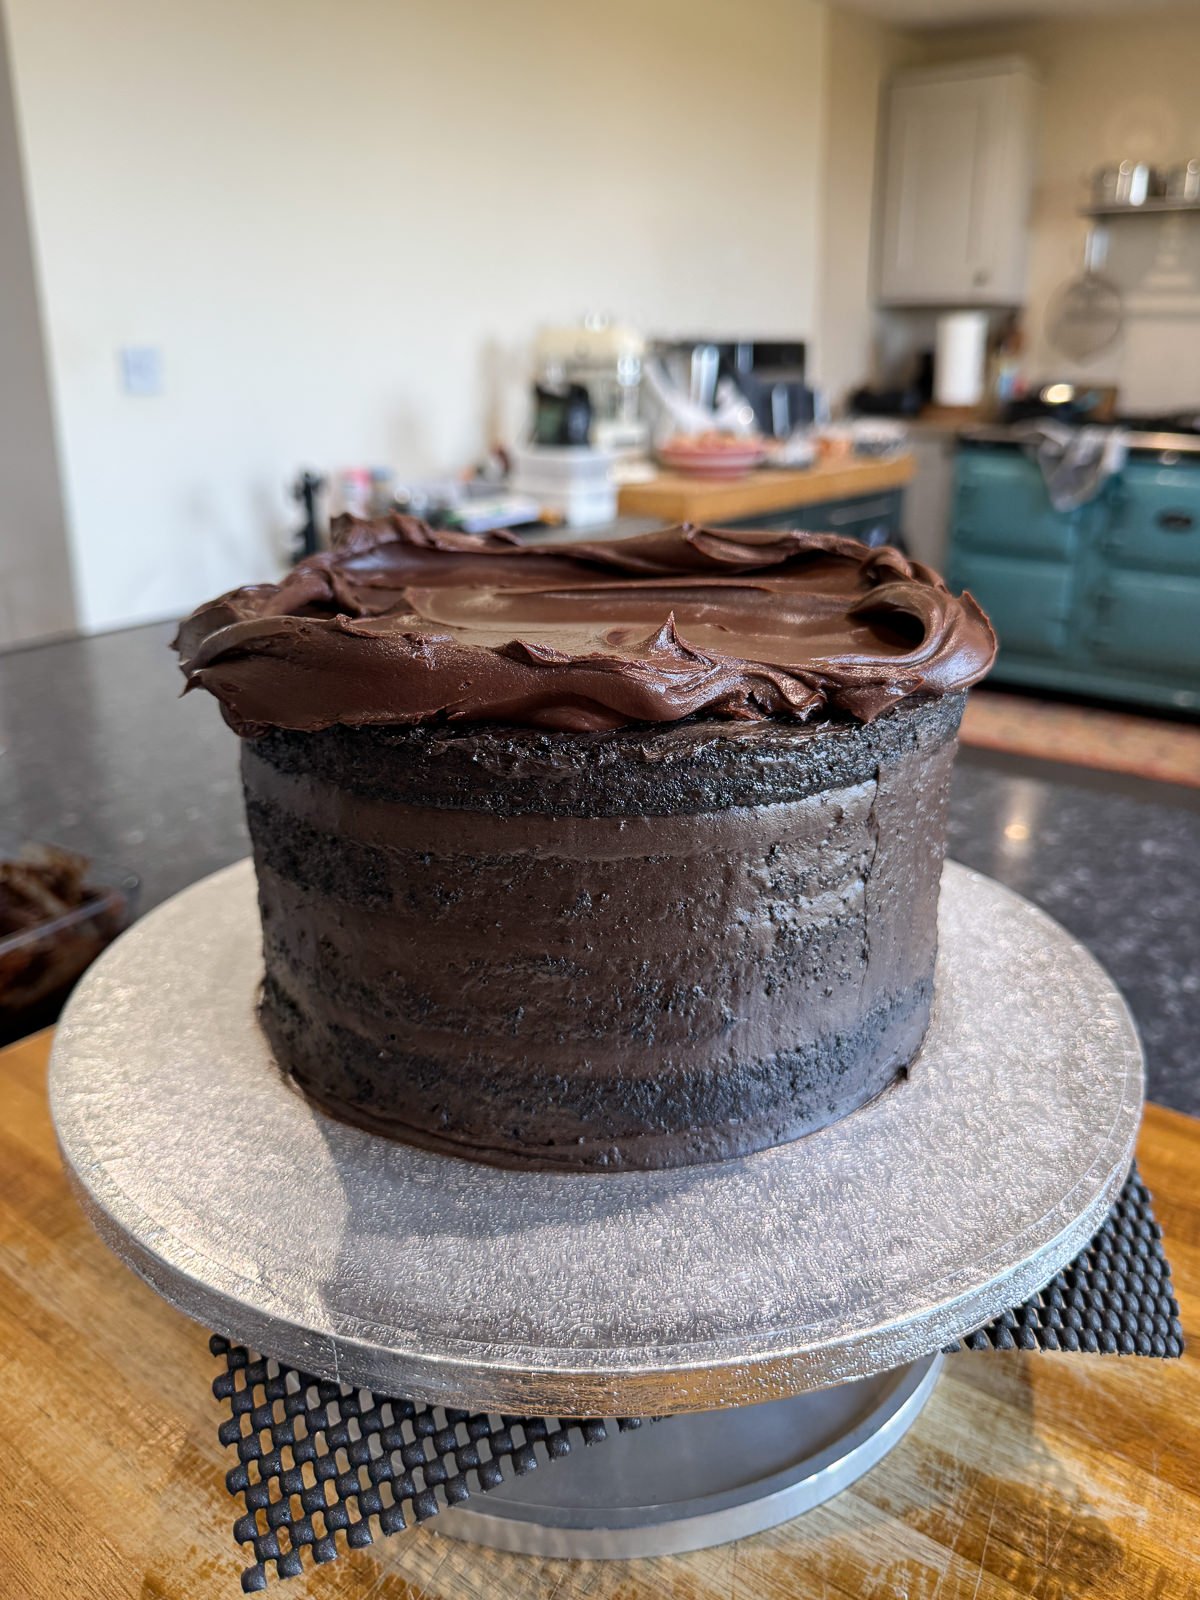
- Next, spoon the ganache on top of the cake then use a palette knife to spread it all over the top & sides, in an even layer.
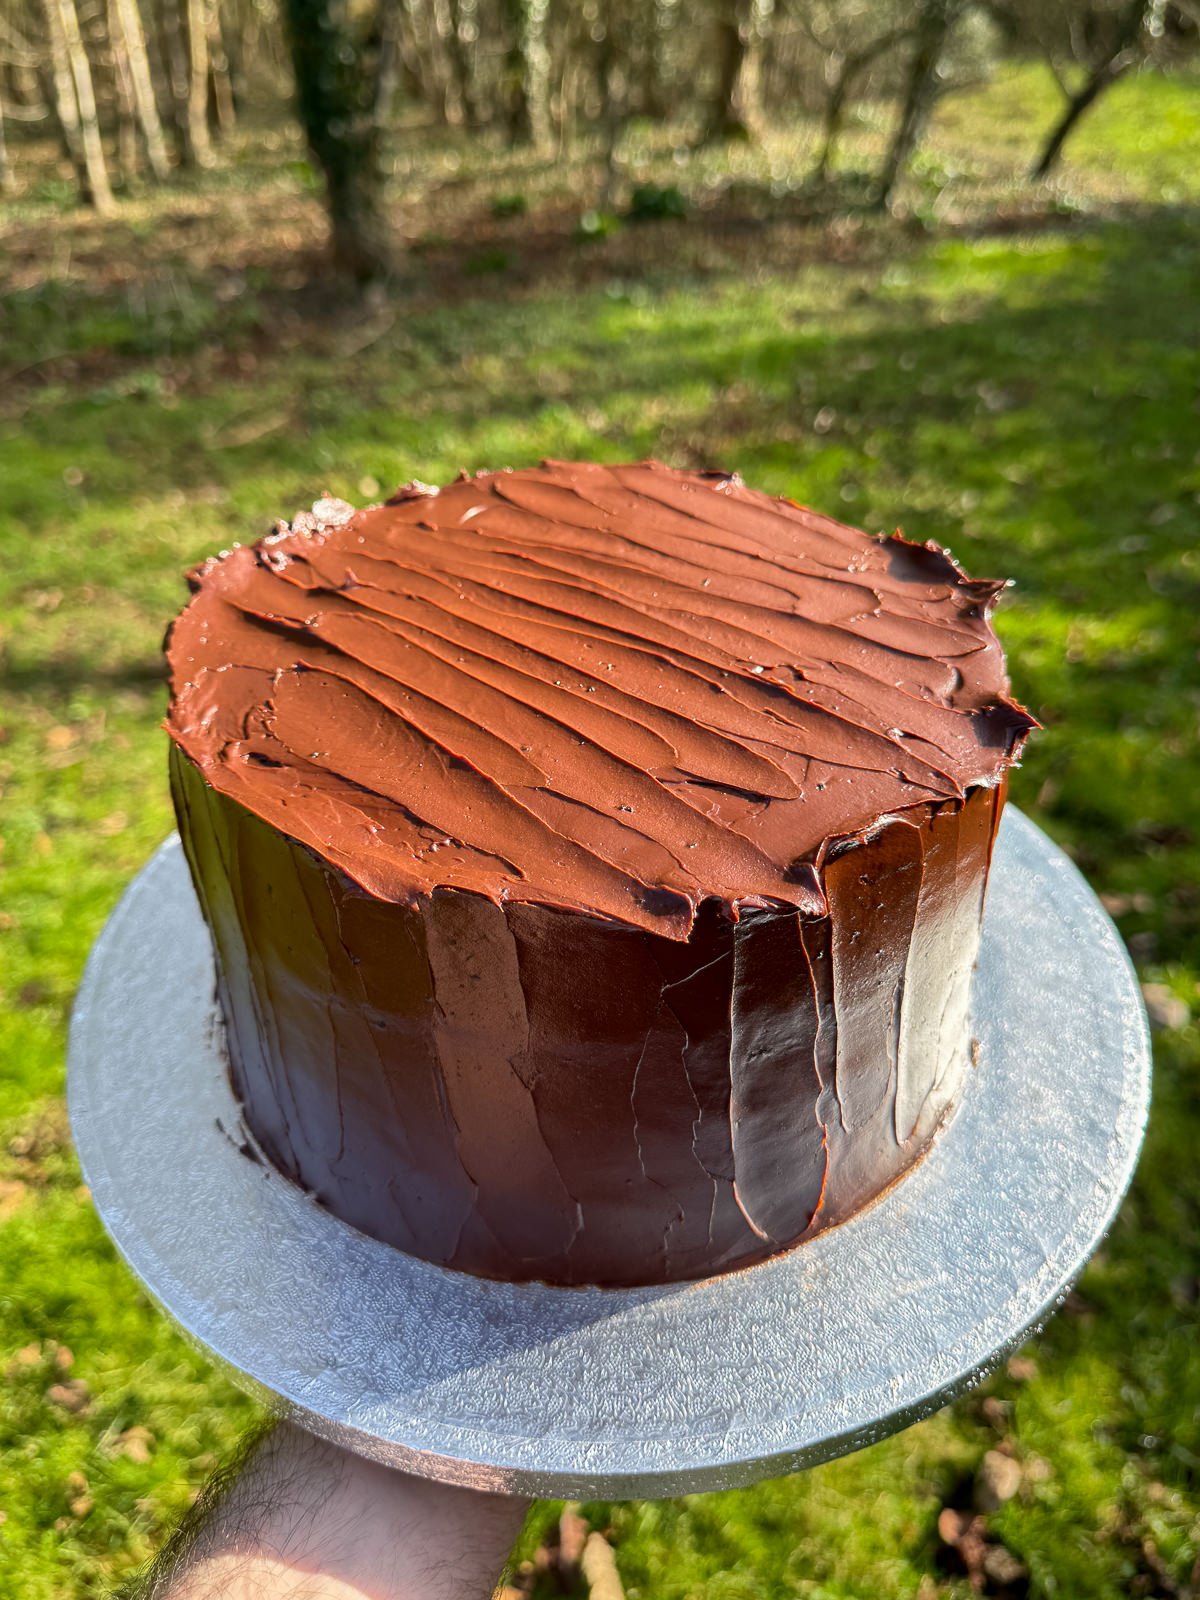
- To finish, I like to lightly blow torch the ganache to give it a glossy finish (be careful no to melt it!) then use a palette knife to make some decorative swoops on the top & sides. Decorate yours however you like though!
Serving Chocolate Fudge Cake
I can’t stress this enough but chocolate fudge cake is SO much better when served at room temperature! If you’re storing your cake in the fridge it’s best to let it sit out for at least an hour before serving. Alternatively, you could microwave a slice 5-10 seconds, to take the chill off.
When it comes to what to serve with your rich chocolate cake, you really don’t need a lot. I tend to either serve it on its’ own or simply with a drizzle of pouring cream, to cut through all of that chocolate! A scoop of vanilla ice cream would be good as well though.
Tips, Tricks & Troubleshooting
- Use a good quality cocoa powder to give the fudge cake & frosting the best flavour. To get that signature deep, black sponge you’ll need to use a black cocoa powder.
- Add sour cream to the chocolate cake batter to give the sponge a softer, more tender crumb.
- Bloom the cocoa powder in the cake & the frosting! This is where you mix cocoa powder with a warm liquid (in this case water or cream), to intensify the flavour.
- For the best rise, get the cake batter into the oven as soon as it’s been mixed. Also, avoid opening the oven too early & make sure to allow plenty of time for preheating.
- For the richest flavour, use a 72% dark chocolate for the chocolate ganache. A bar of chocolate works better than chocolate chips.
- Chill the chocolate sponges in the fridge overnight, to give the flavours time to develop. This also makes it easier to cut the sponge into layers as the cake will be slightly firmer.
- Add mascarpone to your chocolate ganache, to give it a more spreadable consistency & a glossy finish. To prevent the ganache from splitting, give it a quick blend with a stick blender.
Frequently Asked Questions
To cook chocolate fudge cake in an Aga, cook the sponges on a grid shelf placed onto the floor of the baking oven, with a cold plain shelf placed on the top runners. Use the simmering plate to warm the cream for the ganache.
To make a rich, dark black chocolate cake, you need to use a black Dutch processed cocoa powder. This type of cocoa powder has been treated with an alkaline solution which gives it a dark colour & a more intense cocoa flavour. Regular Dutch processed cocoa & black cocoa can be used interchangeably but black cocoa will give cakes a darker colour.
Chocolate fudge cake should be stored in an airtight container (or in a cake stand) & is best eaten within 3 days. As the frosting & ganache both contain dairy, you’ll need to store the fudge cake in the fridge. Make sure to let the cake come back up to room temperature before serving though, for the best flavour & texture!
Where a regular chocolate cake is fluffy & chocolatey, chocolate fudge cake is denser, moister & richer, with a more intense chocolate flavour. Although the 2 batters will use similar ingredients, chocolate fudge cake batter will be a lot thinner & often uses a darker cocoa powder.
Sour cream is added to chocolate cake batter to add extra fat, without affecting the consistency. The extra fat from the sour cream gives chocolate cake a softer, tender, moister crumb.
Equipment Used
Please note that these are affiliate links & I may make a small commission if you make a purchase using these links, at no extra cost to you. For more information, click here.
More Baking Recipes To Try!
- Chocolate Cherry Swiss Roll
- Pain Aux Raisin Danish Pastries
- Classic School Cake
- Kettle Chip Rocky Road
- Brown Butter & Miso Pecan Pie Bars
- Brown Butter Oreo Chocolate Chip Cookies
- Chocolate Loaf Cake With Dark Chocolate Ganache
If you have enjoyed this chocolate fudge cake recipe, it would mean a lot if you could leave a review & rating. And if you’d like to stay up to date with future recipes, follow us on Instagram & TikTok!
Chocolate Fudge Layer Cake
Equipment
- 2 8" Round Cake Tins
- Stand Mixer
- Mixing Bowls
- Wire Cooling Racks
- Sieve
- Stick Blender
- Palette Knife
- Cake Stand
- Blowtorch
Ingredients
Chocolate Fudge Cake
- 85 g Black Dutch Processed Cocoa Powder (See Notes)
- 2 tsp Instant Coffee
- 160 g Boiling Water (From The Kettle!)
- 250 g Plain Flour
- 200 g Caster Sugar
- 200 g Dark Brown Sugar
- 1 tsp Bicarbonate Of Soda
- ½ tsp Baking Powder
- ¾ tsp Table Salt
- 125 g Unsalted Butter
- 75 g Vegetable Oil
- 250 g Sour Cream
- 4 Large Eggs
- 2 tsp Vanilla Extract
Chocolate Ganache
- 350 g Double Cream
- 75 g Unsalted Butter (Roughly Chopped)
- 75 g Golden Syrup (Or Light Corn Syrup)
- 360 g Dark Chocolate (72% Is Best – See Notes)
- A Pinch Of Sea Salt
- 100 g Mascarpone (At Room Temperature)
Chocolate Fudge Frosting
- 100 g Double Cream
- 40 g Black Dutch Processed Cocoa Powder
- 120 g Dark Chocolate (72% Is Best)
- 120 g Unsalted Butter (Softened)
- 200 g Icing Sugar (Sifted)
- A Pinch Of Table Salt
- 100 g Mascarpone (At Room Temperature)
- 50 g Golden Syrup (Or Light Corn Syrup)
Instructions
Chocolate Fudge Cake
- Preheat an oven to 170°c/150°c fan (338°f/302°f). Grease 2, 8 inch round cake tins with butter then line just the bases with a disc of baking parchment. Set aside for now.Make sure to give your oven plenty of time to preheat. The cake batter is quick to make!
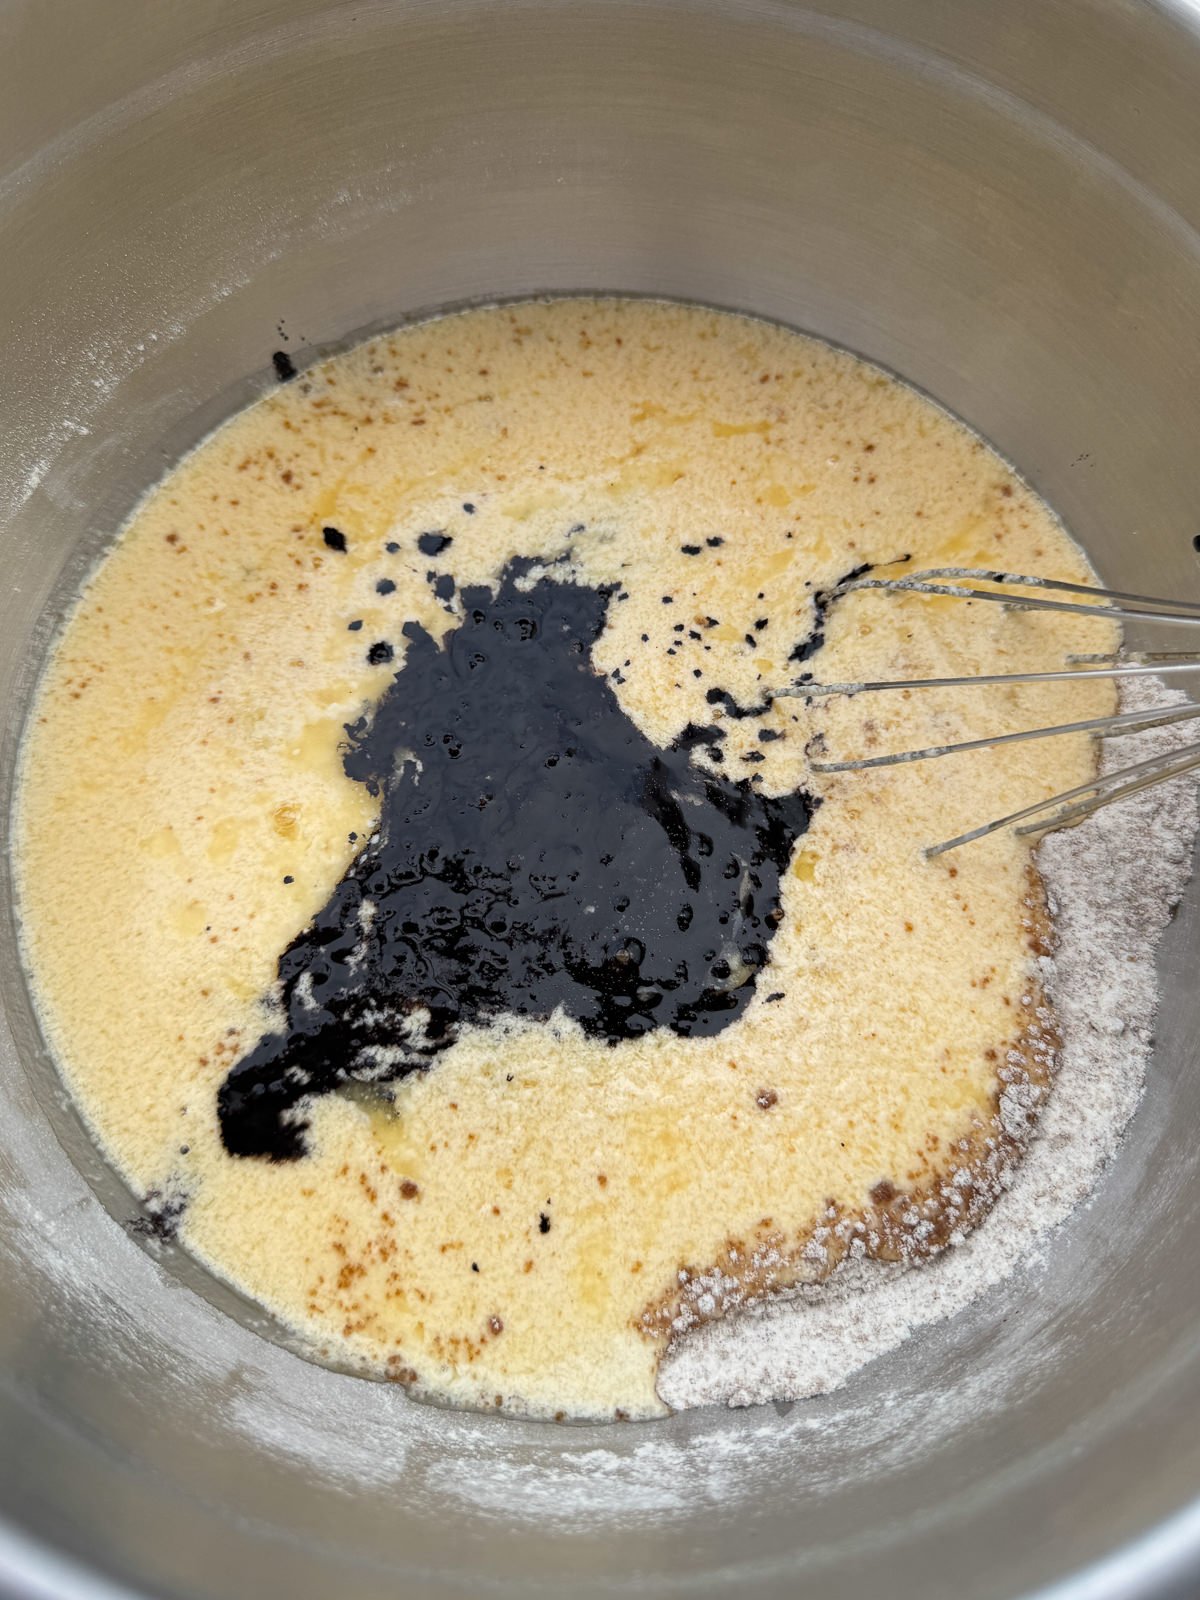
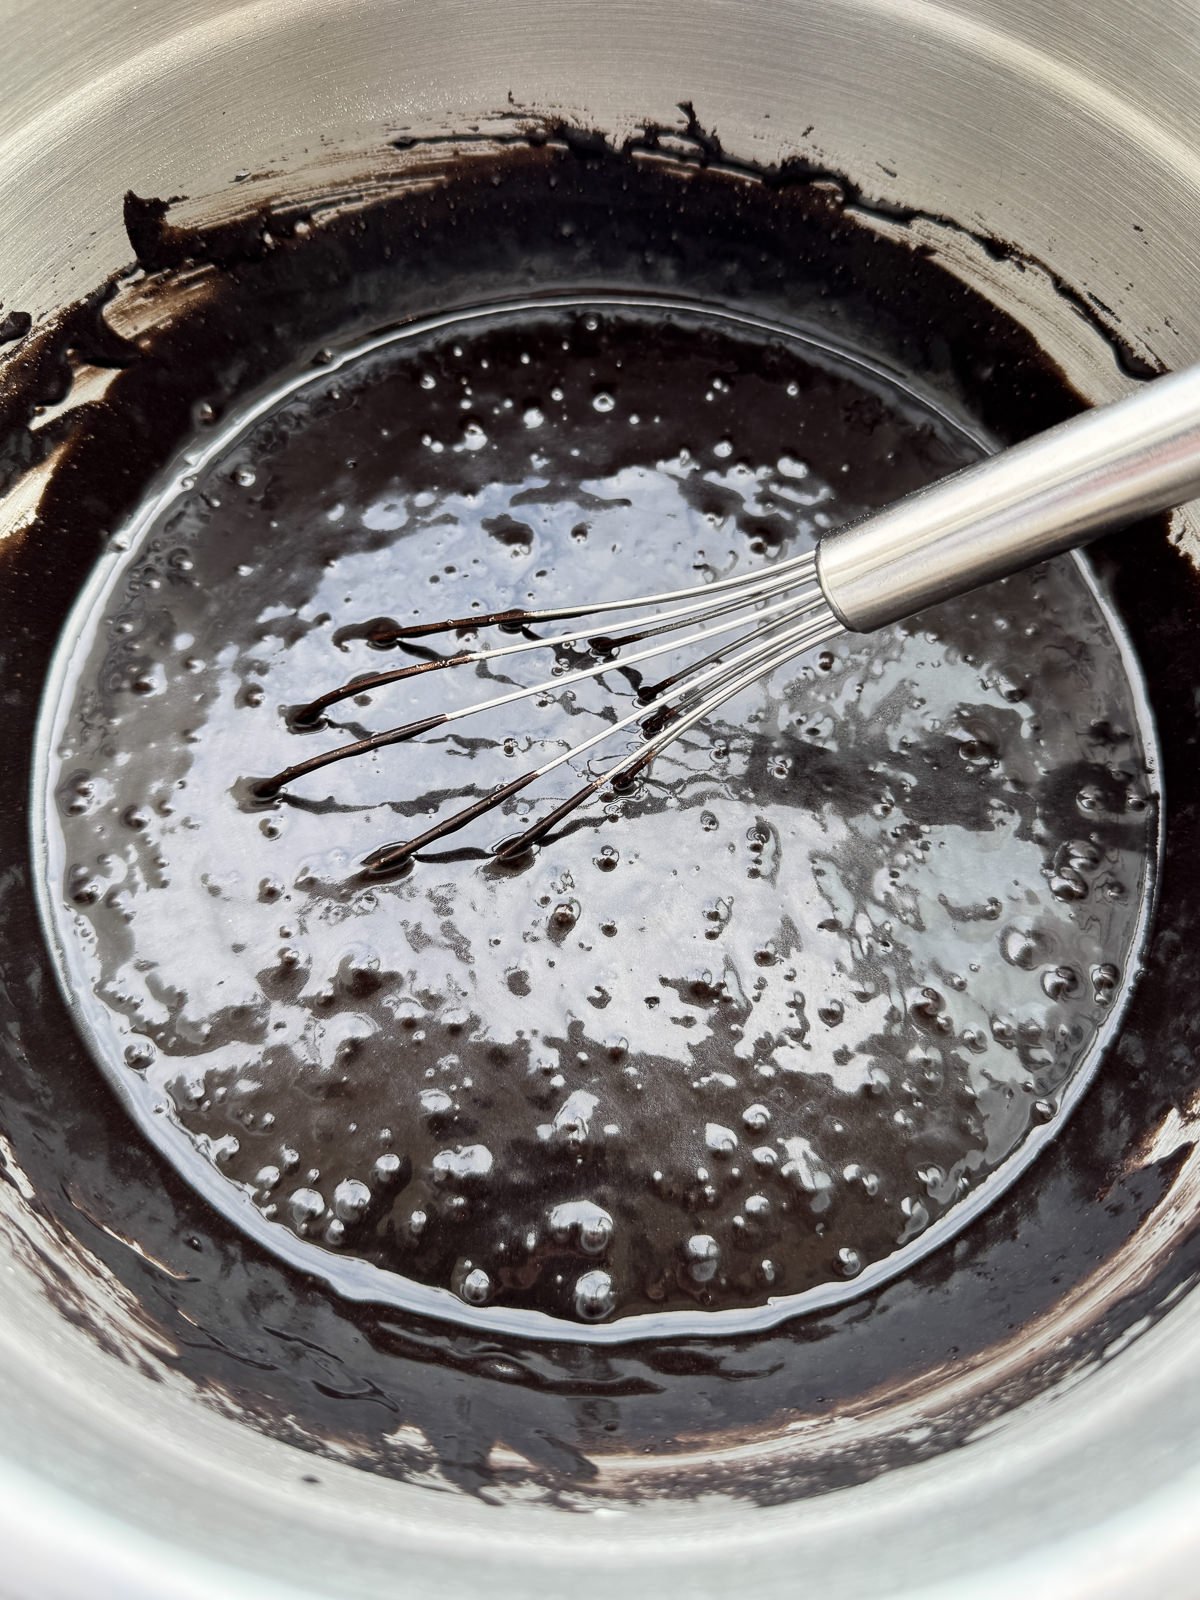
- Add the cocoa powder & instant coffee into a bowl, pour over the boiling water (from the kettle) then whisk to combine. Let the cocoa bloom & cool down slightly whilst you make the batter.
- Next, add the flour, both of the sugars, bicarbonate of soda, baking powder & table salt into a large mixing bowl then whisk to combine. Set this to one side.
- Chop the butter into small chunks, add into a heatproof jug (or bowl) then microwave to melt. Add in the veg oil, sour cream, eggs & vanilla then whisk to combine.Alternatively, melt the butter in a pan on the stove then transfer it to a jug.
- Next, add the wet ingredients & the cocoa mix into the flour then gently whisk by hand until smooth & combined. Be careful not to over mix the batter though!
- As soon as the batter is mixed, equally divide it between the lined tins then bake in the preheated oven for 30-35 minutes, until a skewer inserted into the centre comes out clean.The bicarb will start to react as soon as the batter is mixed, so the cakes need to go into the oven straight away! If you'd like to weigh the batter into the tins, each one should have around 775g in.
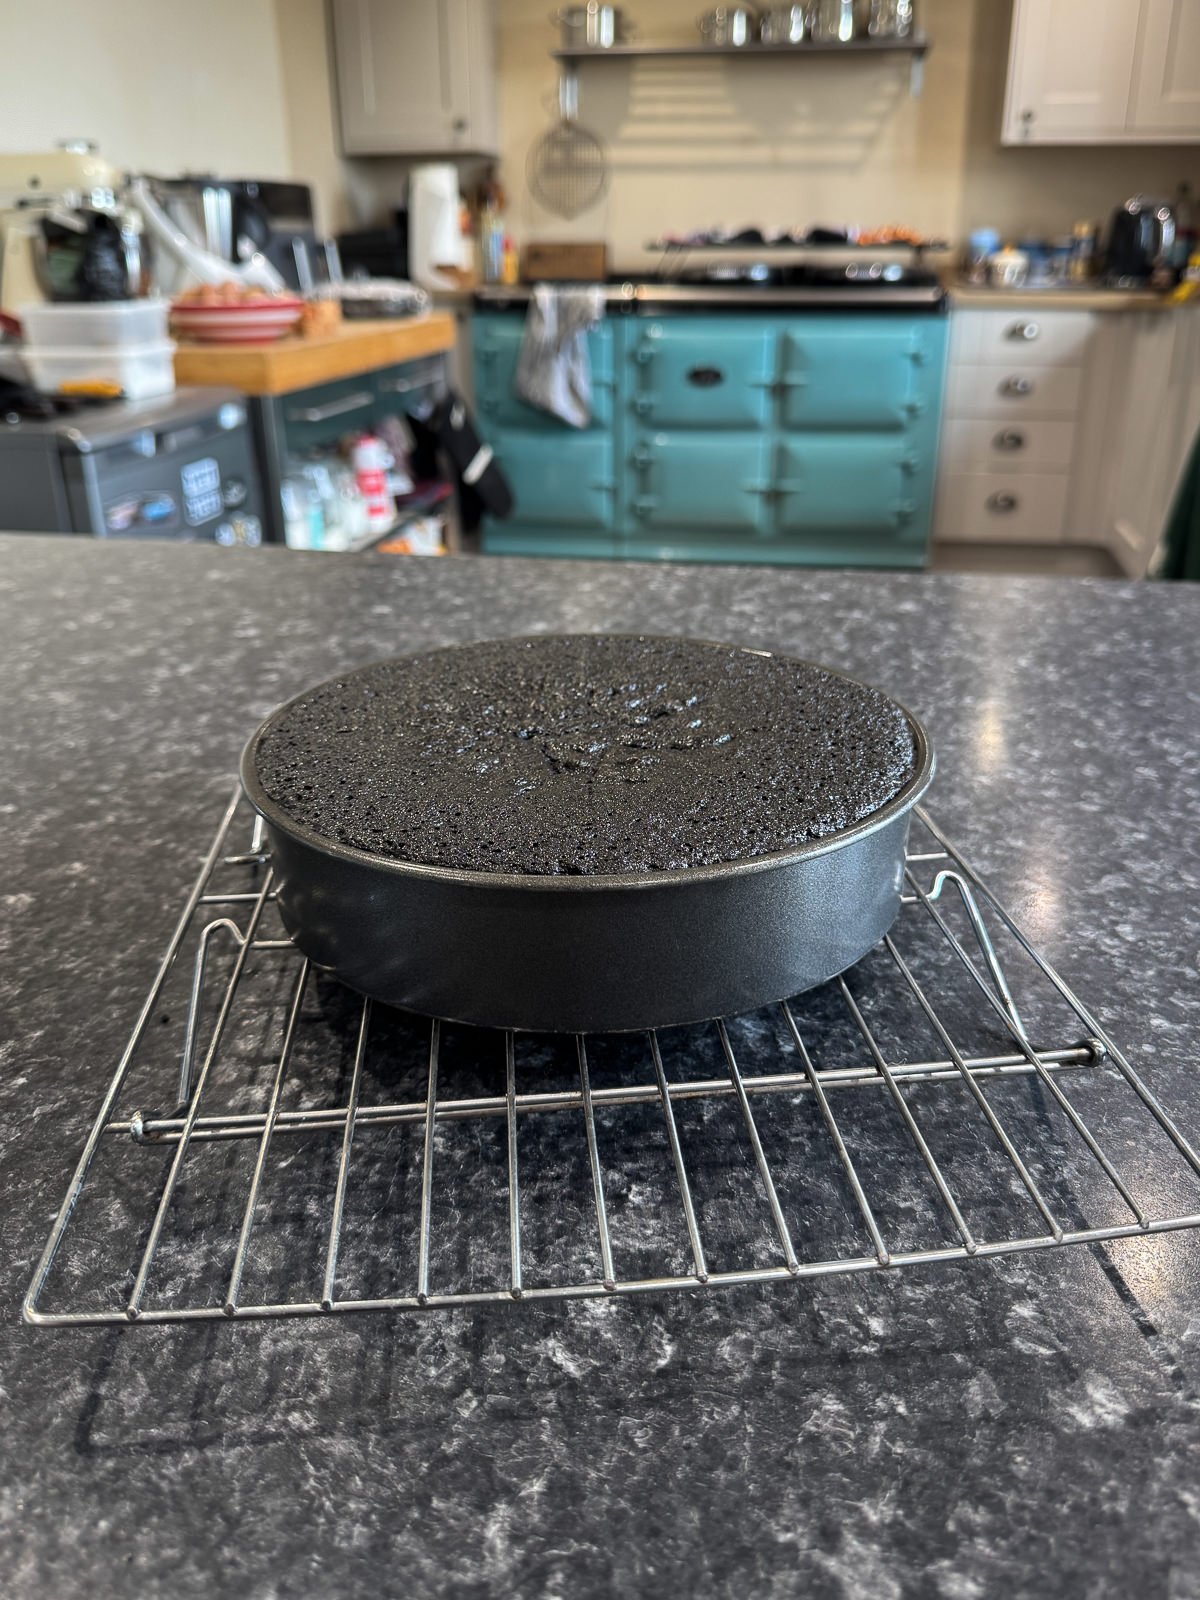
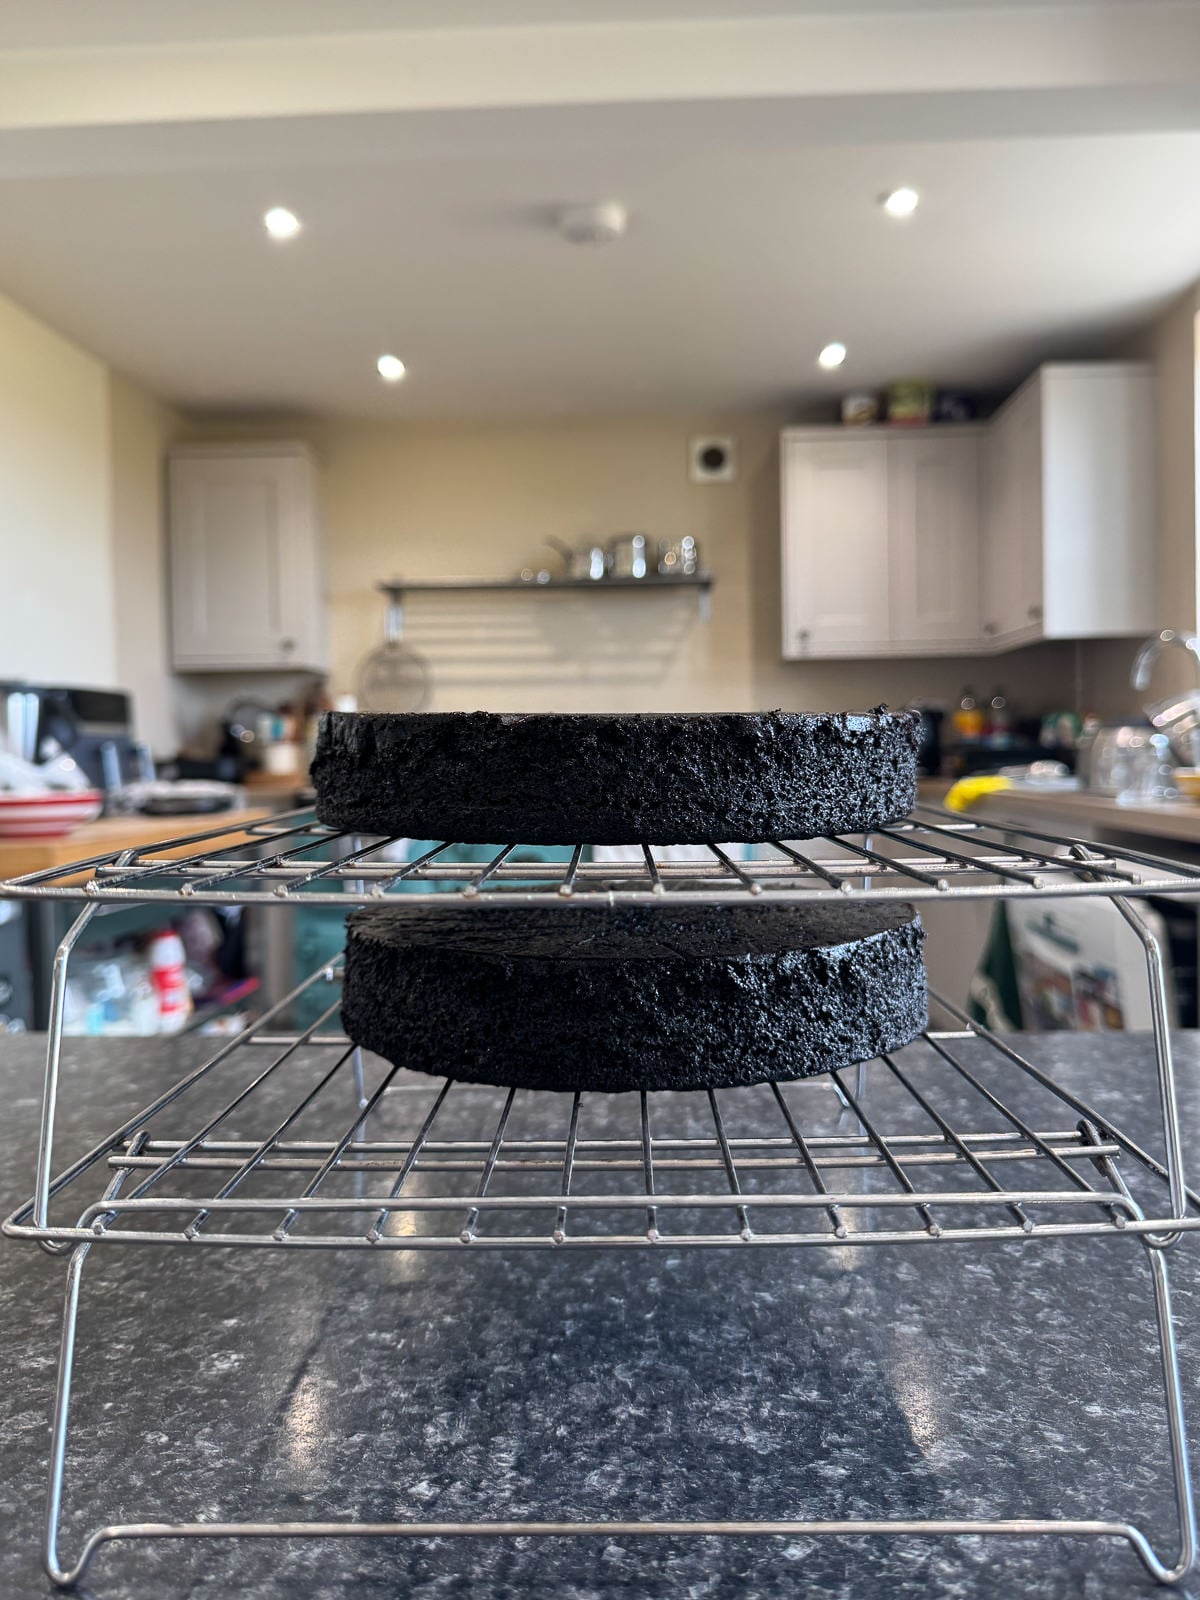
- Once the cakes are baked, let them cool in the tins for 15 minutes. Then run a small, sharp knife around the edge of each tin before turning each cake out onto a wire cooling rack. Carefully remove the parchment then leave to cool until just slightly warm.Place the cakes top side down onto the cooling racks. This will give the cakes a flatter top!
- Once cooled, wrap the cakes in clingfilm then chill in the fridge overnight.Wrapping the cakes up when they're still slightly keeps them moist. Chilling them makes it easier to cut them in half when we assemble the cake.
Chocolate Ganache
- Add the cream, butter & golden syrup into a medium sized saucepan then set over a low heat & warm, stirring frequently until the butter has melted & the cream is steaming hot. But not boiling! If you take the temperature of the cream, it will be around 80°c/176°f when ready.Make the ganache the day before assembling the cake, so that it has time to set. Or at least a couple of hours before!
- Whilst the cream is warming up, chop the chocolate into small pieces then place into a heatproof mixing bowl, along with a pinch of sea salt.
- Once the cream is hot, pour it over the chocolate then let the mix stand for 2 minutes, without stirring.Don't skip this step!
- Next, use a spatula to gently stir the cream & chocolate together until melted & smooth, starting from the middle, working outwards.
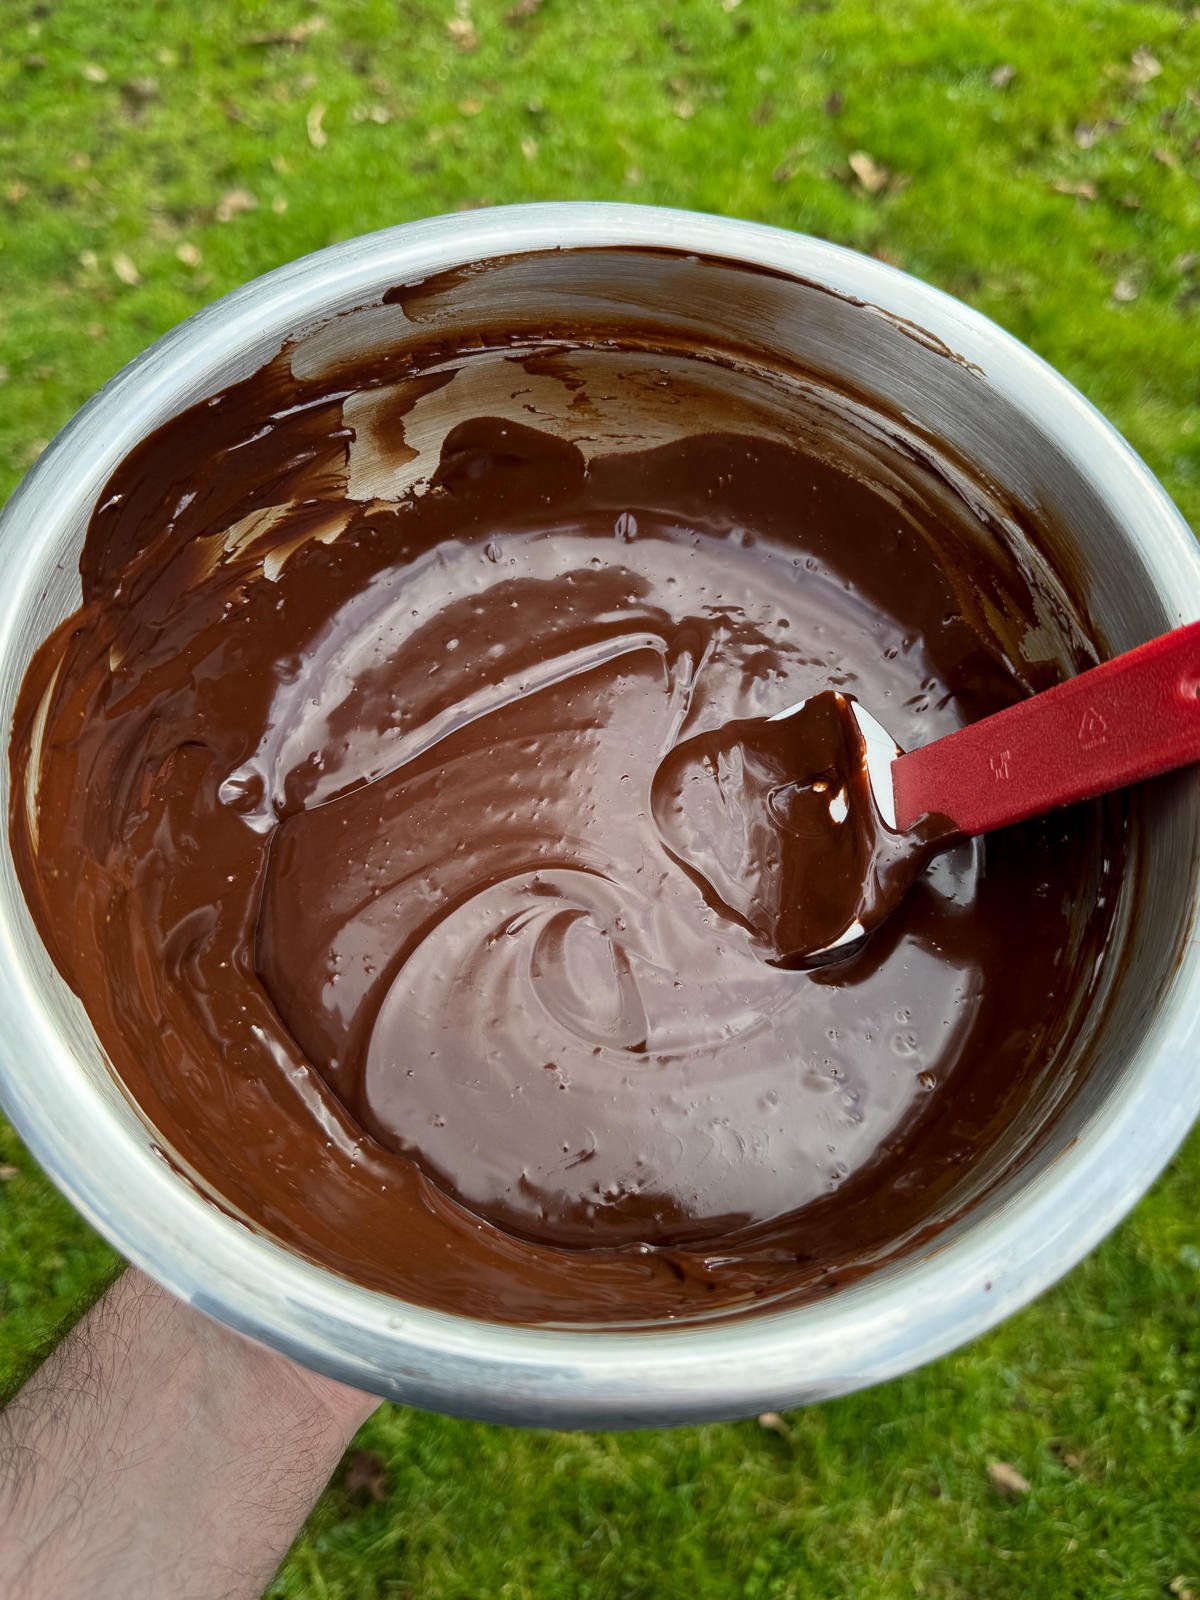
- Once the chocolate has melted, add in the mascarpone then use a stick blender to blend it into the ganache. The mix may look split at first but keep blending & it will come together, to make a smooth, shiny ganache.
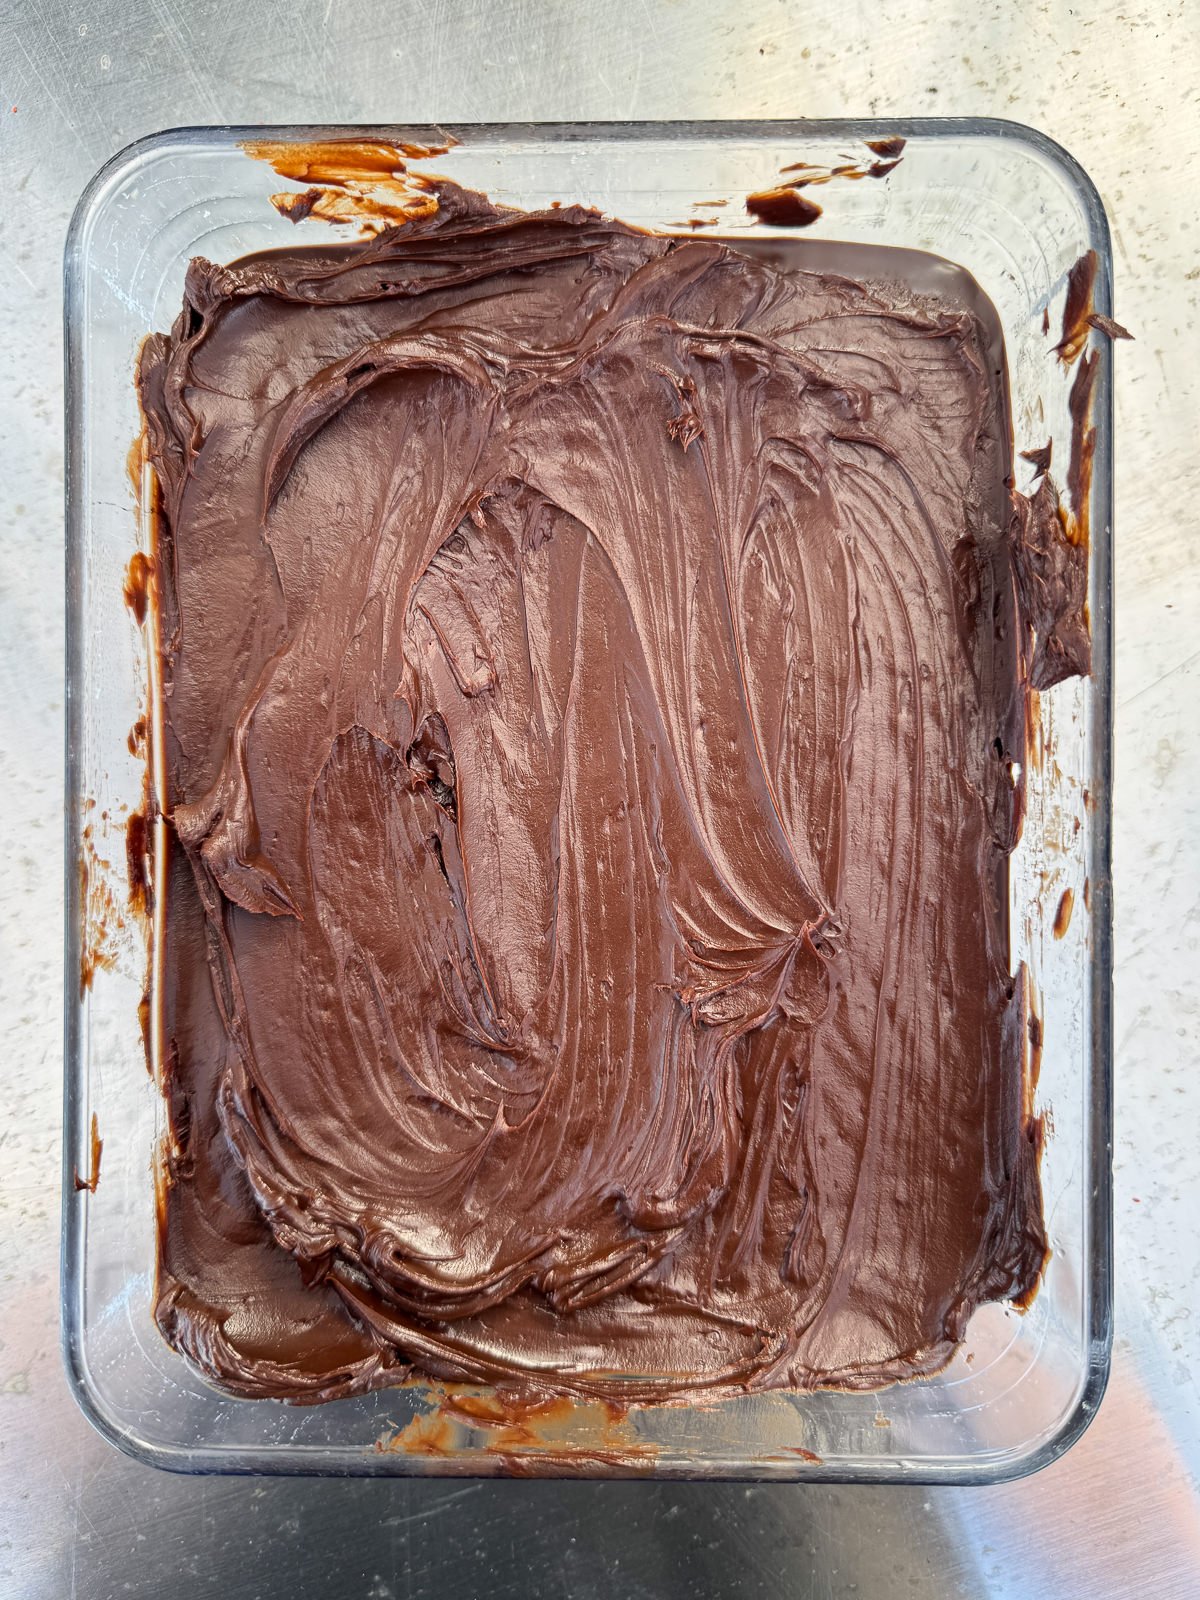
- Transfer the ganache to a shallow dish then cover the surface with a piece of clingfilm & leave to set at room temperature until thick enough to spread. This will take an hour or two. You can speed this process up by putting the ganache in the fridge but it will lose some of its' shine!As the ganache contains mascarpone, it will need to be stored in the fridge if you're making it ahead of time. To make it more spreadable after being chilled, you'll need to let the ganache sit out at room temperature for around an hour.
Chocolate Fudge Frosting
- Place the cream into a small heatproof bowl then microwave until steaming hot (but not boiling). Add in the cocoa powder, whisk to combine then leave to cool completely.Make the frosting just before assembling the cake! If you don't have a microwave, warm the cream up in a small pan then transfer to a bowl.
- Roughly chop up the dark chocolate then place into a small, heatproof bowl. Melt the chocolate (either in a microwave or over a bain marie) then leave to cool completely as well.Wait for both components to cool before continuing with the frosting. This will take around 20 minutes.
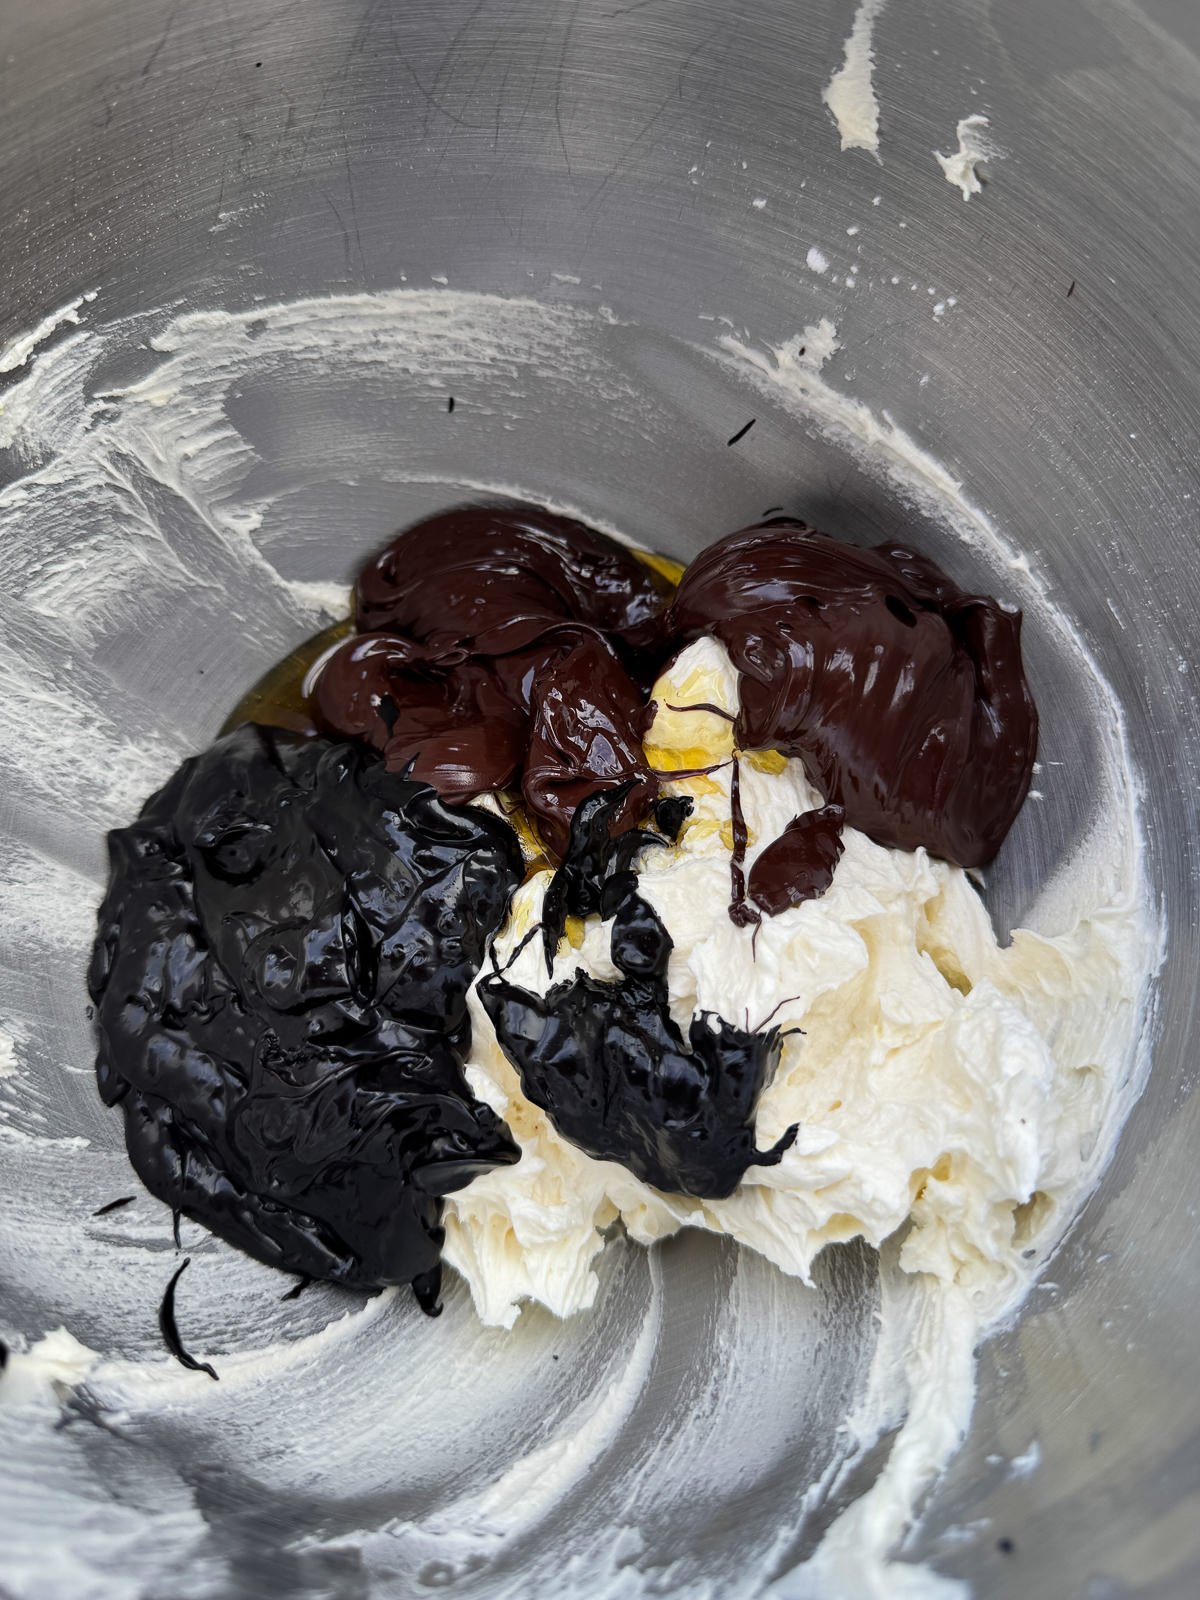
- Next, add the softened butter, sifted icing sugar & salt into the bowl of a stand mixer then use the paddle attachment to beat on a medium speed until light & fluffy and the icing sugar has dissolved fully. This will take 4-5 minutes.Make sure to scrape the sides of the bowl down regularly with a spatula.
- Once the butter is mixed, add in the mascarpone, golden syrup and the cooled cocoa mix & melted chocolate then mix on a medium speed for another 2-3 minutes until you've got a smooth, fluffy frosting. Make sure to scrape the bowl & paddle down frequently to avoid streaks in the frosting.
Assembly
- Unwrap the cakes then use a sharp serrated knife to cut each sponge in half, so that you end up with 4 layers. Or if you'd prefer, use a cake leveller cutter tool. Stack the layers up separated between parchment paper as you cut them.Once cut it's best to flip the top layers of cake upside down, as this will give us a flatter surface for the frosting.
- Next, spread a small amount of frosting onto the middle of a serving plate/cake board then place a layer of cake on top. The frosting stops the cake from sliding around. If you've got one, place the plate onto a turn table with a non slip mat underneath.
- Add 2 generous spoonfuls of frosting on top of the cake layer then use a palette knife to spread it out into an even layer that reaches the edge of the sponge. The aim is to use just under a third of the frosting per layer, which will leave us with a small amount to use as a crumb coat on the outside of the cake.
- Place another cake layer on top of the frosting then repeat the frosting & cake layers twice more. You'll end up with 4 cake layers & 3 frosting layers. Make sure to stack the cakes up straight otherwise you'll have a wonky cake!
- Next, spread the small amount of remaining frosting onto the outside & top of the cake, to make a thin crumb coat. This doesn't have to be neat, it's just gives us an even surface to spread on the ganache. At this point, it's best to chill the cake in the fridge for 1 hour, to let the frosting firm up slightly.
- Once the cake has set, coat the cake in the ganache. To do this, give the ganache a gentle stir to give it a more spreadable consistency then spoon it on top of the cake. Then use a palette knife to spread the ganache all over the sides & top of the cake, in an even layer.Make sure to bring the ganache back up to room temperature if it's been in the fridge!
- To finish the cake, I like to give a the ganache a quick blowtorch to give it a glossy finish then use a palette knife to make a few decorative swoops. You can decorate yours however you like though!If you're using a blowtorch, be careful not to melt the ganache! You only need a gentle heat to finish the ganache.
- The cake is now ready to serve! The best way to cut the cake is to use a large knife that's been dipped in warm water & dried between cuts.


amazing recipe !! could you suggest any alternate to eggs?
Thank you! Sorry I haven’t tried this one without eggs, so wouldn’t be able to suggest an alternative
Is it possible to use all ganache instead of icing+ganache?
Yes, absolutely! I’d make 1.5x the ganache recipe to give you enough for the layers & the outside
Hiii thanks for the recipe ! It looks phenomenal. Just a quick question do you think I can use the fudge frosting to frost the whole cake or would it be too dense/hard ?
Hi! You could definitely use the fudge frosting for the whole cake, I’d make double the amount! I’d recommend serving the cake at room temperature to keep the frosting soft & fudgy, as it will set up slightly in the fridge
Thank you sooo much for your answer and details !! I planned to make a copycat of the cake in The Bear using this recipe as a base and I think it will be amazing with this fudge frosting ☺️
Awesome! Let me know how it turns out!
Hey! Unfortunately I live in the US and double cream is apparently only available in stores under one brand, and it’s a shelf stable version, which seems to be pretty mediocre at best from what I’ve read.
Is there anything to look out for, or ratios to adjust, if I’m using heavy whipping cream as a substitute for double cream in the frosting and ganache?
♥
Hi! I believe heavy cream can be used as a direct substitute for double cream. You should be fine using the same amount of cream for the frosting (it’s only for blooming the cocoa). For the ganache, I’d maybe increase the amount of butter to 100g (instead of 75g) just to compensate for the lower fat percentage in heavy cream compared to double.
I have just made this sponge – it’s decent! It took longer than 30 minutes in a fan oven at 150 – closer to 50 minutes.
The sponge is structurally sound and moist making it easy to fill (I used all butter (200g) and no oil as I hate the taste of oil in cakes). Only thing I would say is that the sponge itself doesn’t have much depth of flavour – most of the flavour from this cake will come from the filling and icing. Don’t get me wrong this is a recipe that is a success and I would be proud to serve it to many people, but getting a bit more flavour into the sponge would just elevate it to the next level!
Made this for dessert tonight and it exceeded my and my family’s expectations. Ridiculously chocolatey and delicious. Could have polished this whole cake off myself. Will absolutely be making this again.
Thank you for making my recipe! Really glad you liked it