Overnight Focaccia
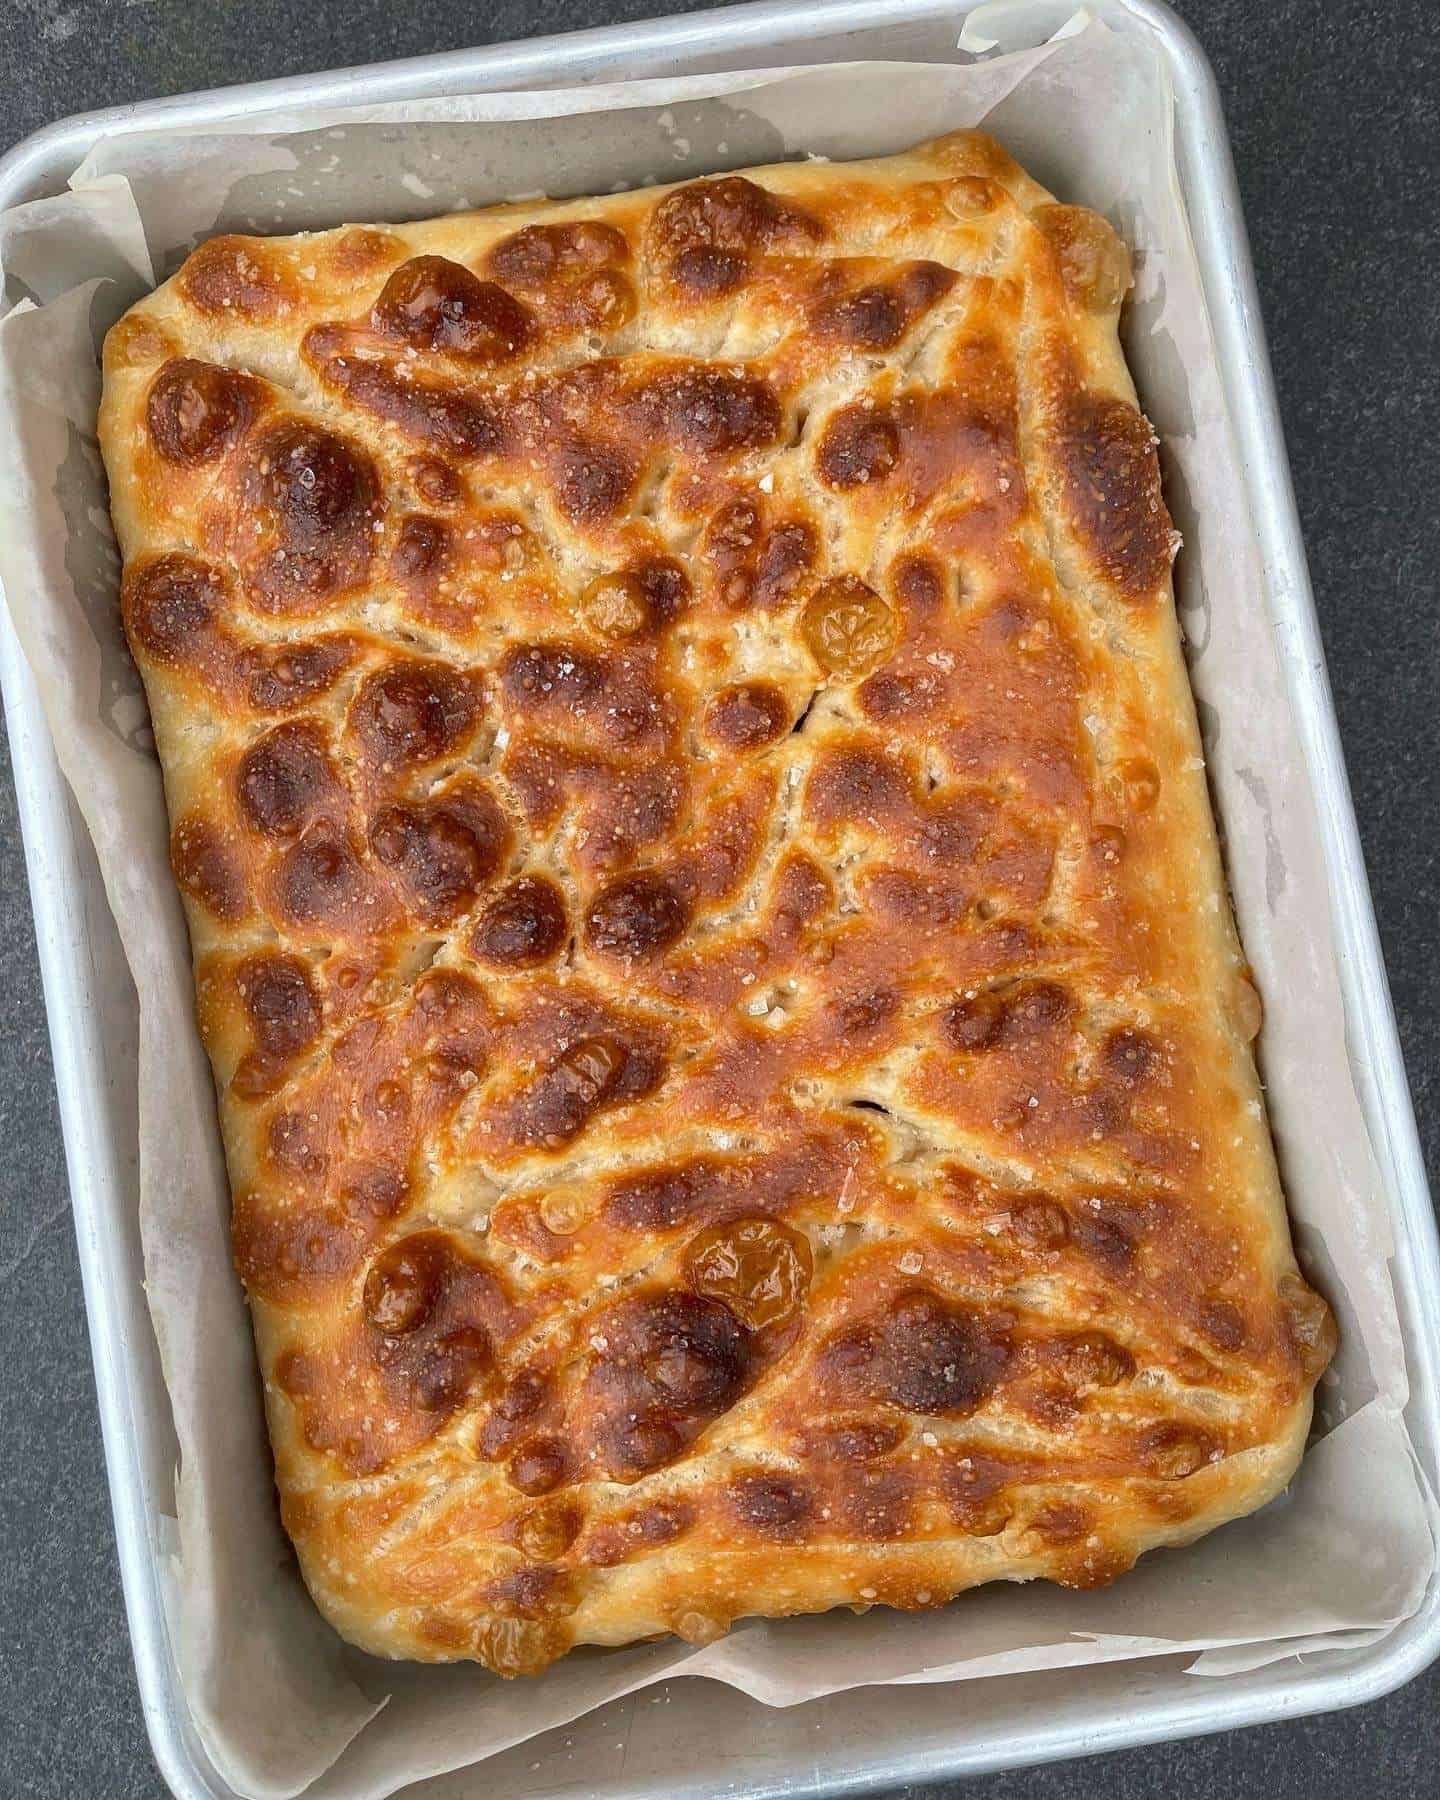
The best focaccia, is an overnight focaccia!
A high level of hydration paired with a 24 hour cold proof in the fridge produces a bread that is light & fluffy on the inside & crispy on the outside. Great eaten as is or used for a sandwich.
This post contains affiliate links.

Overnight Focaccia
If your just starting out in your bread making journey or if you fancy making a super easy, hands off bread dough, this overnight focaccia recipe is the one for you!
Using just five ingredients & with very little kneading involved, this bread makes an incredibly light & fluffy bread with an open crumb & a crispy, golden top.
The secret?
A 24 hour cold prove in the fridge!
Chilling the dough in the fridge for a whole day instead of at room temperature for an hour or so, makes a dough that’s as light as cloud & a bread that has a super light, open crumb.
The Cold Prove
Cold proving focaccia dough is used for a couple of reasons.
Using a cold prove slows down the focaccia’s final rise, giving it plenty of time for flavour to develop. It also allows the baker to cook the bread at a later time (no more than 48 hours later though). This is especially good for when you’ve got a busy schedule.
Doughs that have been cold proved also tend to have a deeper, darker crust when compared to doughs that have risen at room temperature.
What You’ll Need
- Flour – You’ll need a strong white bread flour for this focaccia recipe, ideally with a protein content of 12-15%. I use a white Canadian bread flour from Shipton Mill, in the UK.
- Yeast – I find that dried active yeast works best for overnight doughs, like this focaccia. Instant/fast action yeast can be used instead & can be added directly into the flour, without being activated in warm water first.
- Salt – A good quality sea salt works best in bread doughs. I use Maldon salt but most other fine sea salts will work as well.
- Water – Make sure to accurately measure the temperature of your water with a food probe.
- Olive Oil – A good olive oil works best for focaccias.
How To Make Overnight Focaccia
Step 1 – Autolyse
The first step is to mix the warm water & yeast together then leaving it to go frothy. Next we place flour, water & yeast into the bowl of a stand mixer, mix with the dough hook until just combined then leave it to autolyse (or hydrate) for 30 minutes.
Step 2 – Add Salt & Oil
The next step is to add in the sea salt & olive oil then knead the dough until it passes the windowpane test. This will take 10-15 minutes, on a medium mixer speed.
The windowpane test is used to assess gluten development in your dough. To do this, take a small amount of dough & stretch it between your fingers. If it stretches thin enough to see through, the dough has been kneaded enough.
Step 3 – Coil Folds
Next, we’re going to leave the dough out at room temperature for 1 hour, performing a set of coil folds every 15 minutes.
To learn about coil folds, take a look at my step by step sourdough recipe.
Step 4 – Cold Prove
At this point, the dough is covered & placed into the fridge for at least 24 hours.
Step 5 – Final Rise
The following day, the dough is transferred to an lined & oiled 9×13″ baking tin & left to double in size at room temperature.
Once doubled, the dough is drizzled with a generous amount of olive oil then we use our fingers to dimple the dough all over, spreading it out all over the tin. A sprinkle of sea salt & it’s off to the oven.
Step 6 – Baking
After baking at 220°c/428°f for 20-25 minutes, we brush more olive oil onto the dough then let it cool in the tin for 20 minutes. Then we transfer the focaccia to a wire rack & leave it to cool completely before serving.

Toppings
The great thing about this dough is that it’s so versatile when it comes to adding flavourings & toppings. I like to top mine with just sea salt or with some finely chopped rosemary & confit garlic. The sky’s the limit though!
Keep in mind that if you want to top the focaccia with something heavy, say olives or tomatoes then they will sink into the dough. If you want to avoid this, use less water in the dough. I’d go for 80% hydration or less.
Overnight Focaccia Tips & Tricks
Here’s some handy tips & tricks for making the best focaccia!
- Use a high protein flour – Make sure to use a strong white bread flour with a protein content of 12-15%. This is key for gluten development, fermentation & improves the focaccia’s texture.
- Use high quality ingredient – Using good flour, sea salt & olive oil makes all the difference to the flavour of our focaccia.
- Knead the dough for long enough – Make sure to knead the dough until it passes the window pane test. Proper gluten development is crucial for properly fermented bread dough.
- Cold prove overnight – Proving the focaccia overnight in the fridge is key to making the best tasting focaccia! The longer the dough is in the fridge, the more the flavour develops. I find that 24 hours is the sweet spot but you can go up to 48.
- Let the focaccia cool completely – It might be tempting to cut into your homemade focaccia whilst it’s still warm but cut it too soon & the crumb could be gummy & undercooked. Letting it cool completely prevents this!
Cooking Focaccia In An Aga
With all of my recipes, I include cooking instructions for conventional ovens, fan ovens & also Agas.
Bake the focaccia on the grid shelf which is placed on the floor of the roasting oven. The bread will take 25-30 minutes to cook.
Equipment Used
Please note that these are affiliate links & I may make a small commission if you make a purchase using these links, at no extra cost to you. For more information, click here.
More Bread Recipes
- Step By Step Sourdough
- How To Make A Sourdough Starter
- Garlic & Rosemary Focaccia
- Overnight Tangzhong Doughnuts
- Tangzhong Burger Buns
- Tear & Share Cheesy Garlic Bread
- Potato Burger Buns
- Tangzhong Hot Cross Buns
- Cheese & Marmite Hot Cross Buns
- Overnight Potato Focaccia
Watch How To Make This Recipe
If you have enjoyed this overnight focaccia recipe, it would mean a lot if you could leave a review & rating!
Overnight Focaccia
Equipment
- Stand Mixer
- 9" x 13" Baking Tin
- Large Glass Bowl
Ingredients
- 550 g Strong White Bread Flour
- 495 g Water – 100°f/38°c 90%
- 5 g Dried Active Yeast 1%
- 11 g Maldon Salt 2%
- 25 g Olive Oil – Plus extra for finishing & greasing the tin 4.5%
Instructions
- In a jug, whisk together the water & yeast then leave to go frothy, 5-10 minutes.
- Give the activated yeast another whisk then add into the bowl of a stand mixer along with the flour. Mix with the dough hook until just combined then cover & leave to autolyse for 30 minutes.
- Next, add in the salt & olive oil & mix on a medium speed until the dough passes the windowpane test. This will take around 15 minutes.To perform the window pane test, stretch a small amount of dough between your fingers. If the dough stretches thin enough so that you can see your fingers through it without tearing, it's ready.
- Transfer the dough to a lightly oiled glass bowl & leave at room temperature for 1 hour. During this hour, coil fold the dough every 15 minutes.
- Cover the bowl with clingfilm & place in the fridge for at least 24 hours (no more than 48).
- Grease & line a 9”x13” baking tin then pour in 2 tbsp of olive oil.
- Tip the dough into the tin then gently stretch towards each corner, but don’t worry if the dough doesn’t completely fill the tin at this point. Cover loosely with clingfilm & leave to rise at room temperature until roughly doubled in size, around 2-3 hours.
- Preheat an oven to 220°c/200°c fan (428°f/392°f) around 30 minutes before you cook the focaccia.
- Once the dough has risen, pour a good amount (around 2 tbsp) of olive oil over the focaccia & use your fingers to dimple the dough all over, making sure that the dough reaches all corners of the tin.
- Sprinkle the focaccia with a generous amount of sea salt then bake until a deep golden brown. This will take 25-30 minutes.
- Once baked, brush the focaccia with 2 tbsp of olive oil, leave to cool in the tin for 20 minutes then transfer to a cooling rack to cool completely before serving.


