Danish Pastry Dough
Here’s a step by step guide to making the flakiest homemade Danish pastry! This pastry can be used to make bakery style Danishes, croissants & turnovers and is surprisingly easy to make.
This post contains affiliate links.
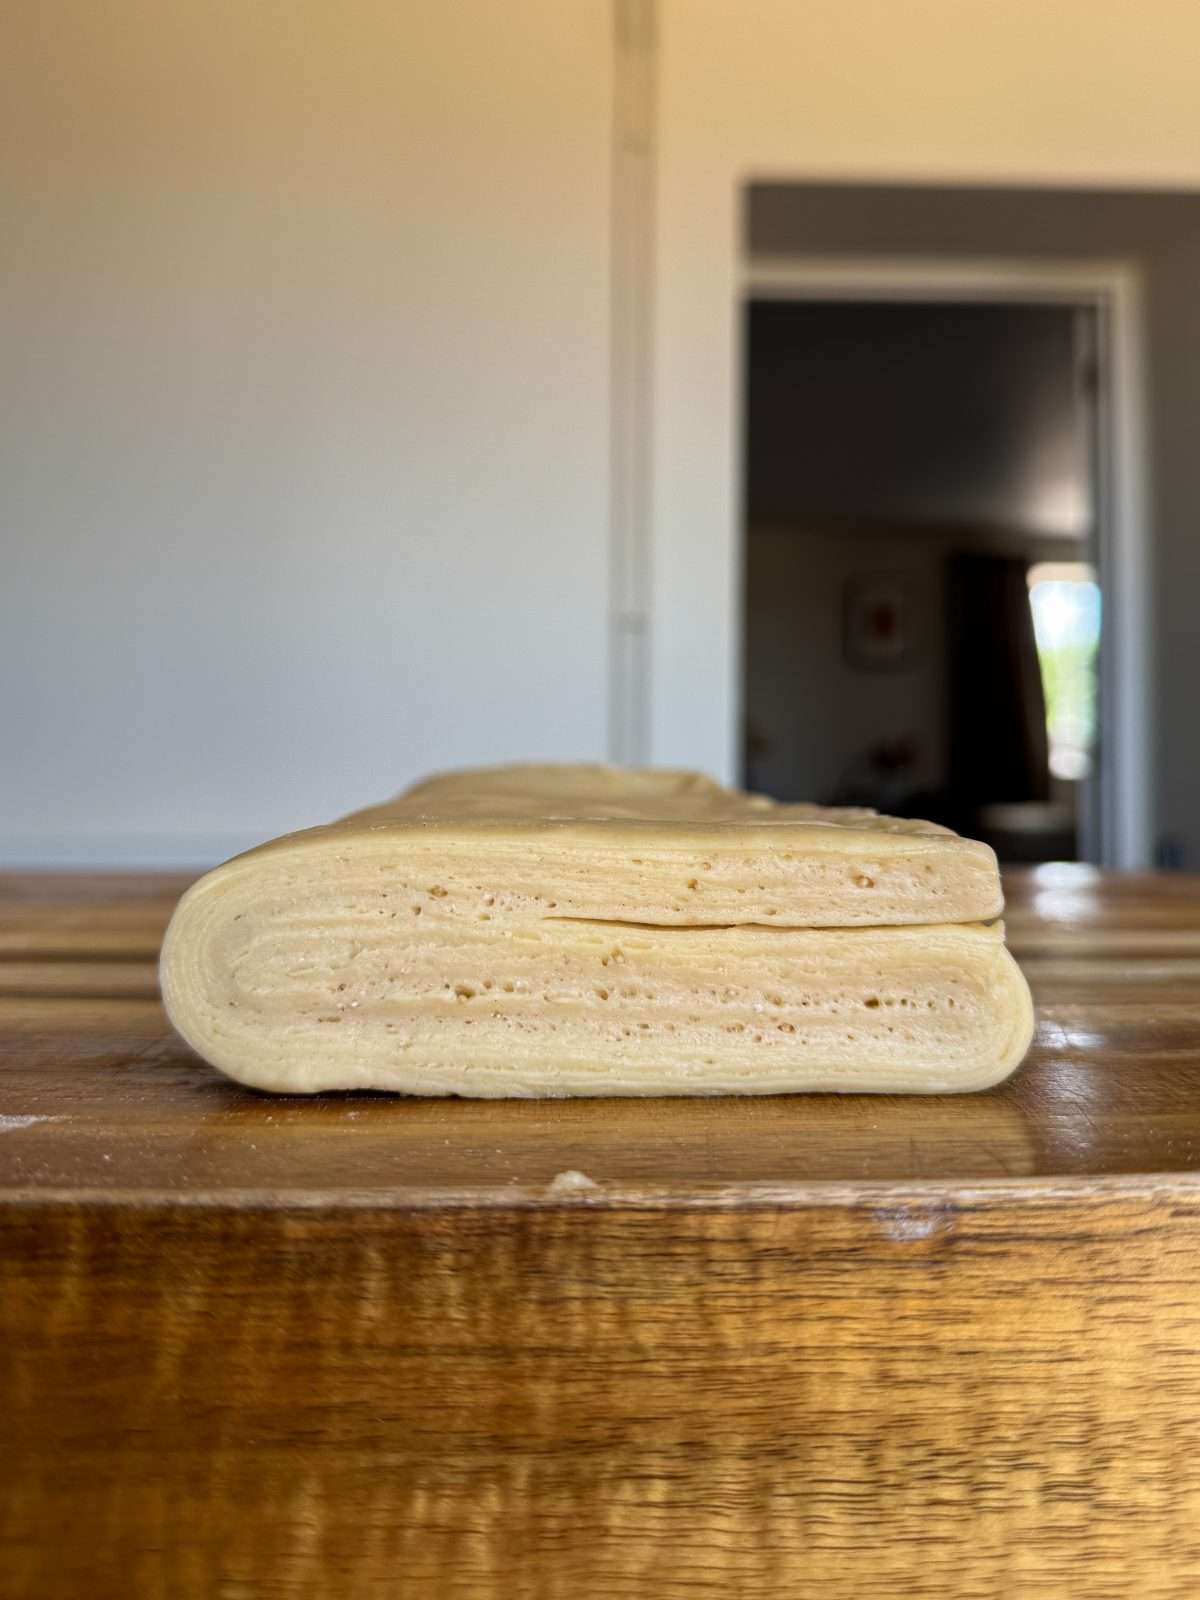
If you’ve ever wondered how to make bakery style Danish pastries from scratch then you’re in the right place! Here I’ll show you how to make this laminated pastry at home then you can use it to make Danishes, croissants, turnovers & lots more.
If you’ve never had or made Danish pastry before, it’s very similar to croissant dough but is a bit sweeter & slightly less crisp. It’s still super flaky though! This is a type of laminated pastry that’s made with a yeasted dough, so it has more structure & a lighter texture then delicate pastries, like puff pastry. It does take a bit of effort to make from scratch, as we need to laminate butter through the dough but it’s really not too difficult to do & the results are worth it!
For more pastry, cake, cookie, brownie & bread recipes, take a look at our ever growing collection of baking recipes! Plus, take a look at my “If I Had A Bakery” newsletter for more exclusive baking recipes…
What You’ll Need
- Flour – I use a mix of plain flour (all purpose) & strong white bread flour for my Danish pastry, as I find that it gives it the best texture. Make sure to use a bread flour with a protein content between 12-14%. I use a Canadian white bread flour from Shipton Mill.
- Butter – When making laminated doughs like this one, it’s important that you use a good quality butter with a butter fat content of at least 82%. Most supermarket butters will work but I’d recommend double checking the packaging.
- Sugar – You’ll need caster sugar for the dough. This adds sweetness, moisture & tenderness to the Danish pastry & helps it brown as it bakes.
- Milk – Whole milk works best for this recipe but semi skimmed will work as well.
- Salt – A good quality, fine sea salt is best. I use Maldon salt.
- Eggs – You’ll need a large egg for the Danish pastry dough. This should weigh around 50 grams out of the shell.
- Yeast – We’re using dried active yeast for this recipe, which is available in most supermarkets. Instant yeast would also work but will shorten the fermentation & proving time considerably.
How To Make Danish Pastry Dough (From Scratch!)
Danish pastry is very similar to croissant dough but with the addition of eggs & extra sugar. However, the dough & laminating process is pretty much the same. The key things to remember here, is temperature control (keep the dough cold!), resting the dough & proper lamination. It’s not too tricky though! If the weather’s warm during the day, I’d recommend making it early in the morning or later in the evening, to avoid melting the butter.
1. Making The Dough
The first step when making Danish pastry is to make an enriched, yeasted dough. This is also known as a detrempe, which is similar to when you make croissant dough or homemade puff pastry.
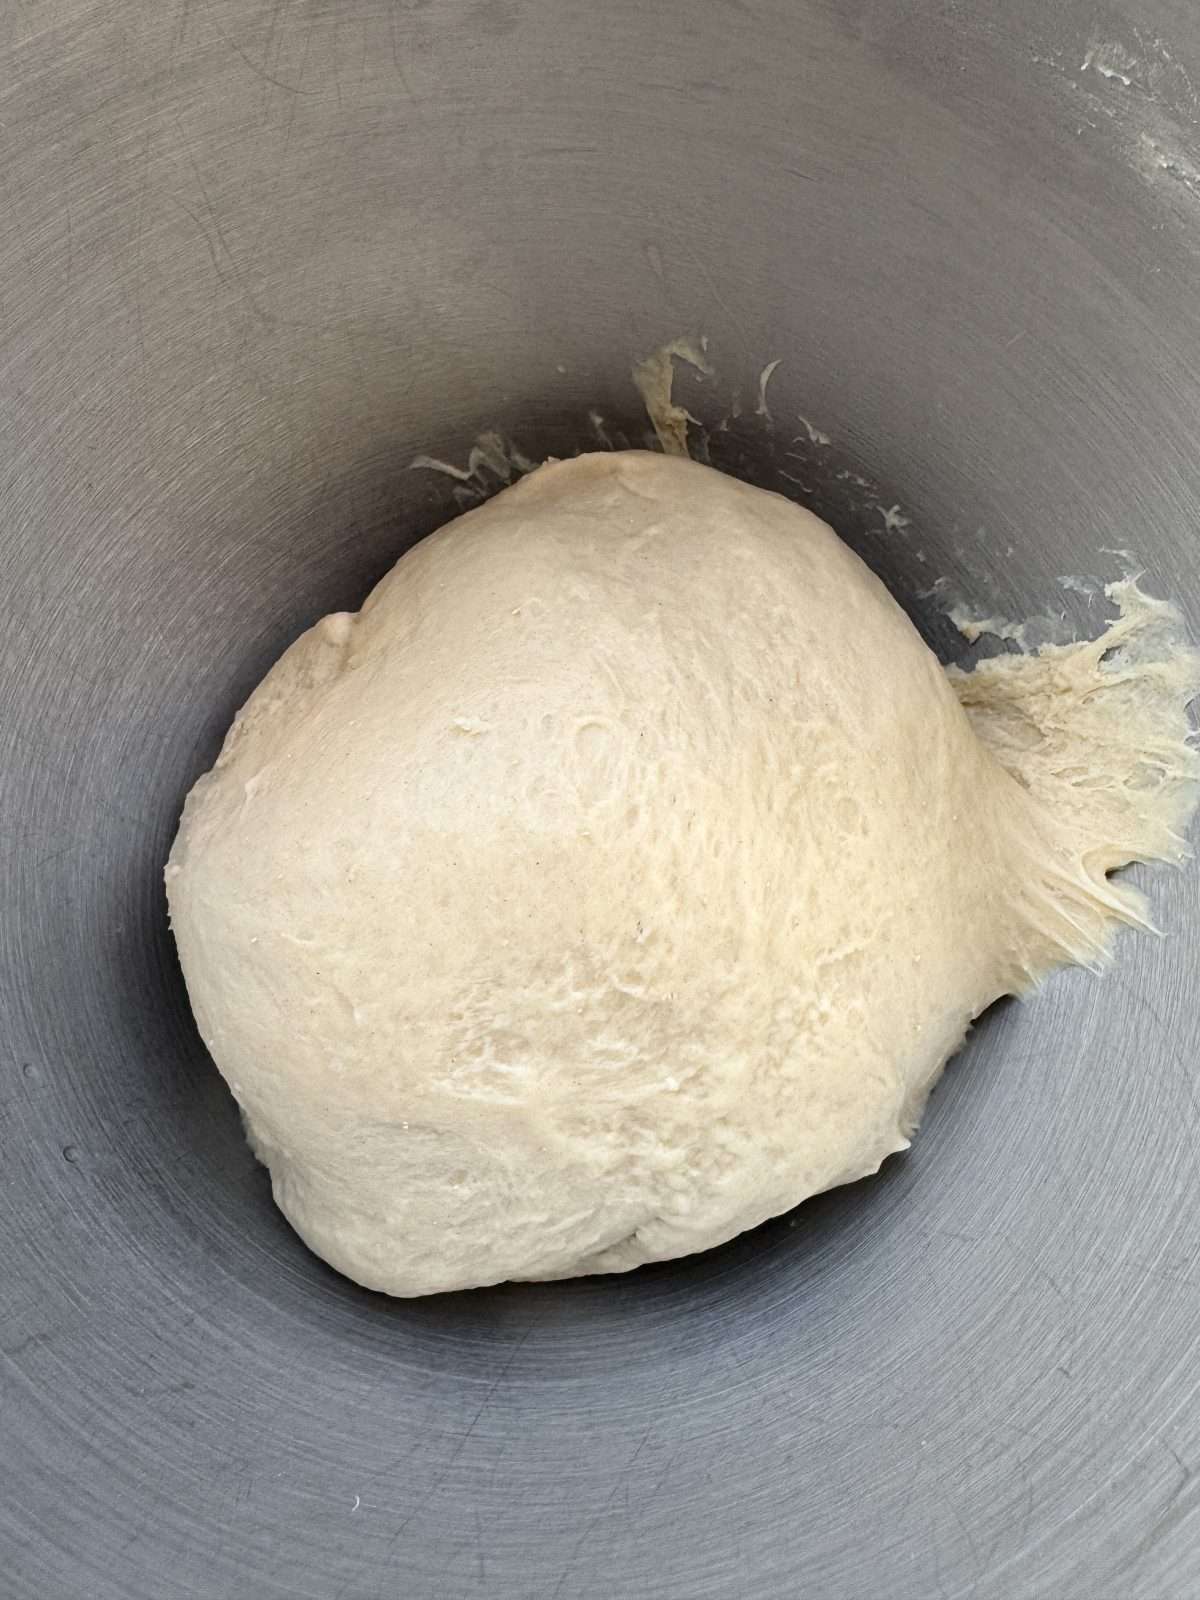
To make the dough, we add plain & bread flours into the bowl of a stand mixer along with caster sugar, sea salt, dried active yeast, milk, water & an egg then mix with the dough hook on a medium-low speed, until a smooth dough forms. Next, we gradually mix in softened butter then continue mixing until the dough passes the windowpane test (more on this below!).
2. Overnight Chill
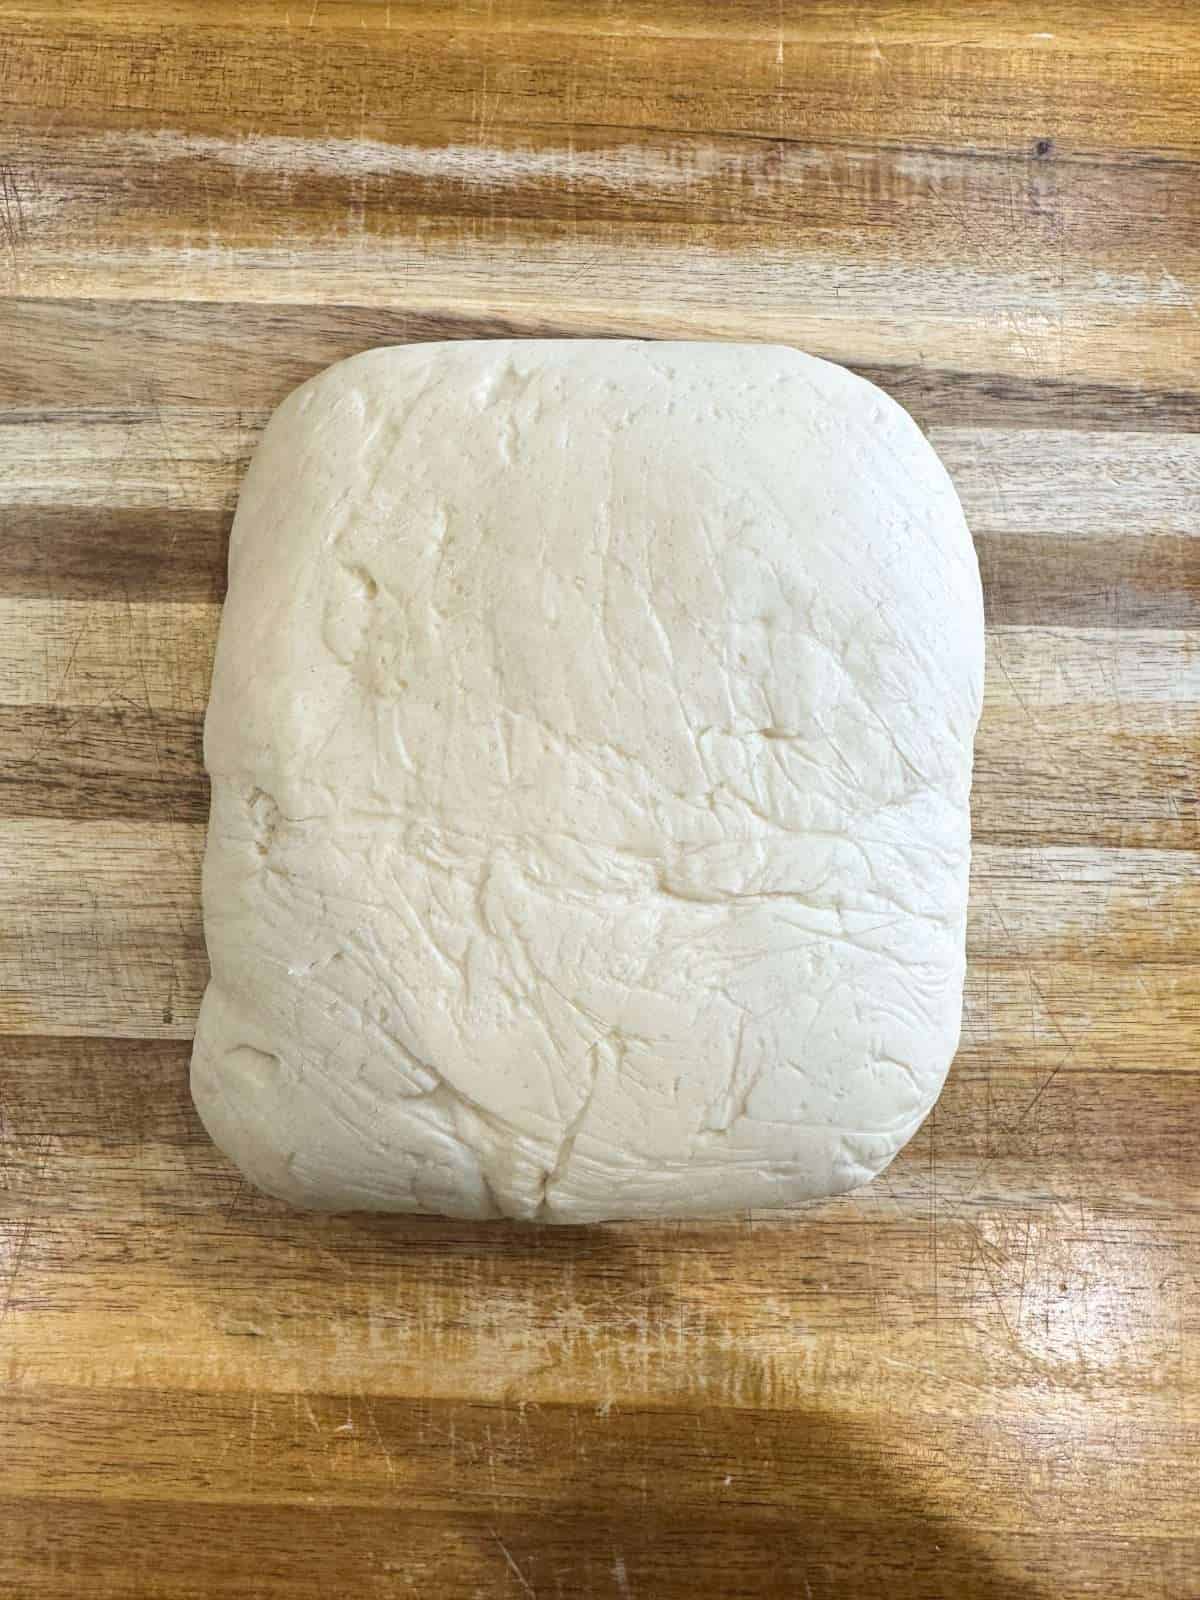
Once our dough is ready, we transfer it to a work surface then use a rolling pin to roll it out into a 2cm thick rectangle. We then wrap the dough in clingfilm & chill in the fridge for at least 12 hours or up to 16.
Rolling the dough out into a rectangle before chilling it, ensures that it is the same temperature all the way through. Temperature control is key when making Danish pastry!
3. Butter Layer
The next step is to prep the butter layer. You can actually buy pre made blocks of butter online that are specifically for croissant & Danish pastry dough that is designed to be more pliable & less prone to cracking. This stuff can be expensive though, so I tend to replicate this by mixing regular butter with a small amount of plain flour. Just make sure to use a butter with a butter fat content of at least 82% (most supermarket butters are fine but I’d double check the label just in case).
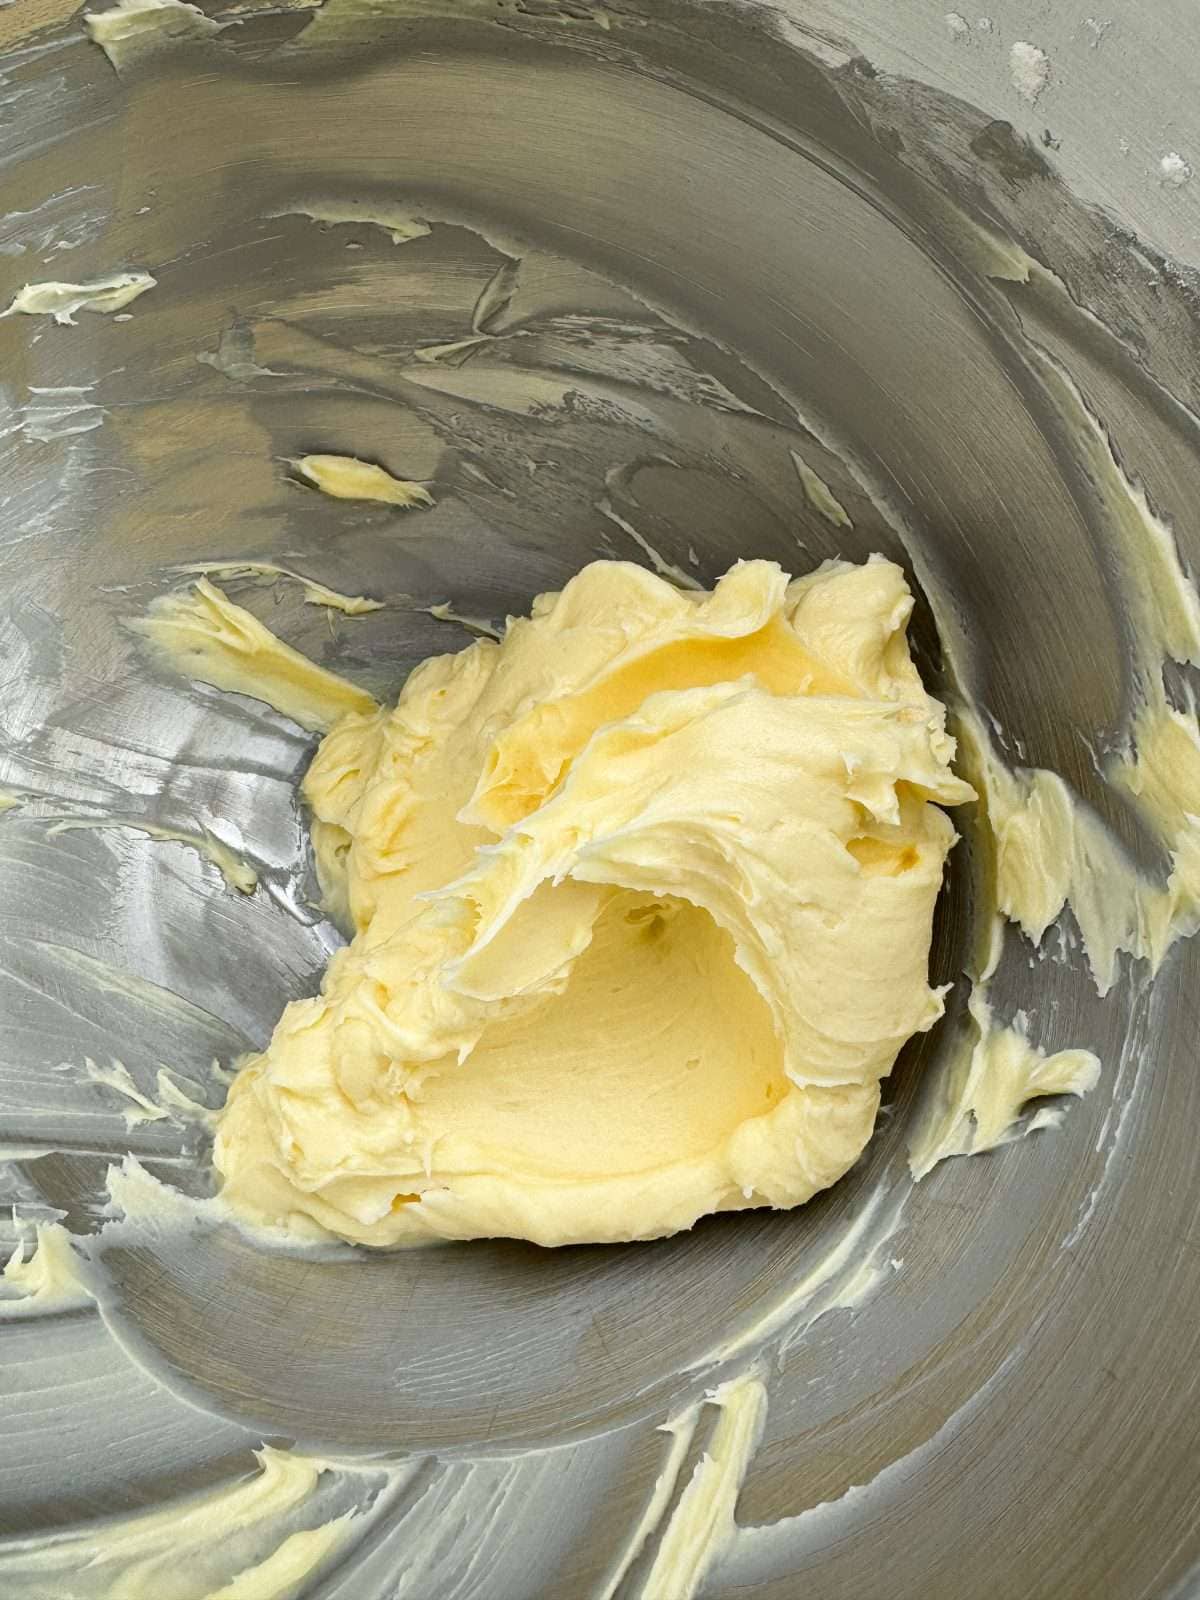
To prep the butter layer, we add softened butter & a small amount of plain flour into the bowl of a stand mixer then mix with the paddle attachment, on a medium-low speed until it’s smooth & combined. This will only take a couple of minutes – we don’t want to over mix it!
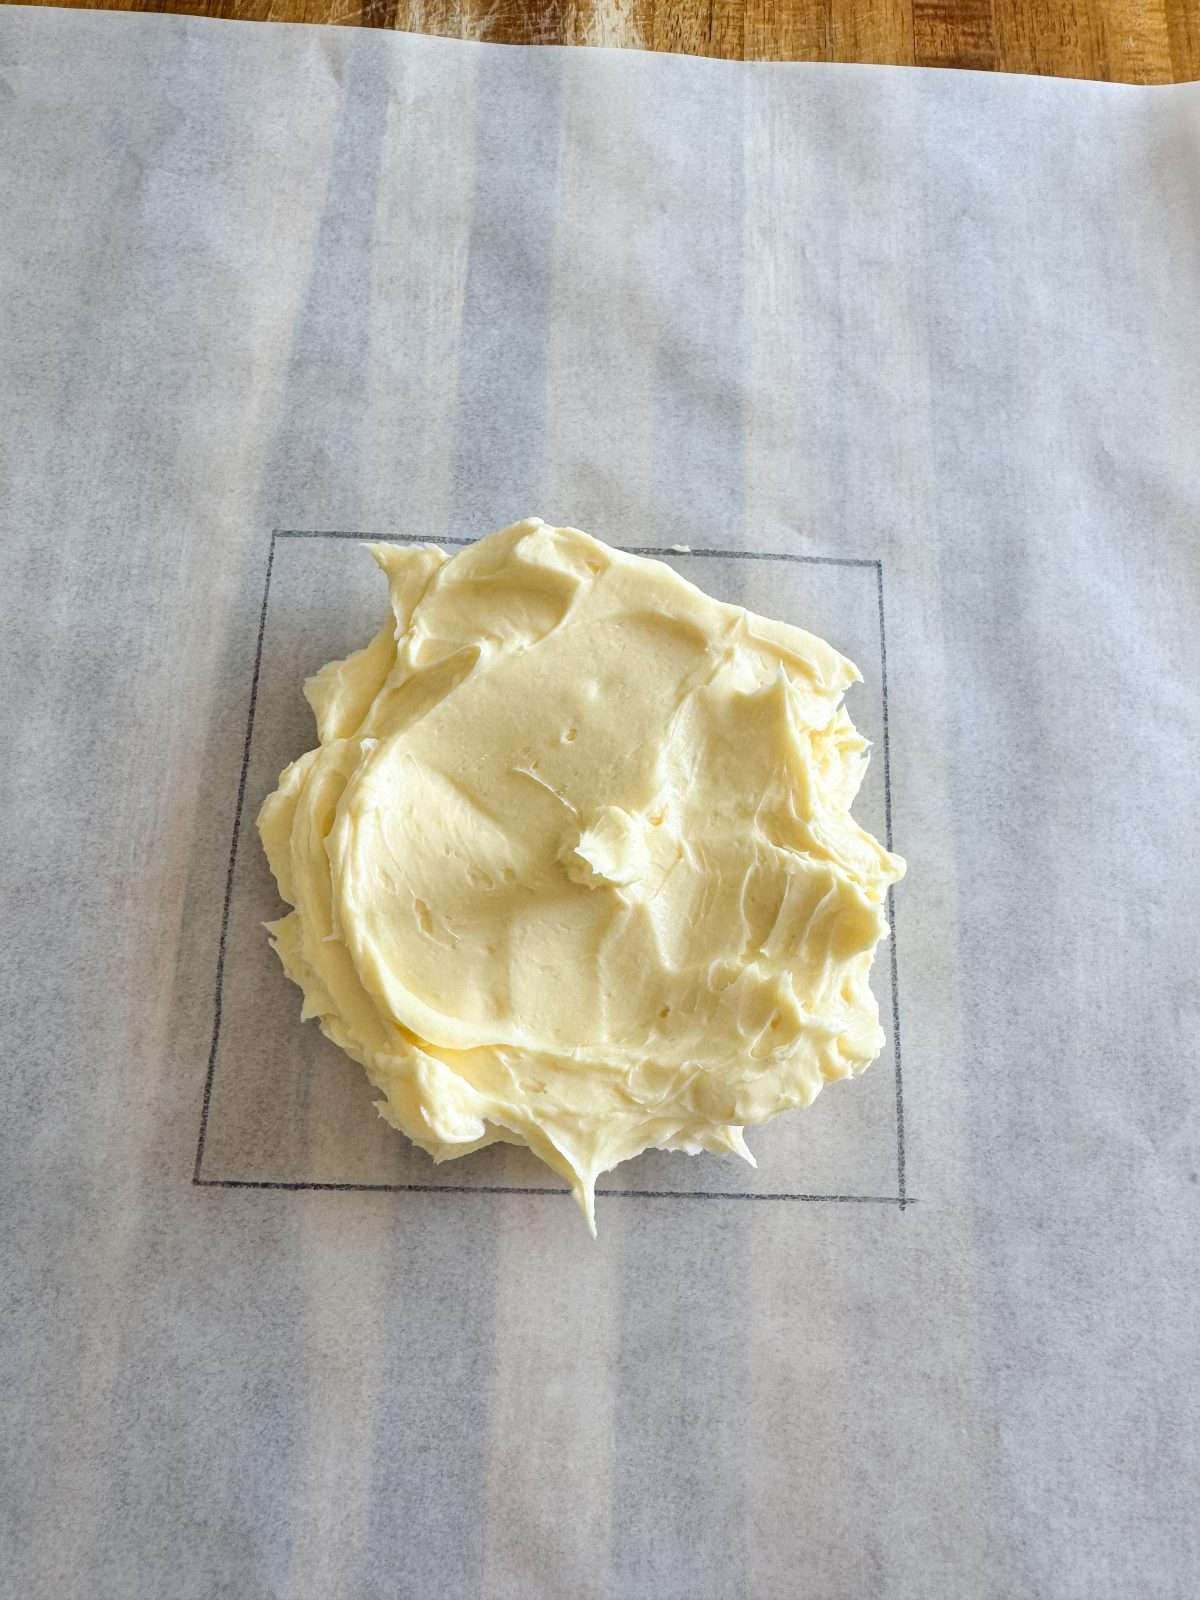
Next, we draw a 6″ square onto a large piece of baking parchment, flip it over then place the butter in the middle of the square. We then fold the excess baking parchment over the butter so that each edge lines up with the edges of the square that we drew onto the parchment.
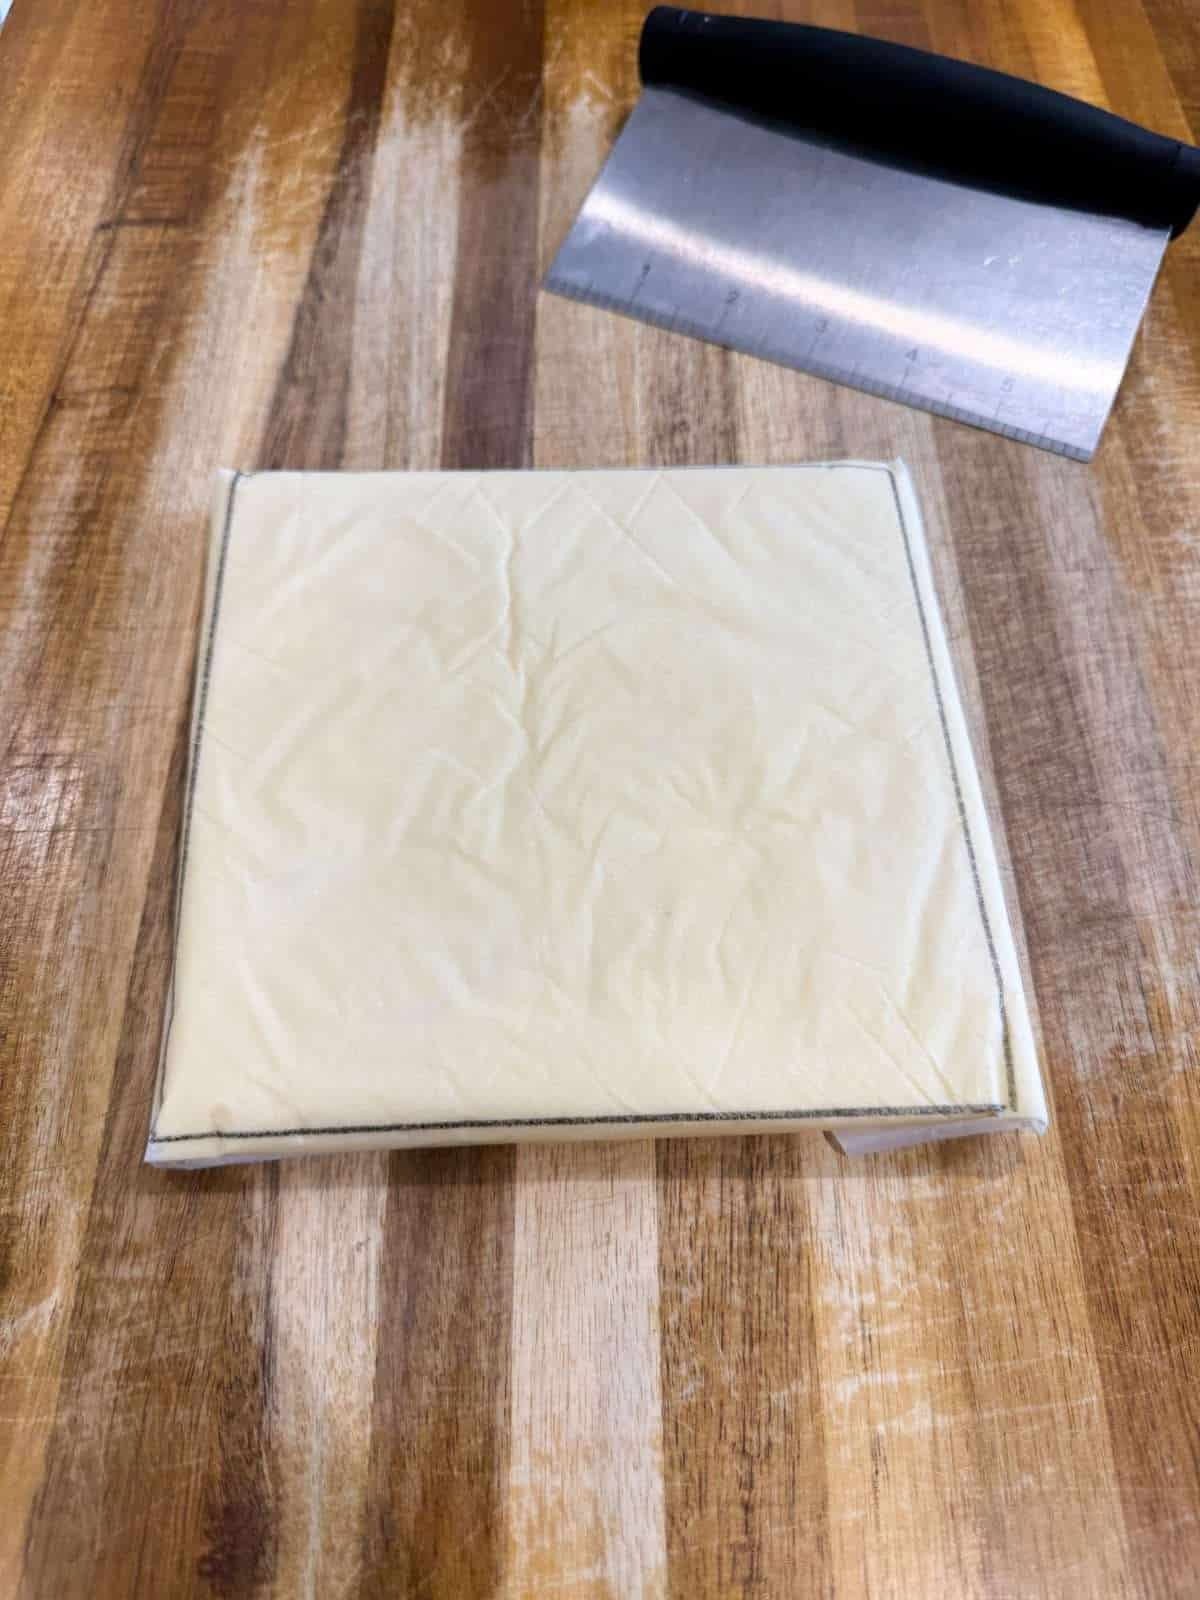
Now we flip the parchment over so that the folds are underneath then use a rolling pin to roll the butter out into an even layer that reaches each edge of the square that we drew on earlier. We then need to chill the butter block for 30 minutes or so, until it has firmed up by still feels pliable. To check this, give the butter a gentle bend with your hands. If it bends easily & feels firm, it’s ready.
4. Laminating
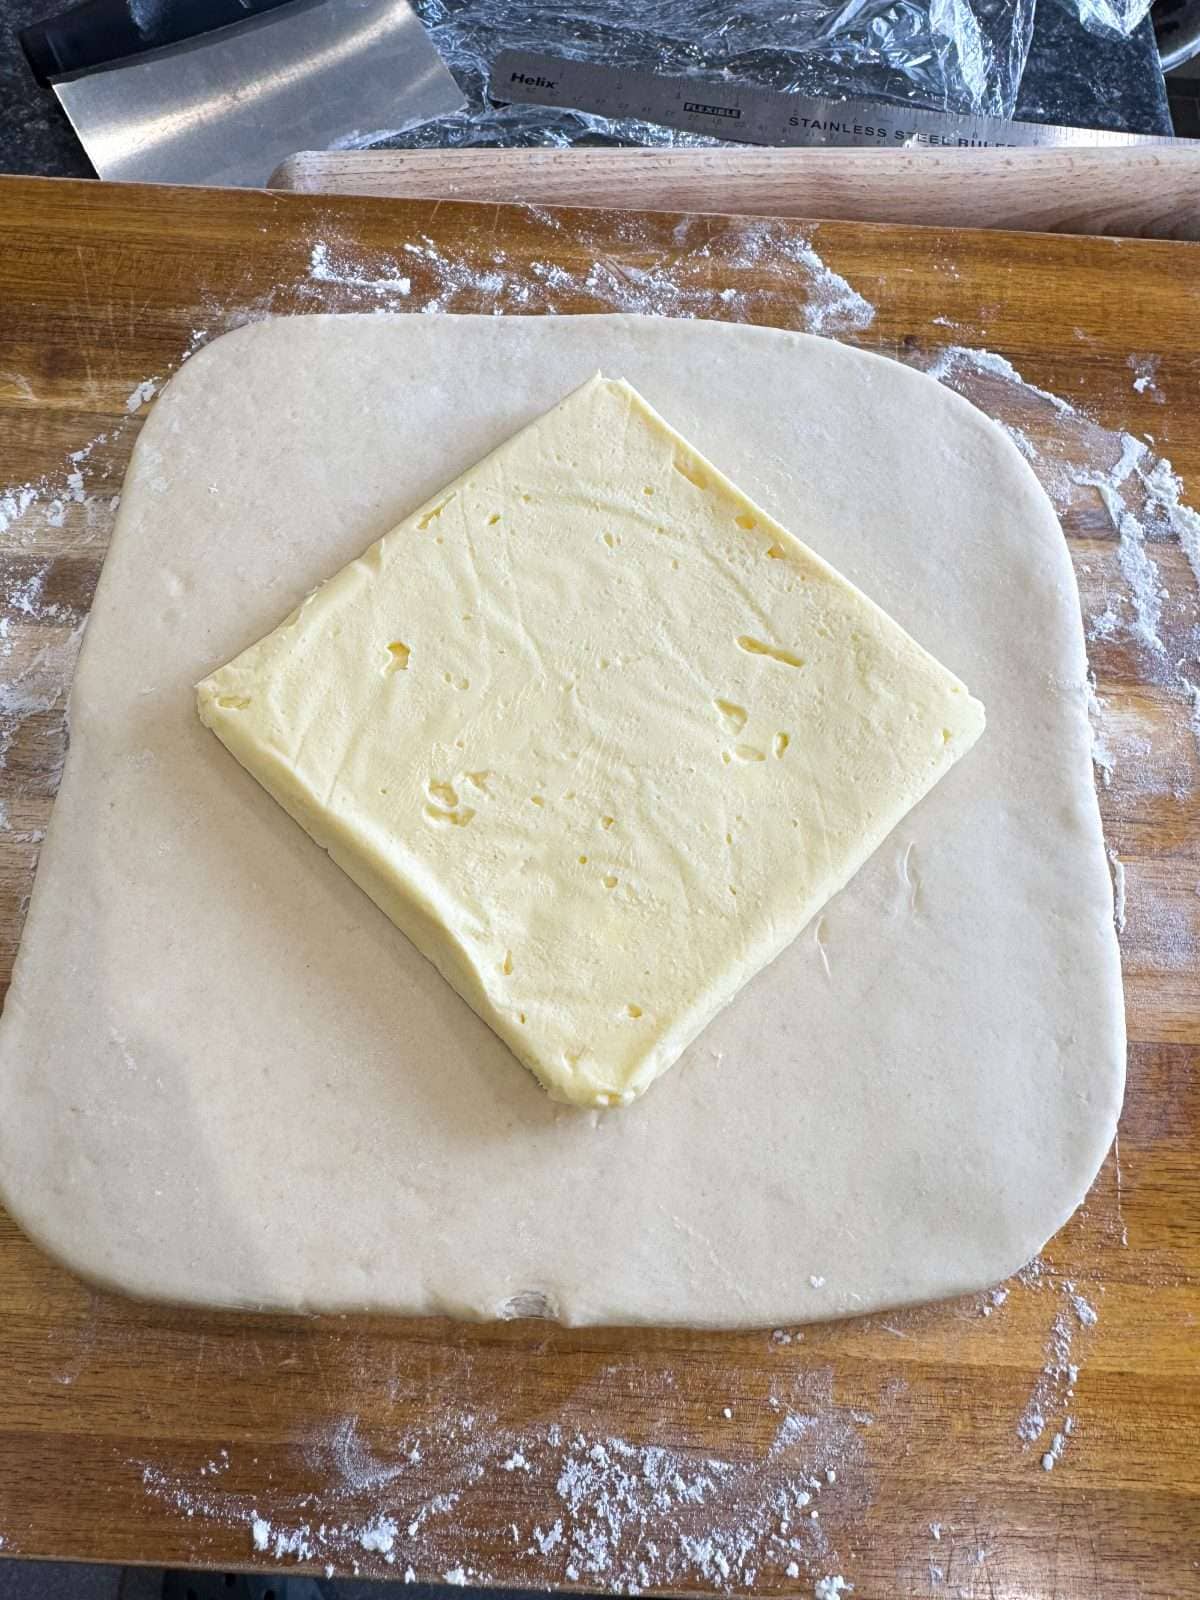
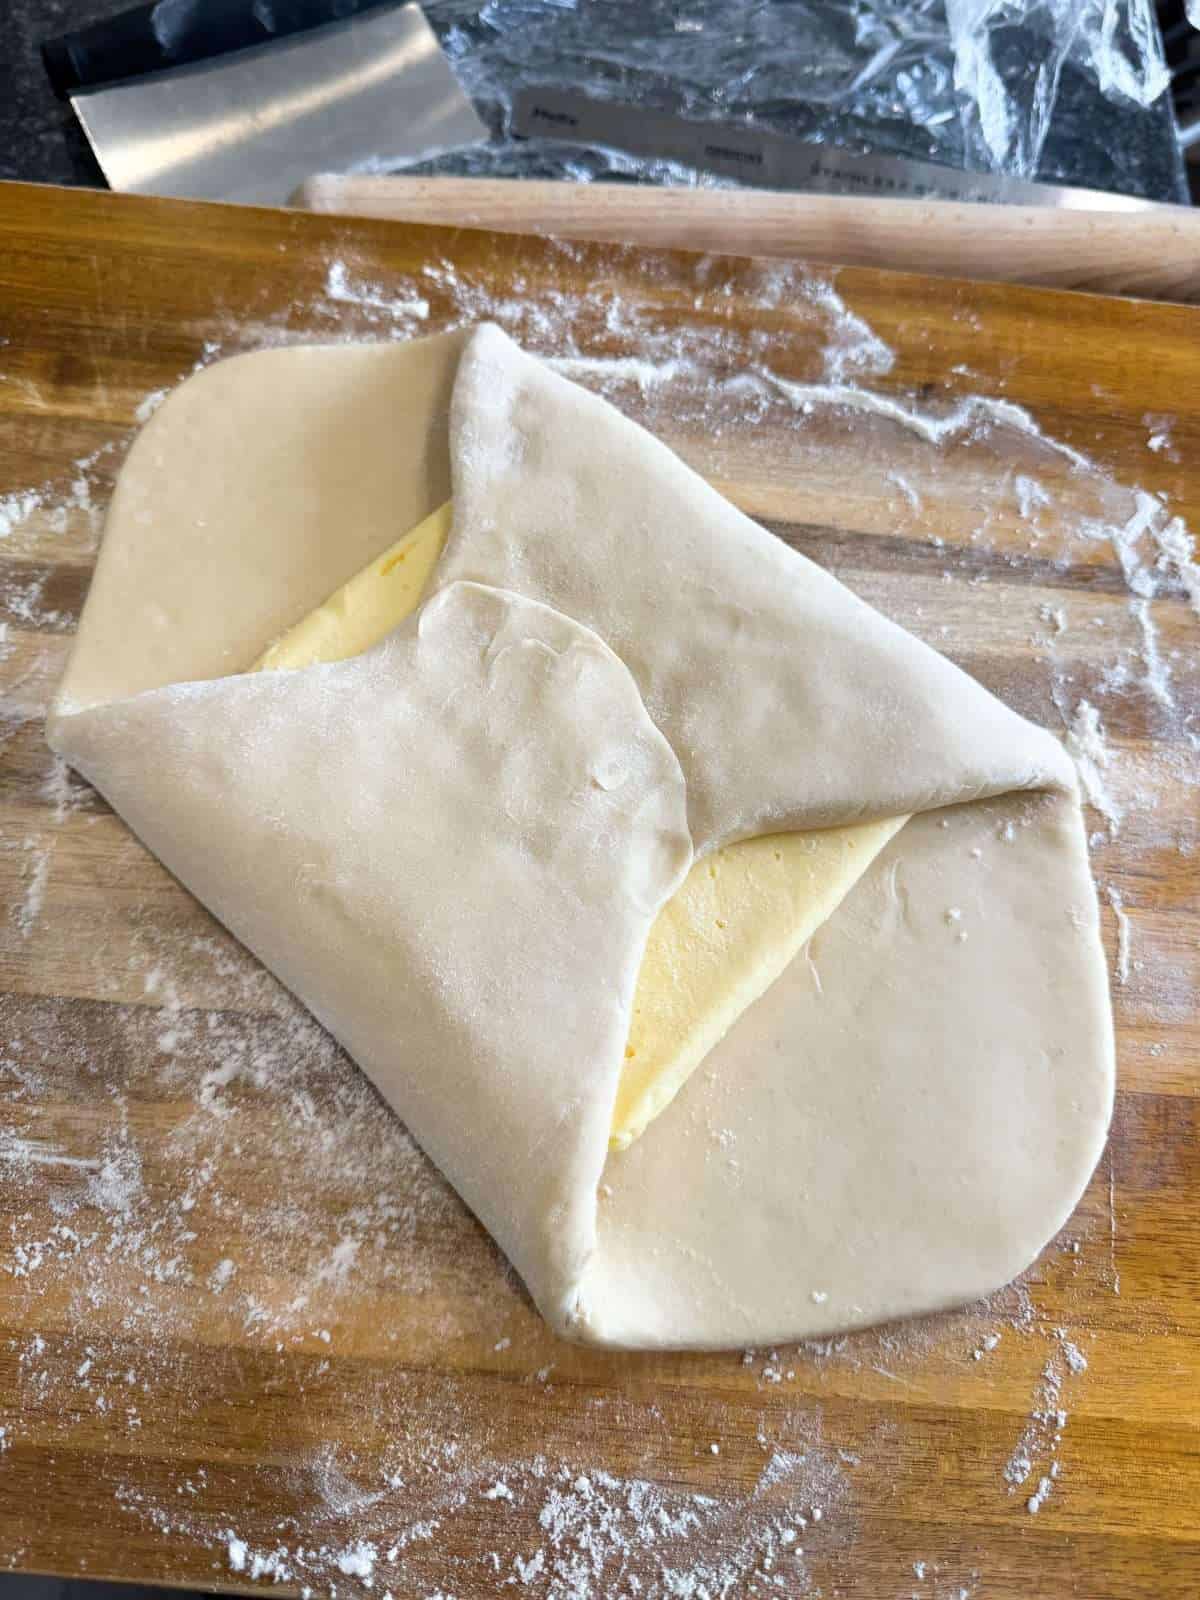
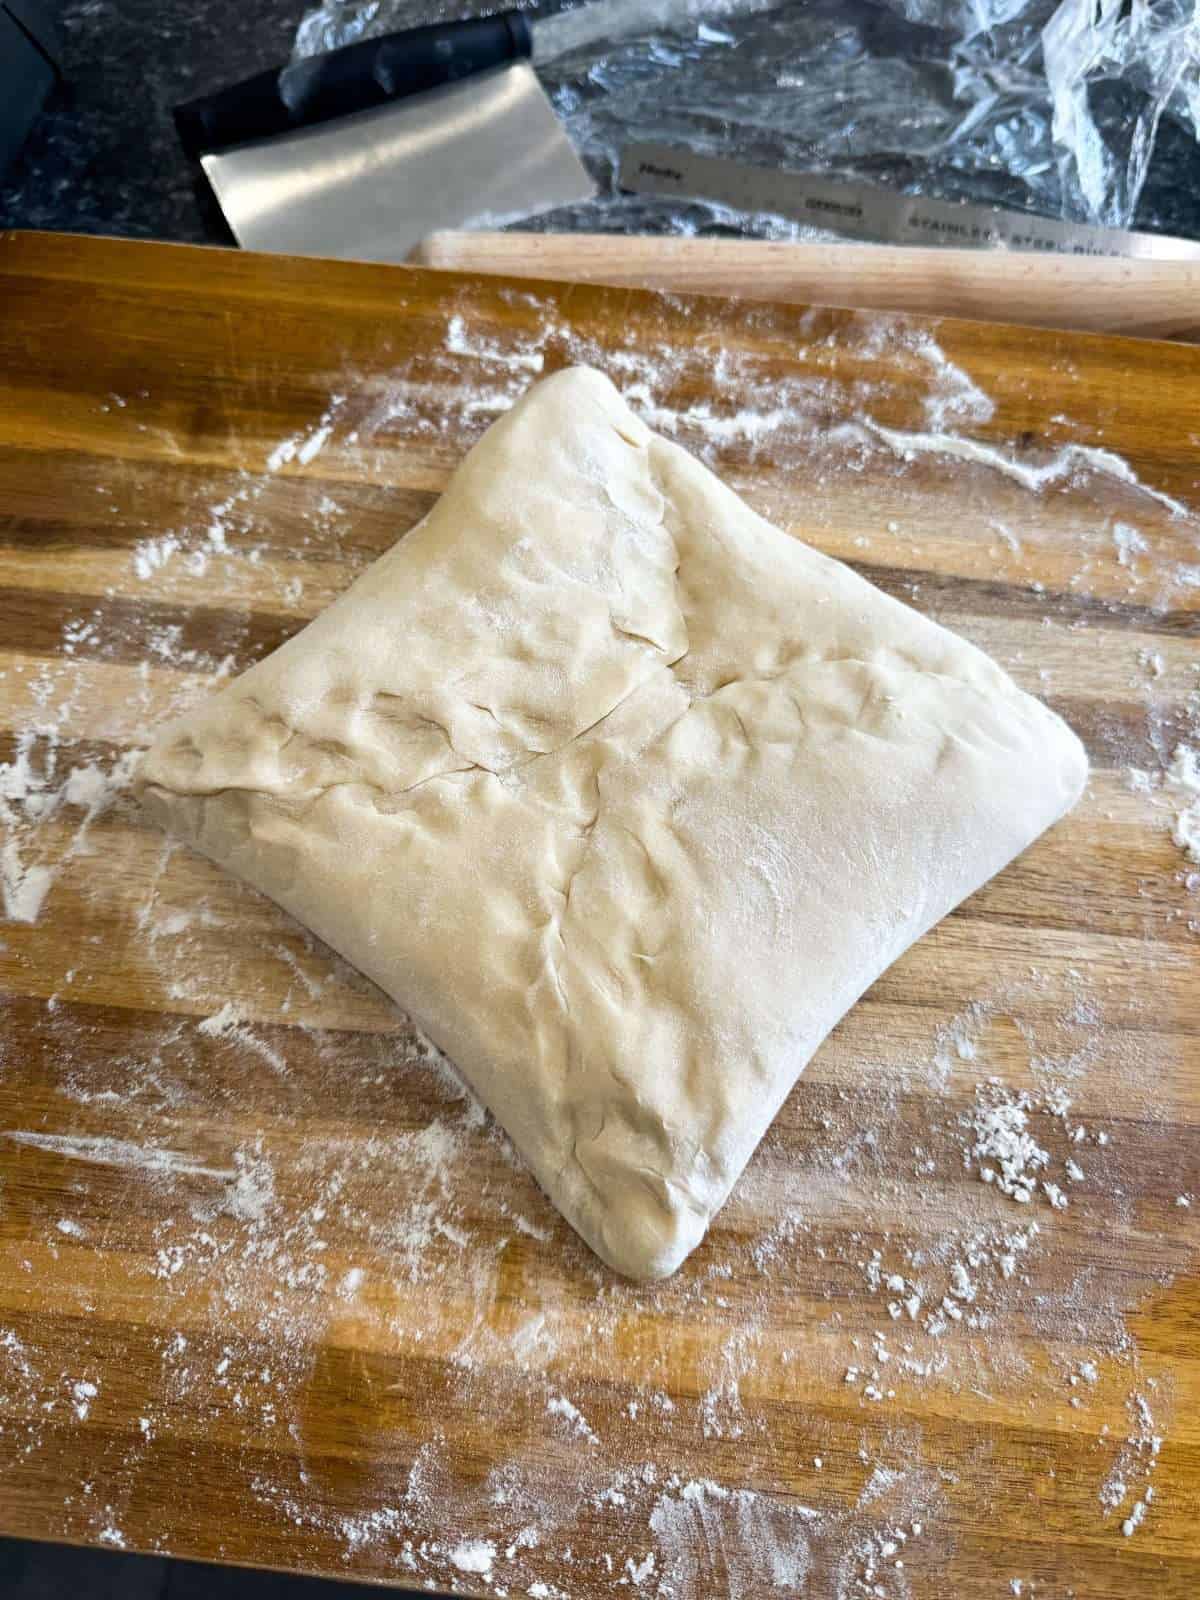
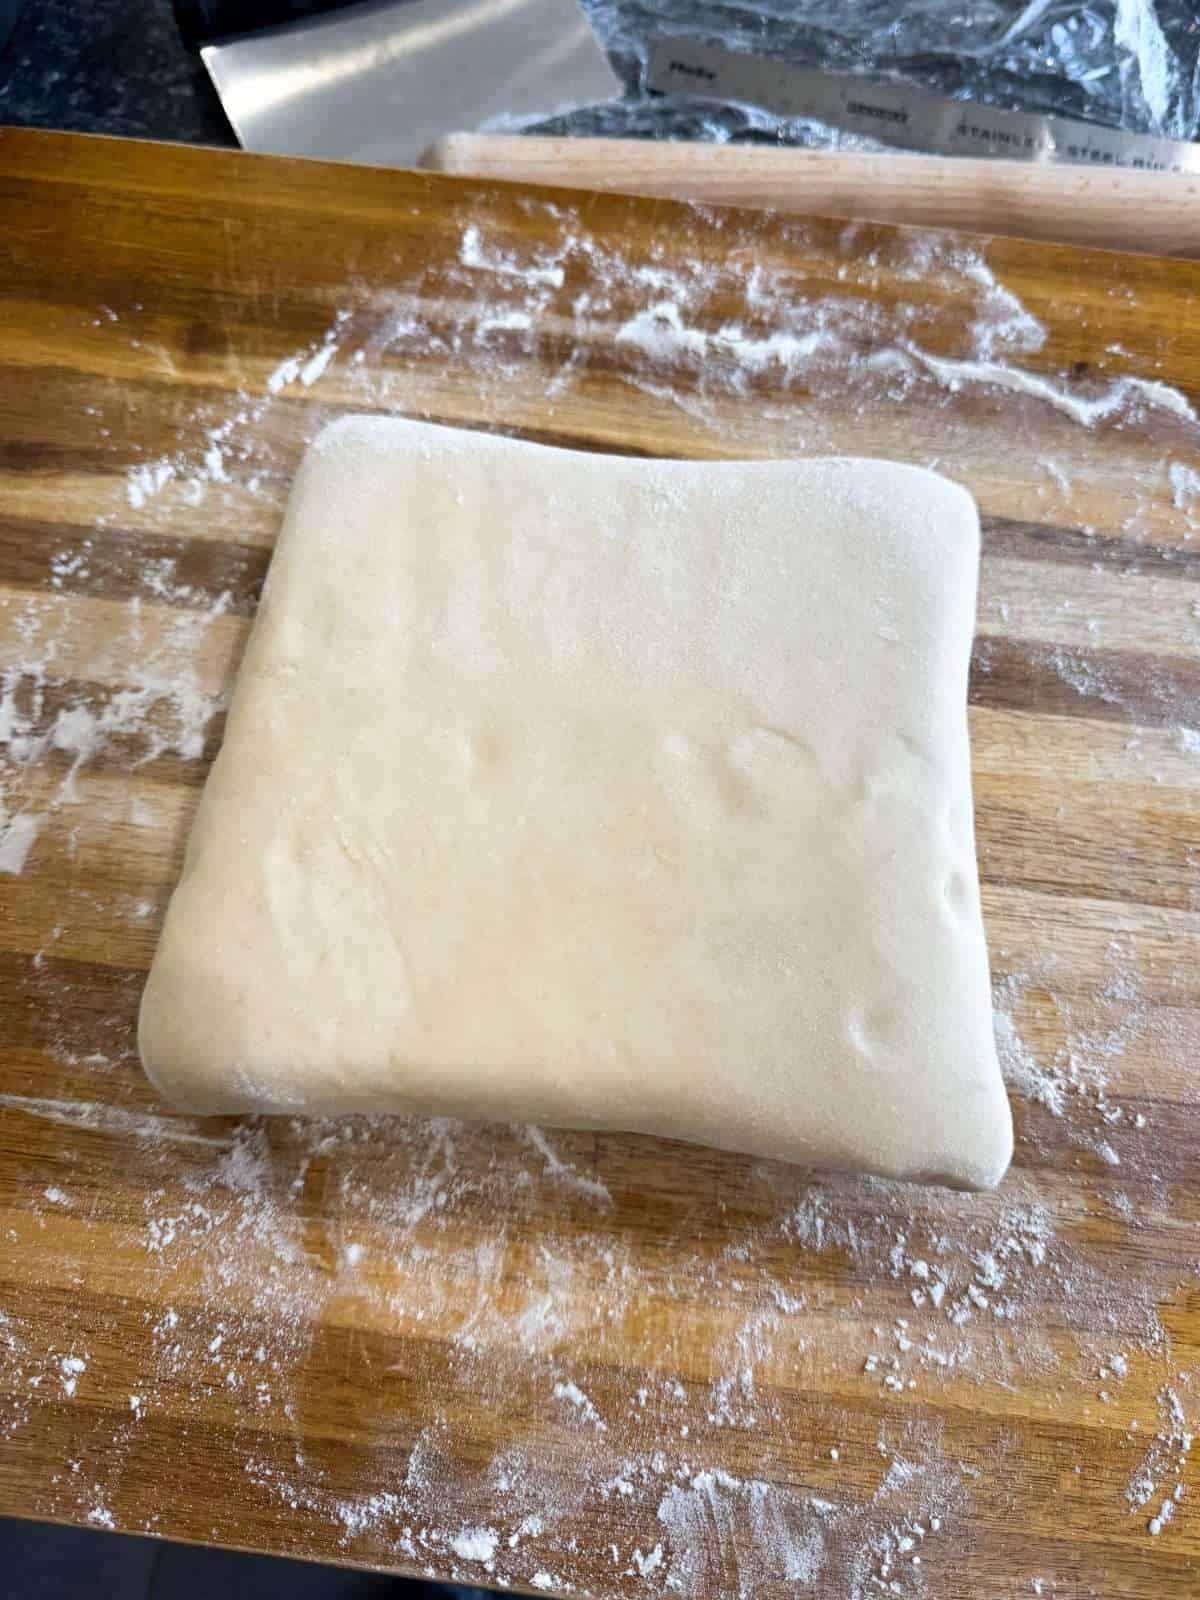
Now we’re going to laminate the dough! To do this, we take the dough out of the fridge then roll it out on a lightly floured surface into a 10″ square. Next, we dust off any excess flour, unwrap the butter then place it into the middle of the dough so that it’s sitting diagonally, like a diamond. Then we fold 2 opposite corners into the middle, pinch to seal then fold the remaining corners over the top, pinching along all of the overlapping edges to seal completely.
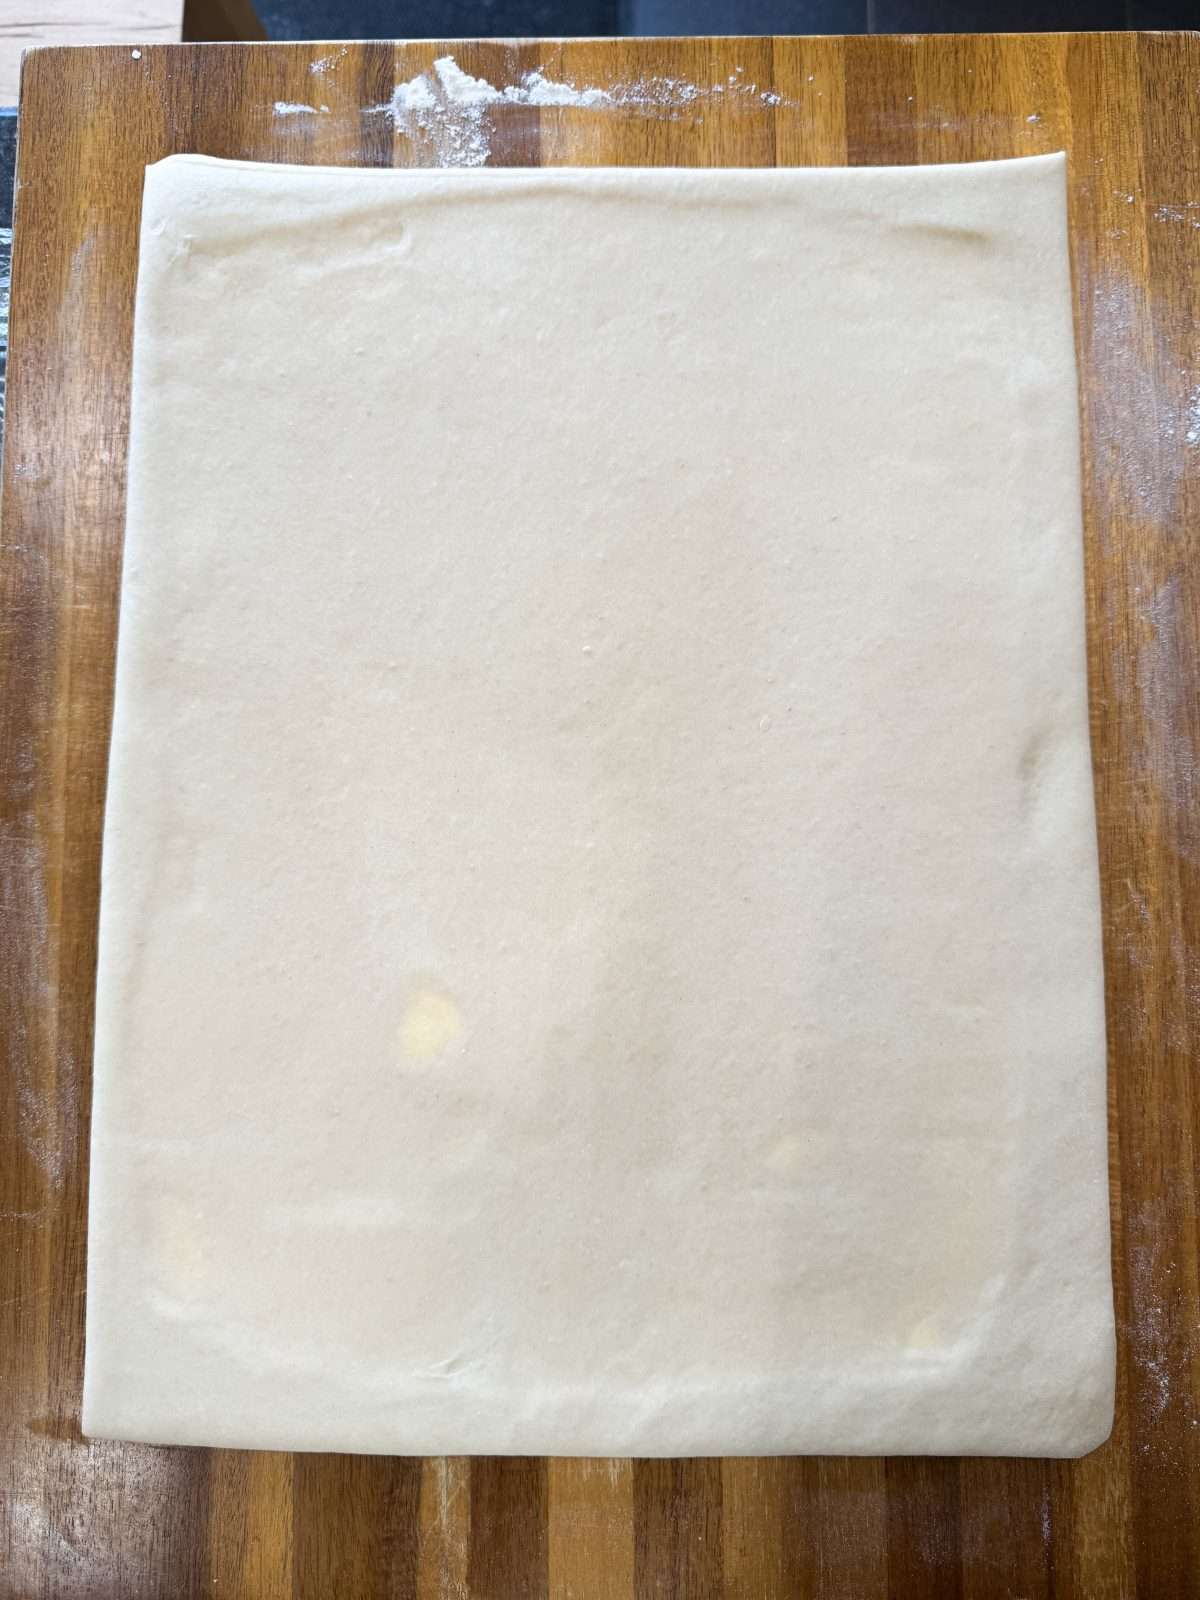
The next step is to roll out & fold the dough, to create lots of layers of butter (this is the lamination). To do this, we flip the dough over so that the seam is underneath then roll it out into a rectangle that measures 30x40cm & is roughly 5mm thick. Next, we trim the edges slightly (I use a pizza wheel here!) to neaten up then brush off any excess flour.
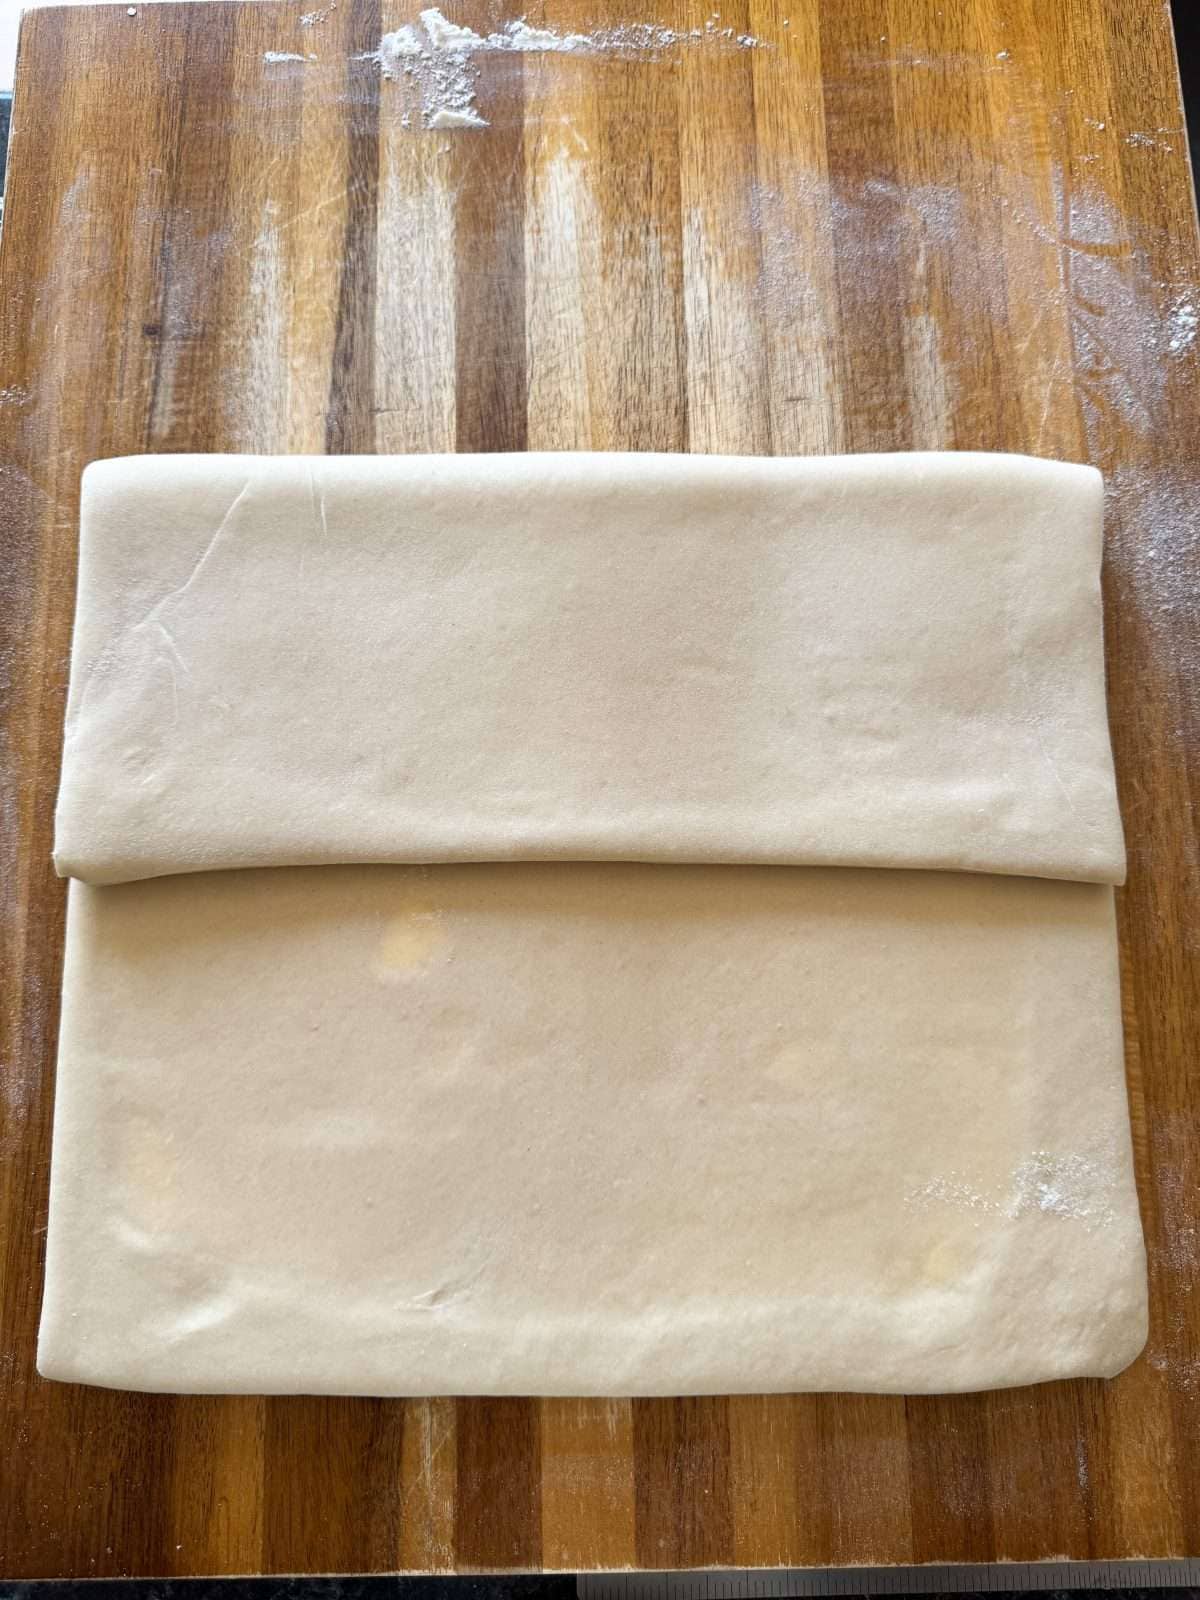
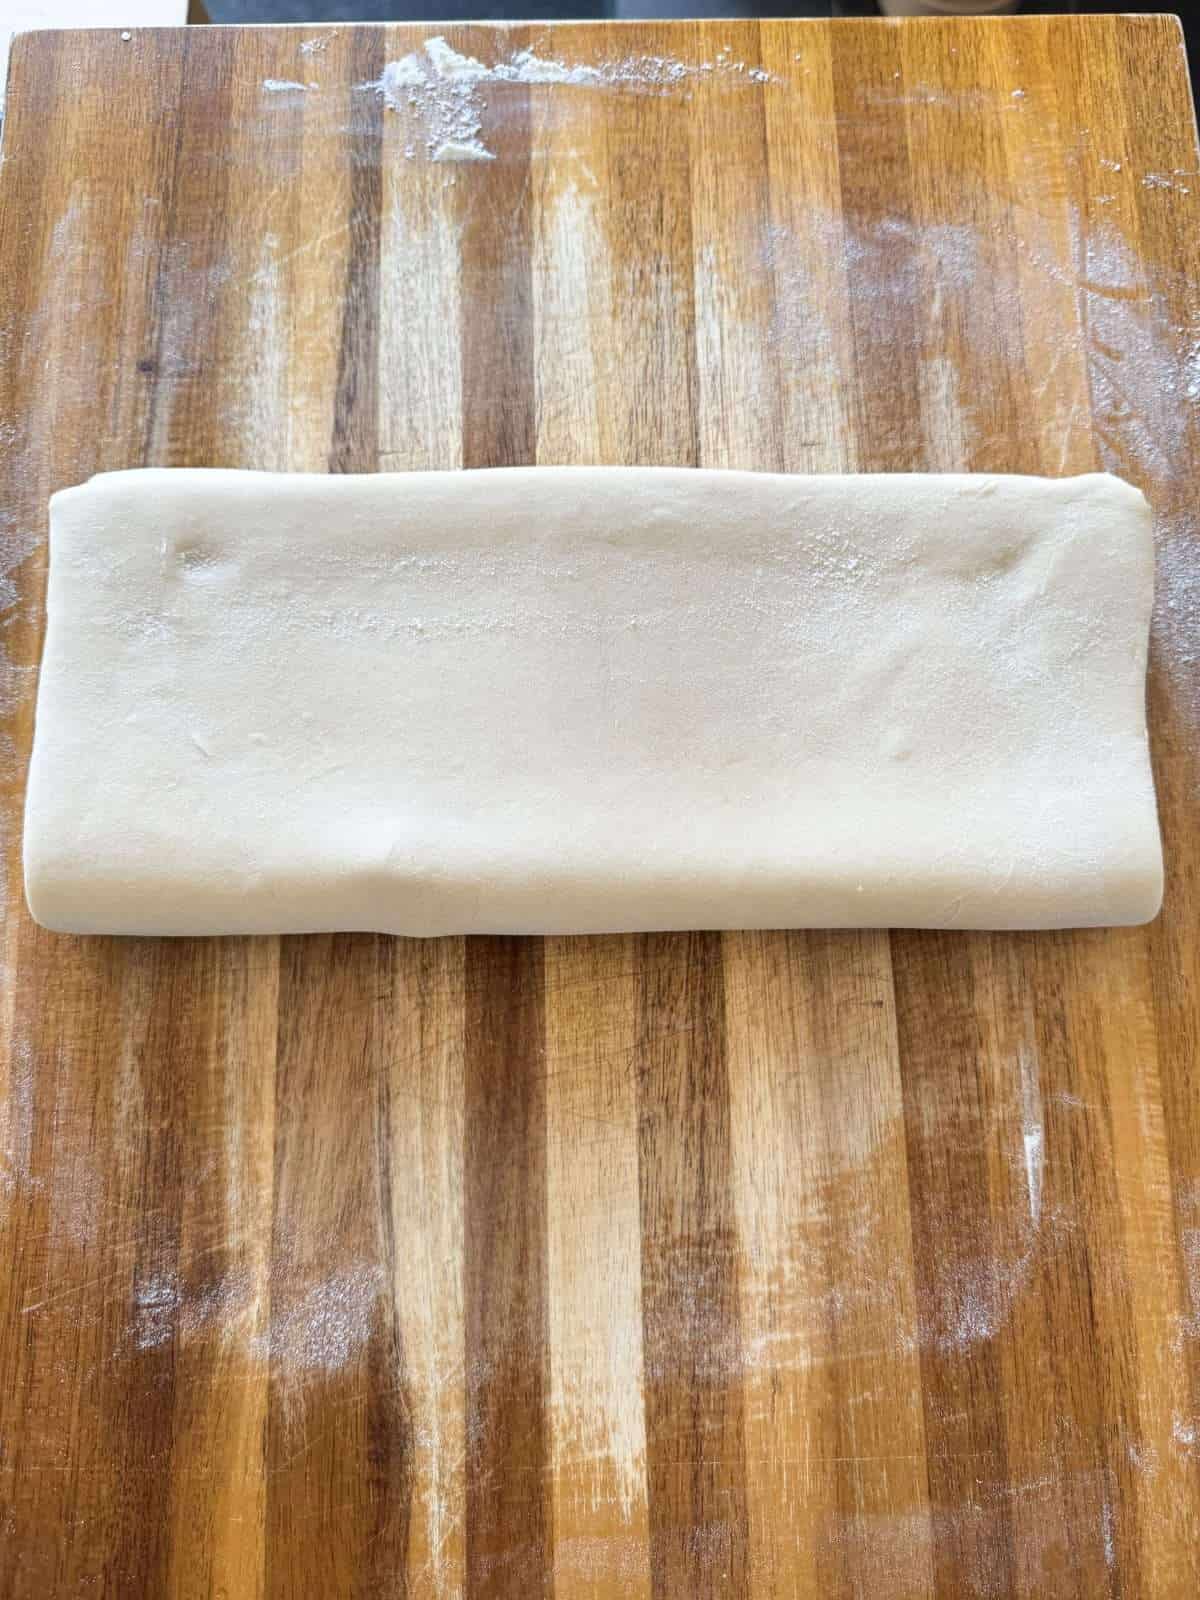
Next, we need to mentally divide the dough into thirds horizontally with one of the shorter edges sitting closest to you. We take the bottom third of the dough & fold it up over the middle third, brush any excess flour from the top then fold the top third over the top. We then chill the dough for 30 minutes, turn 90 degrees then repeat. We then chill again then repeat for a final time, bringing the total number of folds to 3.
Laminating Danish Pastry – Step By Step
- Roll the chilled dough into a 10″ square then place chilled butter in the middle, sitting diagonally like a diamond.
- Fold the corners over the butter, pinching to seal. Start with opposite ends first.
- Flip the dough over & roll out into a rectangle measuring 30x40cm. The thickness of the dough should be 5mm.
- Trim the edges slightly, to neaten up. A sharp knife or a pizza cutter works best. Brush any excess flour off the pastry.
- Mentally divide the dough into thirds then fold the bottom third over the middle third.
- Brush any excess flour off the folded dough then fold the top third over the top.
- Wrap the dough in clingfilm then chill for 30 minutes.
- Take the dough out of the fridge, place it onto the work surface the same position as before then turn it 90 degrees clockwise.
- Roll out again to a 30x40cm rectangle then repeat the folding process.
- Chill the dough for another 30 minute then repeat the turning, rolling out & folding process for a final time.
5. Final Chill (Before Using)
Once the dough has been laminated, it needs to chill in the fridge for at least 2 hours before using, or for up to 24 hours. This gives the gluten time to relax & ensures that the butter layers are firm, which is key to getting the flakiest danish pastry!
As Danish pastry dough contains yeast, it’s best to use it within a day of making it, otherwise it won’t rise as much as it proves & bakes.
A Note On Proving & Baking
How you shape & bake your Danish pastry depends on what dish you’re making! But as a general set of guidelines, the dough will need to be proved for 2-3 hours once shaped then baked at a fairly high temperature, to get the best rise & colour in the oven. I bake classic Danish pastries (like pain aux raisins) at 220°c/428°f for 16-18 minutes.
You’ll know when the dough is ready to be baked when it feels light & airy and wobble when you gently shake the tray.
The Windowpane Test
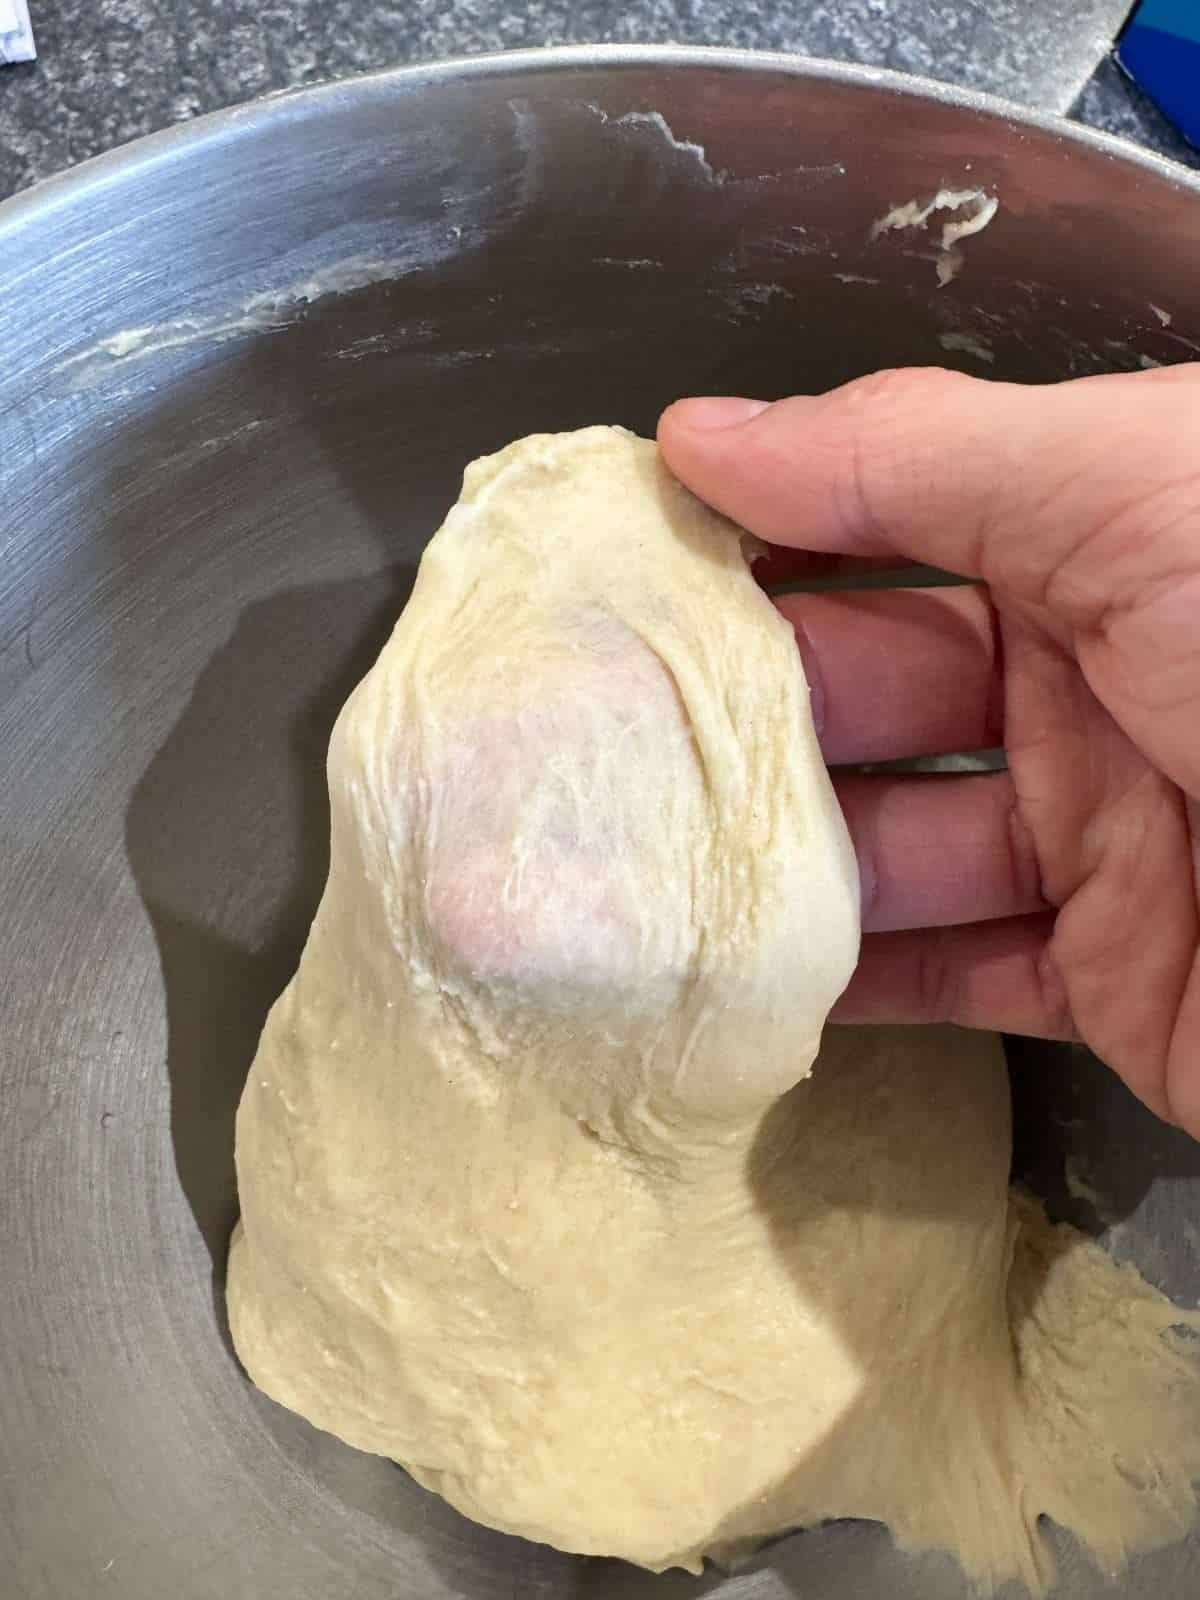
The best way to assess the gluten development in your dough is by using the windowpane test. Here, you take a small piece of dough & stretch it between your fingers. If it stretches thin enough so that you are able to see through it, enough gluten has been developed. If it tears, more kneading is required.
Frequently Asked Questions
Danish pastry & croissant dough are very similar & are made pretty much the same way. However, Danish pastry dough contains eggs & more sugar. Croissants are crisp & light once baked & Danish pastries are flaky and have a slight chew.
Danish pastry can be made with either plain flour (all purpose) or strong white bread flour. However, I find that using a combination of plain & bread flour gives Danish pastry the best balance of flakiness & chew. I tend to use 60% plain flour & 40% bread flour.
Danish pastry is best used within a day of being made & needs to be stored in the fridge. As Danish pastry contains yeast, it’s best to use it within a day so that it rises properly when you prove it.
I find that 3 sets of “letter folds” works best for homemade Danish pastry, as it gives the pastry plenty of layers & a perfectly flaky texture once baked. A letter fold is where the pastry is rolled into a rectangle then folded into thirds (like a letter), to laminate.
Danish pastry can be used the same way as croissant dough! It’s best used for bakery style Danish pastries, croissants & turnovers.
Equipment Used
Please note that these are affiliate links & I may make a small commission if you make a purchase using these links, at no extra cost to you. For more information, click here.
More Baking Recipes To Try!
- Lemon Drizzle Cookies
- Tres Leches Cake (3 Milk Cake)
- Classic School Cake
- Brown Butter & Miso Pecan Pie Bars
- Kettle Chip Rocky Road
- Brown Butter Biscoff Rice Krispie Treats
If you have enjoyed this recipe for danish pastry dough, it would mean a lot if you could leave a review & rating. And if you’d like to stay up to date with future recipes, follow us on Instagram & TikTok!
Danish Pastry Dough
Equipment
- Stand Mixer
- Rolling Pin
- Ruler
- Baking Trays
- Pastry Brush
Ingredients
Danish Pastry
- 360 g Plain Flour
- 240 g Strong White Bread Flour (See Notes)
- 80 g Caster Sugar
- 12 g Fine Sea Salt
- 170 g Whole Milk (Cold)
- 100 g Cold Water
- 12 g Dried Active Yeast
- 1 Large Egg (50g Out Of The Shell)
- 60 g Unsalted Butter (At Room Temperature)
Butter Layer
- 300 g Unsalted Butter (At Room Temperature)
- 25 g Plain Flour
Instructions
Dough
- Add both of the flours into the bowl of a stand mixer, along with the sugar & sea salt then whisk to combine.
- Next, add the milk & water into a jug then add in the yeast. Whisk to dissolve the yeast then add into the flour, along with the egg. Mix with the dough hook on a medium-low speed until a smooth dough forms. This will take 3-4 minutes.The milk should be straight from the fridge, so that it's as cold as possible.
- With the mixer still running, add in the butter a small piece at a time making sure to let each piece incorporate fully before adding in more. Then once all the butter has been added, continue mixing on a medium-speed until the dough passes the windowpane test. This will take another 5 minutes or so.To perform the windowpane test, stretch a small pice of dough with your fingers. If it stretches thin enough to see through, it's ready.
- Once the dough is ready, transfer it to a work surface then use a rolling pin to roll it out into a 2 cm thick rectangle. Wrap the dough in clingfilm then chill in the fridge for 12-16 hours.The dough shouldn't stick as you roll it but if it does, dust your work surface with a small amount of flour. Don't wrap the dough too tightly as we need to allow some room for expansion.
Butter Layer
- The next day, place the butter & flour into the bowl of a stand mixer then use the paddle attachment to mix on a low speed until combined & smooth. Don't over mix though!Make sure that the butter is soft, so that it mixes with the flour properly.
- Take a large piece of baking parchment then use a pen to draw a 6 inch square in the centre. Flip the baking parchment over then place the butter in the middle of the square.
- Next, fold the excess baking parchment over the butter so that each edge lines up with the edges of the square that we drew onto the parchment.If there's too much parchment it can make rolling the butter out tricky, so I like to trim some of the excess parchment off before folding it over the butter.
- Flip the parchment over so that the folds are underneath then use a rolling pin to roll the butter out into an even layer that reaches each edge of the square that we drew on earlier. Place the butter into the fridge & chill for 30 minutes or until the butter has firmed up but is still pliable.To test if the butter is ready, give it a gentle bend with your hands. If it bends easily & feels firm, it's ready.
Laminating
- Once the butter is ready, take the dough out of the fridge & place it onto a lightly floured work surface. Dust the pastry with a small amount of flour then use a rolling pin to roll out into a 10" square.
- Dust any excess flour off the dough then place the square of butter on top, in the middle so that it's sitting diagonally (like a diamond).
- Starting with 2 opposite corners, fold the dough over the butter so that they meet in the middle, overlapping slightly (like an envelope). Pinch the dough together to seal.
- Fold the remaining 2 corners over into the centre then pinch along all overlapping sections of dough to seal.
- Flip the dough over so that it's sitting seam side down then use a rolling pin to roll the dough out into a rectangle that measures 30x40cm & is around 5mm thick.
- Trim the edges edges slightly so that they're straight then brush any excess flour off the top of the pastry. I find that a pizza wheel works best for trimming the dough!
- Next, you need to mentally divide the dough into thirds horizontally with one of the shorter edges sitting closest to you. Take the bottom third of the dough & fold it up over the middle third. Brush any excess flour from the top then fold the top third over the top. There's a visual guide to doing this in the post above.
- Wrap the dough in clingfilm then chill in the fridge for 30 minutes. Remember how the dough was facing on your work surface.
- Once chilled, place the dough back onto your work surface facing the same way as before then turn it 90 degrees clockwise & repeat the rolling out & folding process, the same way as before. Chill the dough in the fridge for another 30 minutes then repeat this process a final time. This will bring the total number of folds to 3. Make sure to trim the edges before rolling if needed.
- Once your dough has been laminated, wrap it in clingfilm then chill in the fridge for at least 2 hours before using. The dough is best used within a day of being made (24 hours).
Proving & Baking
- Now, how you roll, shape, prove & bake the dough comes down to what recipe/dish that you're making. But as a general set of guidelines, the dough will need to be proved for 2-3 hours once shaped then baked at a fairly high temperature, to get the best rise & colour in the oven. I bake Danish pastries (like pain aux raisins) at 220°c/428°f for 16-18 minutes.You'll know when the dough is ready to be baked when it feels light & airy and wobbles when you gently shake the tray.

