Slow Roasted Pork Shoulder (With Crackling!)
Our slow roasted pork shoulder has tender, juicy meat & the crispiest crackling ever! This is a foolproof way to cook roast pork that works every time.
This post contains affiliate links.
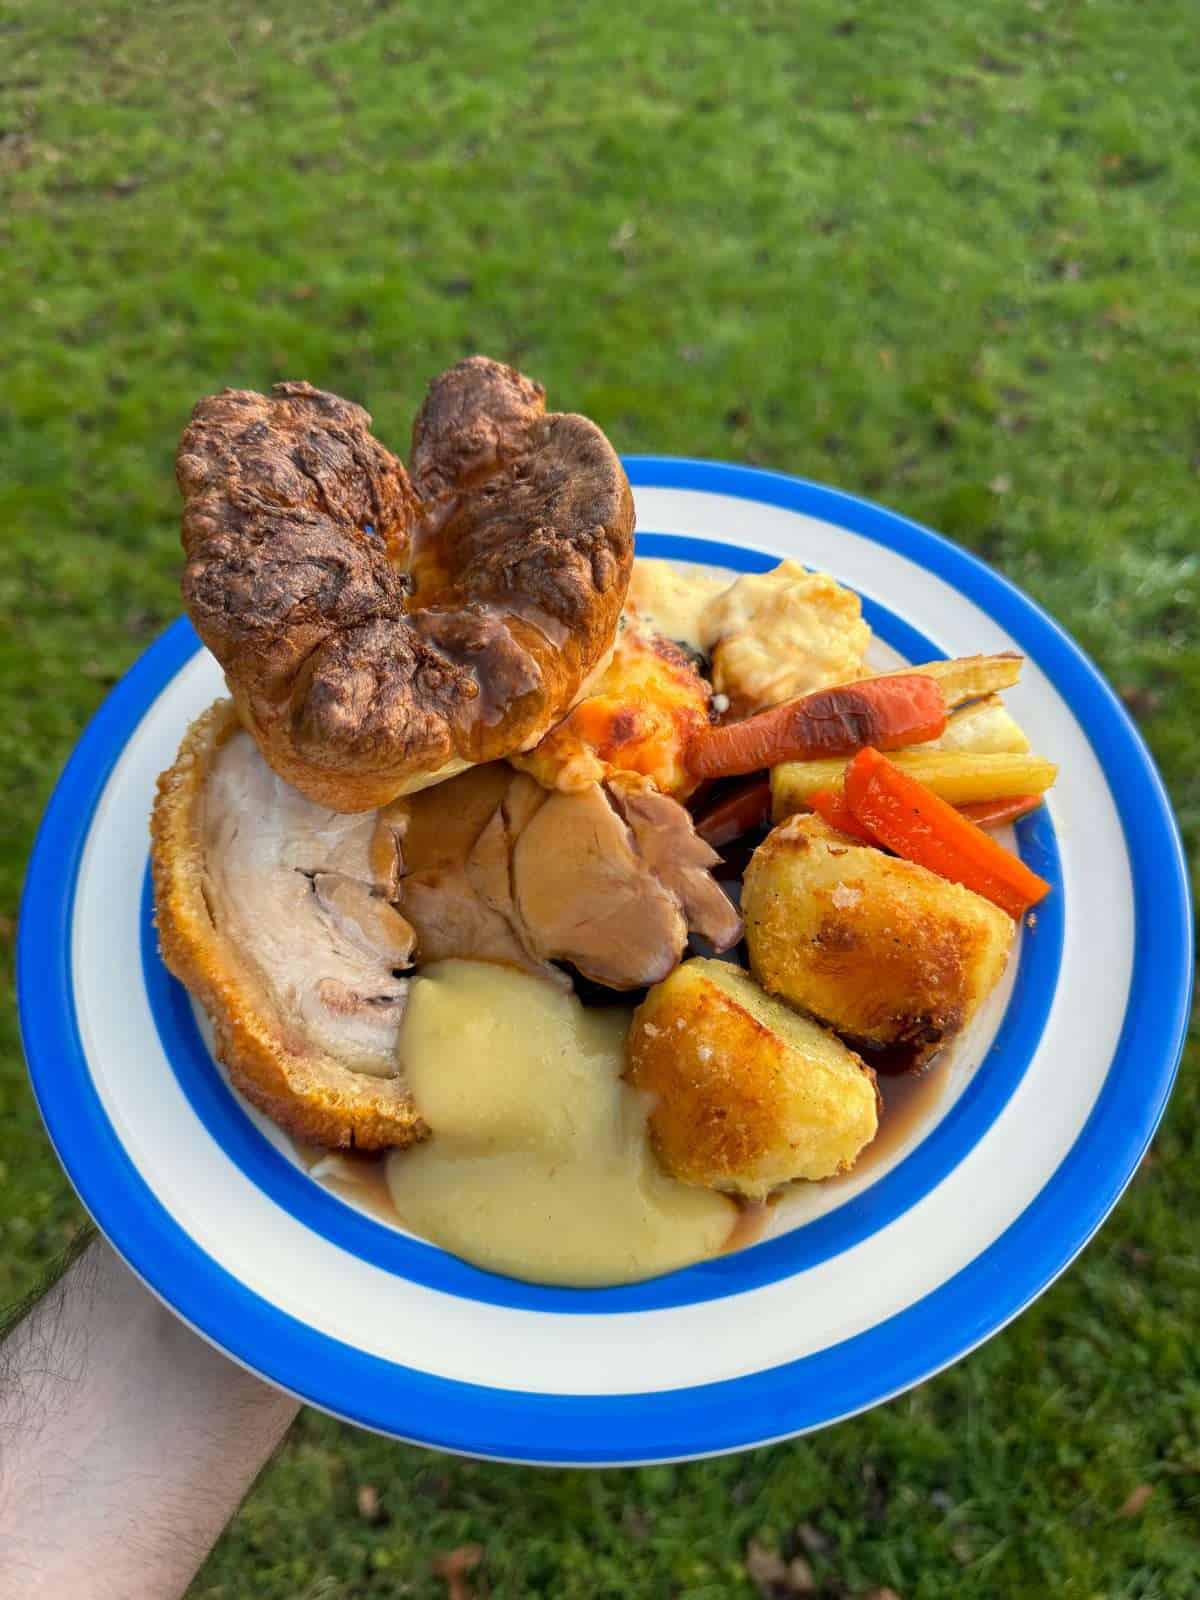
Here’s how to make a juicy roasted pork shoulder with perfectly crisp, crunchy crackling! This is next level roast pork is super easy to make & works fantastically as part of a roast dinner. Plus, any leftovers would make an incredible sandwich…
To make the most tender roasted pork shoulder, we’re going to be slow roasting it in a low temperature oven for several hours then giving it a blast of heat at the end to turn the skin into perfect crackling. And because we’re cooking this roast pork to temperature, not time, it’s guaranteed to work every time.
Some exciting news! I’ve just released my roast dinner eBook over on my brand new online store! This contains everything you need to make a restaurant style roast dinner, including perfectly roasted meats, plenty of side dishes & sauces to serve with different meats.
What You’ll Need
- Boneless Pork Shoulder – For this roast pork, we’re using a rolled, boneless pork shoulder that has had the skin scored (ask your butcher to do this!). I used a 2.5 kg pork shoulder which will comfortably serve 8 people.
- Salt – You’ll need table salt & sea salt for this recipe. We’re using the table salt to salt the skin the day before roasting & sea salt to season the pork just before cooking.
- Vegetable Oil – Veg oil works best for crisping up the pork skin. We’re using a tablespoon off oil, to coat the skin before roasting.
- Digital Food Probe – This is a key bit of kit when it comes to roasting meat as it lets us keep an eye on the internal temperature. I use a Thermapen.
How To Get Perfect Crackling Every Time!
There’s 2 crucial steps when making roast pork with perfect, crispy crackling. First, there’s drying & salting the pork skin which is done the night before cooking. Then secondly, there’s the actual roasting of the pork, which is done in 2 stages; a slow, gentle roast to cook the meat & a blast of high heat to crisp up the skin.
Here’s how I roast pork & get fantastic crackling every time…
Step 1 – Drying & Salting The Pork Skin
Making perfect crackling starts the night before we roast the pork. Here, we need to thoroughly dry the skin, score it with a sharp knife (if it’s not been done by your butcher) then sprinkle it with a light coating of fine table salt. The pork then gets left in the fridge overnight, uncovered.
The aim here, is to get the skin as dry as possible so that it crisps up properly in the oven. The salt draws moisture out of the skin, which dries it out even further whilst helping season the meat as well.
Step 2 – Roasting
Before roasting the pork, we need to coat the skin with a small amount of vegetable oil then sprinkle over a generous amount of sea salt (don’t be shy here!). We rub the salt into the skin with our hands, making sure to work the salt into where the skin is scored.
To roast the pork, you have two options. You can either cook the pork at a high temperature at the start (to crisp up the skin) then cook at a lower temperature to cook the meat through. Or you can slowly roast the meat at a lower temperature for several hours then roast at a high temperature at the end, to crisp up the skin. I prefer the latter but you’ll get crackling either way!
Once your roast pork is cooked, it will need to rest for 30 minutes or so before you slice it. It’s best to cover the pork loosely with foil so that the crackling doesn’t go soggy.
How To Slow Roast A Pork Shoulder
Slow roasting is the best way to cook juicy, tender roast pork with the crispiest crackling! Here, we’re gently cooking our pork shoulder for several hours before giving it a quick blast of high heat at the very end, to crisp up the skin. The great thing about this method of cooking pork, is that it’s super easy and ensures perfect roasted pork everytime!
Salting The Skin
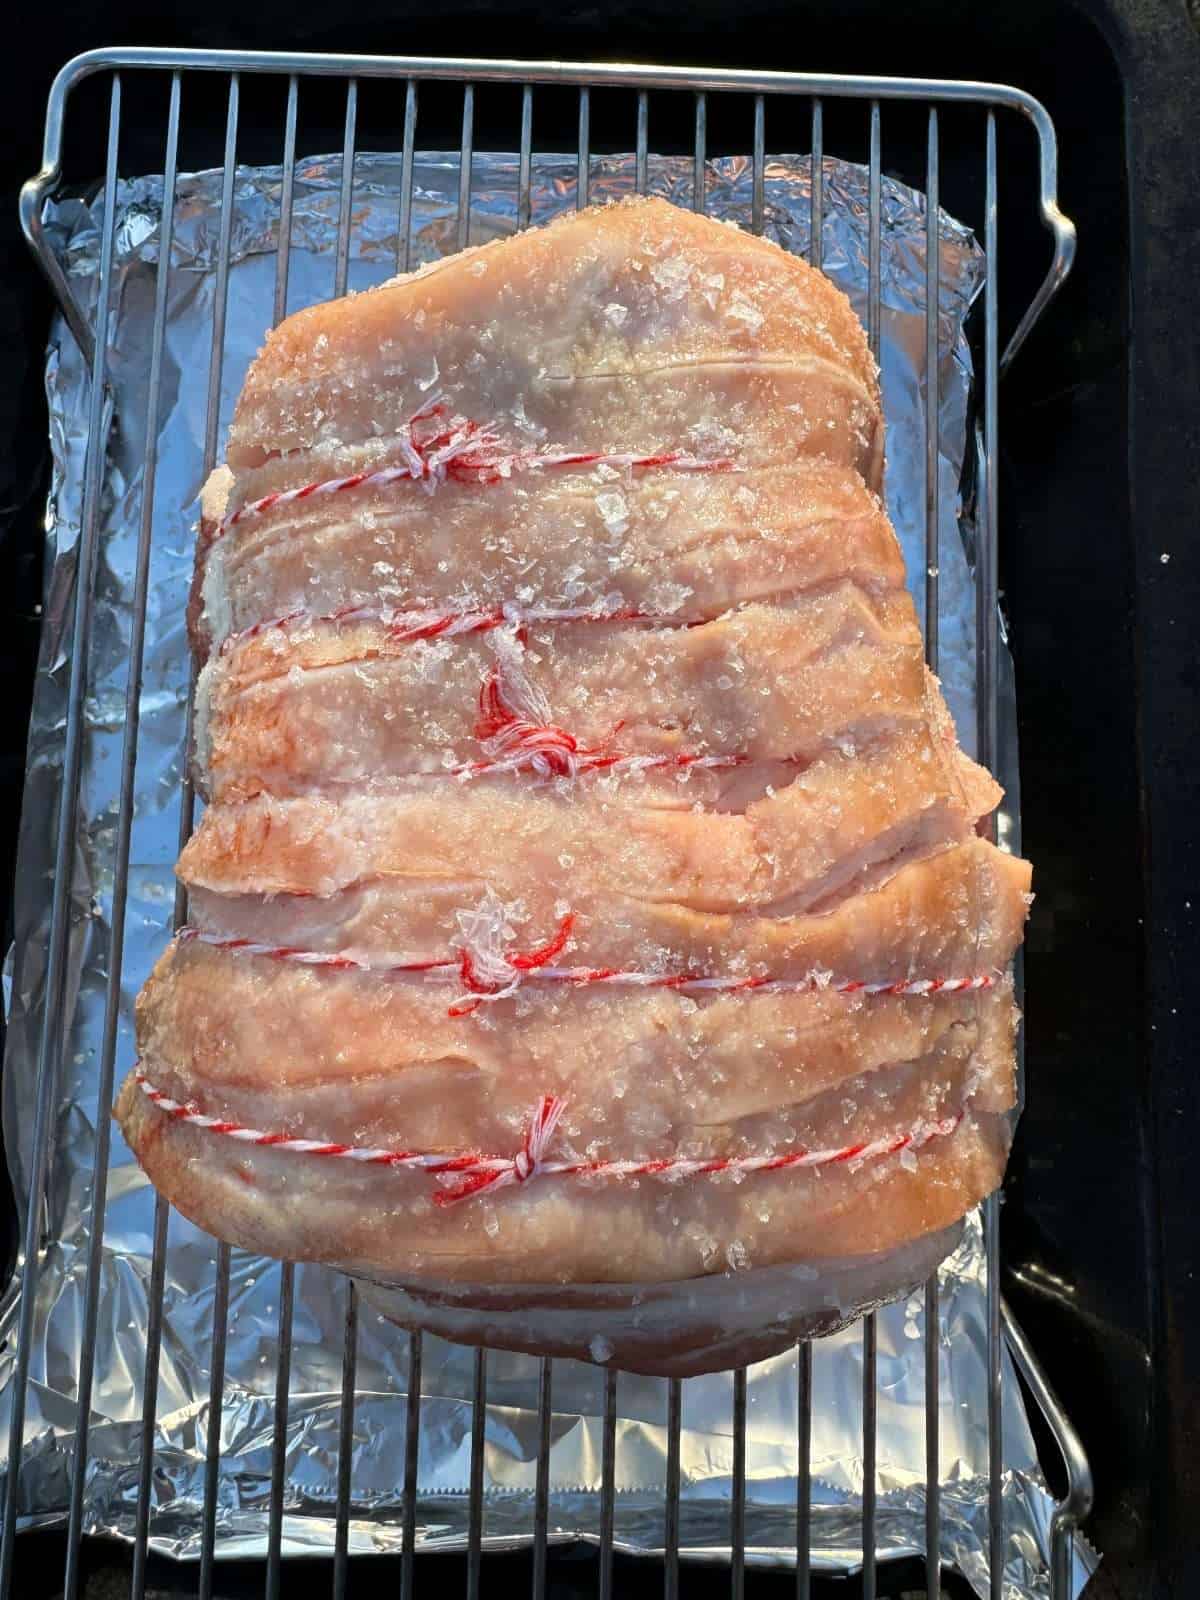
The night before we roast our pork shoulder, we need to thoroughly pat it dry with kitchen paper, salt the skin with table salt then let it sit uncovered in the fridge overnight. The salt draws moisture out of the skin, which helps it crisp up in the oven.
Slow Roasting
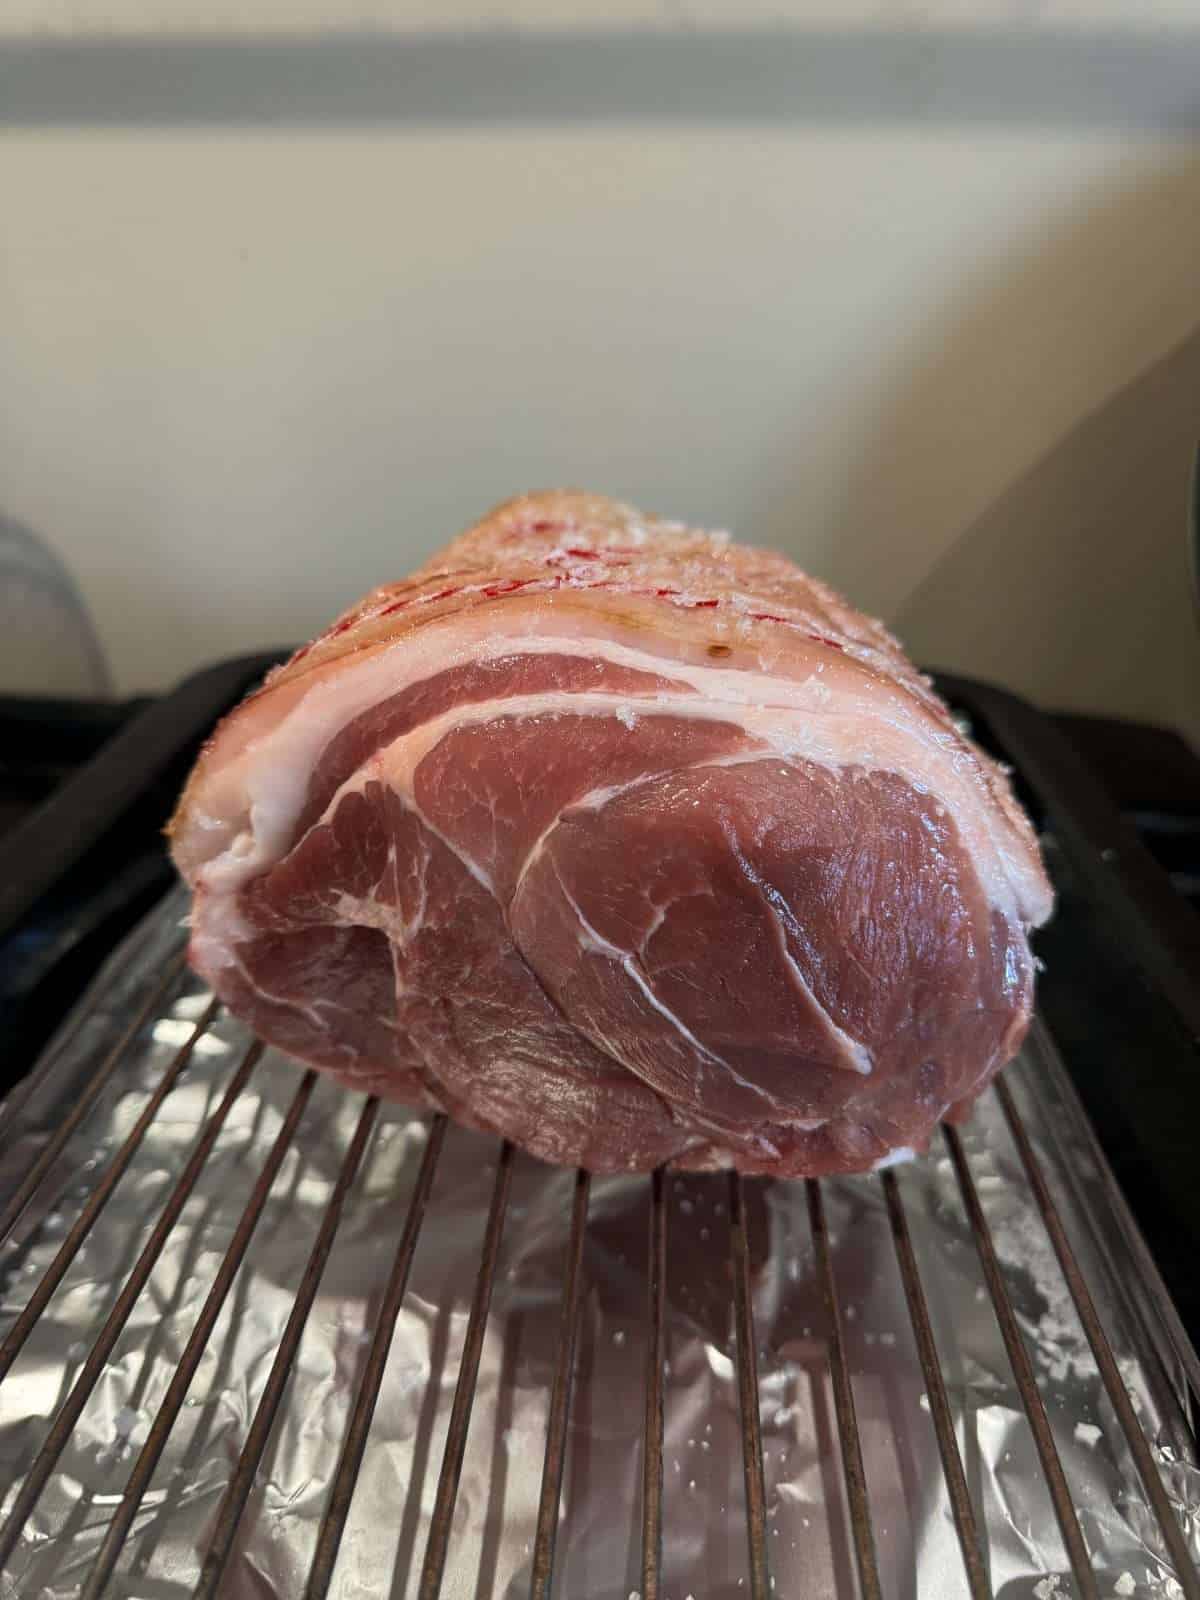
The next day, we take our pork shoulder out of the fridge, place it onto a rack set inside a roasting tin (place the pork skin side up) then let the meat sit at room temperature for 1 hour. Then in the meantime, we need to preheat an oven to 135°c/275°f.
Next, we coat the pork skin with a tablespoon of vegetable oil, season generously with sea salt then rub the salt into the scores in the skin with our hands. Then we place the pork into the preheated oven & cook until it reaches an internal temperature of 71°c/160°f. This will take around 4-5 hours.
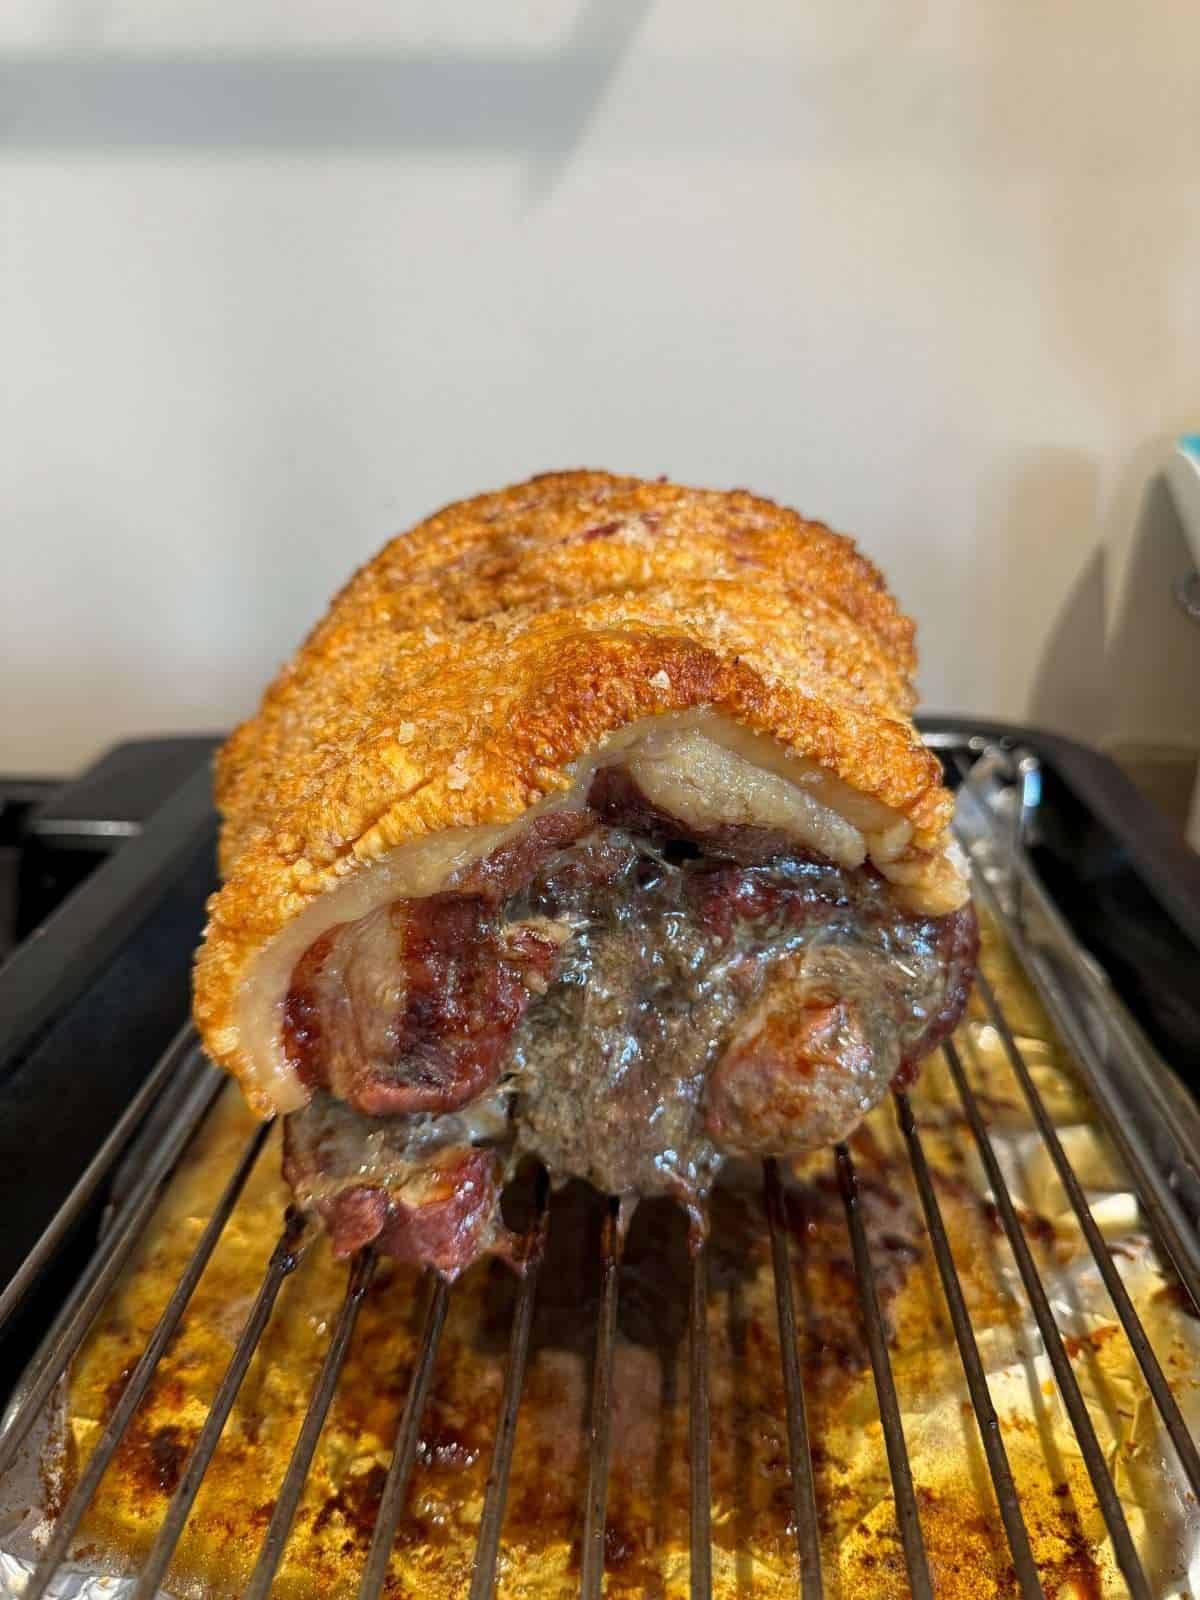
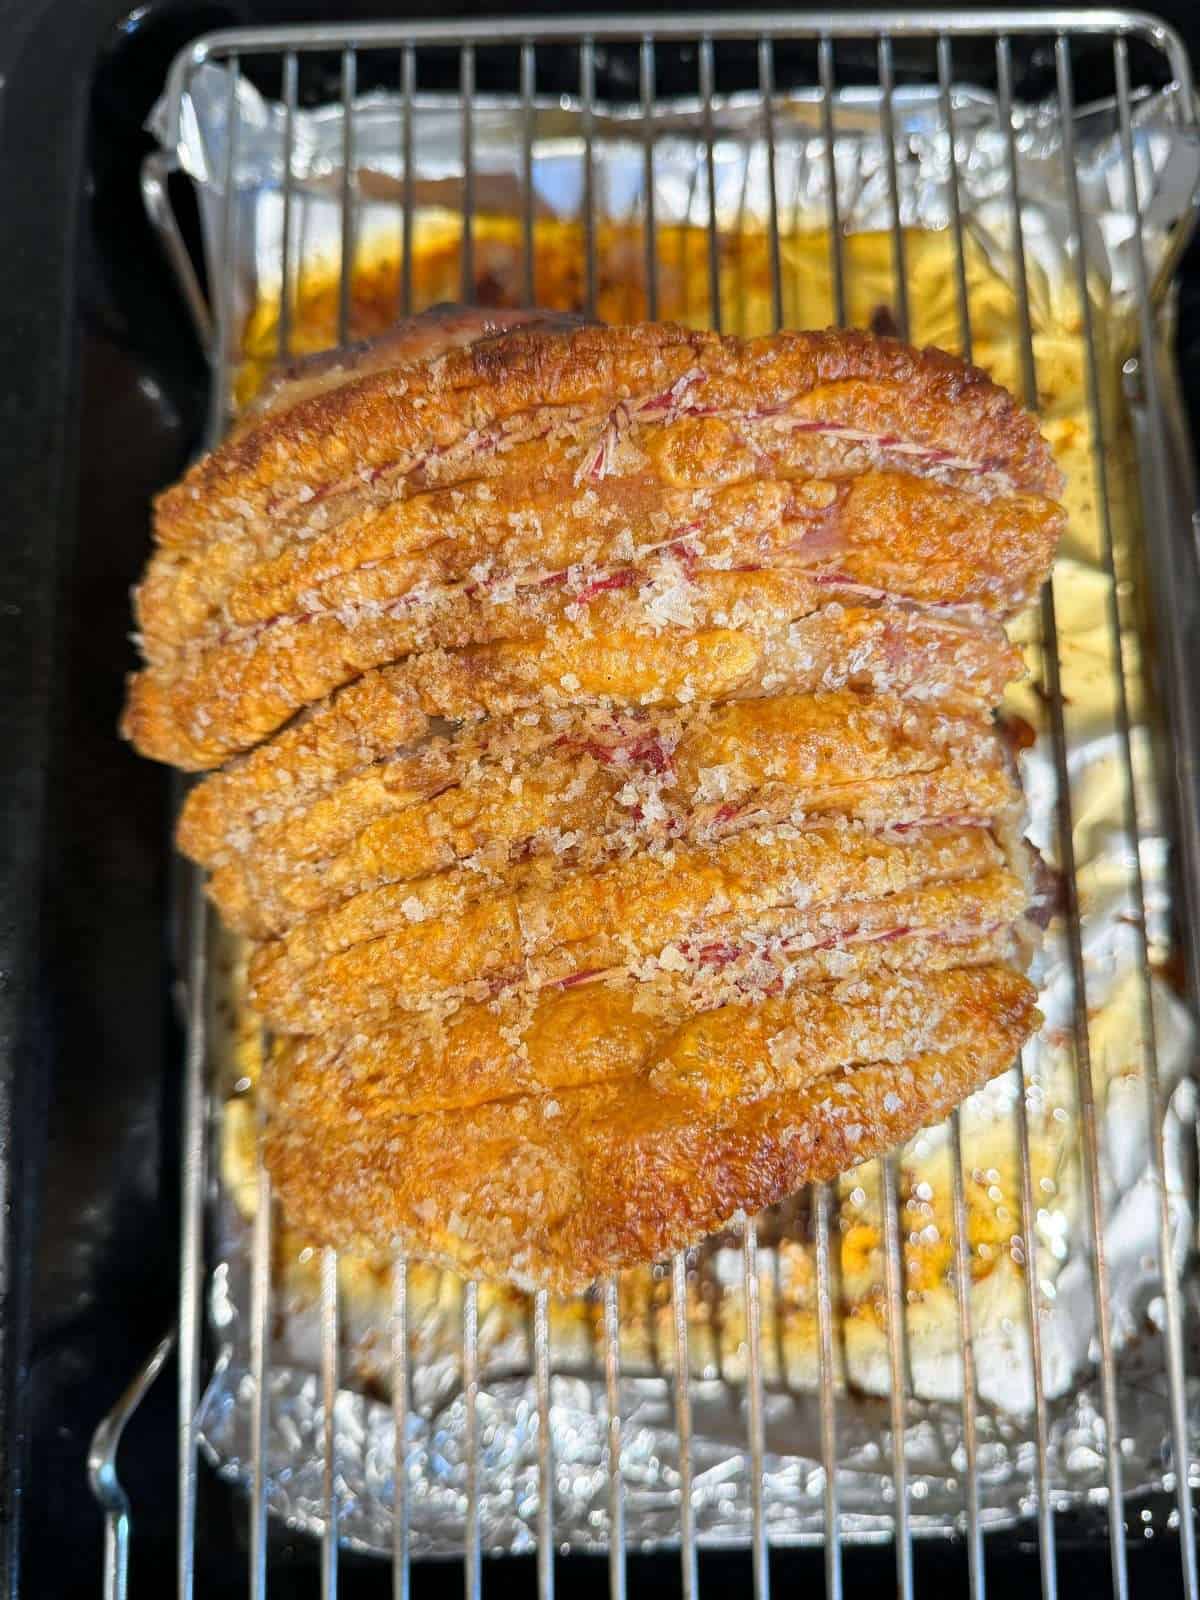
Crisping Up The Skin
When our pork is up to temperature, we take it out of the oven then turn the temperature up to 240°c/464°f. Then once the oven is hot, we cook the pork for another 15-20 minutes, until the skin has crisped up nicely & the internal temperature of the meat has reached at least 75°c/167°f.
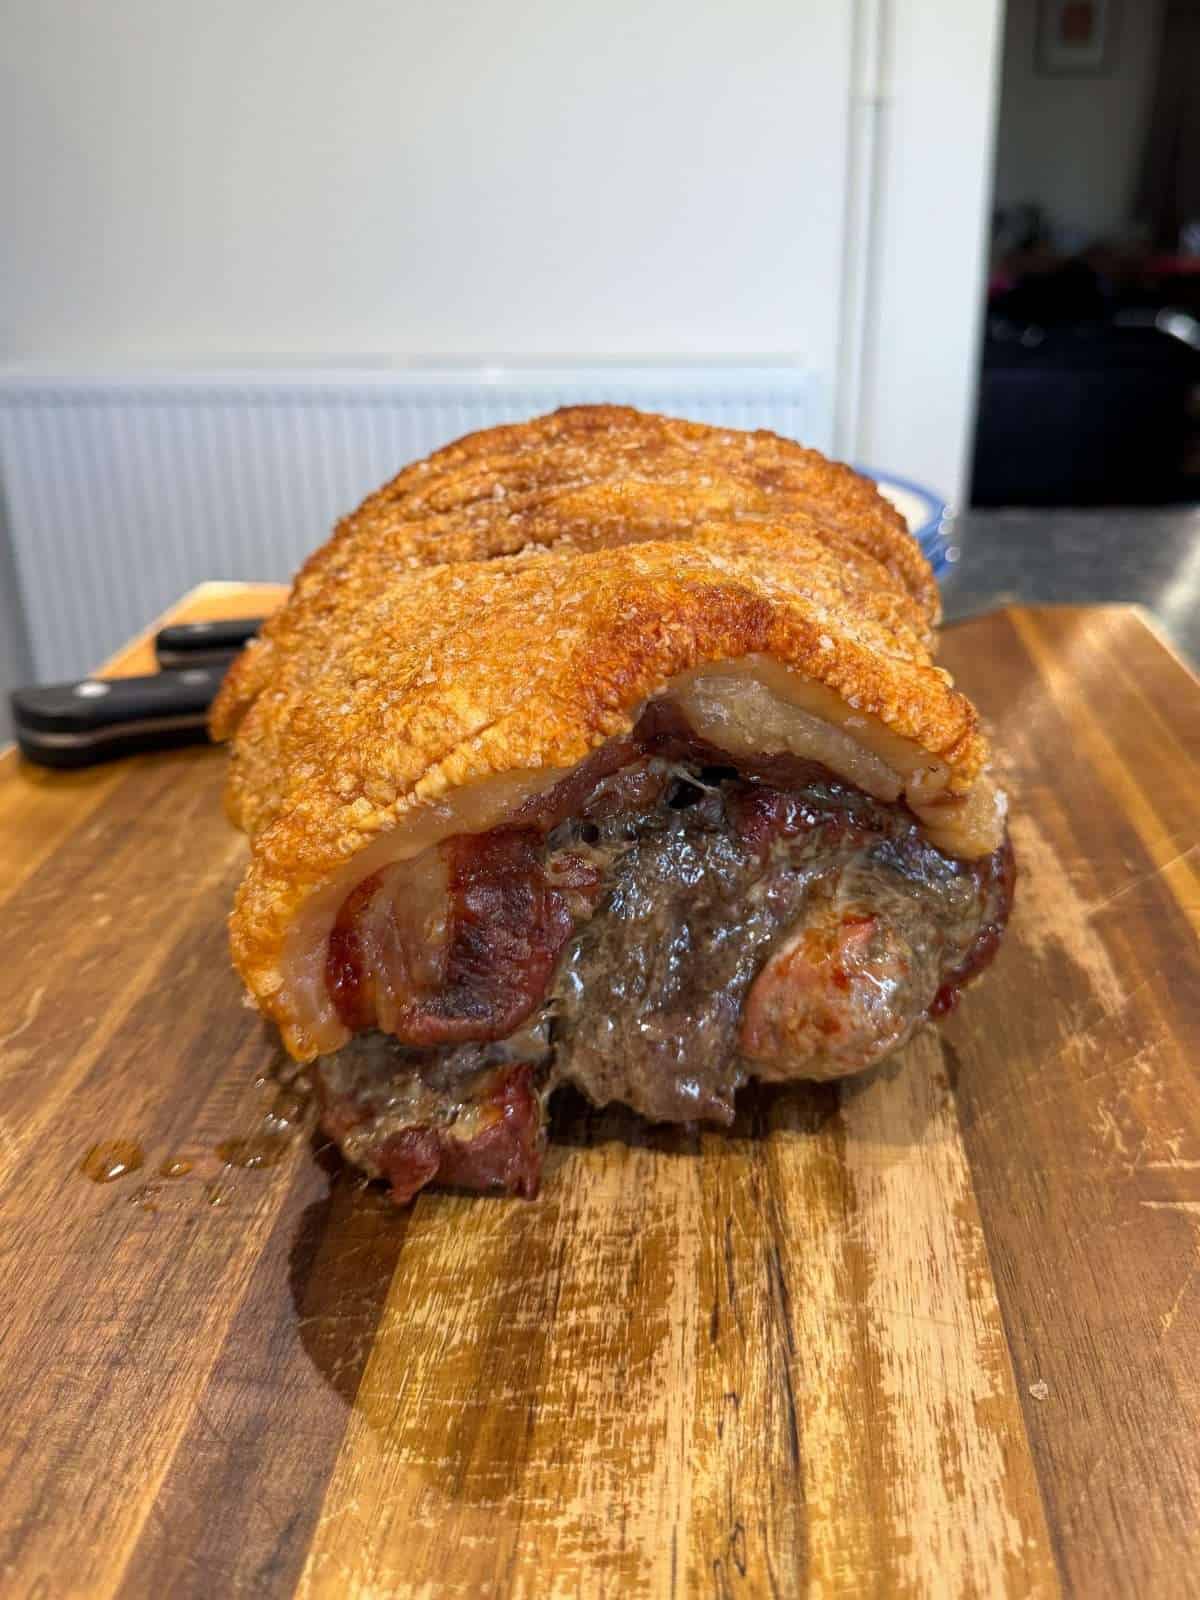
Resting & Slicing
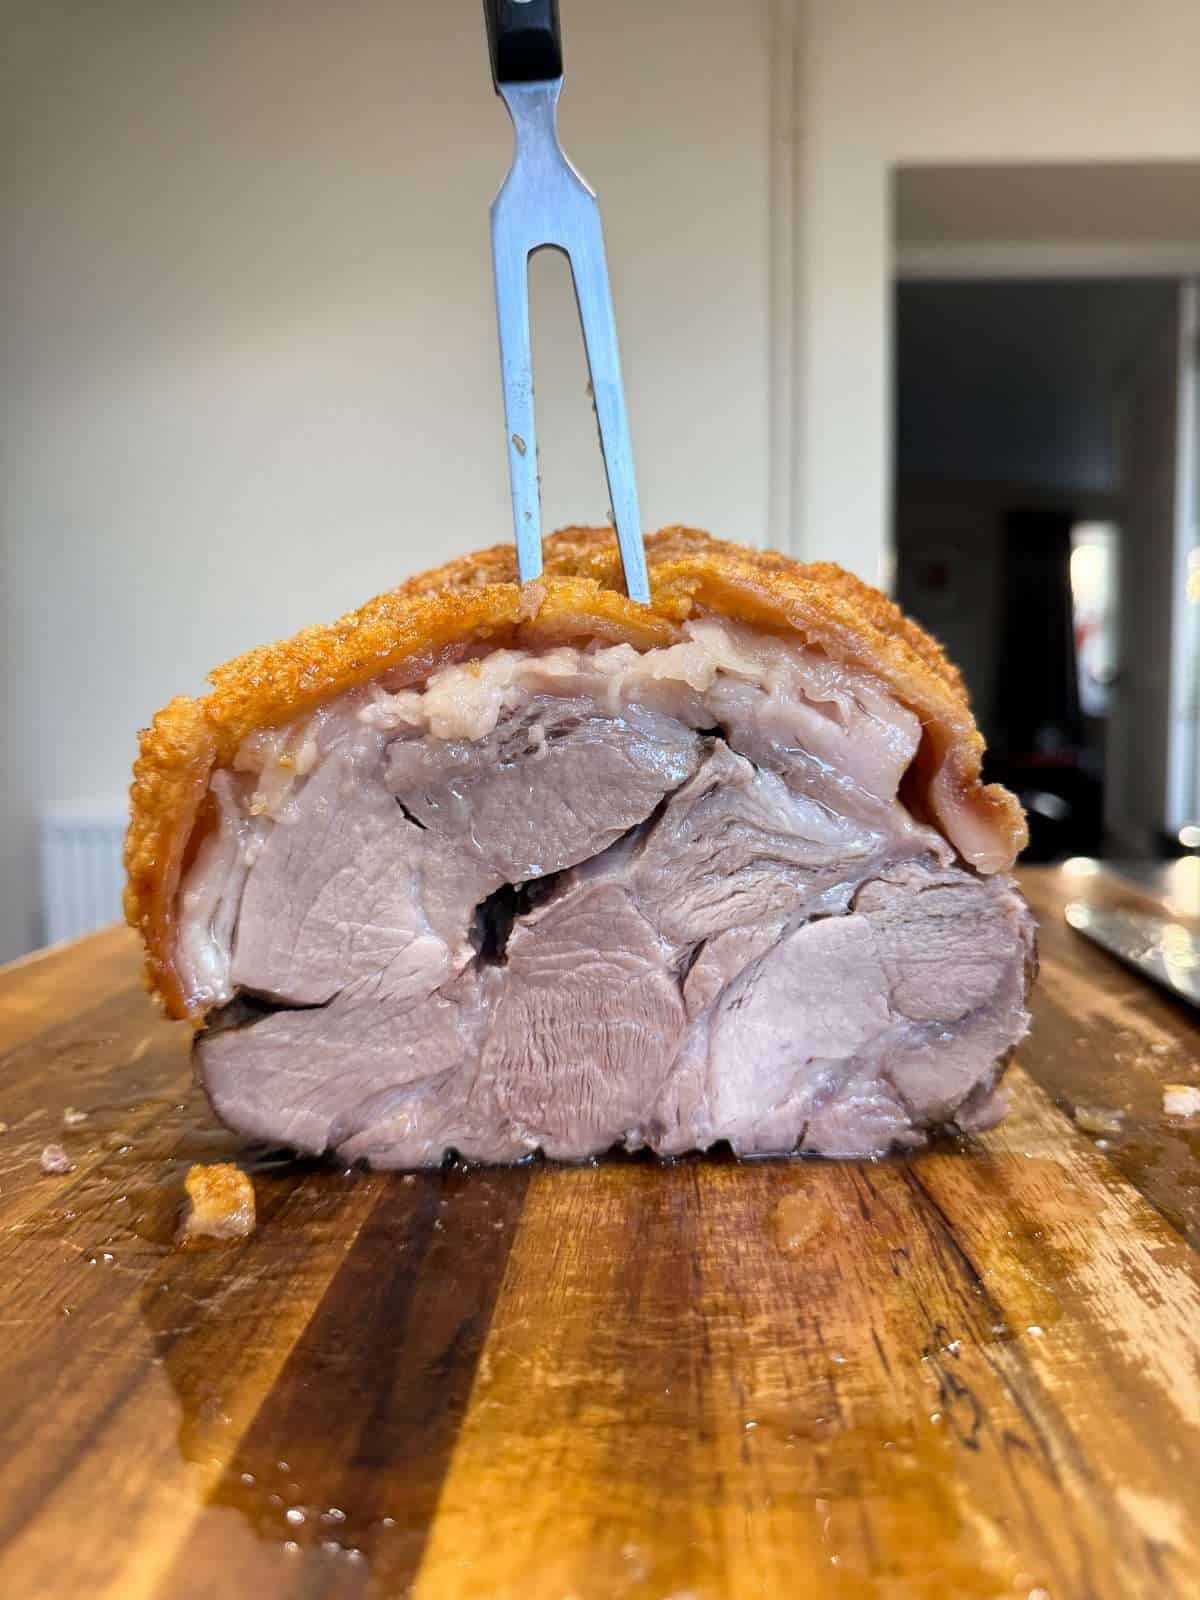
Now that are roast pork is cooked, we need to let it rest for at least 30 minutes (or up to an hour) before slicing & serving it. It’s best to loosely cover the pork in foil as it rest to keep it warm whilst keeping the crackling crisp.
To slice the pork, we carefully remove any string then cut into slices with a sharp serrated knife. Your slices of roast pork won’t need any extra salt but a light seasoning of freshly cracked black pepper will work nicely.
Tips & Tricks For The Best Roast Pork & Crackling
- Dry & salt the skin (with table salt), the night before cooking the pork then let it sit uncovered in the fridge overnight.
- Score the skin with a sharp knife before cooking or get your butcher to do it for you.
- Before roasting, rub vegetable oil & lots of sea salt into the scored skin.
- Roast the pork at a low temperature (around 135°c/275°f) until cooked then turn your oven up to 240°c/464°f and continue cooking for another 15-20 minutes to crisp up the skin.
- When resting the roast pork, cover it loosely in foil to stop the skin from going soggy.
Frequently Asked Questions
Roast pork can dry out when it is overcooked or cooked at too high a temperature. To cook juicy, tender roast pork, it’s best to cook it at a lower temperature, finish at a high temperature (to crisp up the skin) then let it rest for at least 30 minutes before slicing. To avoid overcooking roast pork, it’s best to use a digital food probe to check the internal temperature.
Roast pork shoulder needs to be cooked to an internal temperature of at least 75°c/167°f, in order to be fully cooked. Pork shoulder contains a lot of fat that needs to be cooked to a higher internal temperature compared to other cuts, in order to become tender.
Pork shoulder will take anywhere from 3 to 8 hours to slow roast, depending on the size of the meat. A 2.5 kg pork shoulder will take around 4 hours to cook.
To cut slices of pork with the crackling attached, it’s best to use a sharp, serrated knife. Alternatively, you could remove the crackling & break into pieces then slice the meat separately.
Cooking Slow Roasted Pork In An Aga
With all of my recipes, I include cooking instructions for conventional ovens, fan ovens & also Agas. Here’s how to cook this recipe in an Aga…
To cook in an Aga, slow roast the pork shoulder in the simmering oven, on the second from bottom set of runners (use the bottom runners if the pork hits the top of the oven). To crisp up the skin, roast the pork in the roasting oven, on the second from bottom set of runners.
If you’re cooking your pork in Aga, it might take an extra hour or so to slow roast. To cook it a bit quicker, you could cook it in the baking oven, on the bottom set of runners then slide a cold plain shelf as close to the top of the pork as possible.
Equipment Used
Please note that these are affiliate links & I may make a small commission if you make a purchase using these links, at no extra cost to you. For more information, click here.
More Roast Dinner Recipes To Try!
- Slow Roasted Leg Of Lamb (Reverse Seared)
- Foolproof Roast Chicken (Slow Roasted)
- Slow Roasted Sirloin Of Beef (Reverse Seared)
- Goose Fat Yorkshire Puddings
- Black Garlic Roast Potatoes
- 3 Cheese Cauliflower Cheese
- Red Wine Gravy
If you have enjoyed this recipe for roast pork, it would mean a lot if you could leave a review & rating. And if you’d like to stay up to date with future recipes, follow us on Instagram & TikTok!

Slow Roasted Pork Shoulder (With Crackling!)
Equipment
- Roasting Tin With Rack
- Digital Food Probe
Ingredients
- 2.5 kg Boneless Pork Shoulder (Rolled & Skin Scored – See Notes)
- ½ tsp Table Salt
- 1 tbsp Vegetable Oil
- Sea Salt
Instructions
Salting The Skin – The Night Before
- Pat your pork shoulder dry with kitchen paper then sprinkle the skin with the table salt. Place the pork onto a plate then chill in the fridge overnight, uncovered.
Roasting
- Take the pork out of the fridge, place onto a rack set inside a roasting tin then let the meat sit at room temperature for 1 hour.The pork needs to be facing skin side up.
- In the meantime, preheat an oven to 135°c/115°c fan (275°f/240°f).
- Next, coat the pork skin with the vegetable oil then season generously with sea salt. Rub the salt into the scores in the skin with your hands.
- Place the pork into the preheated oven then cook until it reaches an internal temperature of 71°c/160°f. This will take around 4-5 hours.
- Next, take the pork out of the oven then turn the temperature up to 240°c/464°f. Once up to to temperature, continue cooking the pork for 15-20 minutes, until the skin has crisped up nicely.The pork should have an internal temperature of at least 75°c/167°f once cooked.
- Once cooked, loosely cover the pork with foil then let rest for at least 30 minutes.
- To serve, carefully remove the string from the pork then cut the meat into slices with a sharp, serrated knife.


tried this recipe over the weekend, and it turned out absolutely amazing! The slow roasting method made the pork shoulder incredibly tender, and the crackling was perfectly crispy – just as promised. I really appreciated the detailed instructions, especially the tips on getting the skin to crisp up properly. The seasoning was spot on, giving the meat such a rich, deep flavor. This will definitely be my go-to recipe for special occasions or when I want to impress guests. Thanks for sharing such a fantastic method!
Hi there! Someone in my Facebook gdoup shared this site with us so I came to
look it over. I’m definitely enjoying the information. I’m bookmarking and will bee tweeting this to my followers!
Great blog and excellent deaign and style.