Hoisin Duck Spring Rolls
The crispiest Chinese style spring rolls filled with tender shredded duck, rich hoisin sauce, fresh veg, herbs & sesame seeds! Serve these with extra hoisin sauce & you’re onto a winner.
I’m a huge fan of both shredded duck & crispy spring rolls, so I’ve combined the two to make duck spring rolls! These are a homemade version of the spring rolls that you’d get from a Chinese takeaway & they’re surprisingly easy to make, with a whole load of flavour.
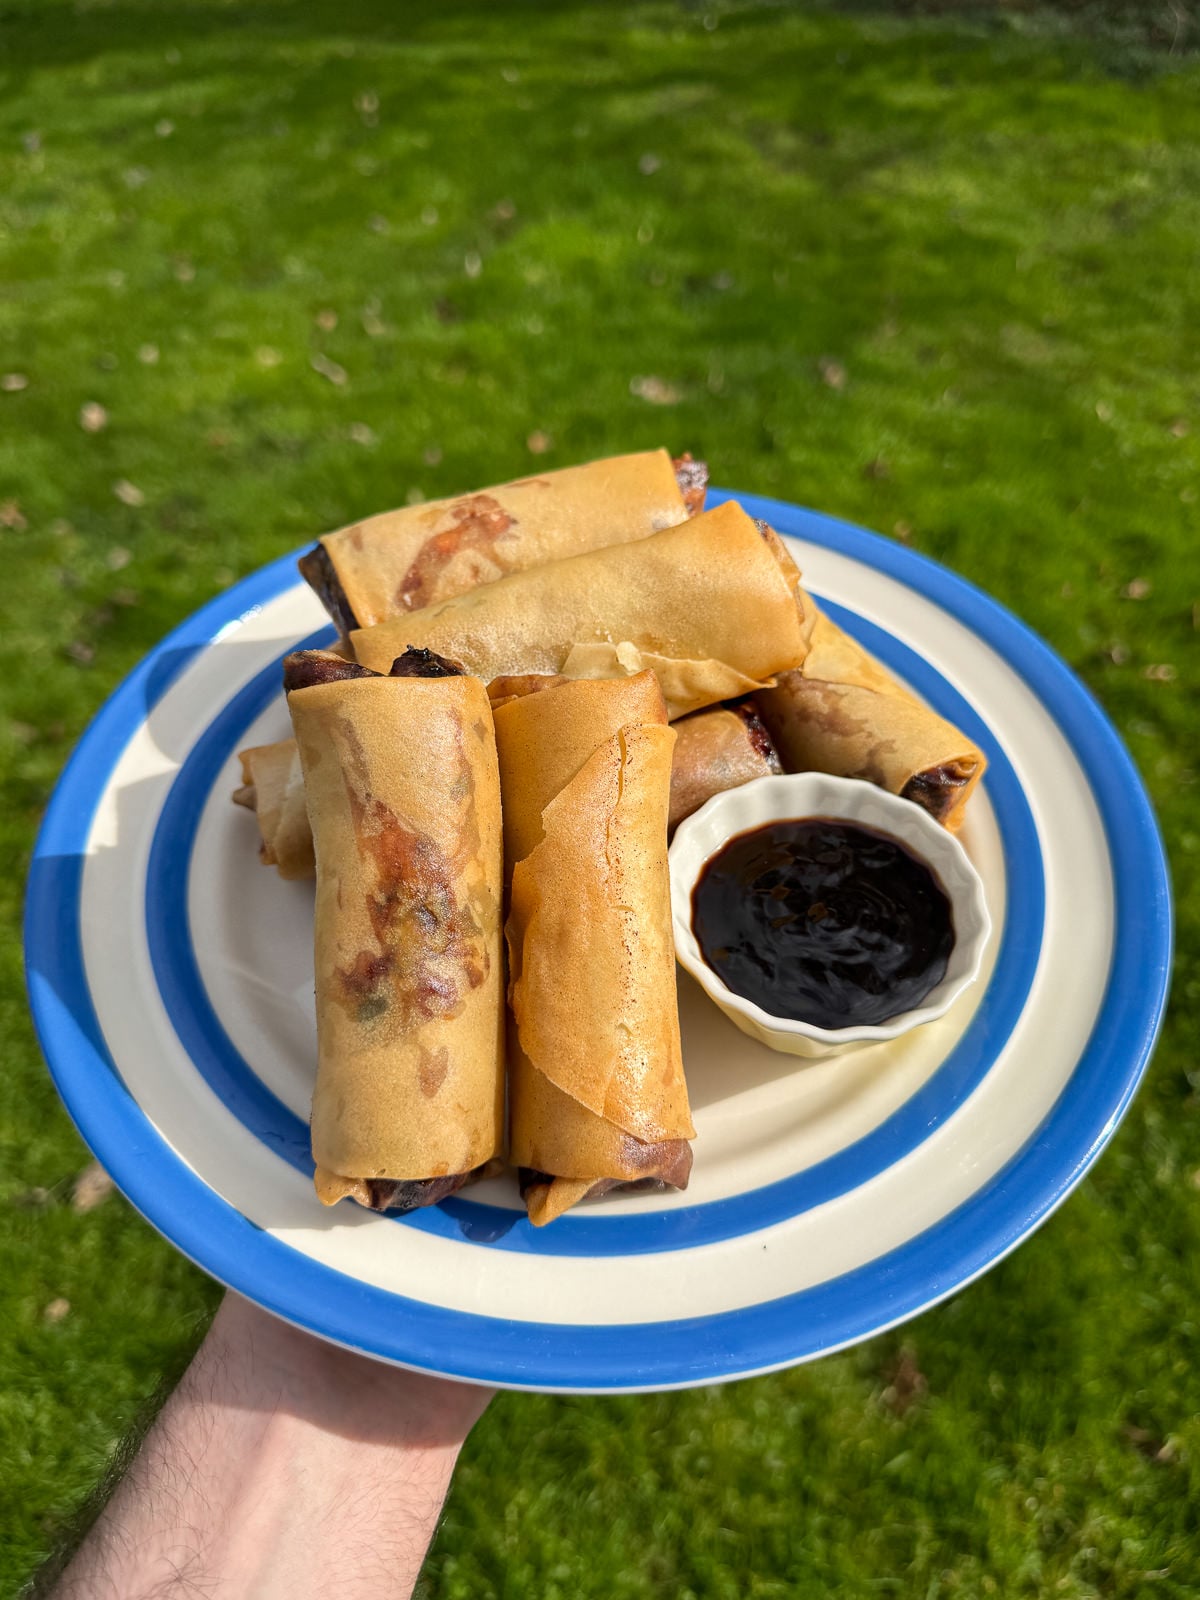
This batch has all the qualities of a really good spring roll. There’s crispy, golden pastry and a flavourful filling made with tender shredded duck, rich hoisin sauce, fresh veg, herbs & sesame seeds. They’re perfect served as an appetizer with extra hoisin sauce for dipping or as a hearty meal, with salad, rice, noodles or other sides. You can even use them to make your own Chinese takeaway at home (or fakeaway!).
For more easy appetizers, take a look at our ever growing collection of snacks & appetizer recipes! Here you’ll find tear & share bread, deep fried cheese, beer battered black pudding & loads more.
What You’ll Need
- Spring Roll Wrappers – These are Chinese style spring rolls, so make sure to buy the right type of spring roll wrapper. Chinese spring rolls are made with a thin wheat based pastry & can be found in some supermarkets or online. If yours are frozen, make sure to defrost them fully before using.
- Shredded Duck – I used my hoisin braised duck legs for these spring rolls but roasted duck will work as well.
- Hoisin Sauce – Using a good quality hoisin sauce makes all the difference with this recipe! You’ll need hoisin sauce for the filling & for dipping the spring rolls in. Plum sauce will also work.
- Vegetables – I used carrots & spring onions in my spring rolls but bean sprouts or Chinese cabbage will work as well.
- Fresh Herbs – I went with fresh coriander for my duck spring roll filling. However if you’re not a fan of coriander, you can go with parsley or chives instead.
- Sesame Seeds – Added to the filling for extra crunch & flavour. I used white sesame seeds but black sesame will work as well.
How To Make Hoisin Duck Spring Rolls
Homemade duck spring rolls are seriously easy to make. As long as your filling is packed full of flavour & you roll them up properly, you can’t go wrong! I’ve included a full step by step guide on how to roll spring rolls as well. It really doesn’t take long to get the hang of rolling if you’ve never made spring rolls before, so don’t worry if the first couple don’t look perfect. They’re meant to be rustic anyway!
Hoisin Duck Filling
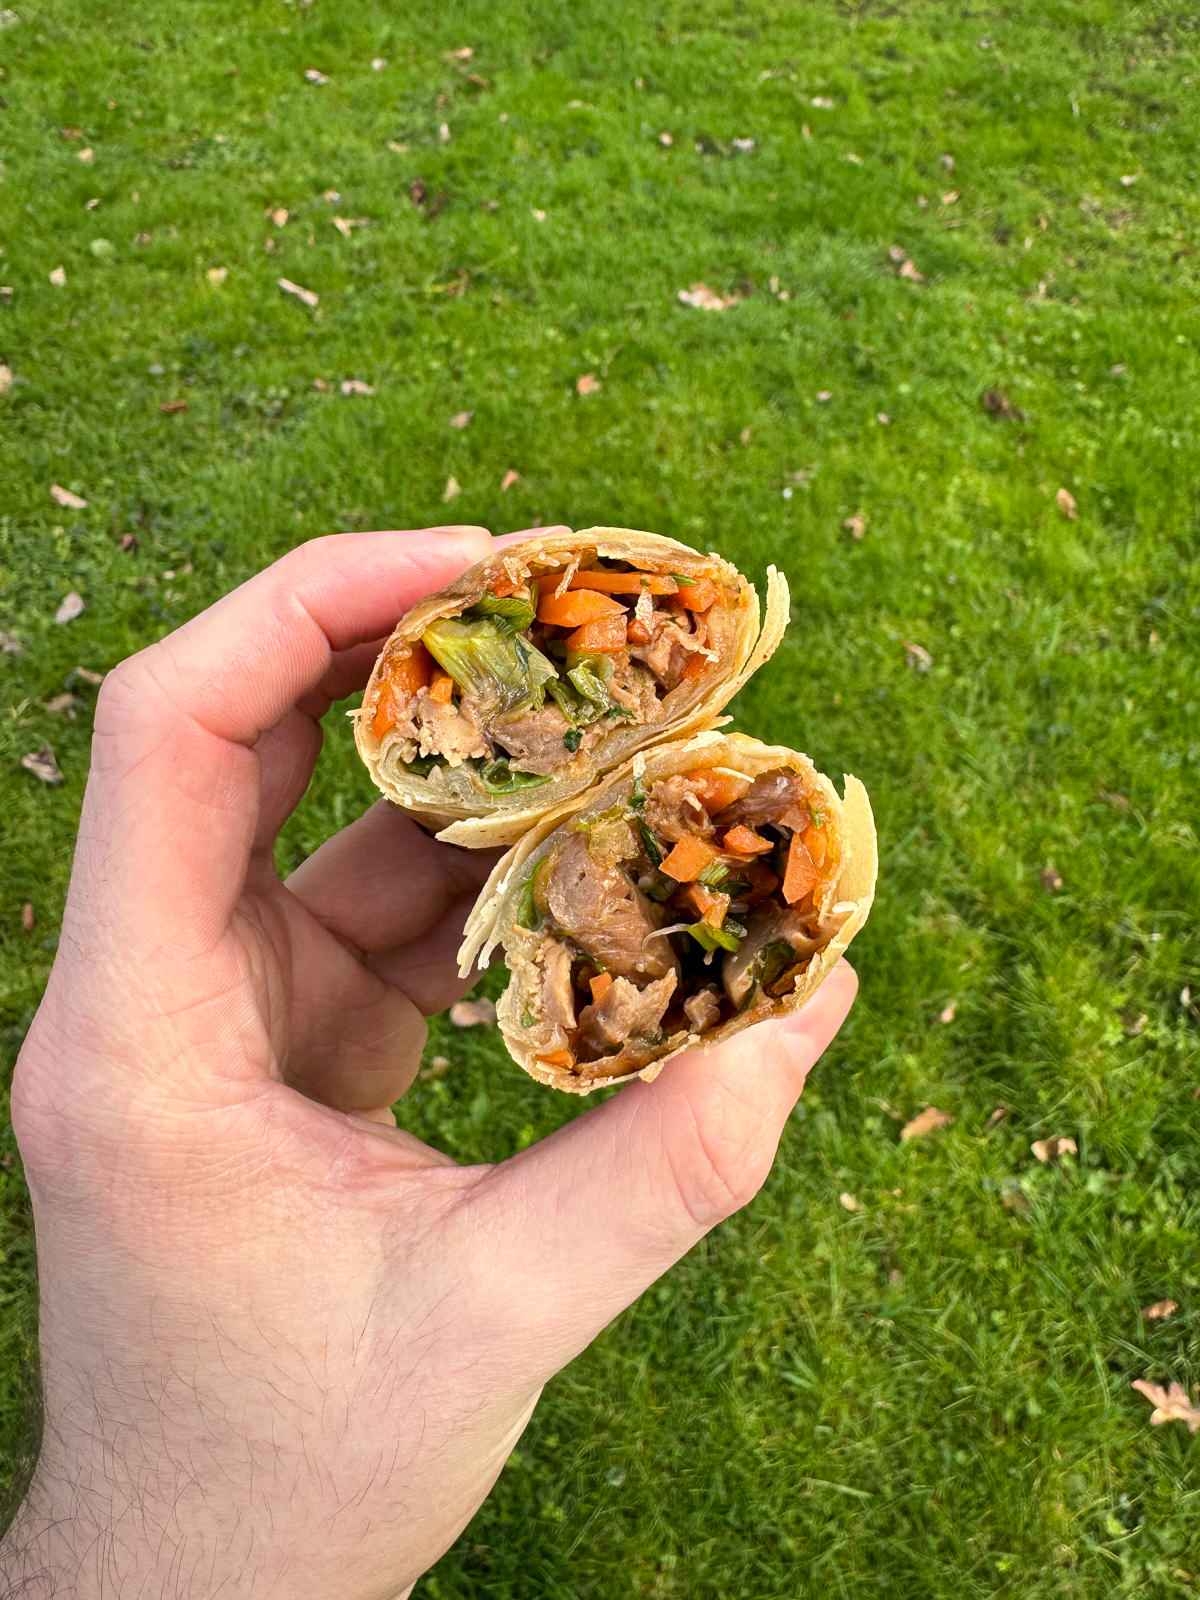
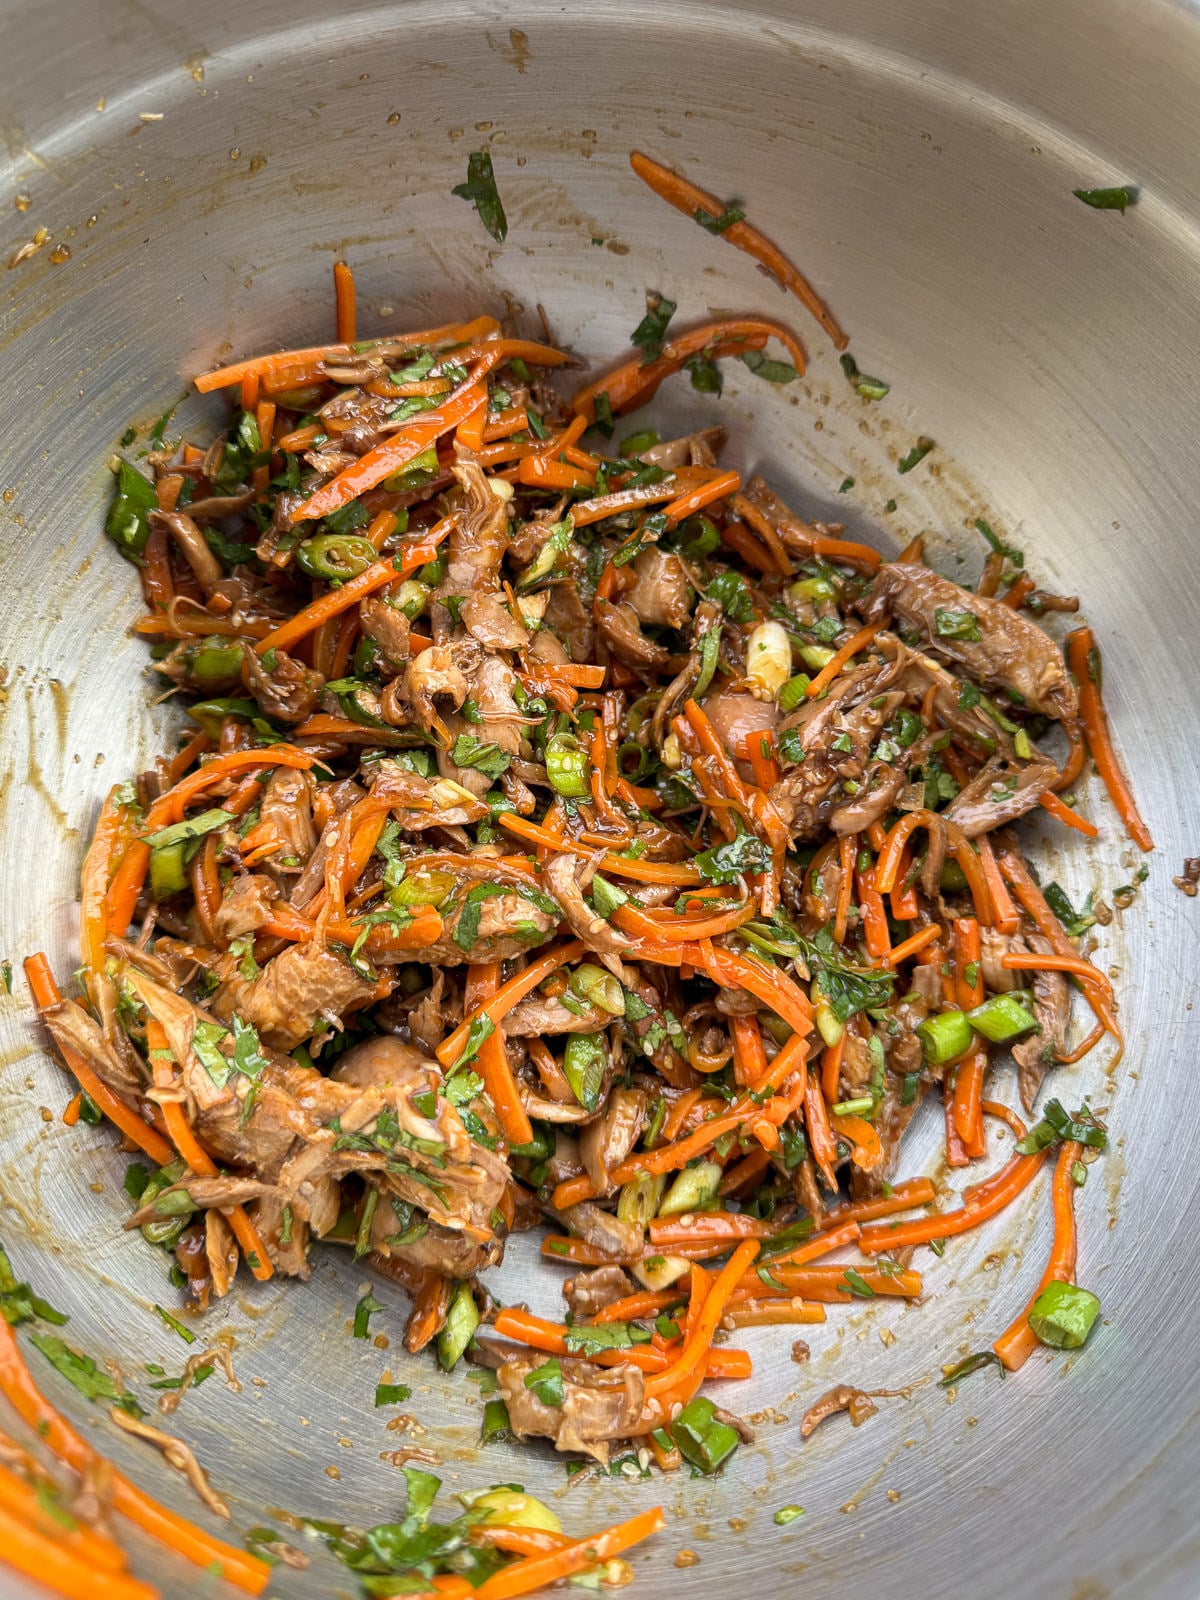
The filling for this batch of spring rolls is a mix of shredded duck, hoisin sauce, carrots, spring onions, toasted sesame seeds & fresh coriander. For the duck, I used my hoisin braised duck legs but feel free to use roasted duck instead. Also, feel free to swap out the vegetables & herbs for other types if you’d prefer. Some bean sprouts & cabbage would be good, so would parsley or chives instead of coriander.
The filling’s super straightforward to prepare as well! As the carrots won’t cook fully inside the spring rolls, I like to fry them in a frying pan first, just until they’re tender. This also gives us chance to toast the sesame seeds at the same time, so we add them into the carrots whilst they cook.
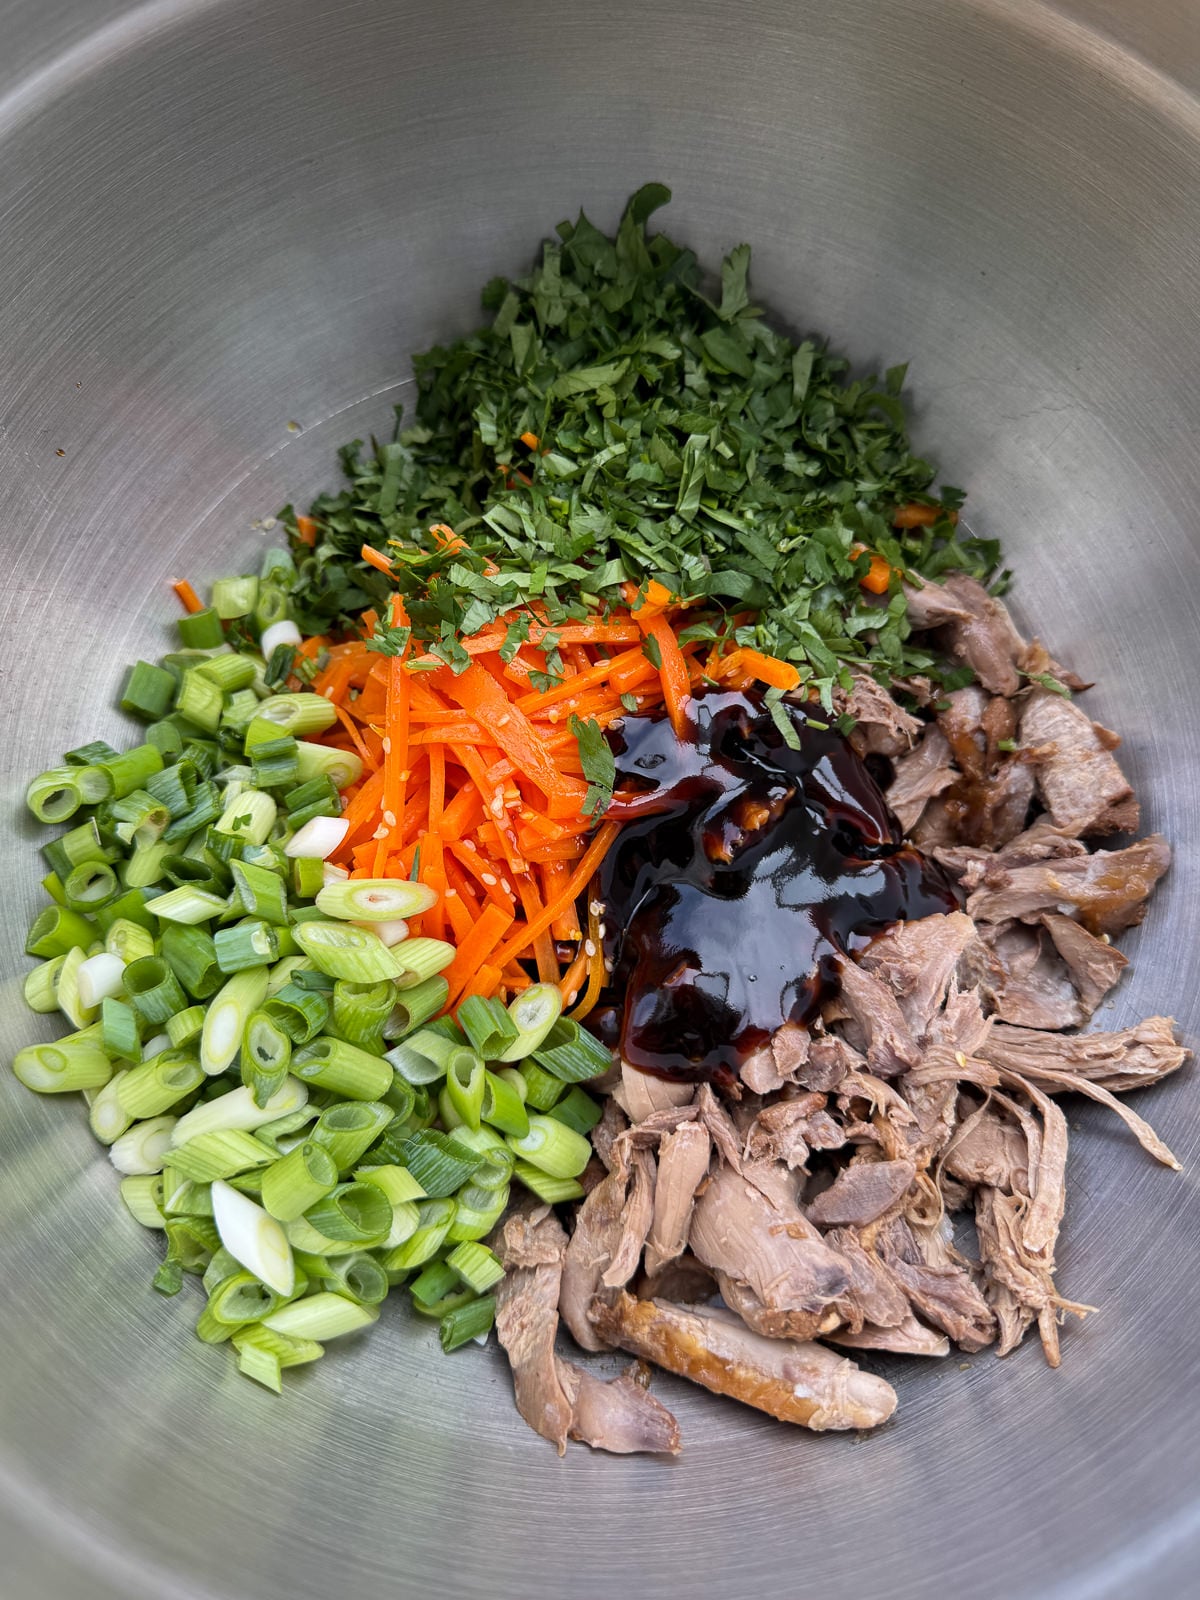
Once the carrots are cooked & cooled down, it’s just a case of mixing them in a bowl with the shredded duck, hoisin sauce, sliced spring onions & chopped coriander. You’ll need to season the filling with salt & pepper at this point as well.
How To Roll Spring Rolls
Rolling spring rolls can seem quite intimidating but once you’ve got the hang of it, they’re super easy! For this recipe, I used spring roll wrappers that measured 25cm x 25 cm. You can use smaller spring roll wrappers but keep in mind that you’ll need less filling per spring roll.
Before assembling the spring rolls, you’ll need to make some spring roll glue by mixing cornflour with enough cold water, to make a thin, brush able paste. Also, make sure to keep the spring roll pastry covered with a damp tea towel as you work, to prevent the wrappers from drying out.
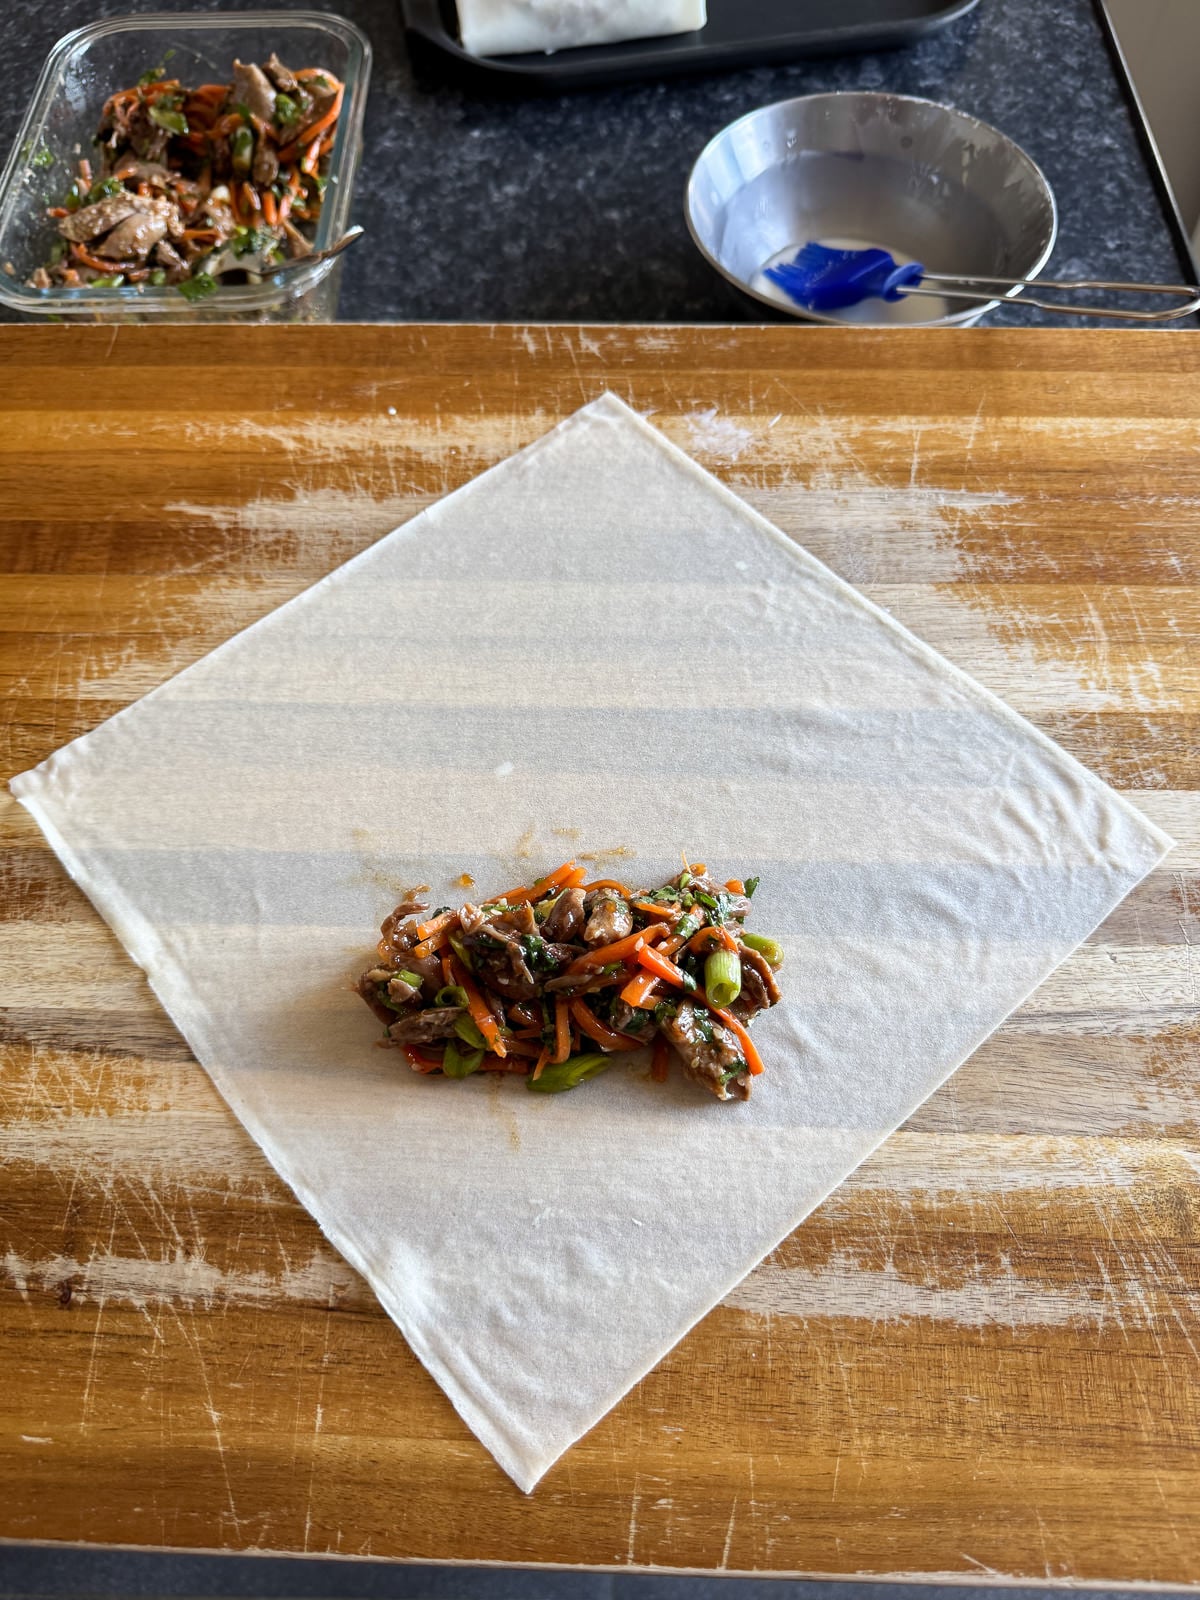
- First, gently peel off a single spring roll wrapper then place it in front of you, so that it’s sitting in a diamond shape.
- Next, place a heaped tablespoon of the filling about 5cm (2 inches) above the bottom corner. Use your spoon to shape the filing into a rough rectangle shape.
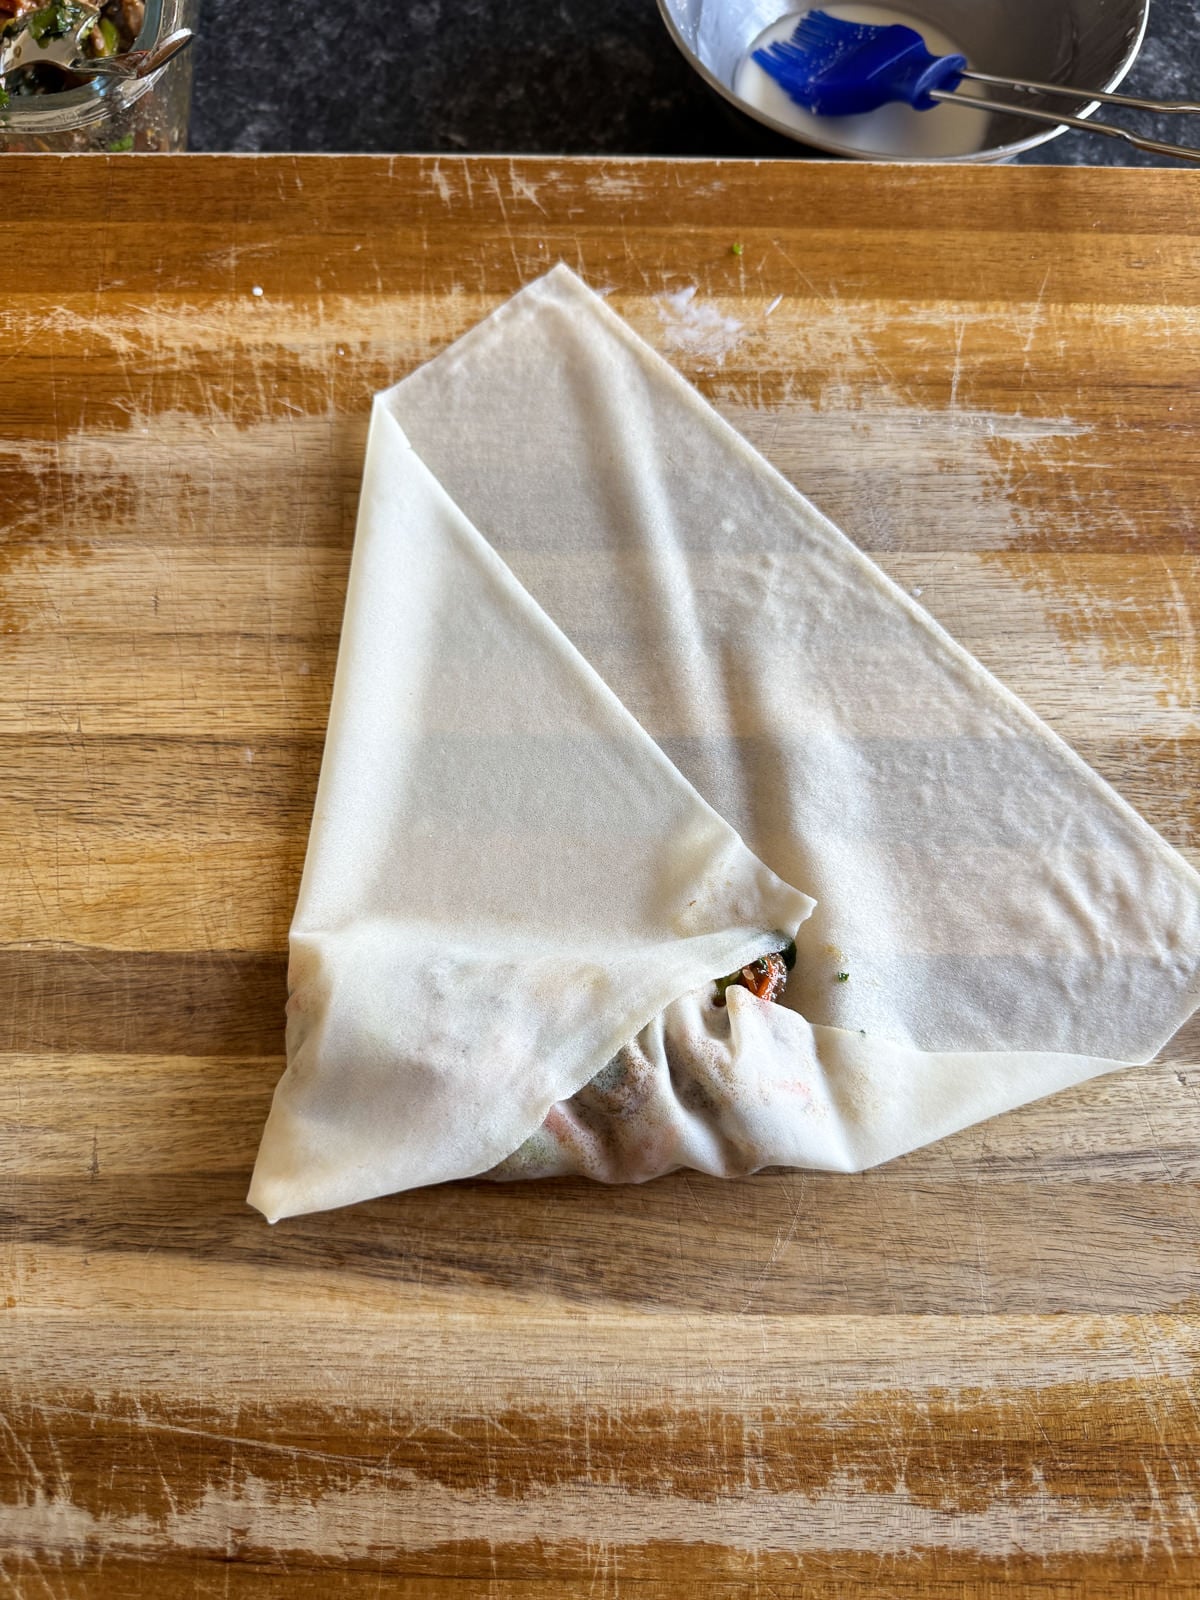
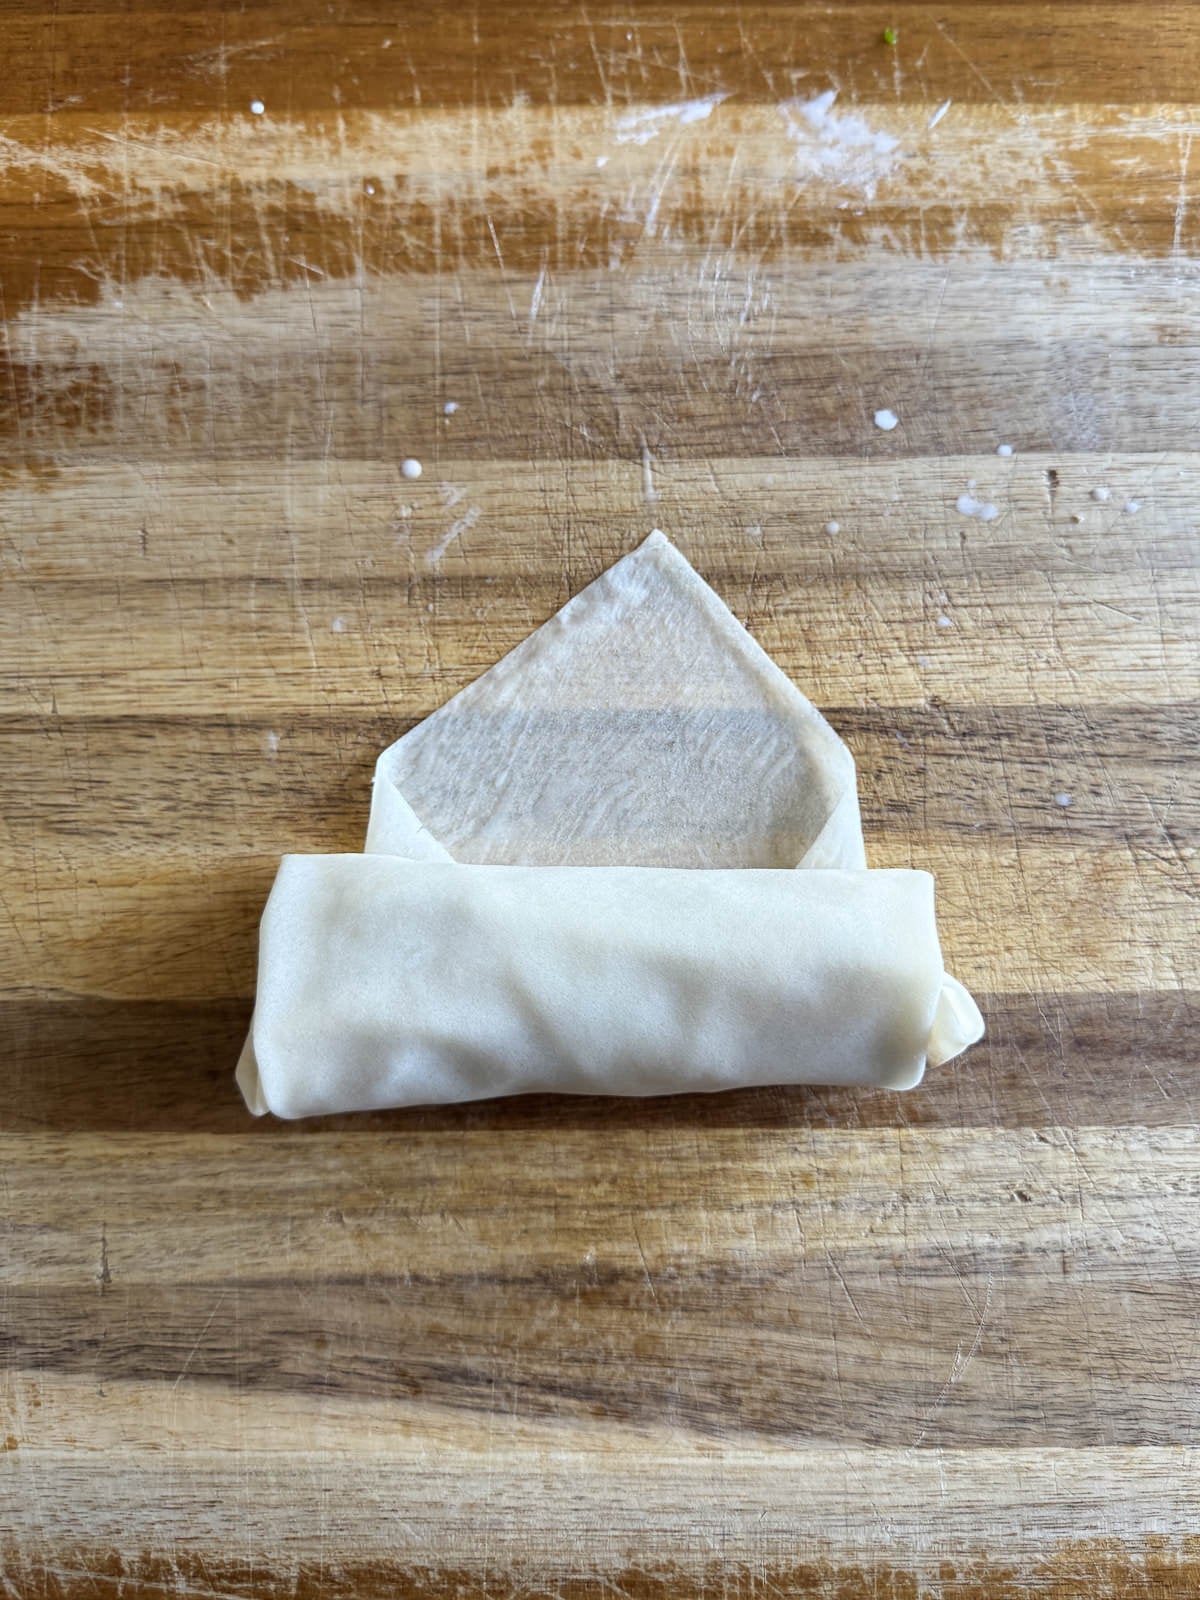
- Fold the bottom corner up over the filling then roll halfway up the wrapper.
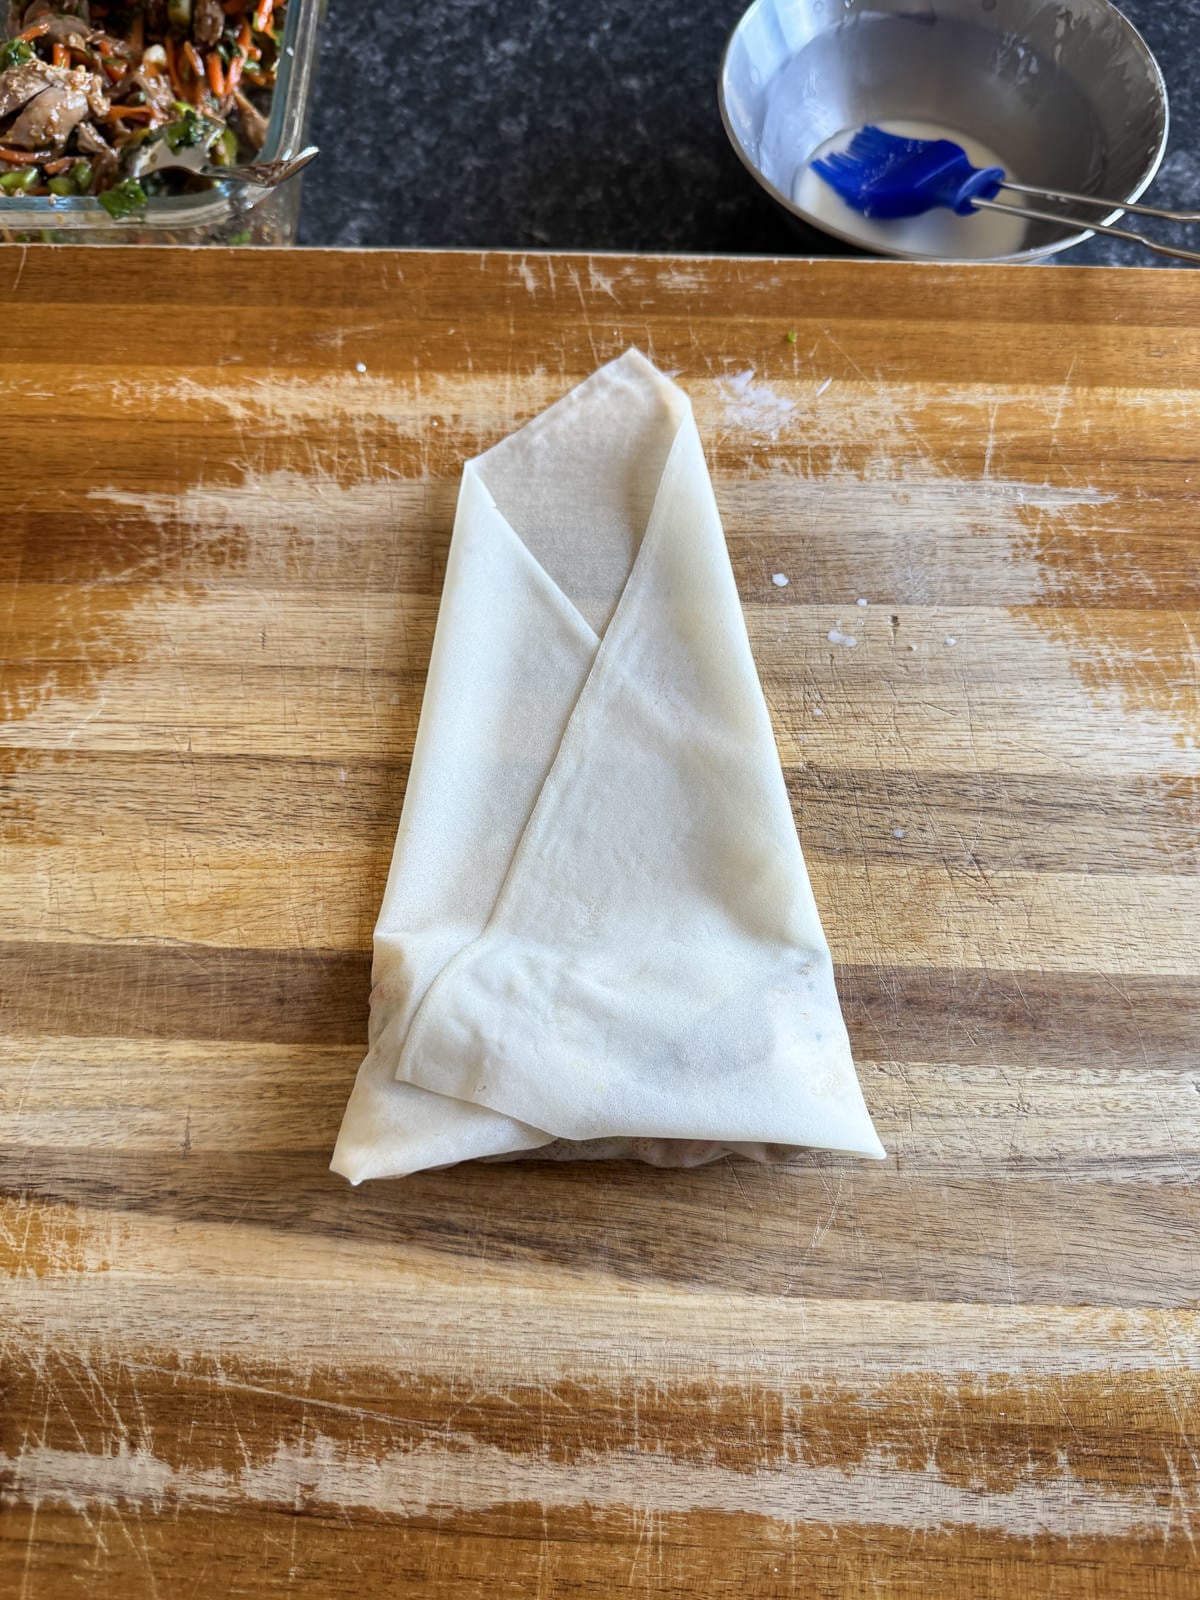
- Fold the left & right sides over into the middle then continue rolling the spring roll up until you’re just below the top corner.
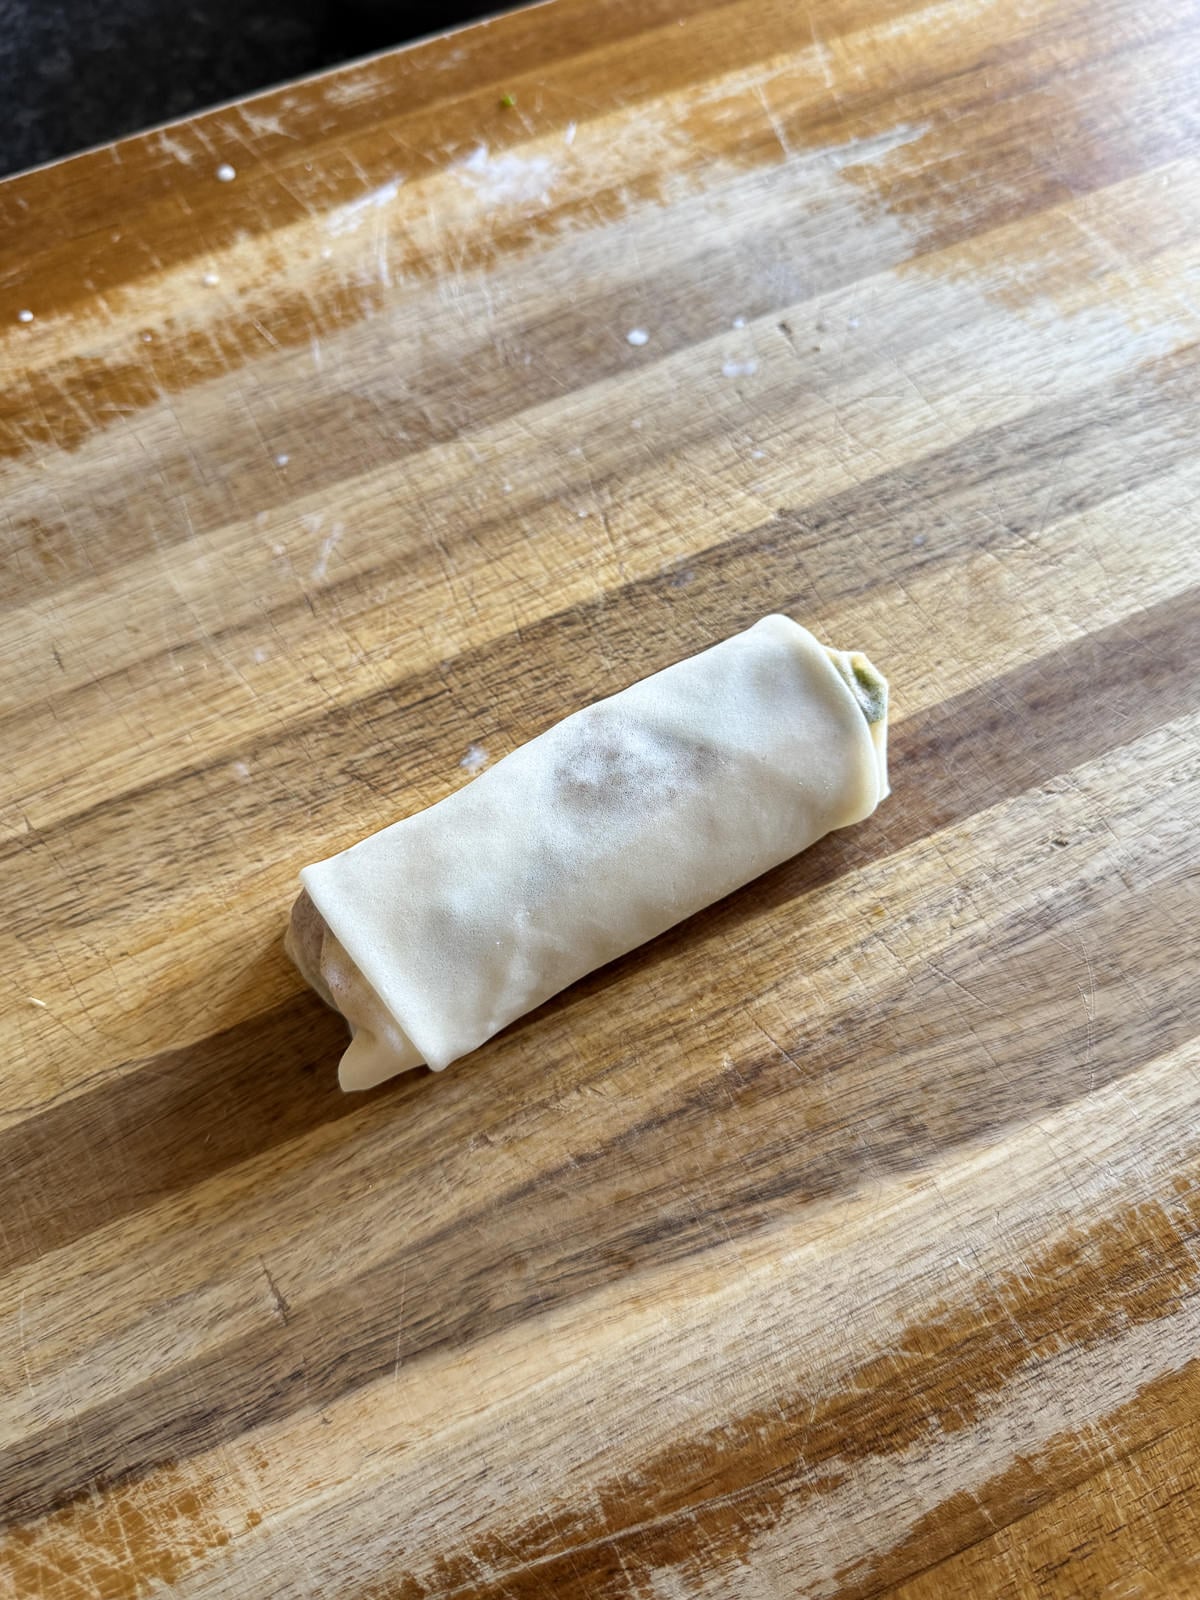
- Brush the small triangle of pastry with the cornflour paste then roll the spring roll over to seal.
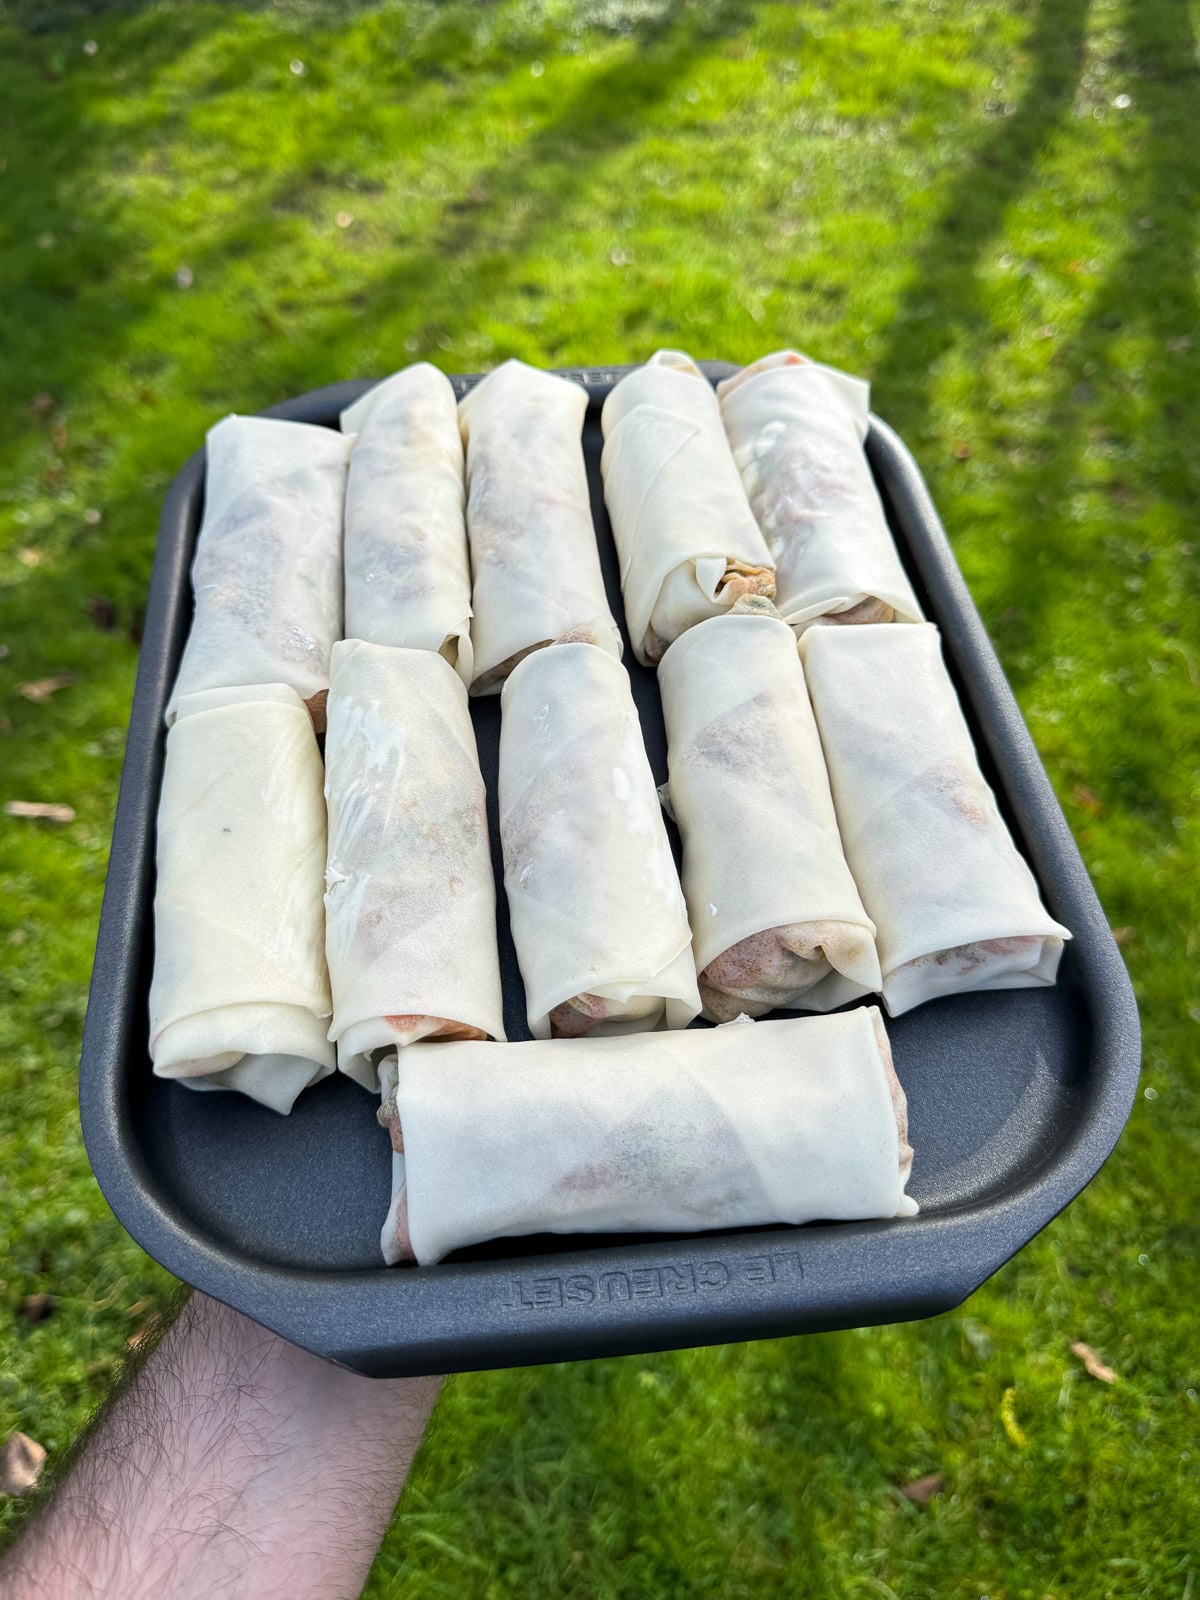
Pretty easy stuff right?! Once assembled, we place the spring roll onto a baking tray then continue rolling spring rolls, using the rest of the filling & pastry. When you’ve rolled all of your spring rolls, you can cook them straight away or store them in the fridge for up to a day. Make sure to keep them covered with clingfilm though, otherwise they’ll dry out.

Deep Frying
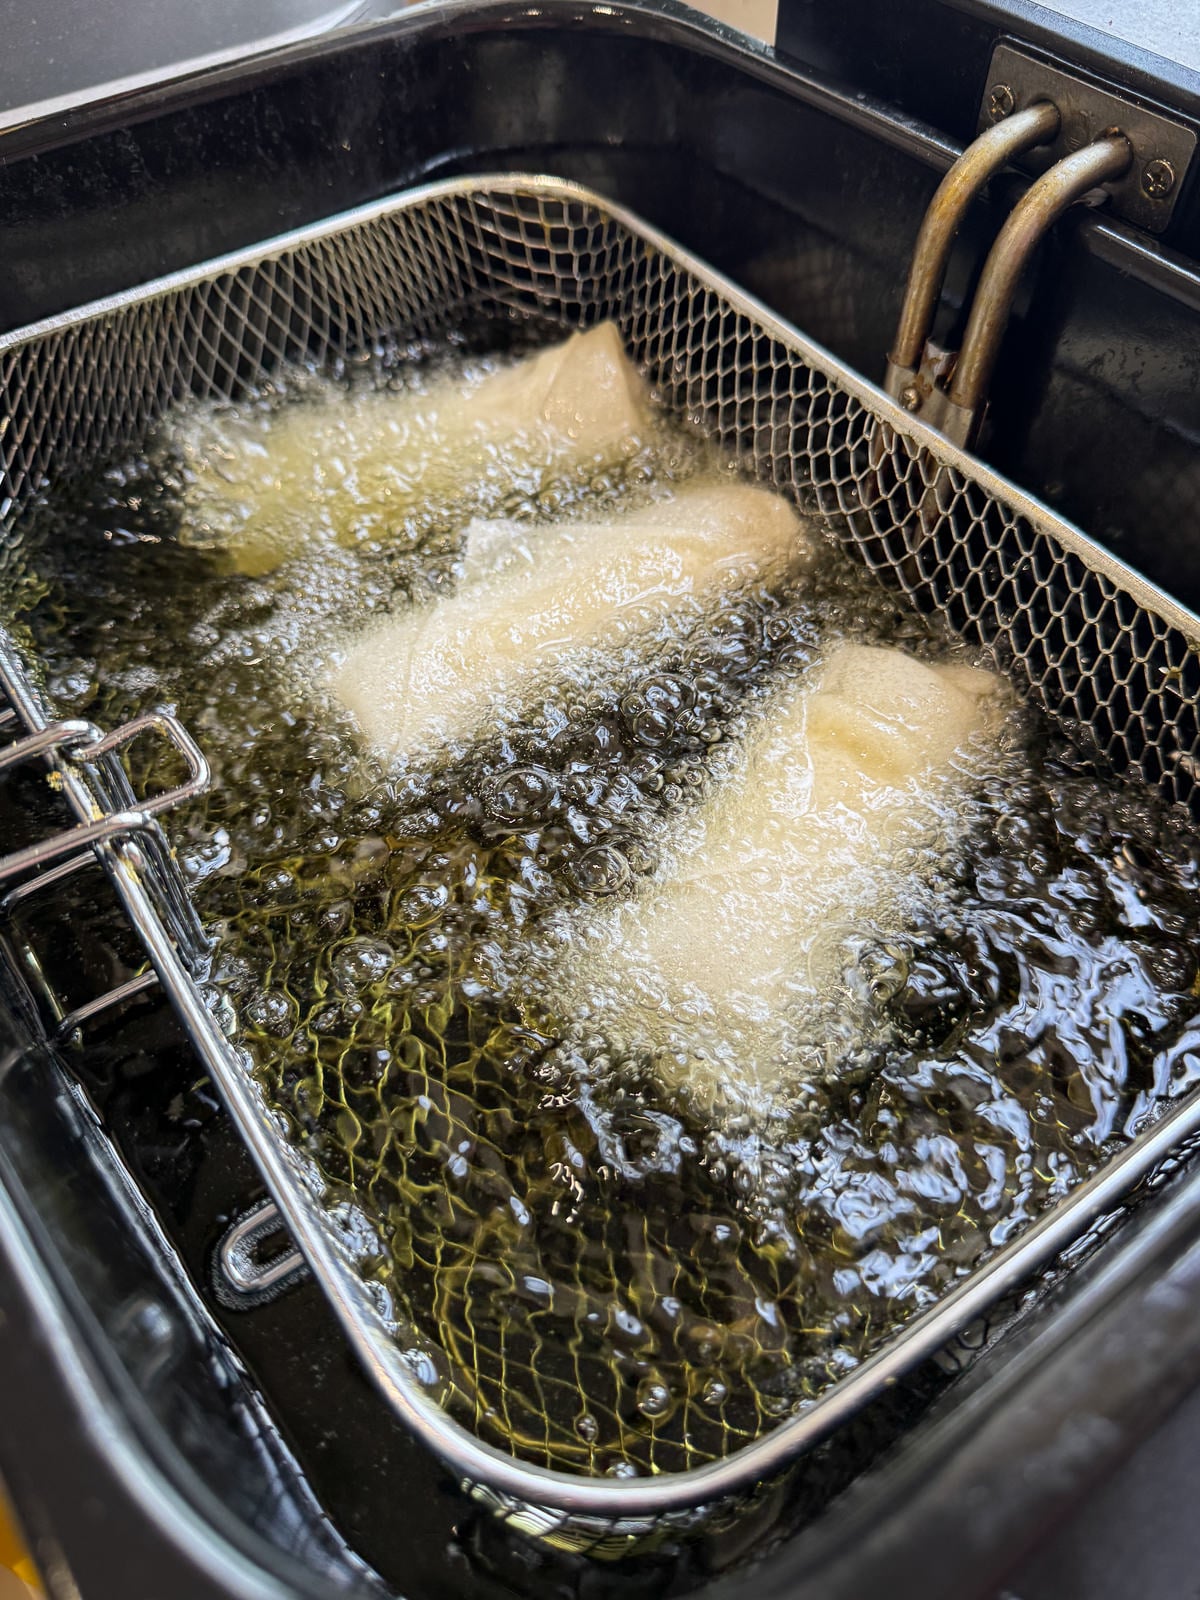
The best way to cook crispy, golden brown spring rolls, is in a deep fat fryer. Although if you haven’t got one, you can use a pan of oil warmed up on the stove or bake your spring rolls in the oven. Just a note; if you do use a pan of oil on the stove, you’ll need to do this really carefully, keeping a careful eye on the temperature of the oil.
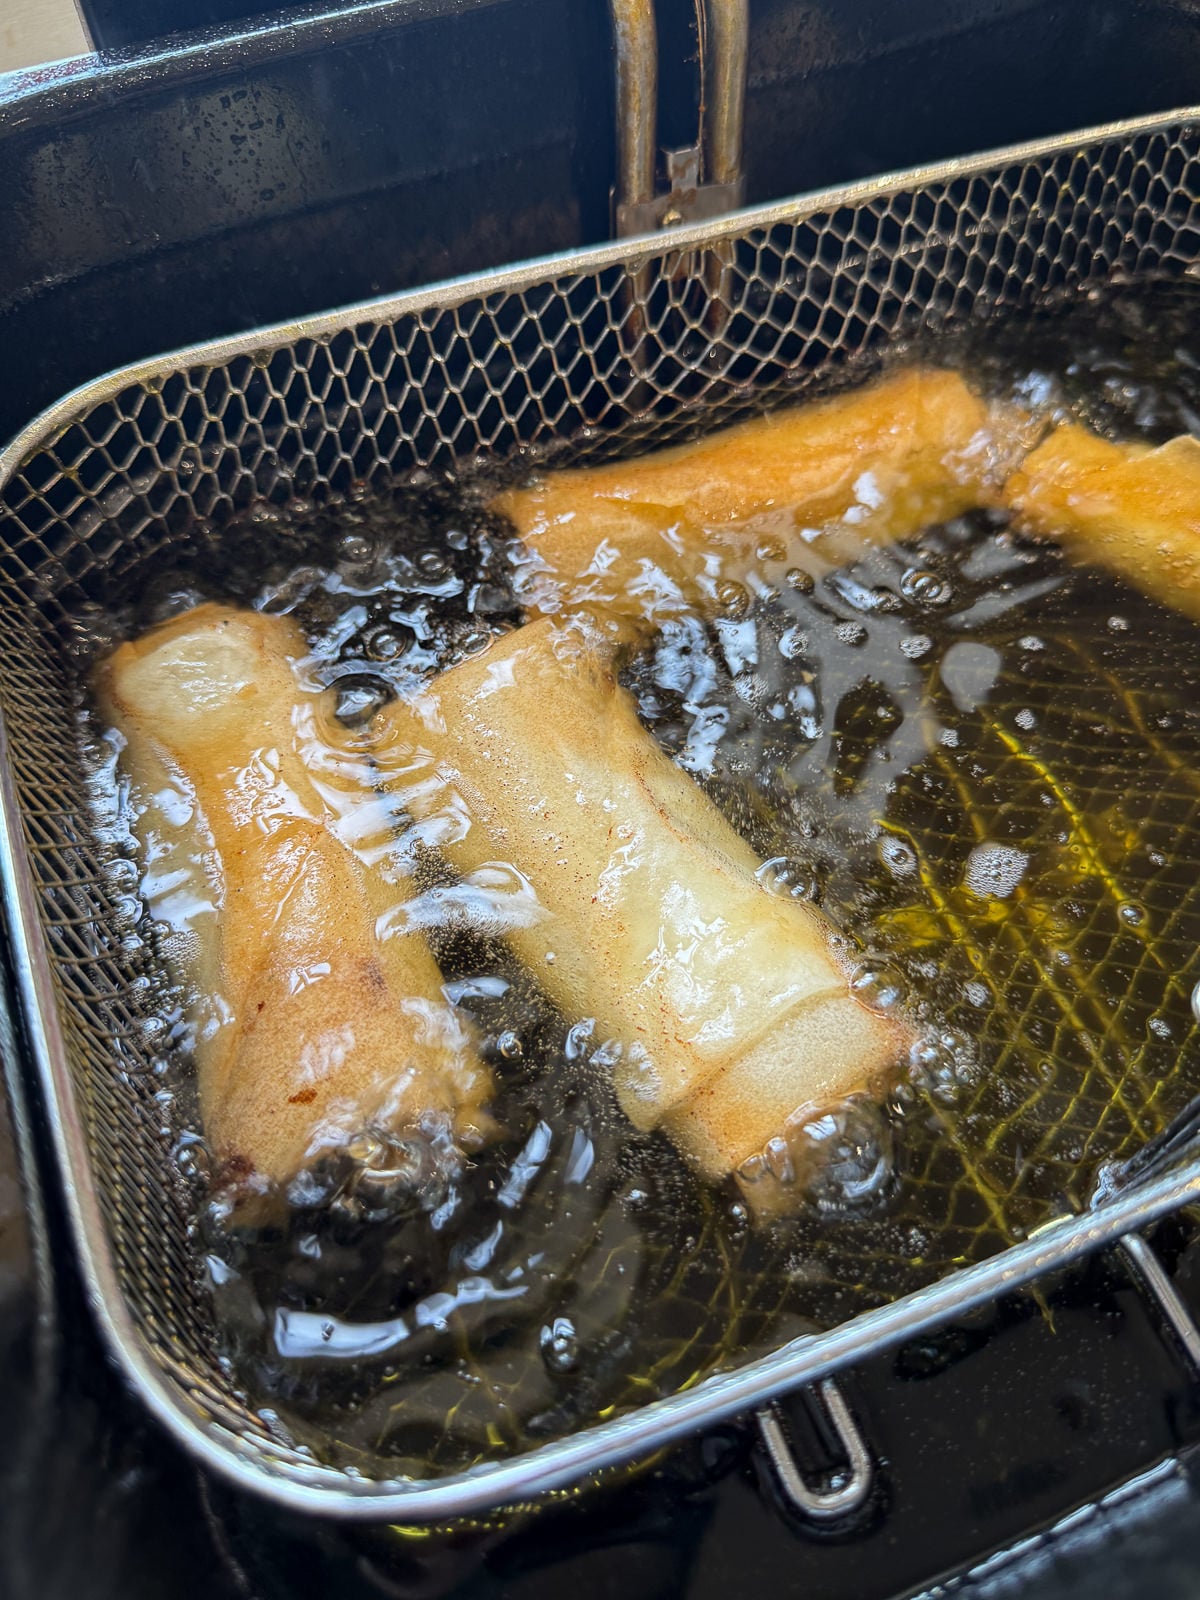
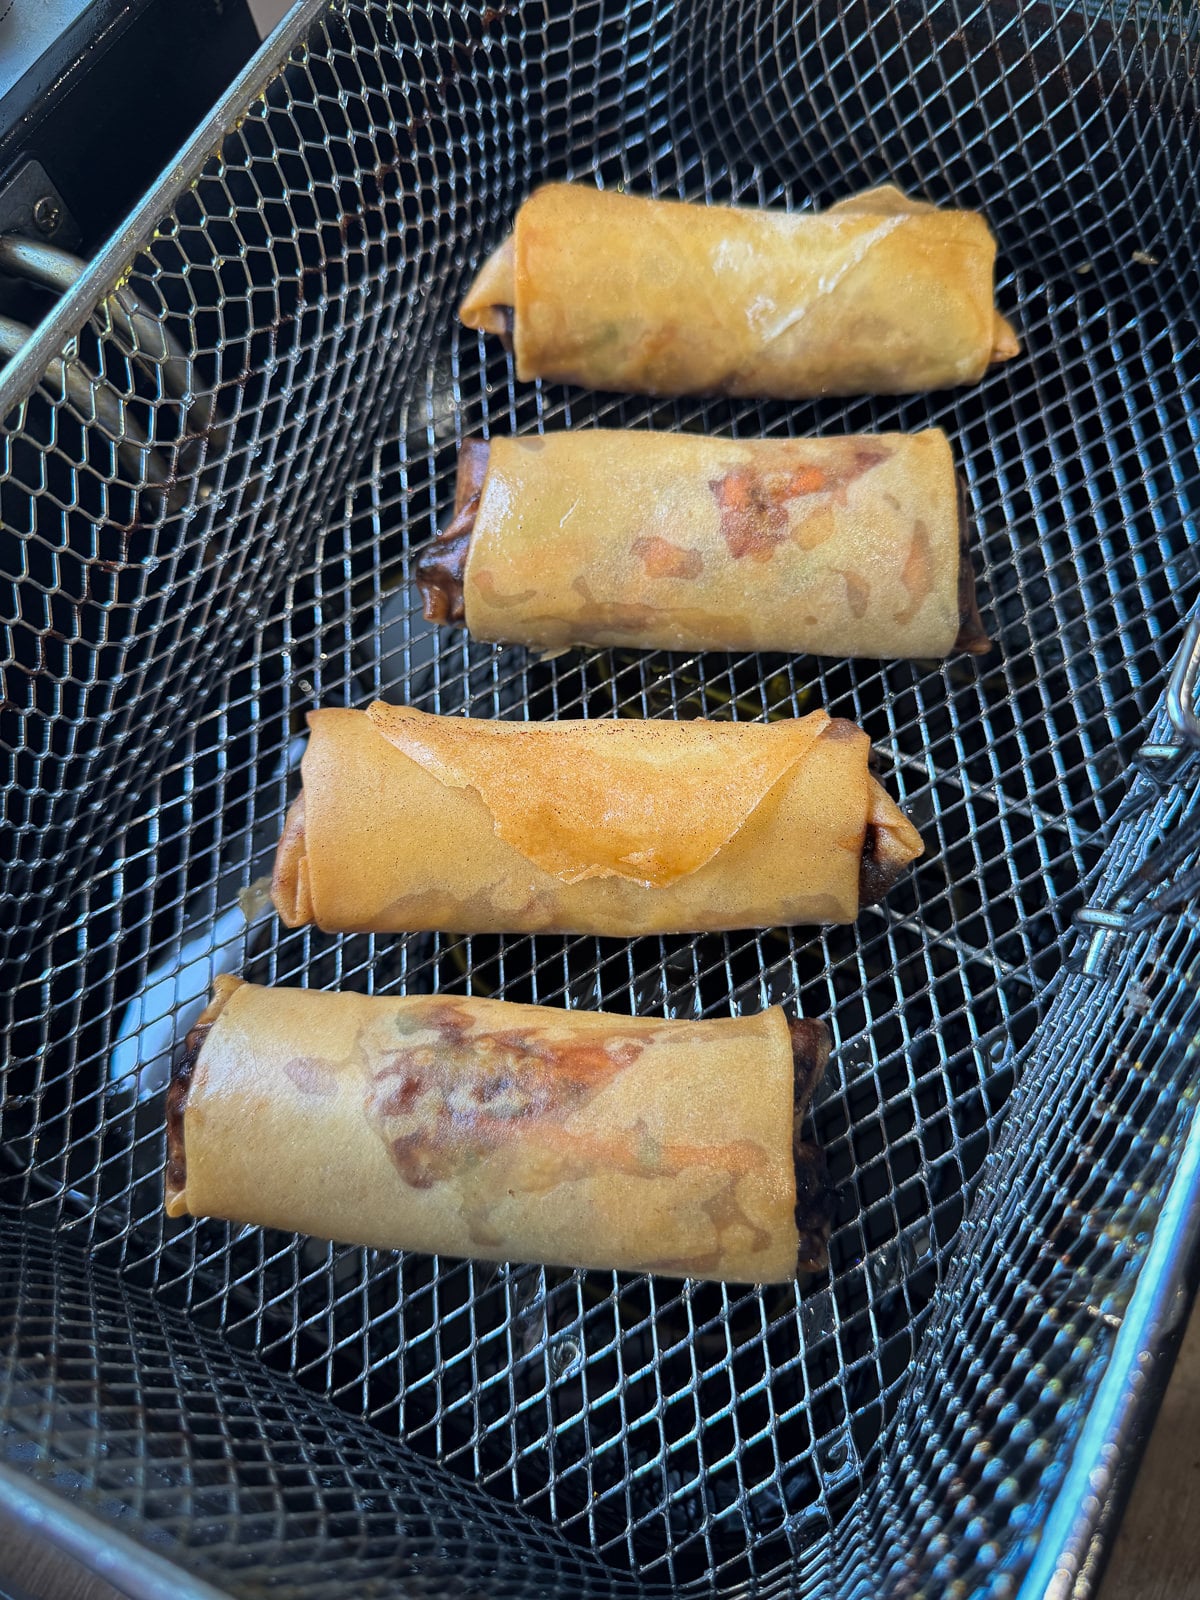
To deep fry spring rolls, we fry them at 180°c/356°f for 6-8 minutes until they’re crispy & a deep golden brown all over. You’ll need to fry the spring rolls in batches, to avoid over crowding your fryer. I could fit 4 spring rolls in my fryer at a time! I’d highly recommend using a digital food probe to double check the temperature of the oil, as domestic fryers tend to be a bit inaccurate.
Once cooked, we need to let the spring rolls sit on some kitchen paper for a minute or two before serving, just to drain off any excess oil. This keeps the springs crisp & prevents them from becoming soggy or greasy.
Baking Option (If You Haven’t Got A Deep Fat Fryer!)
If you haven’t got a deep fat fryer, you can still make crispy spring rolls! The trick here is brush the spring rolls with oil on both sides then bake them at a high temperature to crisp up the pastry. To ensure that the spring rolls are crispy all over, it’s best to bake them on a wire rack in an oven preheated to 200°c/392°f.
Serving Suggestions
I served my duck spring rolls simply, with a pot of hoisin sauce for dipping! This is more suited to serving them as a snack or appetizer. If you wanted a more substantial meal, you could serve your spring rolls with salad or sides such as noodles, steamed/egg fried rice or stir fried veg. As these spring rolls are filled with duck, I’d go with a refreshing smashed cucumber & spring onion salad!
Tips, Tricks & Troubleshooting
- For the crispiest spring rolls, cook them in a deep fat fryer!
- To make the best spring roll filling, cook the duck yourself. I used my hoisin braised duck legs! Make sure to season the filling to taste as well.
- Don’t over fill the spring rolls, otherwise they’ll split & leak as they cook.
- Fry your spring rolls in batches, to avoid over crowding your fryer.
- Serve your spring rolls whilst they’re still crispy & hot.
Frequently Asked Questions
This recipe uses Chinese style spring roll wrappers (not Vietnamese style rice paper wrappers) which are available in some supermarkets or online.
You don’t have to use a deep fat fryer to cook spring rolls! Instead, you can use a pan of oil that’s been warmed up on the stove or you can bake the spring rolls in the oven.
Spring roll wrappers will dry out quite quickly once you open the packet up. To stop the wrappers from drying out, make sure to keep them covered with a damp tea towel whilst you prepare the spring rolls.
Once cooked, spring rolls will be crisp on the outside and a deep, golden brown all over.
Using cornflour mixed with water makes the best spring roll glue as it seals the spring rolls without staining the pastry. If you haven’t got any cornflour, you can use plain flour & water instead or a beaten egg.
The filling for duck spring rolls will keep for up to 2 days in fridge (depending on when you cooked the duck). Once assembled, the spring rolls can be stored in the fridge if you’re not cooking them straight away but will need to be cooked within a day, before the pastry starts to go soggy.
Leftover cooked spring rolls will keep in the fridge for up to 2 days. To reheat them, bake at 200°c/392°f for around 10 minutes, until the pastry is crisp and the filling is piping hot
More Snacks & Appetizers To Try!
- Rice Krispie Fried Mozzarella Sticks With Hot Honey
- Feta Saganaki With Honey & Sesame
- Frickles (Deep Fried Pickles)
- Beer Battered Black Pudding Fritters
- Honey Butter Buttermilk Cornbread
- Baked Camembert Dough Ball Wreath
If you have enjoyed this recipe for duck spring rolls, it would mean a lot if you could leave a review & rating. And if you’d like to stay up to date with future recipes, follow us on Instagram & TikTok!

Hoisin Duck Spring Rolls
Equipment
- Deep Fat Fryer
- Digital Food Probe
- Mixing Bowl
- Baking Tray
Ingredients
Duck Filling
- 2 Large Carrots
- 6 Spring Onions
- 2 tbsp Finely Chopped Coriander
- 1 tbsp Vegetable Oil
- 2 tsp Sesame Seeds
- 400 g Shredded Duck Meat (4 Legs – See Notes)
- 100 g Hoisin Sauce
To Assemble
- 2 tsp Cornflour
- Cold Water
- 12 Spring Roll Wrappers (See Notes)
Instructions
Duck Filling
- First, peel the carrots then cut into thin matchsticks that are 5 cm long. Set these aside for now.These are julienned carrots, for the technical term!
- Peel & lightly trim the spring onions then thinly slice them, at a slight angle. Finely chop the coriander now as well. Set both to one side (separate to the carrots).
- Next, set a large frying pan over a medium heat, add in the vegetable oil then leave to heat up for a minute.
- Once the oil's hot, carefully add in the carrots then fry for 1 minute until they're just starting to soften. Then add in the sesame seeds & continue cooking for another 1-2 minutes until the seeds are toasted & the carrots are just tender. Make sure to stir the carrots frequently! We don't want them to take on any colour at this stage.
- Once the carrots are cooked, transfer them to a large mixing bowl then leave to cool.
- Next, add the shredded duck, spring onions, coriander & hoisin sauce into the mixing bowl then stir to combine. Season the mix to taste with salt & pepper.The mix can now be used straight away or stored in the fridge for a day or two.
Assembly
- First, make the spring roll glue. To do this, add the cornflour into a small mixing bowl then stir in enough cold water to make a paste that's thin enough to spread. You'll need 1-2 tsp of water.
- Next, gently peel off a spring roll wrapper then place it onto a work surface so that it's facing in a diamond shape in front of you. Keep the other spring roll wrappers cover with a damp tea towel, to keep them from drying out.
- To assemble a spring roll, place a heaped tablespoon of the filling about 5cm (2 inches) above the bottom corner. Use your spoon to shape the filing into a rough rectangle shape.There's a visual guide to assembling spring rolls in the post above!
- Next, fold the bottom corner up over the filling then roll halfway up the wrapper. Fold the left & right sides over into the middle then continue rolling the spring roll up until you're just below the top corner. Brush the small triangle of pastry with the cornflour paste then roll the spring roll over to seal.
- Place the spring roll onto a baking tray then repeat the assembly process with the remaining wrappers & filling. Once assembled, the spring rolls can be cooked straight away or stored in the fridge for up to a day. Make sure to cover them with clingfilm so that they don't dry out!
Cooking
- Preheat a deep fat fryer to 180°c/356°f. I'd recommend using a digital food probe to double check the temperature of the oil!
- When the oil is up to temperature, fry the spring rolls for 6-8 minutes, turning occasionally until the pastry is crisp & a deep, golden brown all over. You'll need to fry the spring rolls in batches, to avoid over crowding the fryer! I could fit 4 spring rolls in my fryer at a time.
- Once cooked, let the spring rolls drain in the fryer basket for 30 seconds then transfer to a baking tray lined with kitchen paper. Leave to drain for a minute then serve.The spring rolls are best served straight away whilst they're still hot & crispy!
Baking (Instead Of Frying)
- Preheat an oven to 200°c/180°c fan (392°f/356°f).
- To bake, place the spring rolls onto a rack set on a baking tray. Brush both sides of the spring rolls with a good amount of vegetable oil then cook in the oven for 20-25 minutes until crisp & golden brown.