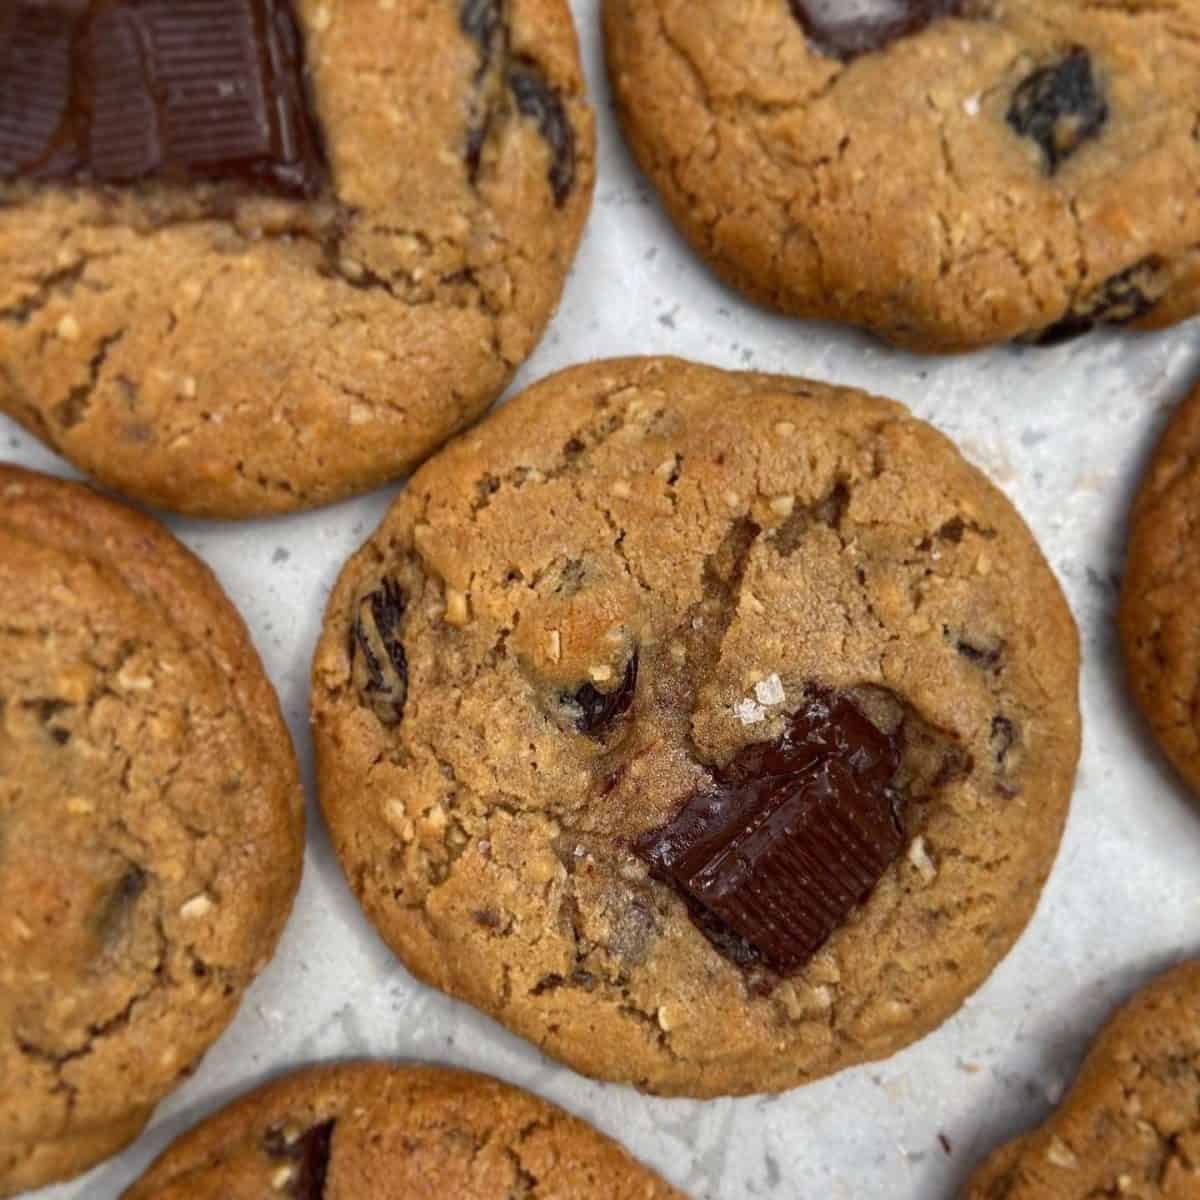
Brown Butter Oreo Chocolate Chip Cookies
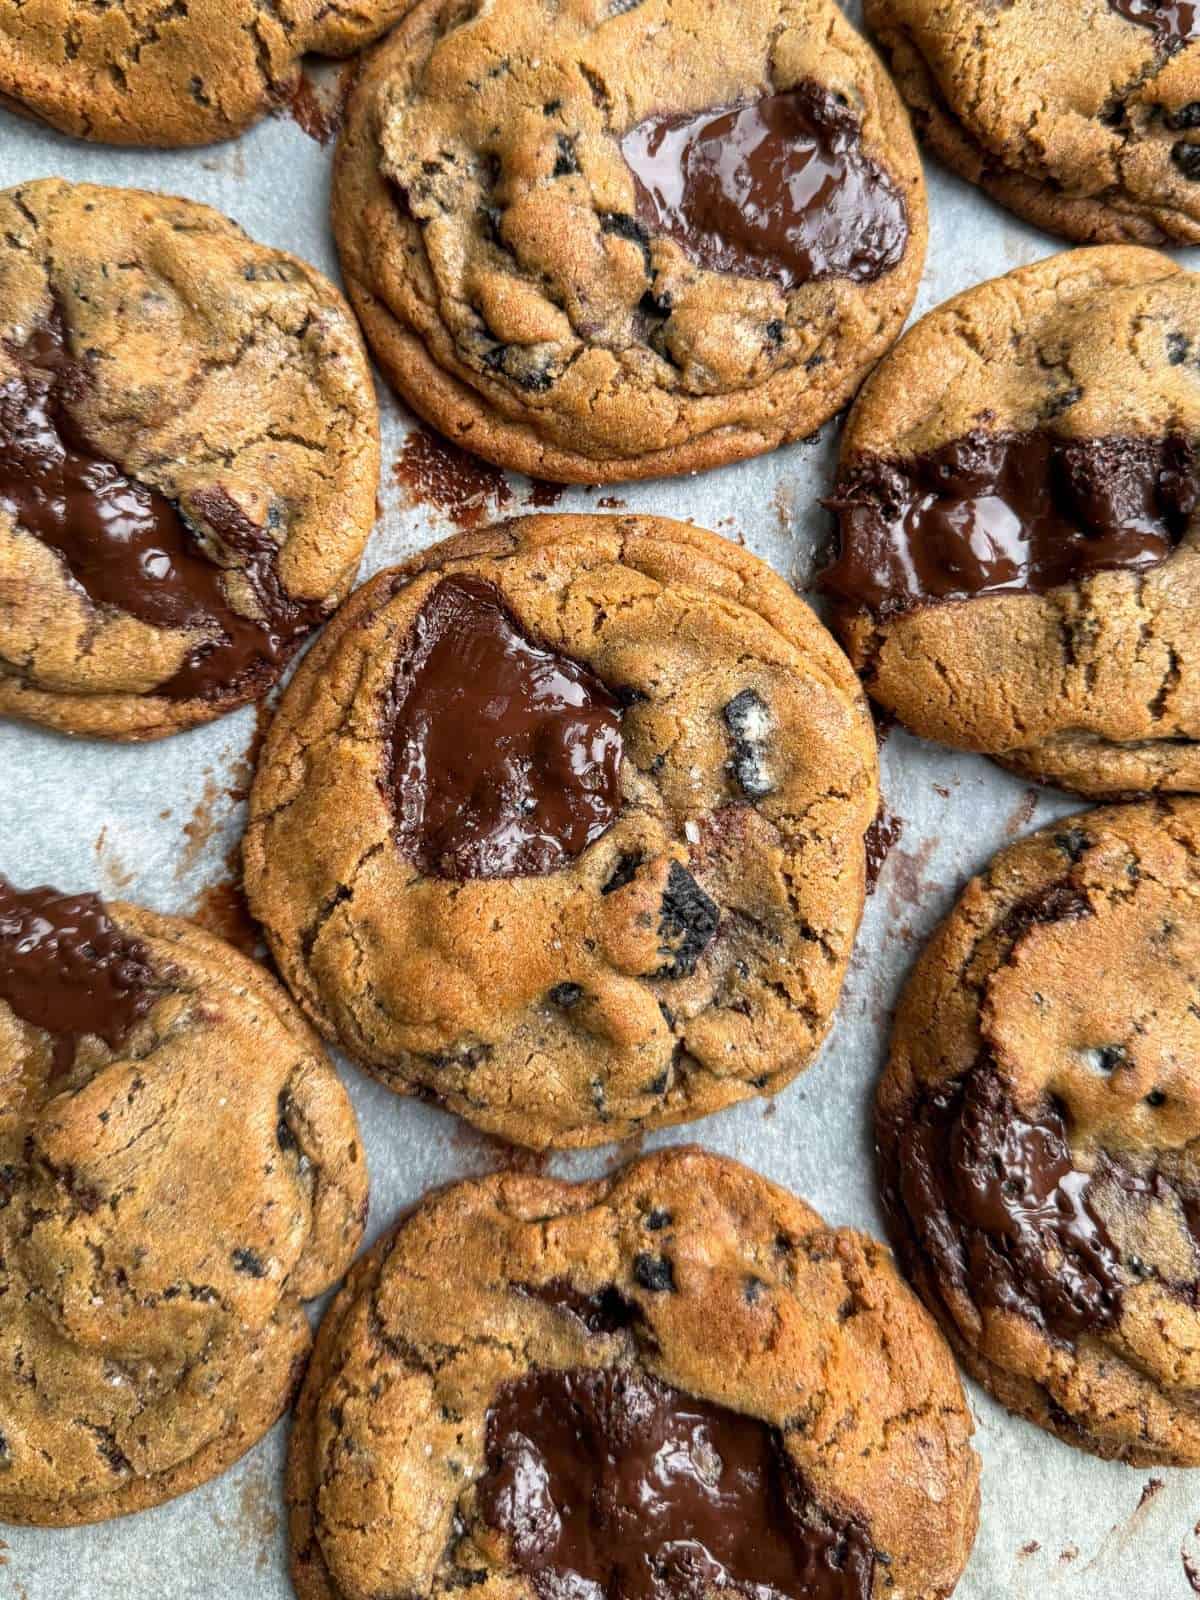
These brown butter Oreo chocolate chip cookies are crisp, fudgy & packed full of dark chocolate chunks & Oreo cookie pieces.
This post contains affiliate links.
If you’re an Oreo fan, you’re going to love these cookies!
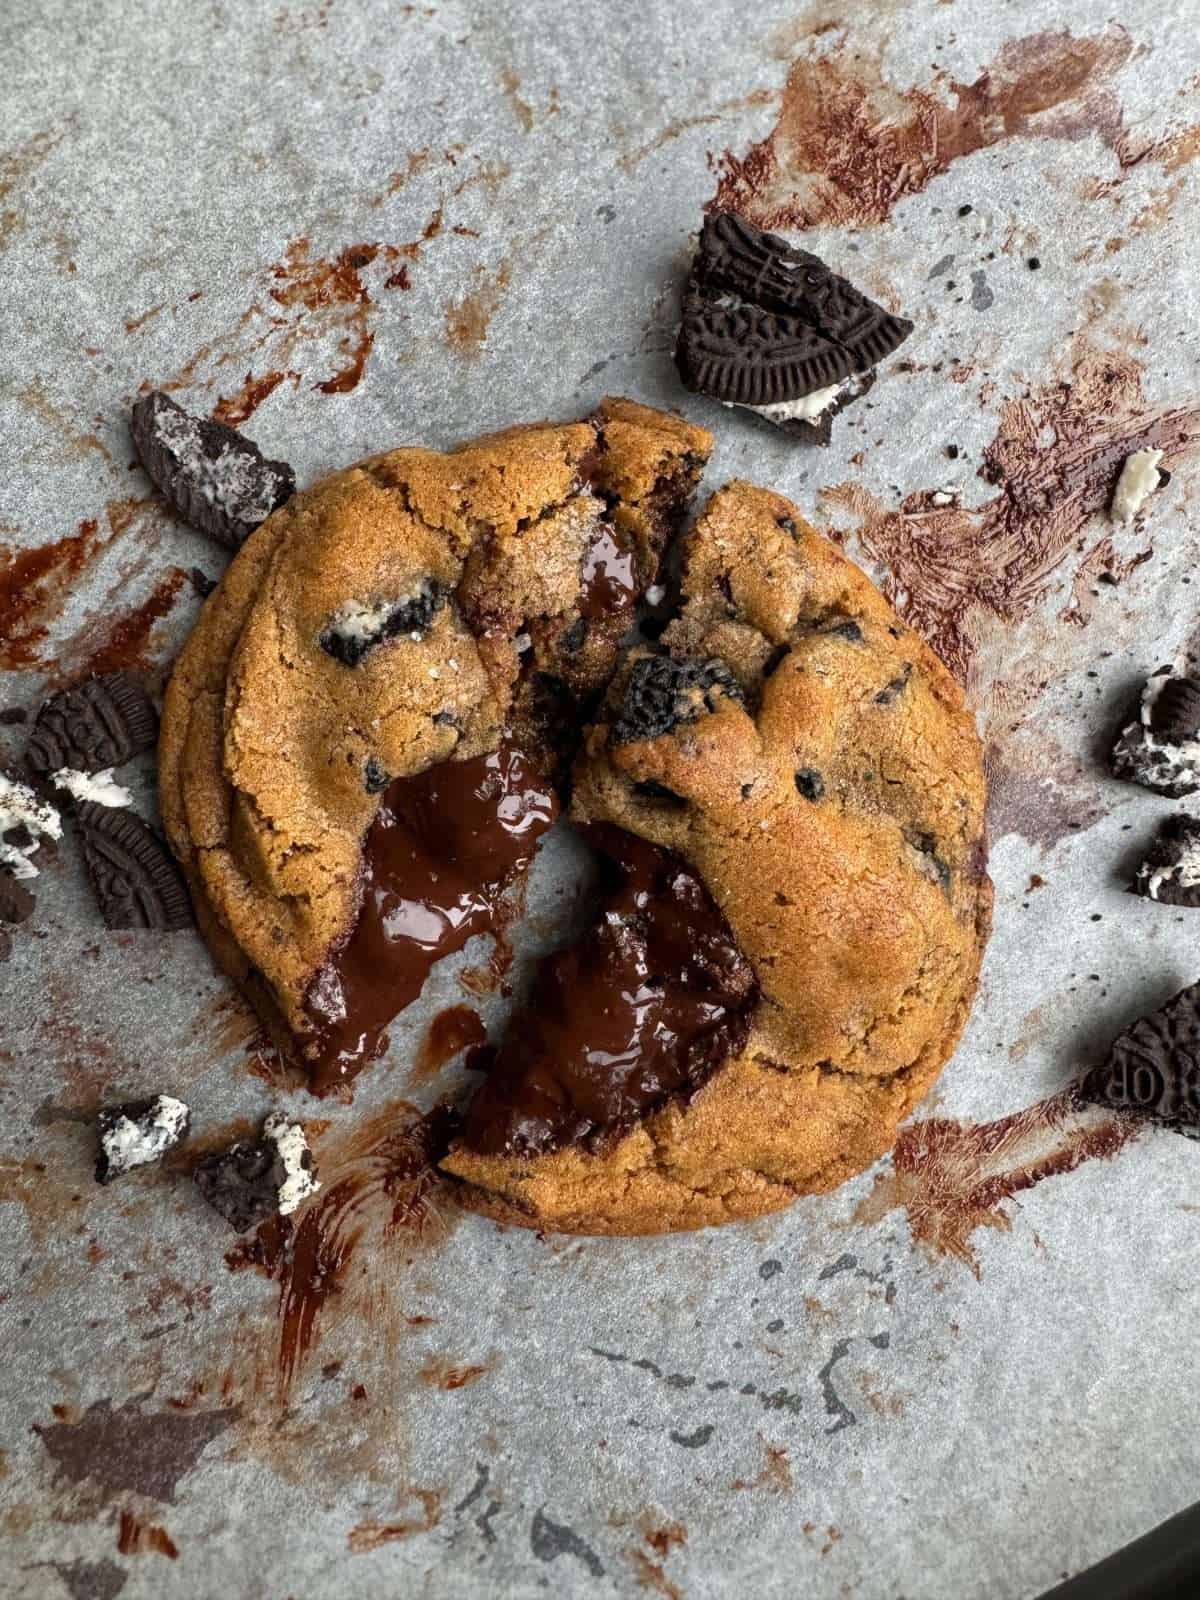
Here, we’ve taken a batch of classic brown butter chocolate chip cookies & stuffed them full of crushed up Oreos. They’re absolutely jam packed full of chocolate and are crisp on the edges & fudgy in the middle, like any good chocolate chip cookie should be!
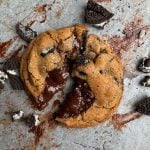
There’s also a chunk of chocolate pressed on top of each cookie before they are baked, which gives them these fantastic pools of molten, melted chocolate once they are cooked. These Oreo cookies are seriously tasty & super easy to make!
For more cookie flavours, check out our ever growing collection of cookie recipes! There’s a whole load of flavours here, from miso banana bread, to brown butter s’more & black sesame cheesecake. If there’s a cookie that you’d like to see on the blog, leave us a comment at the bottom of this post!
Why You’ll Love This Recipe!
- They’re Easy To Make!
These brown butter Oreo cookies couldn’t be easier to make & come together in no time at all! - Double Brown Butter
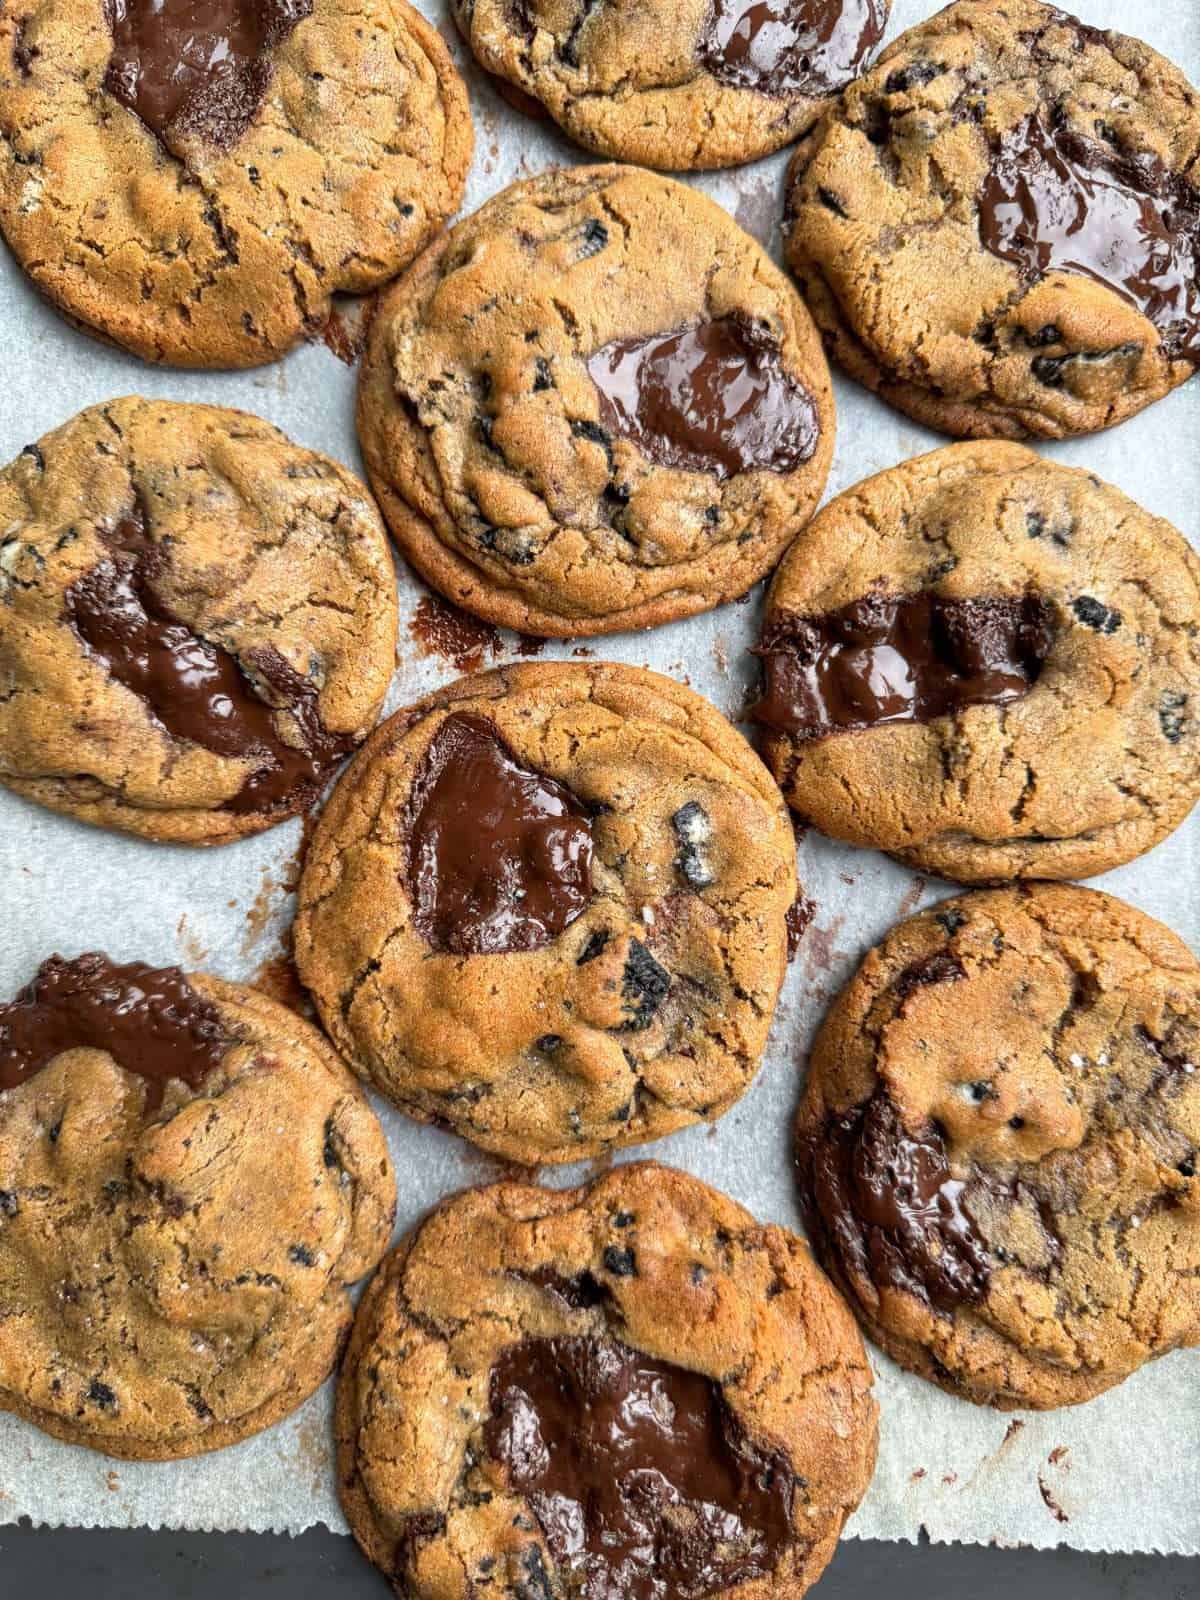
We’re using both brown butter & toasted milk powder in these cookies for double the brown butter flavour. - A Baker’s Dozen
This recipe makes 13, big chocolate chip cookies. They’re perfect for sharing! - Fudgy & Crisp Texture
These Oreo chocolate chip cookies have crisp edges & gooey, fudgy centres.
What You’ll Need
- Oreos – We’re using a whole packet of Oreos for these cookies! I used regular Oreos but pretty much any flavour will work (double stuff would be good!).
- Dark Chocolate – I used a 72% dark chocolate for my cookies but feel free to use something lighter or darker if you’d prefer. I’d recommend roughly chopping up a bar of chocolate (instead of using chocolate chips) as this will melt better.
- Toasted Milk Powder – This is added to the brown butter for double the flavour! A guide on how to make this can be found on the blog.
- Sugar – We’re using both caster & dark brown sugar for these cookies, for the best flavour & amount of spread in the oven.
- Butter – Unsalted butter is used to make our cookie dough, as this allows us to control the salt content of our cookies. Unsalted butter is also easier to make into brown butter as it doesn’t foam as much as salted.
- Flour – Plain/all purpose flour is used in our cookie dough. I like to sift it first to remove any lumps.
- Raising Agents – Our Oreo cookie dough contains equal amounts of baking powder & bicarbonate of soda. Make sure to measure this accurately as it is what gives these cookies their soft, fudgy texture.
- Eggs – You’ll need a large egg, plus 2 extra yolks for these cookies. The extra yolks give our cookies their fudgy texture.
- Vanilla – Adding a teaspoon of good quality vanilla paste gives our cookie dough even more flavour.
- Sea Salt – A light sprinkle of sea salt over the baked cookies, enhances the flavour from the chocolate! I use Maldon sea salt to finish my chocolate chip cookies.
How To Make Brown Butter Oreo Chocolate Chip Cookies
The full, printable recipe card for these oreo cookies can be found at the bottom of this post! Here’s a quick rundown of the recipe…
- Brown Butter
First, we place unsalted butter into a saucepan & brown over a medium heat. Once cooked, we whisk in toasted milk powder then leave to cool.
Check out our how to make brown butter guide for more info on brown butter. Or for more info on toasted milk powder, check out our how to make toasted milk powder guide. - Cookie Dough
To make the cookie dough, we mix brown butter, softened butter, dark brown & caster sugar until well combined (in a stand mixer) then beat in an egg, 2 yolks & a teaspoon of vanilla paste. Next, we sift in plain flour, baking powder, bicarbonate of soda & table salt then fold until just incorporated. - Mix Ins
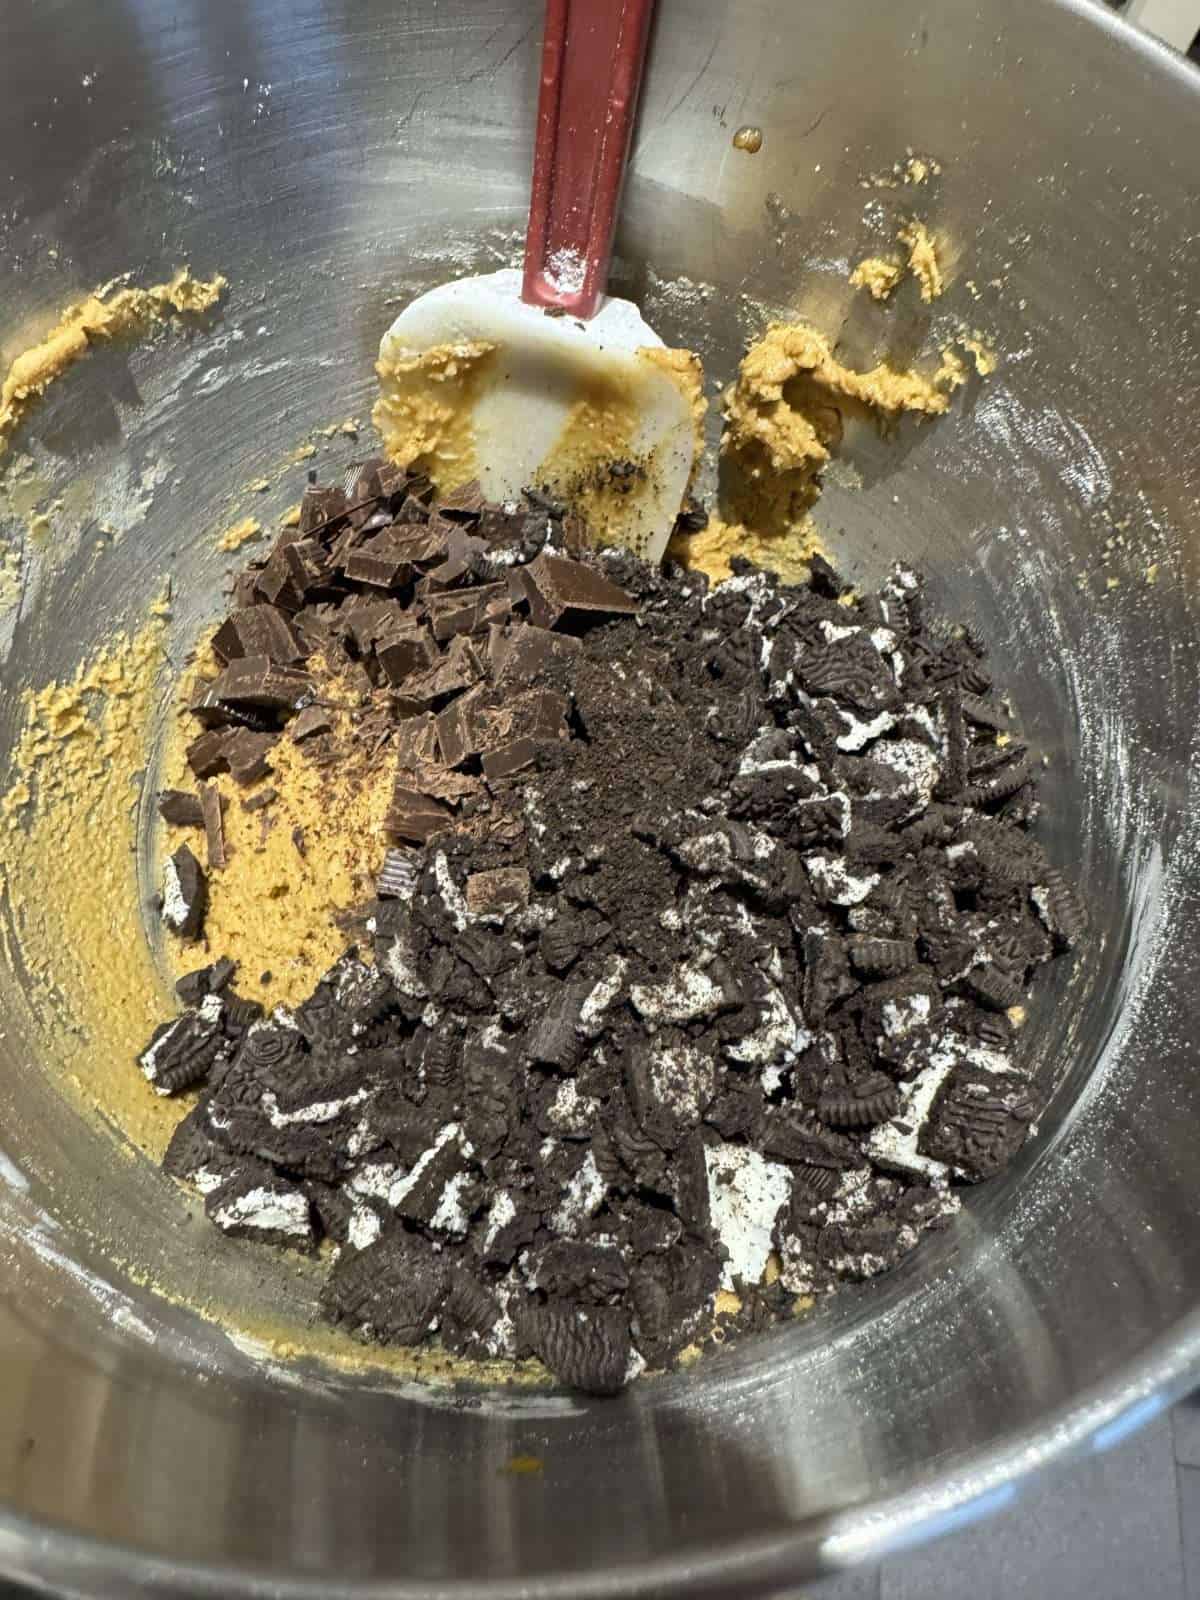
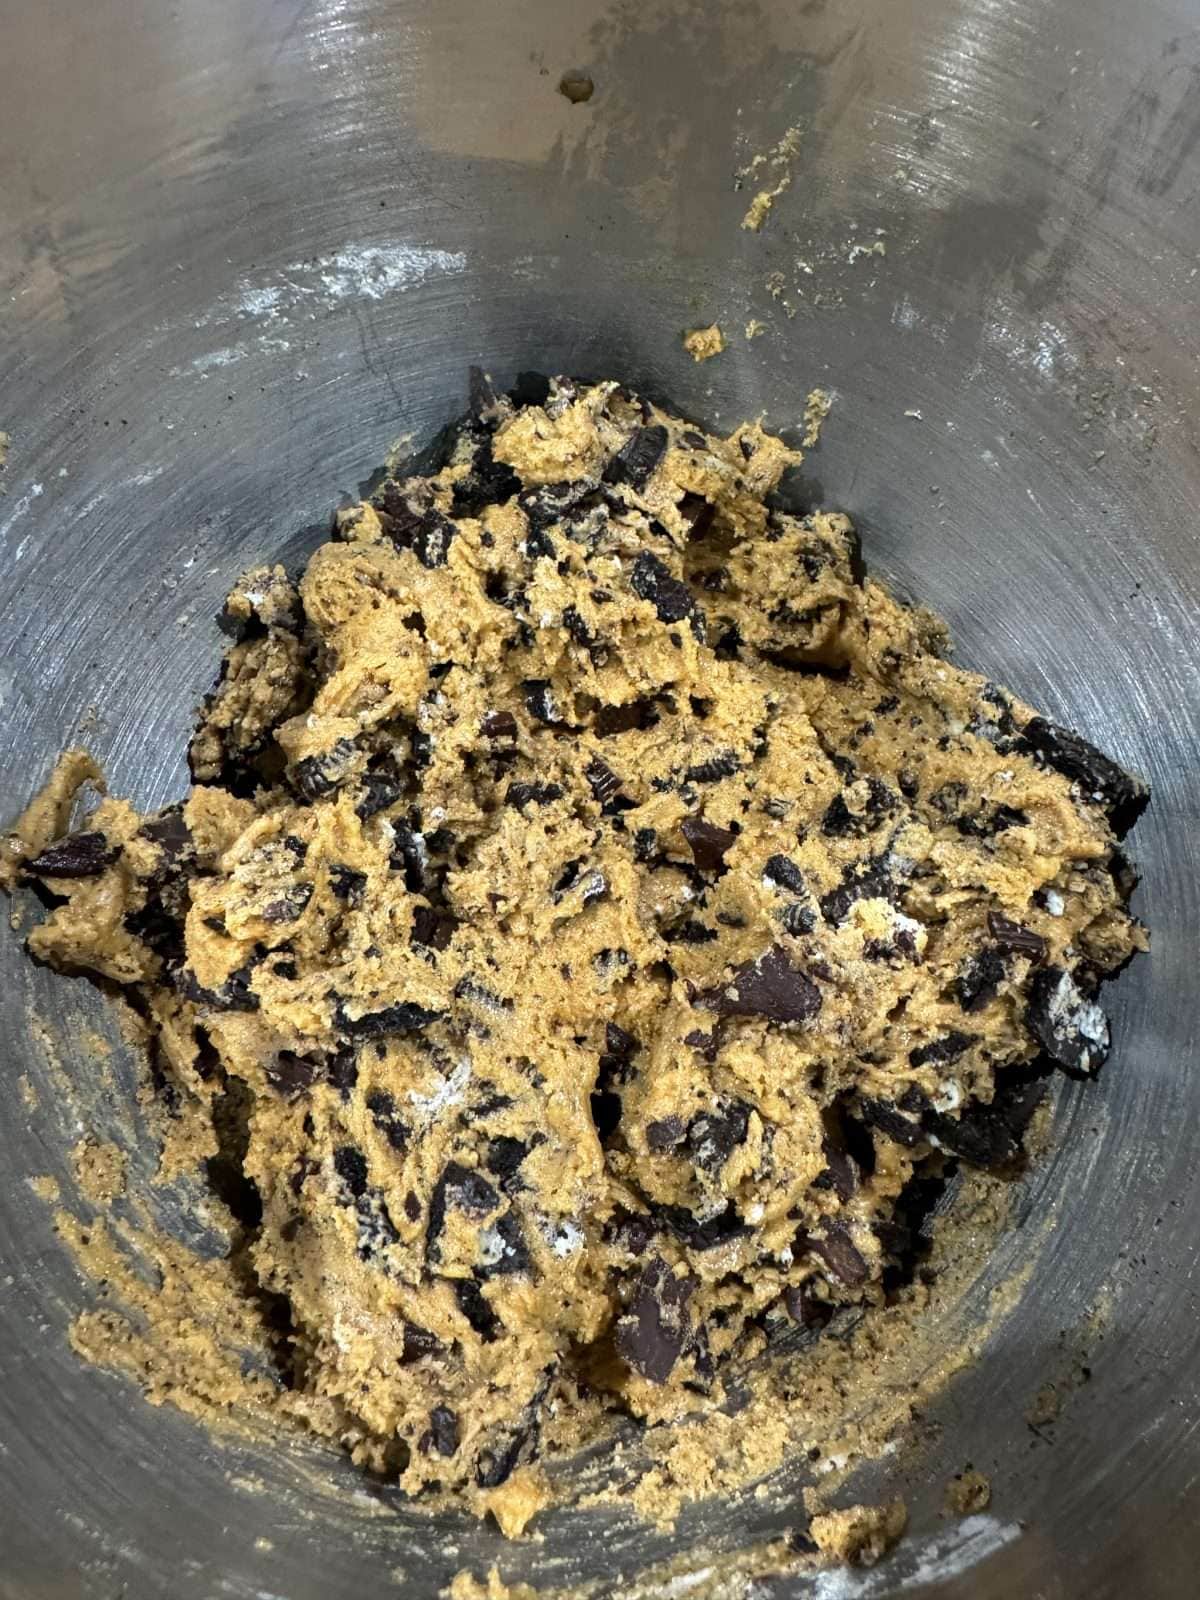
To our cookie dough, we add roughly chopped up dark chocolate & Oreos. We stir to combine then chill the cookie dough in the fridge for 30 minutes. This firms the dough up slightly, making it easier to scoop! - Shaping
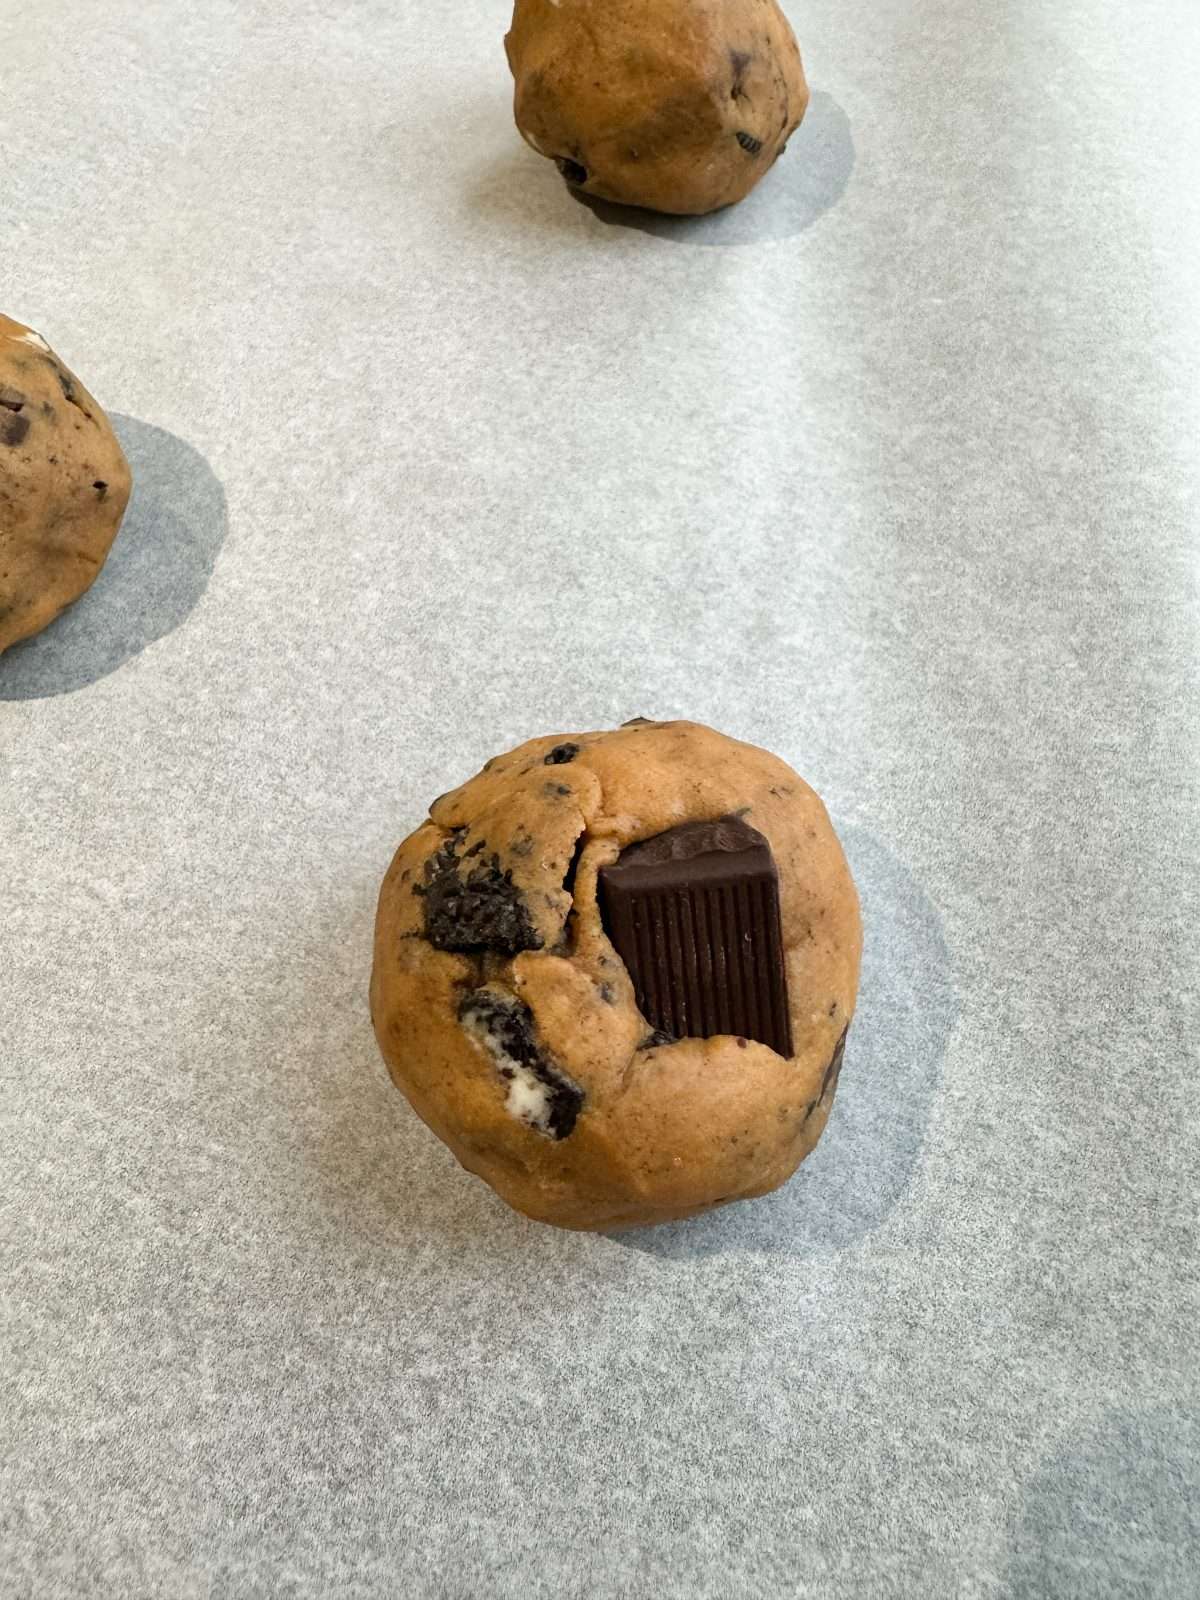
Once chilled, we scoop the cookie dough into 13 equal portions (each should weigh around 80 grams). We then roll the cookies into balls & press a chunk of dark chocolate on top. - Overnight Chill
Now that our cookies are shaped, they need to be chilled in the fridge overnight. This step is key, so don’t be tempted to skip it! This is what makes sure that our cookies don’t spread out too much in the oven. - Baking
We bake the cookies for 13 minutes (@ 180°c/356°f), until the edges are crisp & set but the centres are still soft. We then “scoot” the cookies into uniform circles with a large cookie cutter, sprinkle with sea salt then leave to cool completely, on the tray. We’re using the “Pan Banging” technique when baking the cookies but more on that below.
The Pan Banging Technique
If you’ve ever searched for a cookie recipe on Google, chances are you’ve come across the pan banging technique by Sarah Kieffer from The Vanilla Bean Blog. This technique involves banging the tray of cookies onto your oven rack towards the end of the cooking process. This causes the cookies to deflate, spreading the chocolate out & giving the cookies crinkly edges.
Here’s how we bake these cookies using the pan banging technique…
- Bake the cookies for 9 minutes (undisturbed).
- Next, open your oven door, lift up the baking tray inside the oven by a few inches then let it drop down against the oven rack. Use enough force so that the cookie starts to deflate.
- Bake for another 2 minutes then repeat the pan banging process.
- Bake for another 2 minutes (bringing the total bake time to 13 minutes) then take the cookies out of the oven.
The Cookie Scoot
The cookie scoot is a technique used to shape cookies into a perfect circle as soon as they come out of the oven. To do this, take a large circular cutter & use it to move (or scoot) the edges of the cookies, to make a perfect a circle. This is the secret to making a batch of uniform cookies.
Oreo Cookies Tips & Tricks
- Use a chopped up chocolate bar in the cookie dough, it will melt better than chocolate chips.
- Brown the butter then stir in toasted milk powder, for double the brown butter flavour!
- Make sure to scrape the mixing bowl down with a rubber spatula regularly when mixing the dough, to avoid streaks of unmixed ingredients.
- Roughly chop up the Oreos, for a mix of different size chunks. This adds extra texture to your cookies!
- Chill the cookie dough overnight for the right amount of spread in the oven.
- Use a cookie cutter to “scoot” the cookies into a perfect circle once baked.
- Sprinkle Maldon salt on top of the cookies for extra flavour.
- Bake the cookies until the edges are set but the centres are still soft.
Frequently Asked Questions
Brown butter is made by cooking butter on the stove until it turns a deep golden brown & smells nutty. For a full guide on how to do this, check out our post on how to make brown butter!
Stored in an airtight container, Oreo chocolate chip cookies will keep for up to 3 days. You can also store these cookies in the fridge & they’ll stay fresh for a couple of days extra. Make sure to serve them at room temperature though!
I find that regular Oreos are best for cookies but pretty much any flavour will work, especially double stuff Oreos!
Once cooked, your Oreo chocolate chip cookies will be crisp on the edges & just set in the middle. They will continue to cook as they cool, so be careful not to overcook them, a slightly underdone cookie is better than an overdone one!
I’d recommend sticking with caster sugar & dark brown sugar when making these cookies as this will give them the best flavour, texture & the ideal amount of spread in the oven.
A roughly chopped up bar of chocolate is best for these cookies, as it will melt better than chocolate chips. This is key to getting those molten pools of chocolate in your cookies. I used a bar of 72% dark chocolate.
How To Bake Chocolate Chip Cookies In An Aga
With all of my recipes, I include cooking instructions for conventional ovens, fan ovens & also Agas. Here’s how to cook this recipe in an Aga…
Bake the cookies in the baking oven on the bottom set of runners. Use the boiling plate to brown the butter.
Equipment Used
Please note that these are affiliate links & I may make a small commission if you make a purchase using these links, at no extra cost to you. For more information, click here.
More Cookie Recipes To Try!
- Kettle Chip Chocolate Chip Cookies
- Chewy Ginger Molasses Cookies
- Almond Croissant Chocolate Chip Cookies
- Black Sesame Cheesecake Cookies
- Miso Banana Bread Chocolate Chip Cookies
- Brown Butter S’more Cookies
If you have enjoyed this recipe for brown butter Oreo chocolate chip cookies, it would mean a lot if you could leave a review & rating. And if you’d like to stay up to date with future recipes, follow us on Instagram & TikTok!
Brown Butter Oreo Chocolate Chip Cookies
Equipment
- Stand Mixer
- Medium Saucepan
- Sieve
- Baking Trays
- Large Circular Cookie Cutters
Ingredients
- 200 g Unsalted Butter
- 1 tsp Toasted Milk Powder (See Notes)
- 150 g Dark Brown Sugar
- 125 g Caster Sugar
- 1 Large Egg
- 2 Egg Yolks
- 1 tsp Vanilla Paste
- 300 g Plain Flour
- ¾ tsp Baking Powder
- ¾ tsp Bicarbonate Of Soda
- ½ tsp Table Salt
- 150 g Dark Chocolate
- 150 g Oreos (1 Packet)
- Sea Salt – To Finish
Instructions
Cookie Dough
- Start by browning 120g of the butter. To do this, chop the butter into evenly sized pieces then place into a medium saucepan. Place over a medium heat & allow to melt, stirring regularly with a spatula. Keep cooking, until the butter starts to foam, smell nutty & you can see that the milk solids in the bottom of the pan have turned golden brown.
- Once the butter has browned, take it off the heat & immediately stir in the toasted milk powder. Transfer the butter to a bowl & leave to cool to room temperature. In the meantime, chop the remaining 80g of butter into small pieces & leave to soften at room temperature.The brown butter should take around 30 minutes to cool.
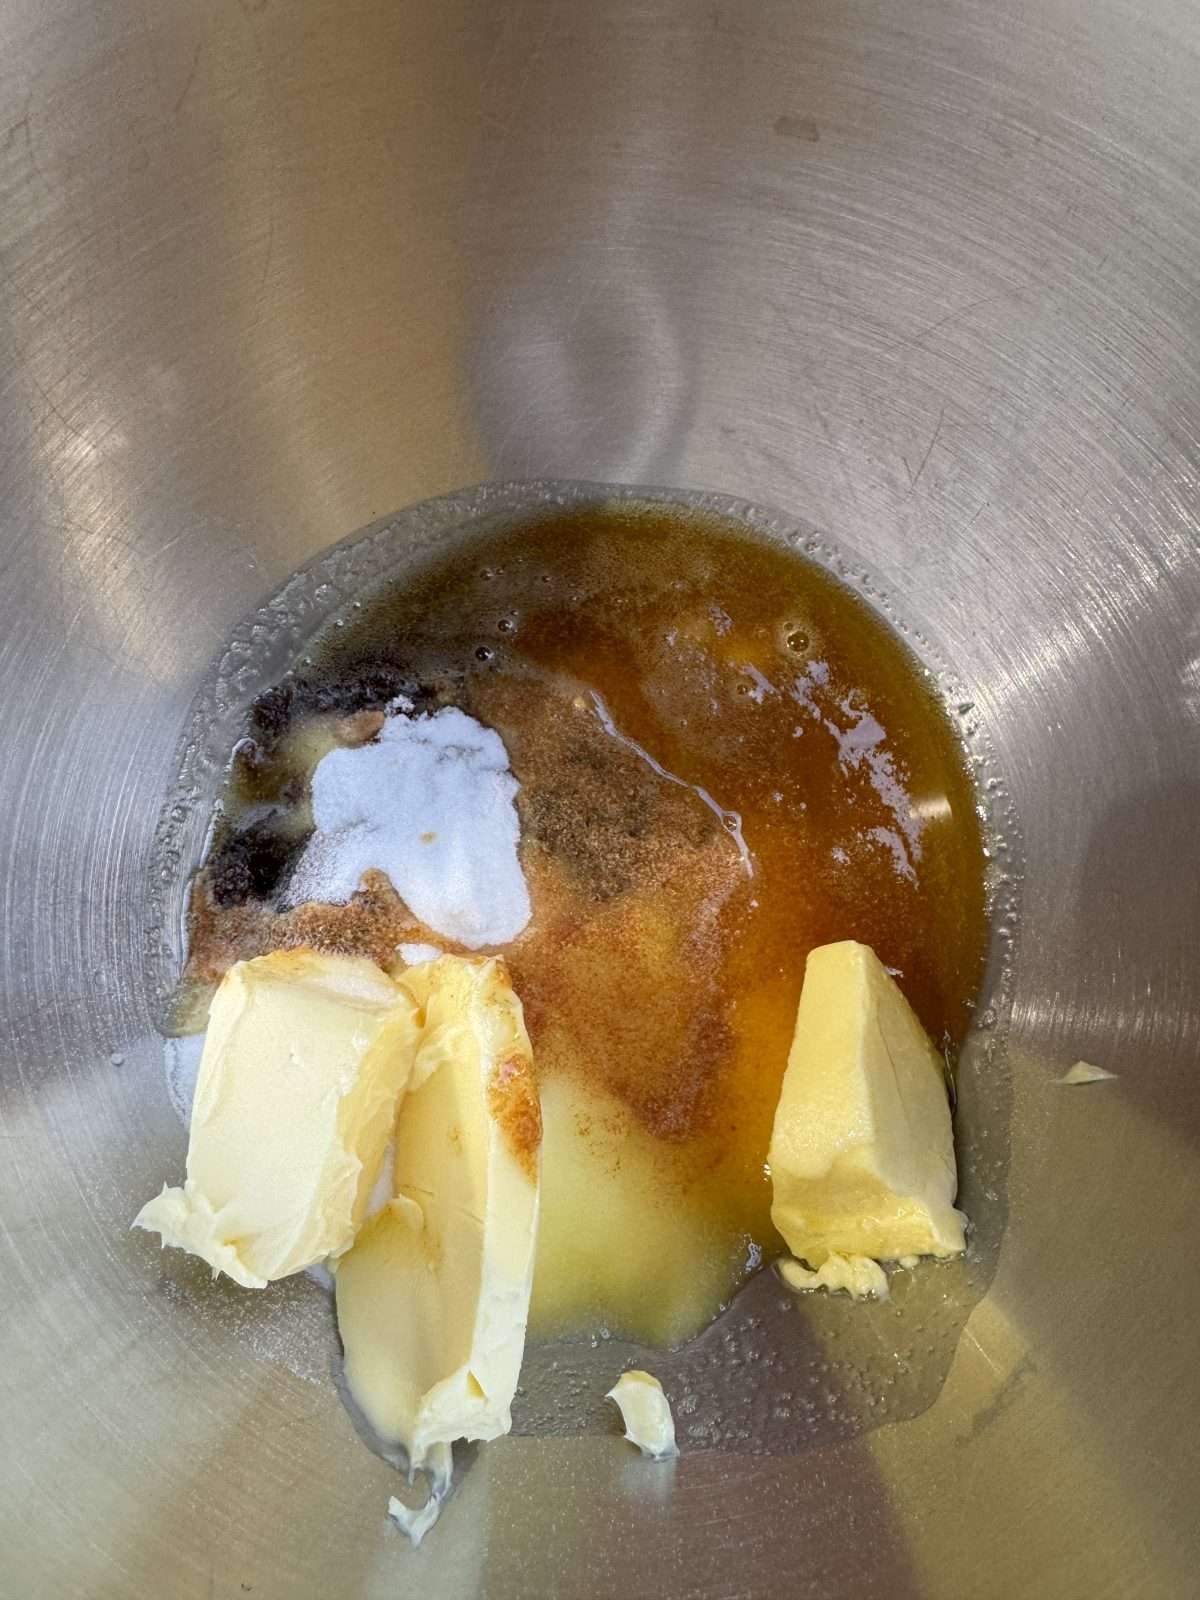
- Next, add both of the butters, the dark brown sugar & caster sugar to the bowl of a stand mixer with the paddle attached. Beat on a medium speed for 1-2 minutes, until combined.Be careful not to over mix the butter & sugar, we don’t want to add too much air into the cookie dough as this will affect the baked cookies.
- In a separate bowl, lightly beat the egg, yolks & vanilla together. Then slowly pour into the butter, with the mixer running on medium speed. Stop mixing once the eggs are just incorporated.
- Next, sift the flour, baking powder, bicarbonate of soda & salt into the butter then mix with a spatula until just combined.
- Roughly chop 100g of the dark chocolate & add into the cookie dough. Roughly chop the oreos then add into the cookie dough as well.
- Using a spatula, stir the cookie dough, chocolate & oreos together then chill in the fridge for 30 minutes, to firm up slightly.
- Whilst the cookie dough is chilling, chop the remaining 60g of dark chocolate into 13 chunks.
- Using a cookie scoop (or a spoon), portion the chilled cookie dough into 13 equally sized portions. Each should weigh around 80 grams.
- With your hands, roll a portion of cookie dough into a ball then press a dark chocolate chunk into the top. Repeat with the remaining dough.
- Place the balls of cookie dough into an airtight container & refrigerate overnight.
Baking The Cookies
- The next day, preheat an oven to 180°c/160°c fan (356°f/320°f).
- Place 3-4 balls of cookie dough onto a lined baking tray, making sure that there’s plenty of room between them.
- Bake the cookies for 9 minutes then open your oven door, lift up the baking tray inside the oven by a few inches then let it drop down against the oven rack. Use enough force so that the cookie starts to deflate. (This is the “Pan Banging” method.)
- Bake for a further 2 minutes then repeat the pan banging process.
- Bake for another 2 minutes (bringing the total bake time to 13 minutes) then remove from the oven.
- Using a large, round cookie cutter, scoot each cookie into a perfect round shape.
- Sprinkle each cookie lightly with Maldon salt then leave on the tray, to cool completely.
- Repeat the cooking process with the remaining cookies, baking 3-4 cookies at a time.


I’ve been trying out various brown butter cookie recipes recently and this is the best one I’ve found. I really enjoyed the taste and consistency of these cookies. A couple of notes – I followed the recipe exactly, including the chill time. I have a fan oven, so I baked the first batch of cookies at 160c. This caused them to spread into each other and they ended up quite thin. They were still tasty, but didn’t exactly have the look I was going for. The next batch I baked at 180c for 11 minutes, and they came out perfectly baked, sized and rounded. I had no more issues with the cookies spreading.
As for the pan-banging method, I do this with any cookies I bake, and this time I followed the exact method stated in the recipe. However, after a bit of trial and error, I found it unnecessary and a little complicated to bang the cookies twice in two minute intervals. Instead, I allowed the cookies to bake until they were done, and then I banged them a couple of times on the counter after taking them out. In my opinion, this yielded a desirable (and similar) result. I was very happy with how the cookies looked after doing this and found the whole method to be less complicated.
These cookies also took a lot longer to fully cool and firm up than other recipes I have tried, which isn’t necessarily a bad thing, just something to keep in mind! They were still falling apart when I tried to pick them up off the cooling rack after being on the counter for over an hour, but leaving them alone for a few hours did the trick (although they tasted amazing when they were freshly out the oven!).
Overall, these were fantastic cookies. They were very easy to make and the taste was genuinely great. I typically find other cookies to have an odd, almost eggy aftertaste to them, but these didn’t. They also had a nice, firm structure and were able to hold their shape, whilst still maintaining a nice chewiness. I really liked the thickness too – weighing out 80g portions is definitely the way to go. I will definitely be making these again – they’ll be my go-to when making chocolate chip cookies from now on 🙂
Thanks for the recipe!
That’s awesome, thanks for the feedback. Glad you liked them!