Classic Cherry Pie
Here’s how to make classic cherry pie from scratch! There’s a flaky pie crust & a sweet cherry & almond filling that’s thick enough to slice perfectly.
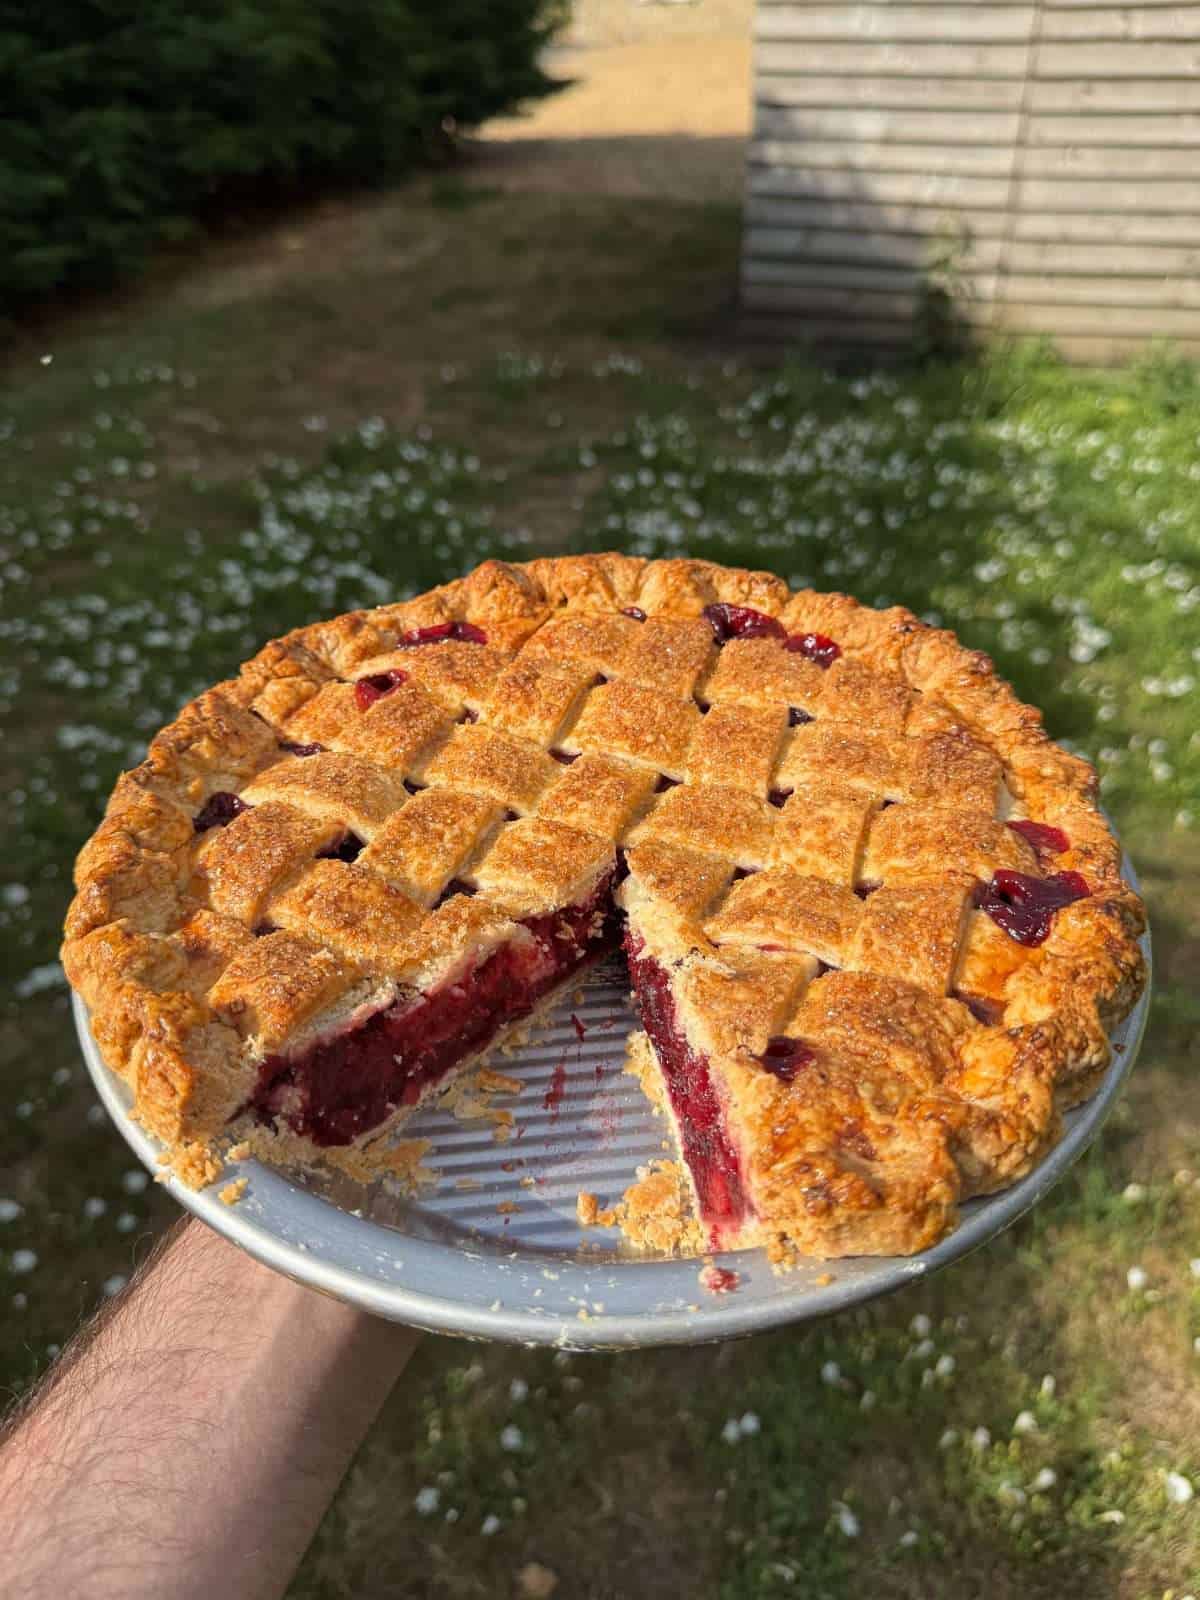
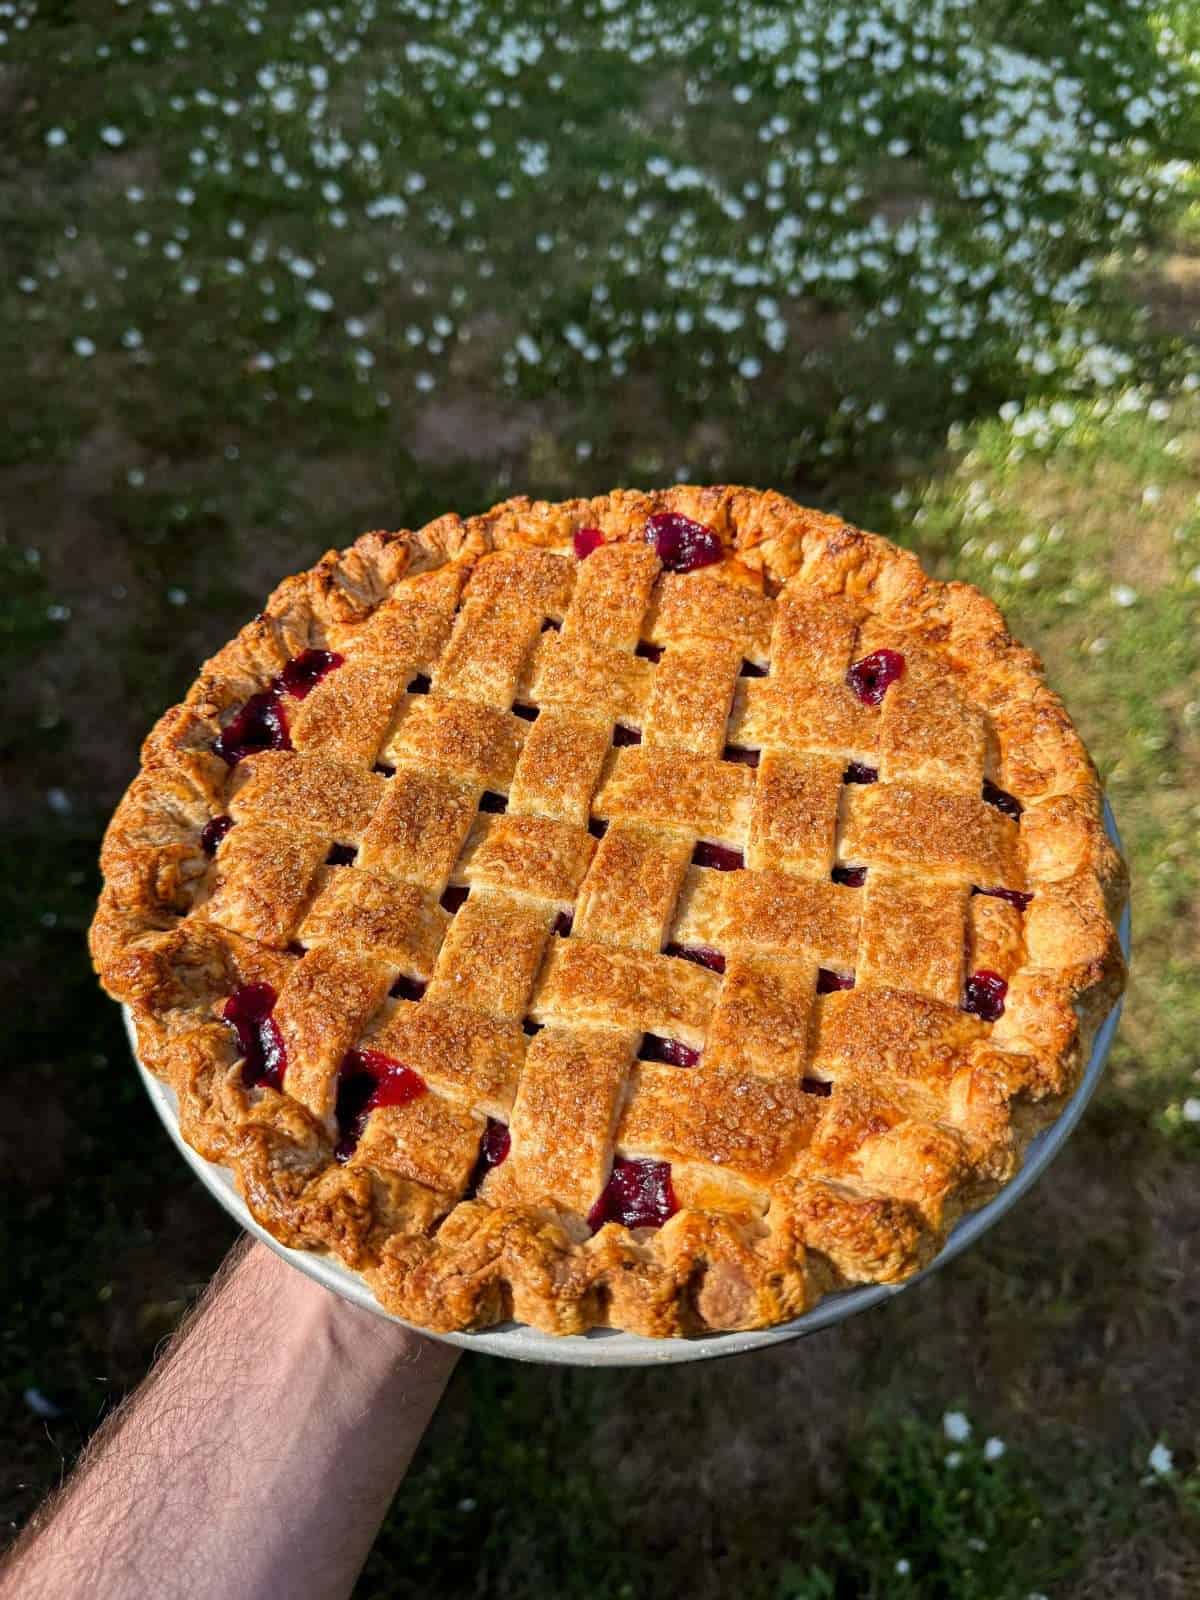
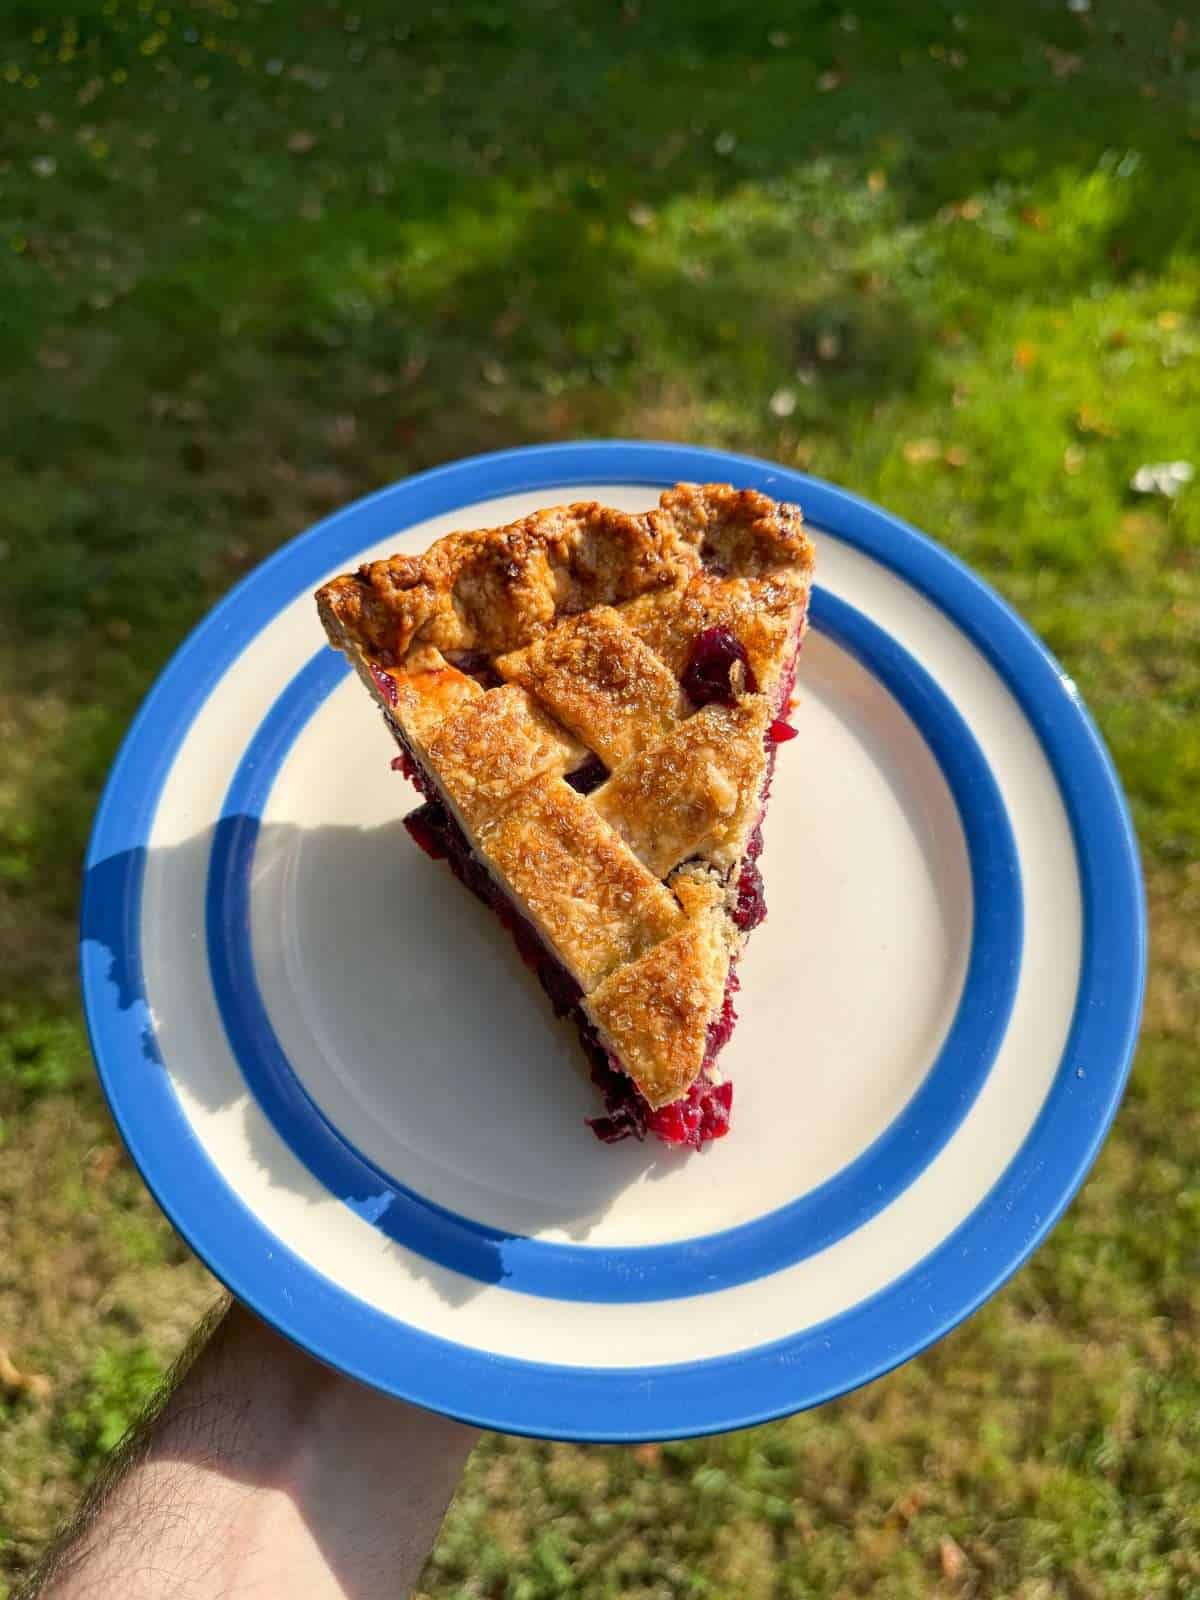
It’s cherry season, so it’s the perfect time of year to make a classic cherry pie! This is an incredibly easy summer dessert that’s perfect for sharing & is a guaranteed crowd pleaser. Serve this pie with ice cream or custard & you’re onto a real winner.
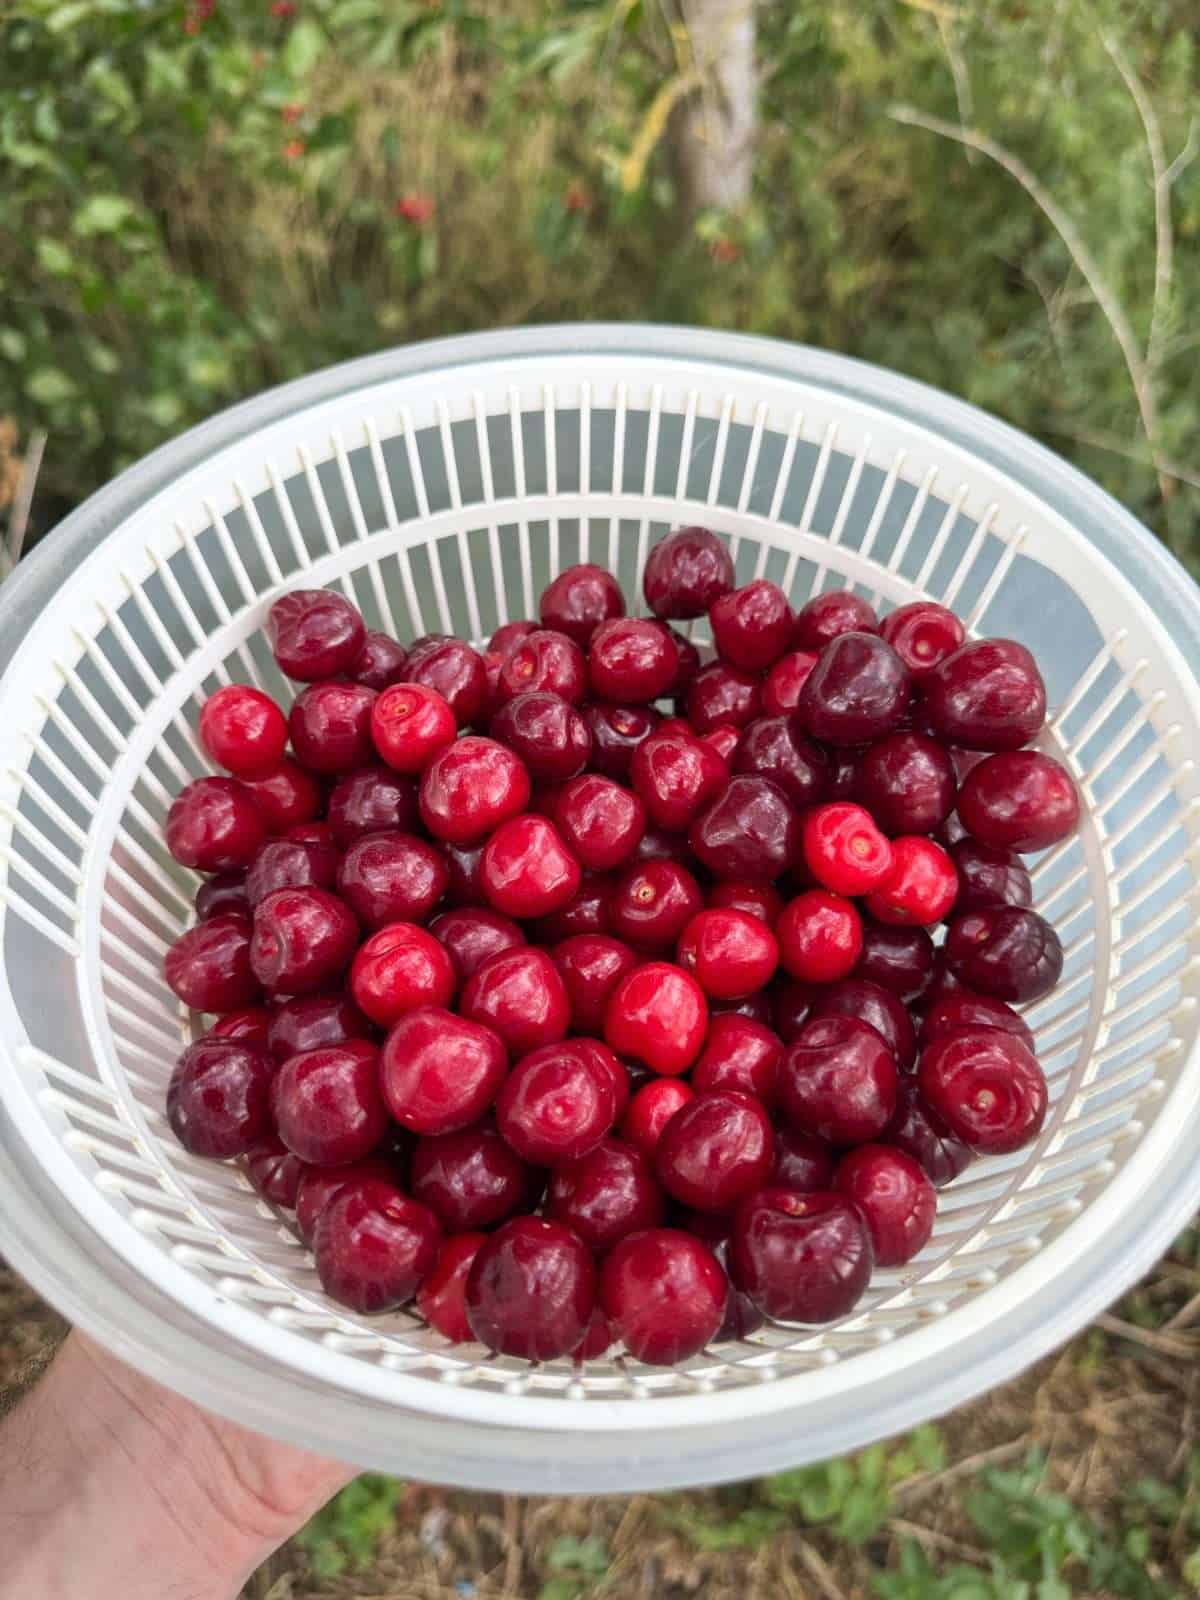
Now let’s talk about the components of this pie; there’s only 2! First, we have a homemade pie crust that’s made with a mix of fats so it perfectly buttery, flaky & crisp (plus it’s super easy to work with!). Then there’s the jammy cherry filling that’s made with seasonal cherries & is packed full of flavour. There’s some really good vanilla in there, as well as a splash of almond extract, some lemon juice & just the right amount of sugar. I used some cherries from the cherry trees that we’ve got on the farm but shop bought is fine. You can even use frozen cherries!
If you’re looking for some more dessert inspiration then check out our ever growing collection of dessert recipes! There’s something for everyone here, from homemade ice creams, to pies, cheesecakes, crumbles & tiramisu. Plus, take a look at my “If I Had A Bakery” substack newsletter for more exclusive baking recipes…
What You’ll Need
- Cherries – You can use sweet or sour cherries for this pie, or a mix of both. If you’re using sour cherries, you’ll probably need to add more sugar to the filling. I’d recommend trying it though before you thicken it with the cornflour. The easiest way to pit the cherries, is to use a cherry pitting tool (these are available online).
- Pie Crust – We’re making our pie crust with a mix of butter & lard. The butter adds flavour & the lards make it extra flaky & sturdy. We’re also adding a small amount of sugar to the dough for sweetness, plus a splash of apple cider vinegar which makes it flakier.
- Almonds – Cherries & almonds work really well together! I add almond extract to the filling & a small amount of ground almonds into the base of the pie which helps prevent the base from going soggy.
- Cornflour – Used to thicken the cherry filling. It’s important to get the filling hot enough once we add in the cornflour, so that it activates & thickens properly.
- Demerara Sugar – We’re sprinkling demerara sugar on top of our pie before baking, which gives it extra crunch & helps the pastry brown in the oven.
- Egg Wash – Brushing a light layer of egg wash on top of our pie gives it a deeper, golden brown finish once baked. To make an egg wash, I whisk an egg & a teaspoon of milk together.
How To Make A Classic Cherry Pie
A good homemade cherry pie isn’t difficult to make but does require plenty of chilling time. The pie crust needs several hours in the fridge & the filling is pre cooked on the stove but needs to cool fully. My point is, it’s best to make this pie the day before you need it; it’s not a last minute dish!
- Pie Dough
We’re making a double pie crust, half will be used for the bottom crust & the other half for the lattice top. This is made the classic way, by rubbing fat into flour (plus sugar & salt) then adding in ice cold water & a splash of vinegar, to make a dough. Once made, we need to chill the dough in the fridge for at least 2 hours before using. - Prep Cherries
To prep our cherries, we need to remove the stones using a cherry pitting tool. Then we cut any big cherries in half but leave any smaller ones whole. This gives the filling some extra texture but also ensures that all the fruit cooks evenly. - Cook Filling On The Stove
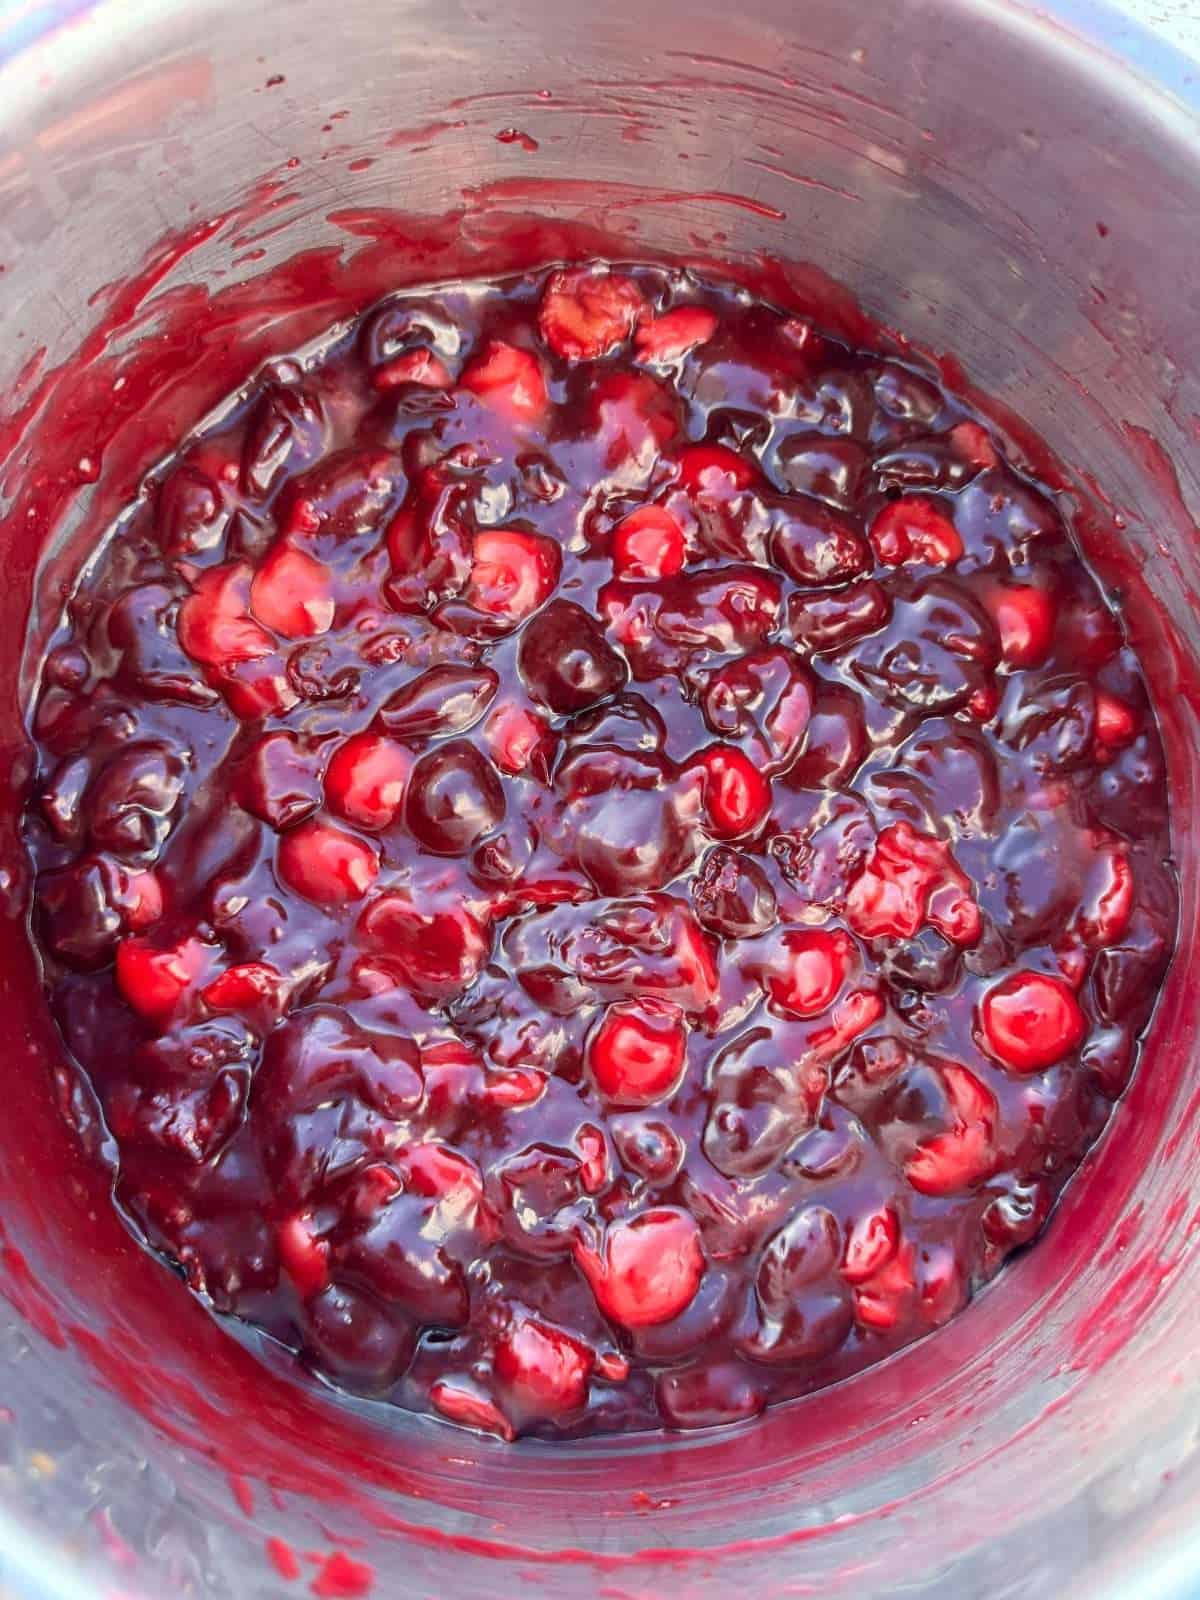
To make the filling, we add the cherries into a large pan with sugar, butter, lemon juice & a pinch of salt then cook over a medium-low heat until the fruit is soft & has released lots of juice. This will take 5-10 minutes. - Thicken Filling
Next, we make a slurry with cornflour & water then we stir it into the cherries. Then we turn the heat up to medium & keep cooking the filling until it has thickened, which will take 2-3 minutes. To finish, we take the pan off the heat then stir in vanilla paste & almond extract then we let the filling cool completely before using. I like to chill it in the fridge for at least a couple of hours but it can be used at room temperature. - Assembly
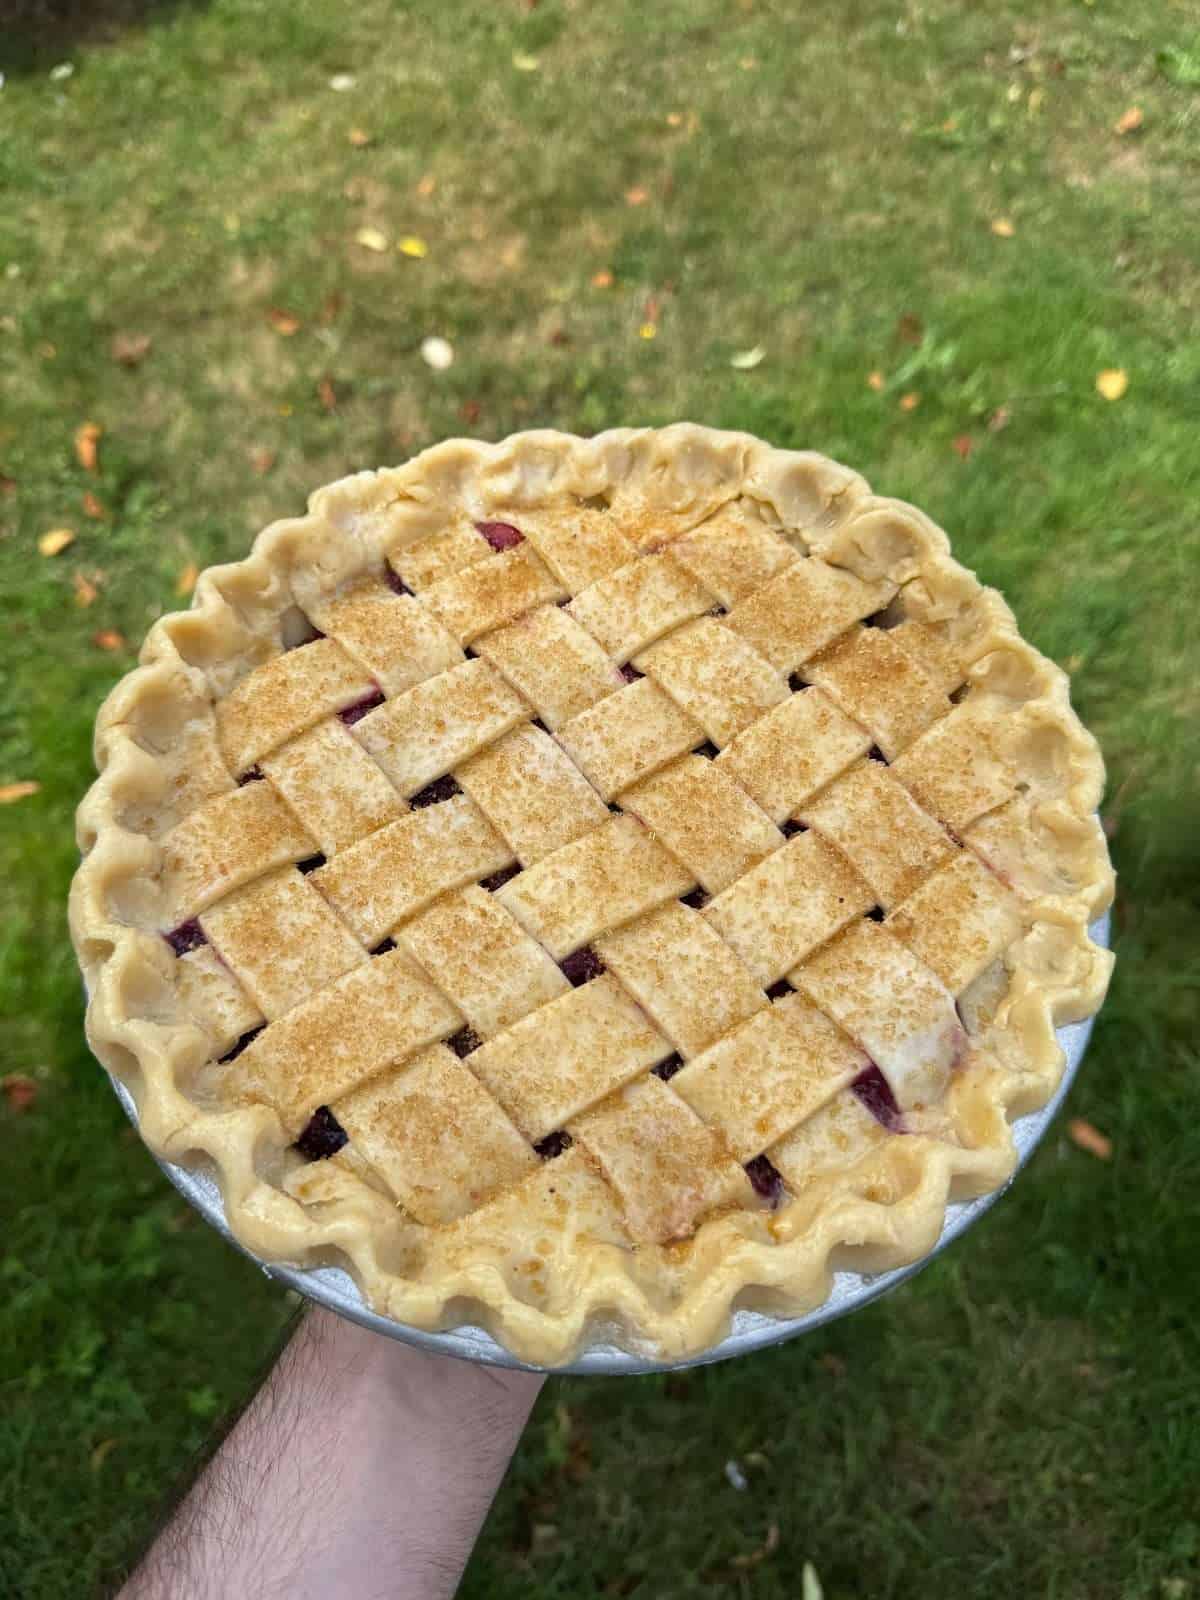
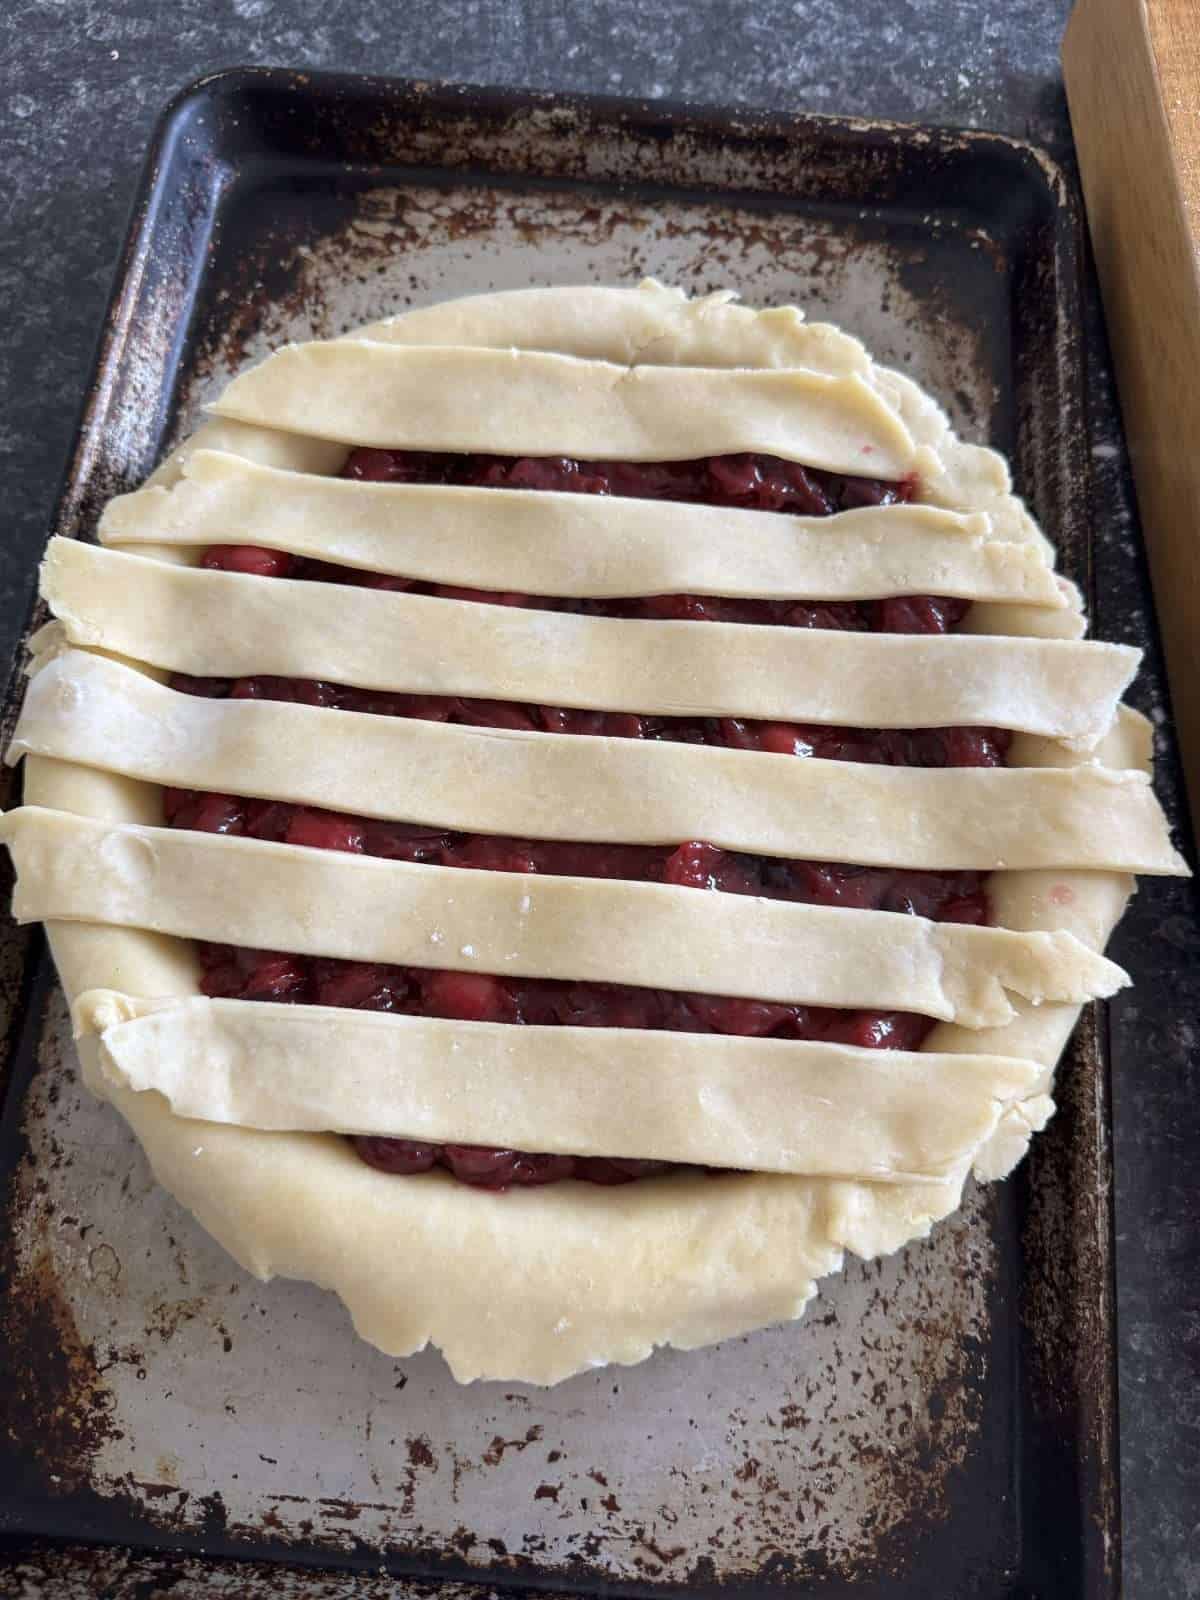
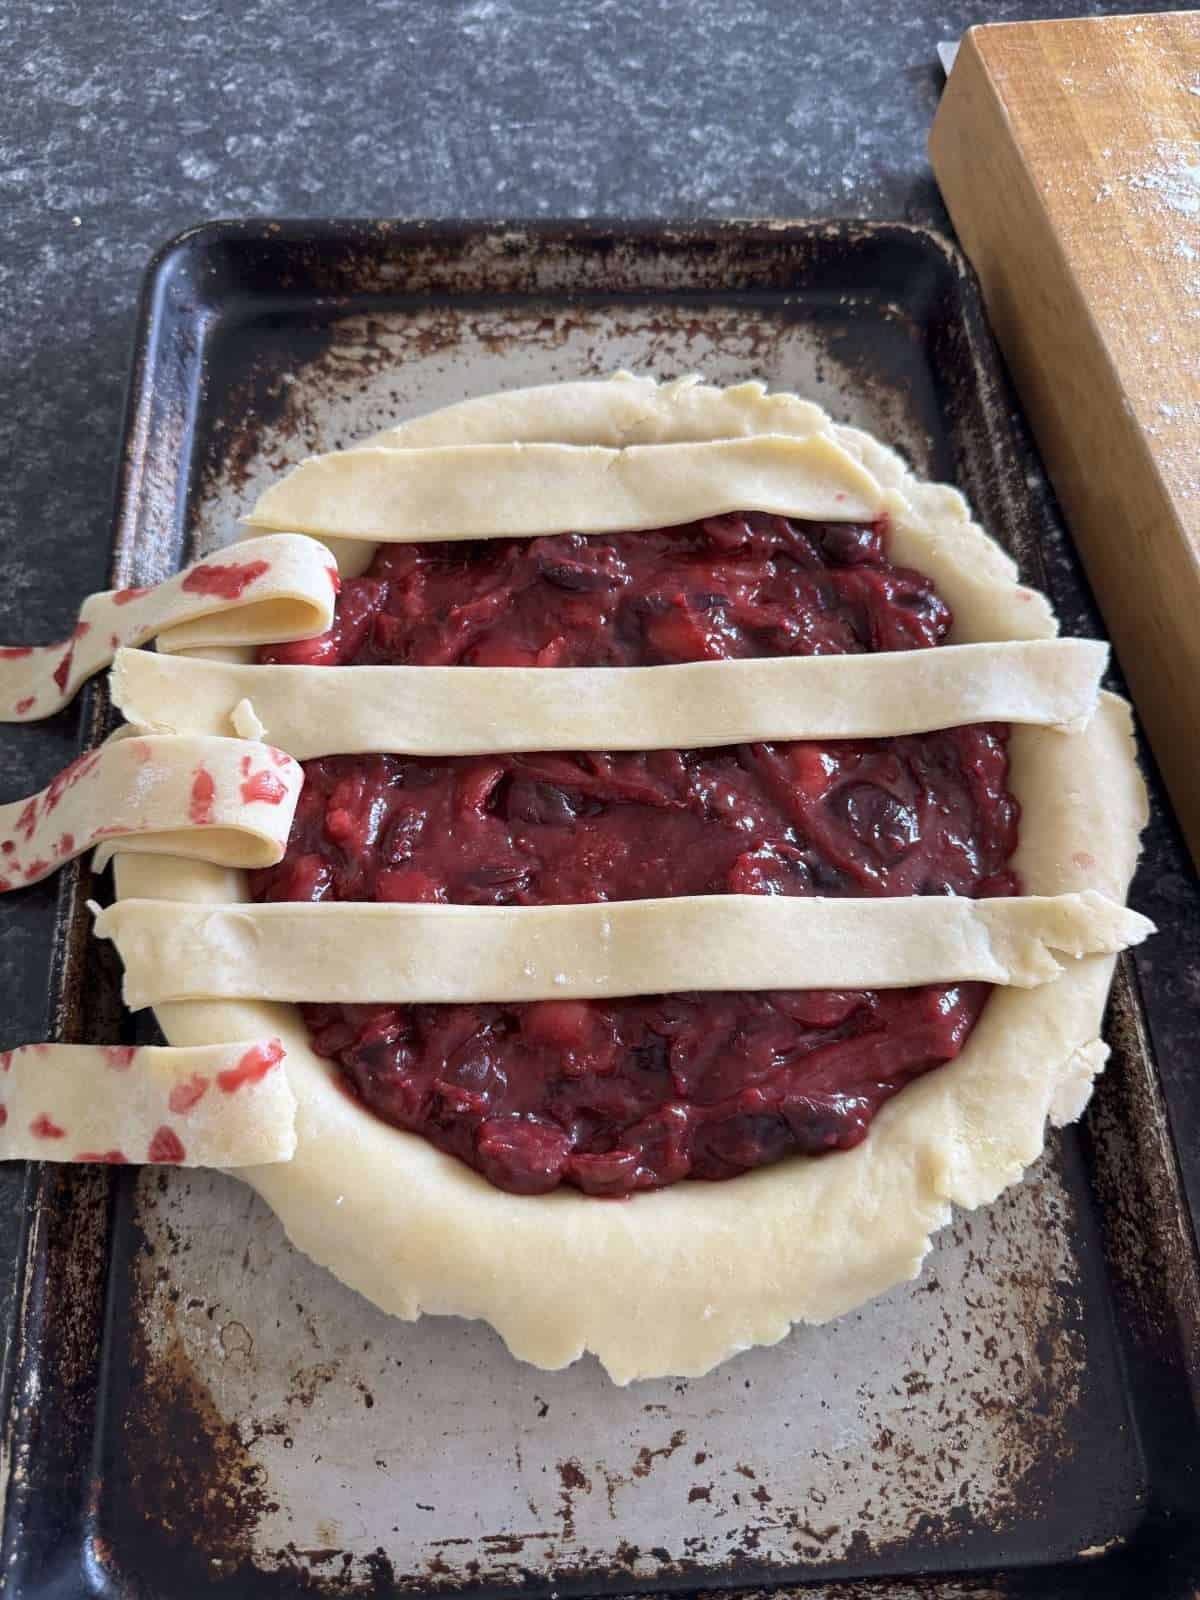
To assemble the pie, we roll one of the crusts out into a large disc (about an inch wider than the dish) then use it to line a 9″ pie dish, leaving a couple of centimetres of pastry overhanging the edge of the dish. Then we sprinkle a light layer of ground almonds into the bottom of the pie then spoon the cherry filling on top. We top the pie with a pastry lattice, crimp the edges then chill in the fridge for at least an hour before baking. - Preheat Oven
Before baking the pie, we need to preheat an oven to 220°c/428°f. We’re also going to place a baking tray inside the oven at the same time, which we’ll be placing the pie on to bake (this helps cook the bottom of the pie properly). - Baking
When we’re ready to bake the pie, we brush the top with egg wash then sprinkle the lattice with demerara sugar. Then we bake the pie for 20 minutes then turn the temperature down to 180°c/356°f & continue cooking until the pastry is a deep golden brown & the filling is bubbling. This will take another 45-50 minutes. - Cooling & Serving
Once our pie is cooked, we let it cool completely before serving. I’d recommend cooling it to room temperature then chilling it in the fridge overnight.

How To Make A Lattice Pie Top
Lattice pie crusts look impressive but they’re actually pretty easy to make! All you’ll need is a sturdy pie dough, a ruler & something to cut the pastry with; I like to use a pizza cutter. This is the way that I make a lattice for a 9″ pie…
- First, roll your pie dough out on a lightly floured surface, into a 12″ circle.
- Cut the pastry into 12, 1 inch wide strips. You’ll need a ruler here…
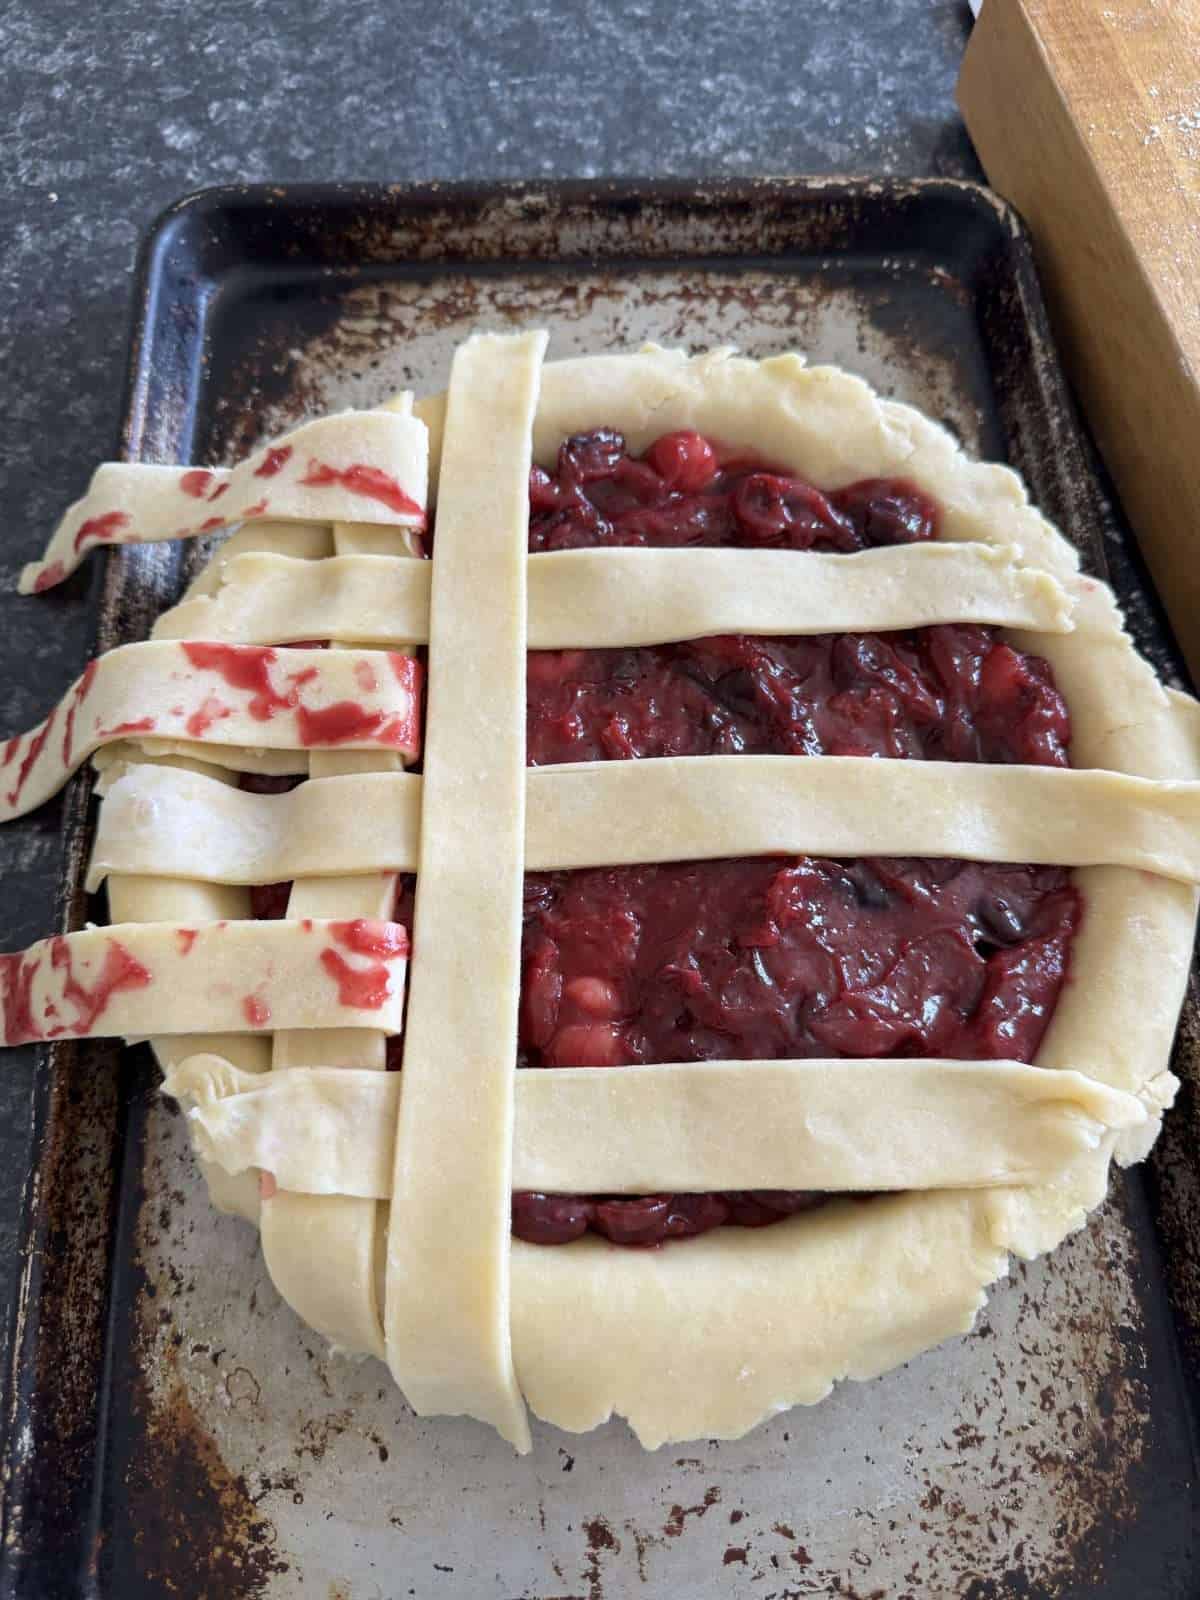
- Place 6 of the strips on top of the pie so that they’re laying across the top horizontally and are evenly spaced apart.
- Fold every other strip back so that they’re hanging off the edge of the pie dish then place one of the unused strips next to them facing vertically. Fold the strips back over the top.
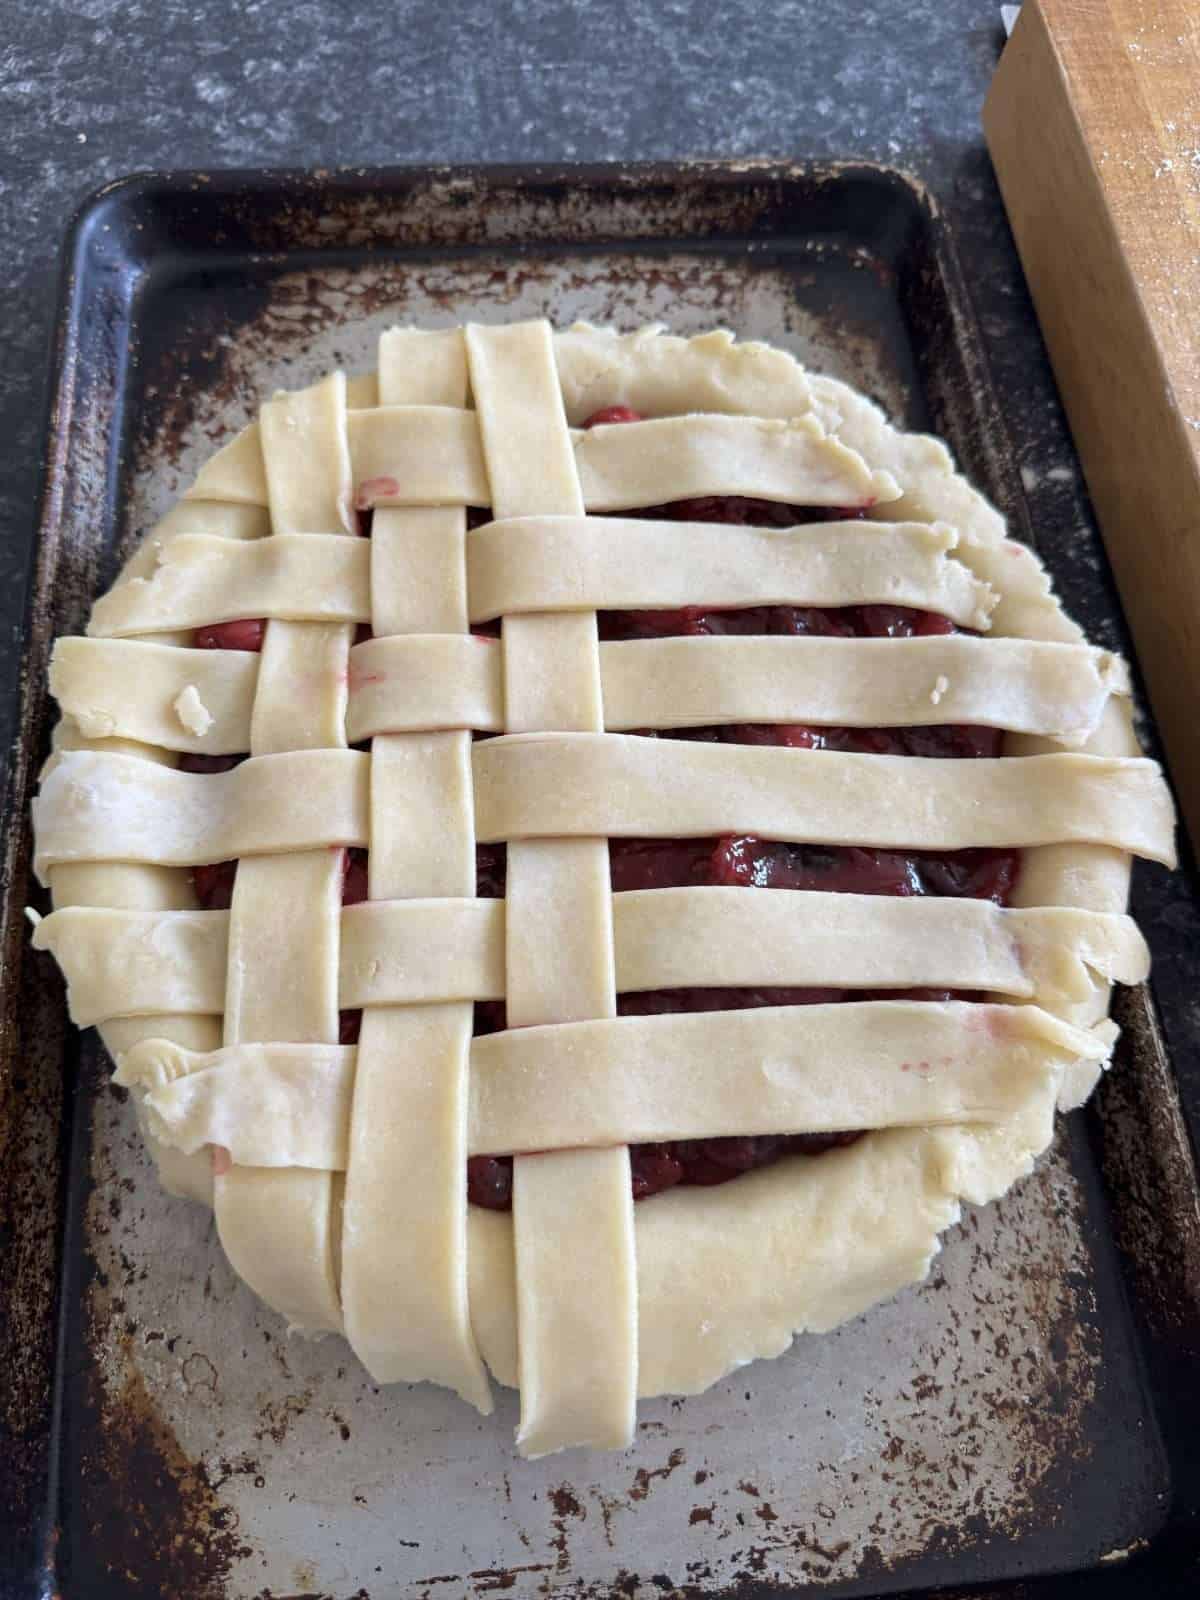
- Next, fold the other 3 horizontal strips back, place another unused strip next to it, facing vertically then fold the horizontal strips back over. Repeat this process, with alternating strips of pastry until you’ve used all the pastry up & you’ve got a complete lattice.
- If needed, use a pair of scissors to trim the edges of the lattice strips so that they’re sitting on the edge of the pie dish.
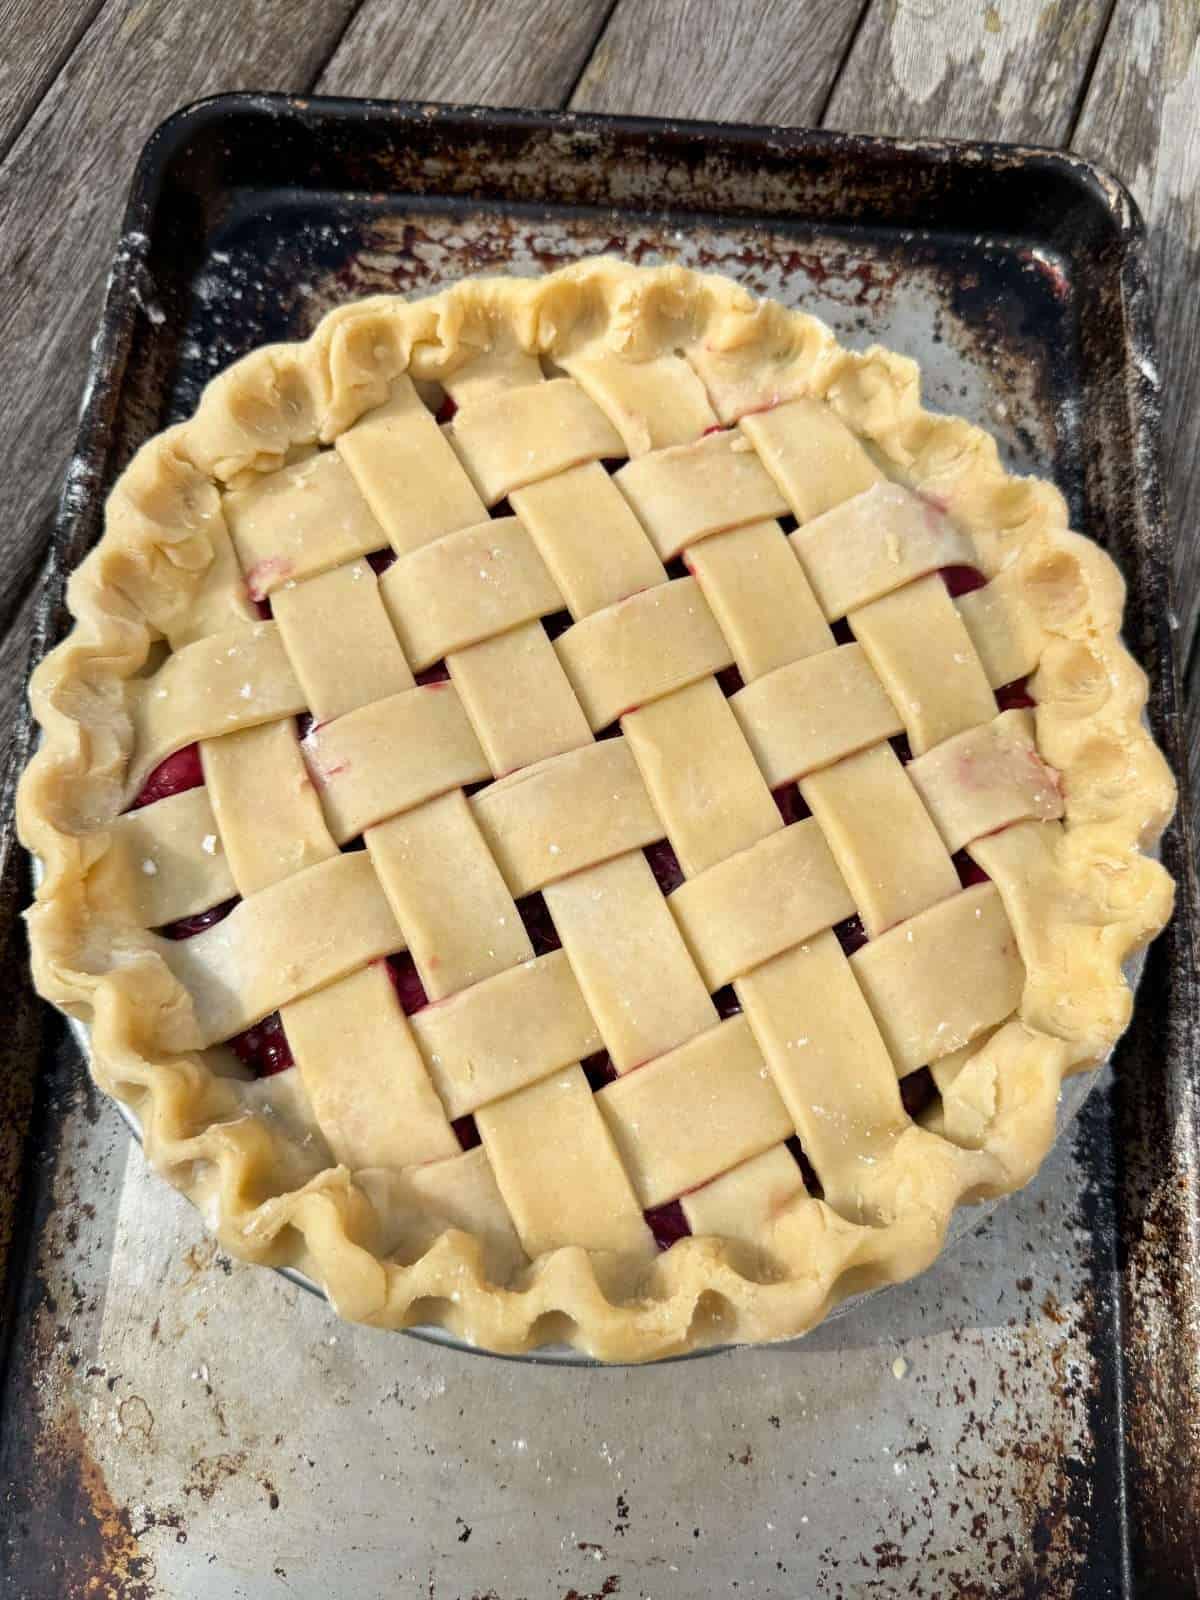
- Fold the overhanging pastry (from the bottom crust) over onto the edge of the pie dish then crimp as desired.
Tips & Tricks
- Pre cook the cherry filling on the stove & thicken it with cornflour. This ensures that the filling will be perfectly set once cooked & cooled down and you’ll get perfect slices of cherry pie!
- Use a mix of lard & butter in the pie crust, for the best balance between flavour & flakiness.
- Sprinkle a tablespoon of ground almonds into the base of the pie before adding in the filling. This is a tip from Edd Kimber & it helps prevent the filling making the pastry soggy.
- Sprinkle a generous amount of demerara sugar on top of the pie before baking. This gives the pastry extra crunch.
- Bake the pie at a higher temperature to begin with then turn the oven down slightly. This helps brown the pastry & gives it extra flakiness. We bake the pie on a preheated baking tray as well, to help properly cook the bottom of the pie, which ensures that it doesn’t get a soggy bottom!
Frequently Asked Questions
Both sour cherries & sweet cherries will work for cherry pie or you can use a mix of both. If you’re using sour cherries, you’ll need to add more sugar to the filling.
To cook cherry pie in an Aga, use the simmering plate to cook the cherry filling. Bake the pie in the roasting oven on the bottom set of runners for 20 minutes then move over to the bottom set of runners in the baking oven for the rest of the cook.
In order for the filling to be completely set, cherry pie needs to be cooled completely before you cut into it. You can either let the pie cool at room temperature for at least 4 hours or if you have time, give it an overnight chill in the fridge.
Cherry can be served either hot, cold or at room temperature. To serve warm, it’s best to microwave individual slices. To serve at room temperature, leave slices out of the fridge for 30 minutes before serving.
Cherry pie goes exceptionally well with vanilla ice cream, custard or vanilla whipped cream!
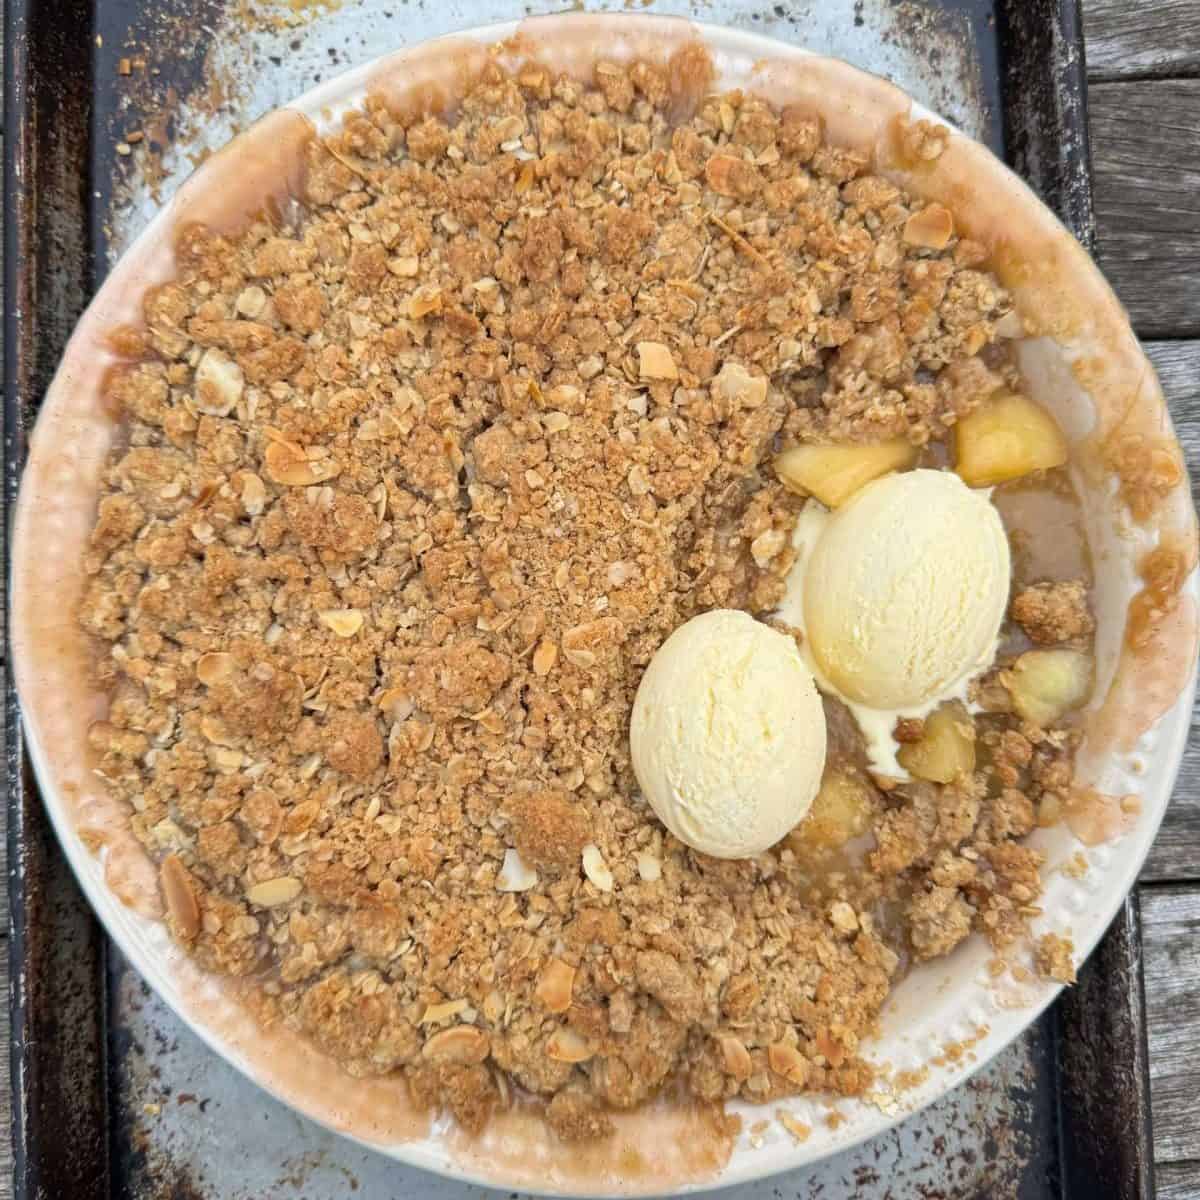
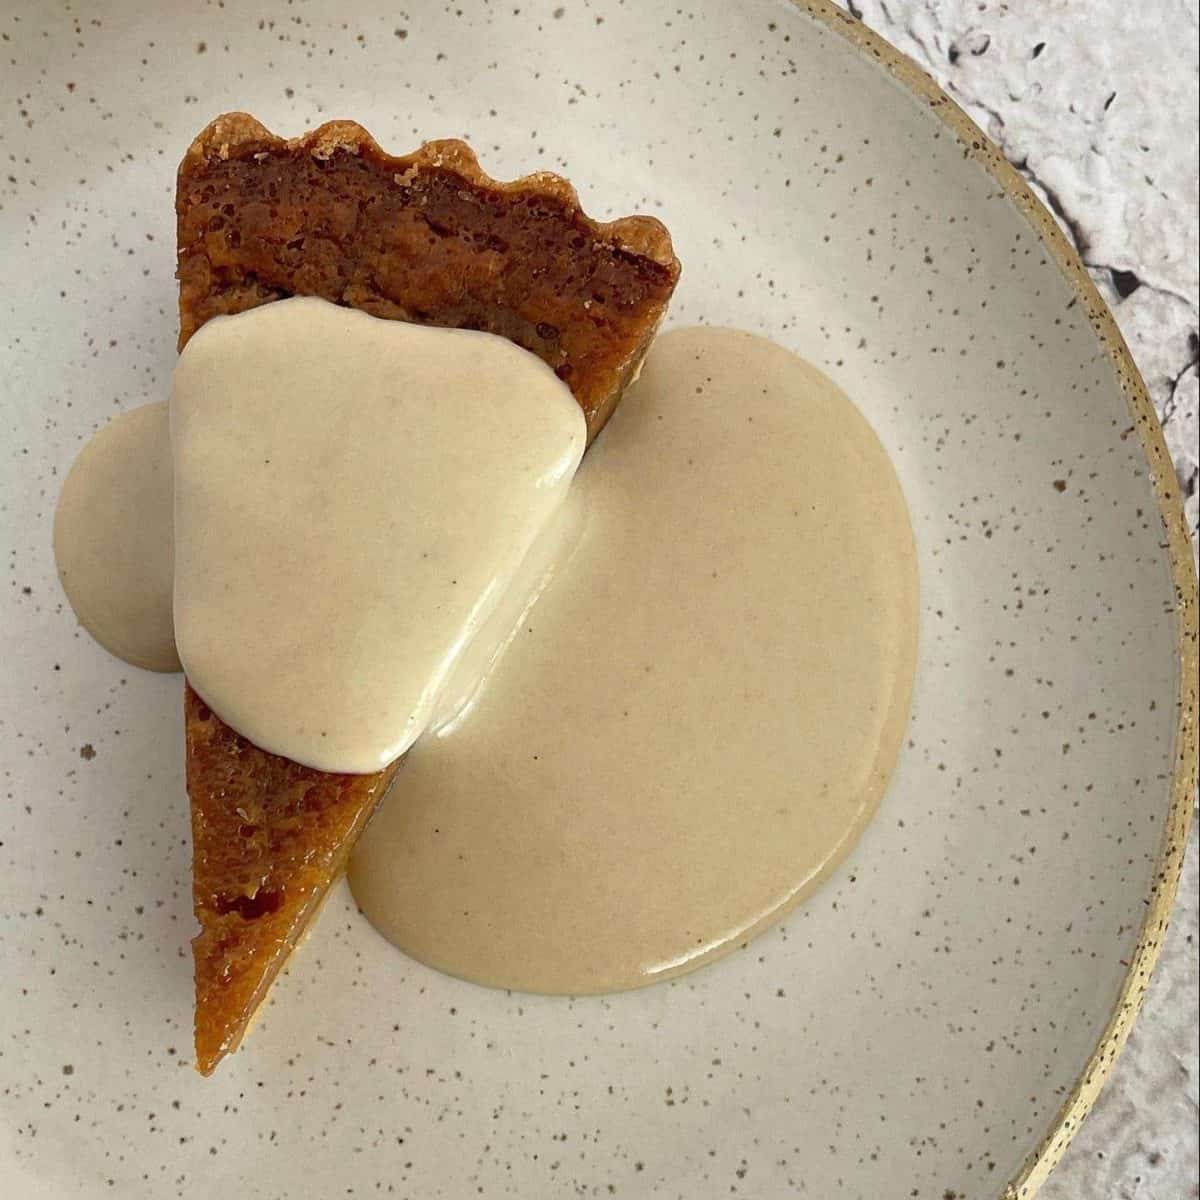
More Desserts To Try!
- Cherry Bakewell Crumble
- Cake Crumb Treacle Tart
- Apricot & Almond Frangipane Tart
- Pear Tarte Tatin
- Brown Butter Hobnob Cheesecake
- Apple & Walnut Strudel
If you have enjoyed this cherry pie recipe, it would mean a lot if you could leave a review & rating. And if you’d like to stay up to date with future recipes, follow us on Instagram & TikTok!

Classic Cherry Pie
Equipment
- 9" Pie Dish
- Cherry Pitter
- Juicer
- Large Saucepan
- Rolling Pin
- Ruler
Ingredients
Pie Crust
- 350 g Plain Flour
- 30 g Caster Sugar
- ½ tsp Fine Sea Salt
- 150 g Unsalted Butter (Cold & Cut Into 1cm Chunks)
- 65 g Lard (Cold & Cut Into 1cm Chunks)
- 50 g Ice Cold Water
- 2 tsp Apple Cider Vinegar
Cherry Filling
- 800 g Pitted Fresh Cherries (See Notes)
- 200 g Caster Sugar
- 50 g Unsalted Butter
- 1 tbsp Lemon Juice
- A Pinch Of Sea Salt
- 40 g Cornflour
- 40 g Cold Water
- 1 tsp Vanilla Paste
- 1 tsp Almond Extract
Assembly
- 1 tbsp Ground Almonds
- 1 Egg
- 1 tsp Milk
- Demerara Sugar
Instructions
Pie Crust
- Place the flour, sugar & salt into a large mixing bowl, whisk to combine then add in the cold butter & lard.
- Using your fingers, rub the fats into the flour until the pieces are roughly the size of peas. We want to keep the pieces of fat fairly large as this makes the pastry extra flaky!
- Next, mix the cold water & vinegar together then add into the flour. Mix by hand, until a rough dough forms. Stop mixing as soon as this happens!
- Tip the dough out onto a clean work surface & knead gently until smooth (be careful not to overwork the pastry) then cut in half, flatten into discs & wrap in clingfilm. Refrigerate for at least 2 hours.
Cherry Filling
- Cut the pitted cherries in half if they're big. If they're small, keep them whole.
- Add the cherries into a large saucepan, along with the sugar, butter, lemon juice & salt. Set the pan over a medium-low heat & cook, stirring frequently until the cherries have softened slightly & they have released lots of juice. This will take 5-10 minutes.Give the cherries a taste before thickening, adding in more sugar if needed.
- Whilst the cherries are cooking, place the cornflour & water into a bowl then stir to make a smooth paste.
- Once the cherries are ready, turn the heat up to medium then stir in the cornflour paste. Continue cooking, stirring regularly until the juice has thickened, this will take 2-3 minutes. The juice needs to be just bubbling, in order to activate the cornflour.
- Take the pan off the heat then stir in the vanilla paste & almond extract. Transfer the filling to a container, leave to cool then chill in the fridge until completely cold (or for up to a day).
Assembly
- Take one piece of pastry out of the fridge, leave to sit out for 20 minutes then roll out on a lightly floured surface into a disc that's an inch bigger than your pie dish. The pastry should be 3-4mm thick.Lightly dust the top of the pastry with flour to stop it sticking to your rolling pin. To get a uniform circle, turn the pastry a quarter turn after each roll. Take the other piece of pastry out of the fridge just before you roll out the first piece.
- Carefully roll the pastry around your rolling pin, unroll into a 9" pie dish then gently press the pastry into the tin. The pastry should be overhanging the edge by a couple of centimetres.
- Sprinkle the ground almonds onto the bottom of the pie then spoon the cold cherry filling on top. Use a spatula/palette knife to spread it out into an even layer. If your kitchen is warm, place the pie in the fridge whilst you make the lattice.
- Next, roll the other piece of pastry out into a 12" circle then cut it into 12x 1 inch strips.I find that a pizza cutter works best here!
- To assemble the lattice, place 6 of the strips on top of the pie so that they're facing horizontally & are spaced apart evenly. Fold every other strip back so that they're hanging off the edge of the tin then place one of the unused strips next to them facing vertically. Fold the strips back over the top.Next, fold the other 3 horizontal strips back, place another unused strip next to it, facing vertically then fold the horizontal strips back over. Repeat this process, with alternating strips of pastry until you've used all the pastry up & you've got a complete lattice. Use the longer strips for the middle of the pie & the shorter ones for the edges. There's a visual guide to making lattice in the post above.
- If needed, trim the edges of the lattice so that it's level with the edge of the pie dish then fold the overhanging pastry (from the bottom crust) over onto the edge of the pie dish. Crimp as desired then chill the pie in the fridge for at least an hour.
Baking
- Preheat an oven to 220°c/200°c fan (428°f/392°f). Place a large baking tray in the oven at the same time. Make sure to give the oven & tray plenty of time to heat up.
- Next, place the egg & milk into a bowl then whisk together. Brush a thin, even layer of the egg wash over the top of the pie then sprinkle a generous amount of demerara sugar over the lattice.
- Place the pie onto the preheated tray, bake for 20 minutes then turn the oven temperature down to 180°c/356°f. Continue baking for 45-50 minutes until the pastry is a deep golden brown all over & the filling is bubbling. If the pastry starts to brown too much, cover it loosely with foil.
- Once cooked, let the pie cool completely before serving. This will take at least 4 hours but if you've got time, an overnight chill in the fridge is best.I've found that a small, sharp knife works best for cutting the pie into slices!