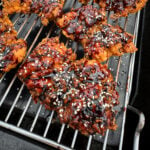
Korean Style Buttermilk Fried Chicken
Crispy buttermilk fried chicken thighs, flavoured Korean fried chicken style & glazed with sticky Korean bbq sauce. Perfect for a fried chicken sandwich!
Servings: 8 Pieces
Equipment
- Deep Fat Fryer
- Mixing Bowls
- Saucepan
- Wire Rack
- Baking Tray
Ingredients
- 8 Chicken Thighs (Skinless & Boneless)
Buttermilk Brine
- 500 g Buttermilk
- 3 Garlic Cloves (Peeled & Grated)
- A 1" Piece Of Fresh Ginger (Peeled & Grated)
- 1 tsp Smoked Paprika
- ½ tsp Table Salt
- ¼ tsp Chilli Powder
Dredge
- 300 g Plain Flour
- 80 g Cornflour
- 1½ tsp Table Salt
- 1 tsp Smoked Paprika
- 1 tsp Garlic Powder
- ½ tsp Ground Ginger
- ¼ tsp Chilli Powder
To Finish
- Korean BBQ Sauce (See Notes)
- 1 tbsp Sesame Seeds (Toasted - See Notes)
Instructions
Buttermilk Brine
- Add all of the ingredients for the buttermilk brine into a large mixing bowl then mix to combine.
- Next, add the chicken thighs into the brine then mix well, ensuring that each piece is fully coated.
- Transfer the chicken & brine to an airtight container then leave to marinade in the fridge for 12-24 hours.The chicken needs at least 4 hours in the marinade but I've found that at least 12 hours is best!
Dredge
- Add all of the dredge ingredients into a mixing bowl, whisk to combine then set aside until needed.
First Dredge
- Once your chicken is marinated, take it out of the fridge then drizzle 3 tablespoons of the marinade into the dredge. Mix the buttermilk into the dredge with your hands – this creates those scraggly bits on the outside of the chicken!
- Next, take a piece of chicken out of the buttermilk then drop into the dredge. Toss the chicken in the flour to fully coat it, making sure to press the dredge into every nook & cranny on the chicken.Make sure to flip the chicken over several times in the dredge for proper coverage!
- Once dredged, take the chicken out of the flour, shake off any excess then place onto a wire rack set over a baking tray. Repeat this process with the remaining chicken. Don't get rid of the remaining dredge, we'll need this later on!
- When all of your chicken is dredged, let it sit at room temperature for 30 minutes. Then in the meantime, preheat a deep fat fryer to 175°c/350°f.I'd recommend using a digital food probe to double check the temperature of the oil.
Second Dredge & Frying
- Take a piece of chicken, toss it in the dredge for a second time then shake off any excess flour and carefully place into the hot oil. Repeat this process with a couple more pieces of chicken but don't overcrowd the fryer!
- Cook the chicken for 4-5 minutes, flipping it over halfway through, until the meat reaches an internal temperature of at least 75°c/167°f. Make sure not to move the chicken for at least the first 2 minutes, as this lets the dredge stick to the chicken properly (it could fall off otherwise!).Use a pair of tongs to flip the chicken over!
- Once cooked, place the fried chicken onto a wire rack set on a baking tray then leave to drain for a minute before serving. Repeat the cooking process with the remaining chicken, making sure that the oil is back up to temperature in between batches.Once cooked, the chicken can be glazed & served straight away or kept warm in an oven set to 120°c/250°f whilst you cook the rest.
Glazing
- To finish, brush each piece of fried chicken with a generous amount of the Korean BBQ sauce then sprinkle over the toasted sesame seeds.
Notes
1. Chicken Thighs - If your chicken thighs still have the skin attached, make sure to trim it off before brining. It's up to you whether you leave the bones in or not but keep in mind that the chicken will take longer to cook if it has the bone in.
2. Korean BBQ Sauce - To glaze the fried chicken, you'll need a batch of my Korean BBQ sauce. This can be made up to a week in advance! They'll be enough sauce for glazing & for serving on the side.
3. Deep Fat Fryer - For the best results, a deep fat fryer should be used for cooking the chicken. If you haven’t got one, a pan of oil heated up on the stove will work, just make sure to do this carefully! I’d recommend using vegetable oil for deep frying. I’d also recommend using a food probe to double check the temperature of your oil as home deep fat fryers tend to not be entirely accurate. Make sure to get the oil back up to temperature between batches of chicken.
4. Internal Temperature - Chicken is fully cooked once it reaches an internal temperature of 75°c/167°f. You’ll need a digital food probe to check this.
5. Sesame Seeds - I used a 50/50 mix of black & white sesame seeds but feel free to use just one type! To toast the seeds, place them into a small frying pan then cook over a medium heat for a minute or two, until fragrant & golden.
6. Keeping Chicken Warm – If you’d like to serve all of your fried chicken at the same time, it’s best to keep the cooked thighs warm in the oven whilst you cook the remaining chicken. I’d recommend a low temperature oven – around 120°c/250°f.
7. Leftovers – Leftover fried chicken should be stored in the fridge & is best eaten within 2 days. To reheat, bake in an oven set to 175°c/350°f, until piping hot (an internal temperature of at least 75°c/167°f).
