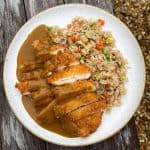
Crispy Chicken Katsu Curry
Our crispy chicken katsu curry is the ultimate midweek meal! Serve the fried chicken & curry sauce with fried rice & you're onto a winner.
Servings: 4 Portions
Equipment
- Large Saucepan
- Jug Blender
- Deep Fat Fryer
- Microplane
- Digital Food Probe
- Meat Tenderising Hammer
Ingredients
Katsu Curry Sauce
- 2 Large White Onions
- 3 Large Carrots
- 4 Cloves Garlic
- 1" Piece Of Fresh Ginger
- 2 tbsp Vegetable Oil
- 3 tbsp Mild Curry Powder
- 1 tsp Turmeric
- 2 tbsp Plain Flour
- 850 ml Chicken Stock See Notes
- 250 g Coconut Milk
- 2½ tbsp Light Soy Sauce
- 1½ tbsp Dark Brown Sugar
- 1 Bay Leaf
- 2 tsp Honey
- 1 tbsp Sriracha Optional
Fried Chicken
- 4 Chicken Breasts
- 120 g Panko Breadcrumbs
- 70 g Plain Flour
- 3 Large Eggs
- 1 tbsp Milk
To Serve
- 1 Batch Fried Jasmine Rice See Notes
Instructions
Katsu Curry Sauce
- Peel the onions, carrots, garlic & ginger. Finely chop the onions & carrots and grate the garlic & ginger.
- Place a large saucepan over a medium heat then pour in 2 tbsp of vegetable oil. Let it heat up for a minute or so then add in the onions & carrots, plus a pinch of salt.
- Fry the veg for 4-5 minutes, until soft then add in the garlic & ginger & cook for another minute. Make sure to stir the veg regularly to prevent it from catching on the pan.
- Stir in the curry powder & turmeric, cook out for 2 minutes (stirring constantly) then stir in the flour & cook out for another minute.
- Next, gradually pour in the chicken stock, stirring constantly to prevent any lumps.
- Once all the stock has been incorporated, add in the coconut milk, soy sauce, brown sugar & the bay leaf. Let the sauce come to a simmer then cook for 15-20 minutes, until the veg is fully cooked & the sauce has thickened.If the sauce starts to boil, reduce the heat slightly to bring it back down to a simmer.
- Next, stir in the honey & sriracha then take the sauce off the heat. Leave to cool slightly, remove the bay leaf then blitz in a jug blender until smooth. Taste the sauce, to check the seasoning then add more salt if necessary.
- Pour the sauce back into a saucepan then set aside. This will need to be reheated on the stove whilst we fry the chicken.The katsu curry sauce can be made up to 3 days in advance & stored in the fridge. To reheat, cook over a medium-low heat in a saucepan.
Fried Chicken
- Cut each chicken breast in half widthways then working with one piece of chicken at a time, pound with a meat tenderiser (or rolling pin), between 2 pieces of baking parchment to a thickness of around 1 cm.
- Next, prepare the pané station. To do this, take 3 bowls, fill one with the breadcrumbs, one with the flour & the other with the eggs & milk. Beat the eggs with a fork then season each bowl with salt & pepper.
- Toss a chicken fillet in the flour then dunk in the egg then the breadcrumbs. Place the chicken on a tray then repeat with the remaining fillets.After bread crumbing, the chicken can be cooked straight away or stored in the fridge for up to one day.
- Preheat a deep fat fryer to 180°c/356°f.
- Fry the breaded chicken fillets for 4-5 minutes, until golden & crispy. The internal temperature should be at least 75°c/167°f (a digital food probe comes in handy here!). Depending on the size of your fryer, you'll probably need to cook the chicken in batches. After the first batch of chicken is cooked, it can be served straight away or kept warm in a 180°c/356°f oven whilst the remaining chicken is fried.
To Serve
- If you're serving the chicken katsu with fried rice, cook it straight after frying the chicken (it only takes a few minutes!). If serving the curry with boiled rice, cook it at the same time as the fried chicken.
- To serve, take four plates & divide the rice between them. Next, slice the chicken fillets up (allowing two per portion) & lay over the rice. Spoon over a generous amount of warm katsu sauce & serve immediately.
Notes
1. Cooking On An Aga - Cook the veg & spices using the boiling plate then once the stock has been added & the sauce is simmering, move over to the simmering plate.
2. Deep Frying - I like to deep fry the chicken so that it's super crispy! If you haven't got a deep fat fryer, you can shallow fry them in a frying pan set over a medium heat.
3. Making In Advance - The katsu curry sauce can be made up to 3 days in advance & stored in the fridge. The chicken can be breadcrumbed & stored in the fridge for up to a day before being cooked.
4. Chicken Stock - If you're using chicken stock cubes, use two of them dissolved in 850ml of boiling water.
5. Sriracha - Sriracha hot sauce is used to add a subtle kick to our curry sauce. Feel free to leave this out if you'd prefer.
6. Fried Rice - I'd recommend serving the chicken katsu with a batch of my fried jasmine rice. You could also serve the curry with some boiled/steamed rice.
❤️ Stay connected with Salt Butter Smoke
The Prep List is my free weekly newsletter with seasonal recipes, kitchen notes and behind-the-scenes from my kitchen. Add Salt Butter Smoke as a Google Preferred Source to see more of my recipes in Search.